

Remember to keep up to date with the news and events by following this blog and on twitter - @plowman91! See you there!
New VLOG coming tomorrow!
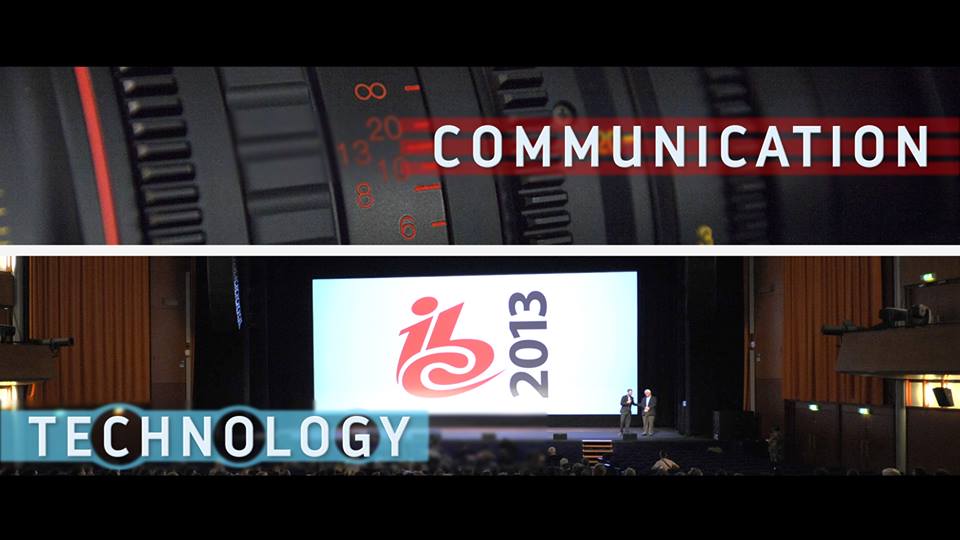
I'm doing a new VLOG tomorrow, hosted by myself and Glen Symes as we cover the IBC Show for The IABM. We'll be giving the low down on our kit choices and capturing the events, news and products from the expo and conference floor. We depart on Wednesday for Amsterdam where I'll be catching up with Steve Warner (IABM Training), Nino Leitner (Cinematographer and Cinema5D), HaZ Dullul (SYNC) and many companies including DJI Phantom, Schneider Kreuznach, Sony and many more.
You can keep up to date here on the blog or -
Ooh, I got the Canon 100mm F/2.8L Macro lens, and the Peak Design Leash too ;)
Also been trekking on with the graphics for all of The IABM video content, a little teaser for you;
Success at the Manfrotto Takeover!

I had a great day at the Manfrotto Takeover on Wednesday at Park Cameras London, I hope all the visitors enjoyed their day too! I'm very busy at the moment, heading out to film a wedding today and tomorrow and have a growing collection of editing that needs to be completed too.. Better to be busy than to be sitting around doing nothing though!
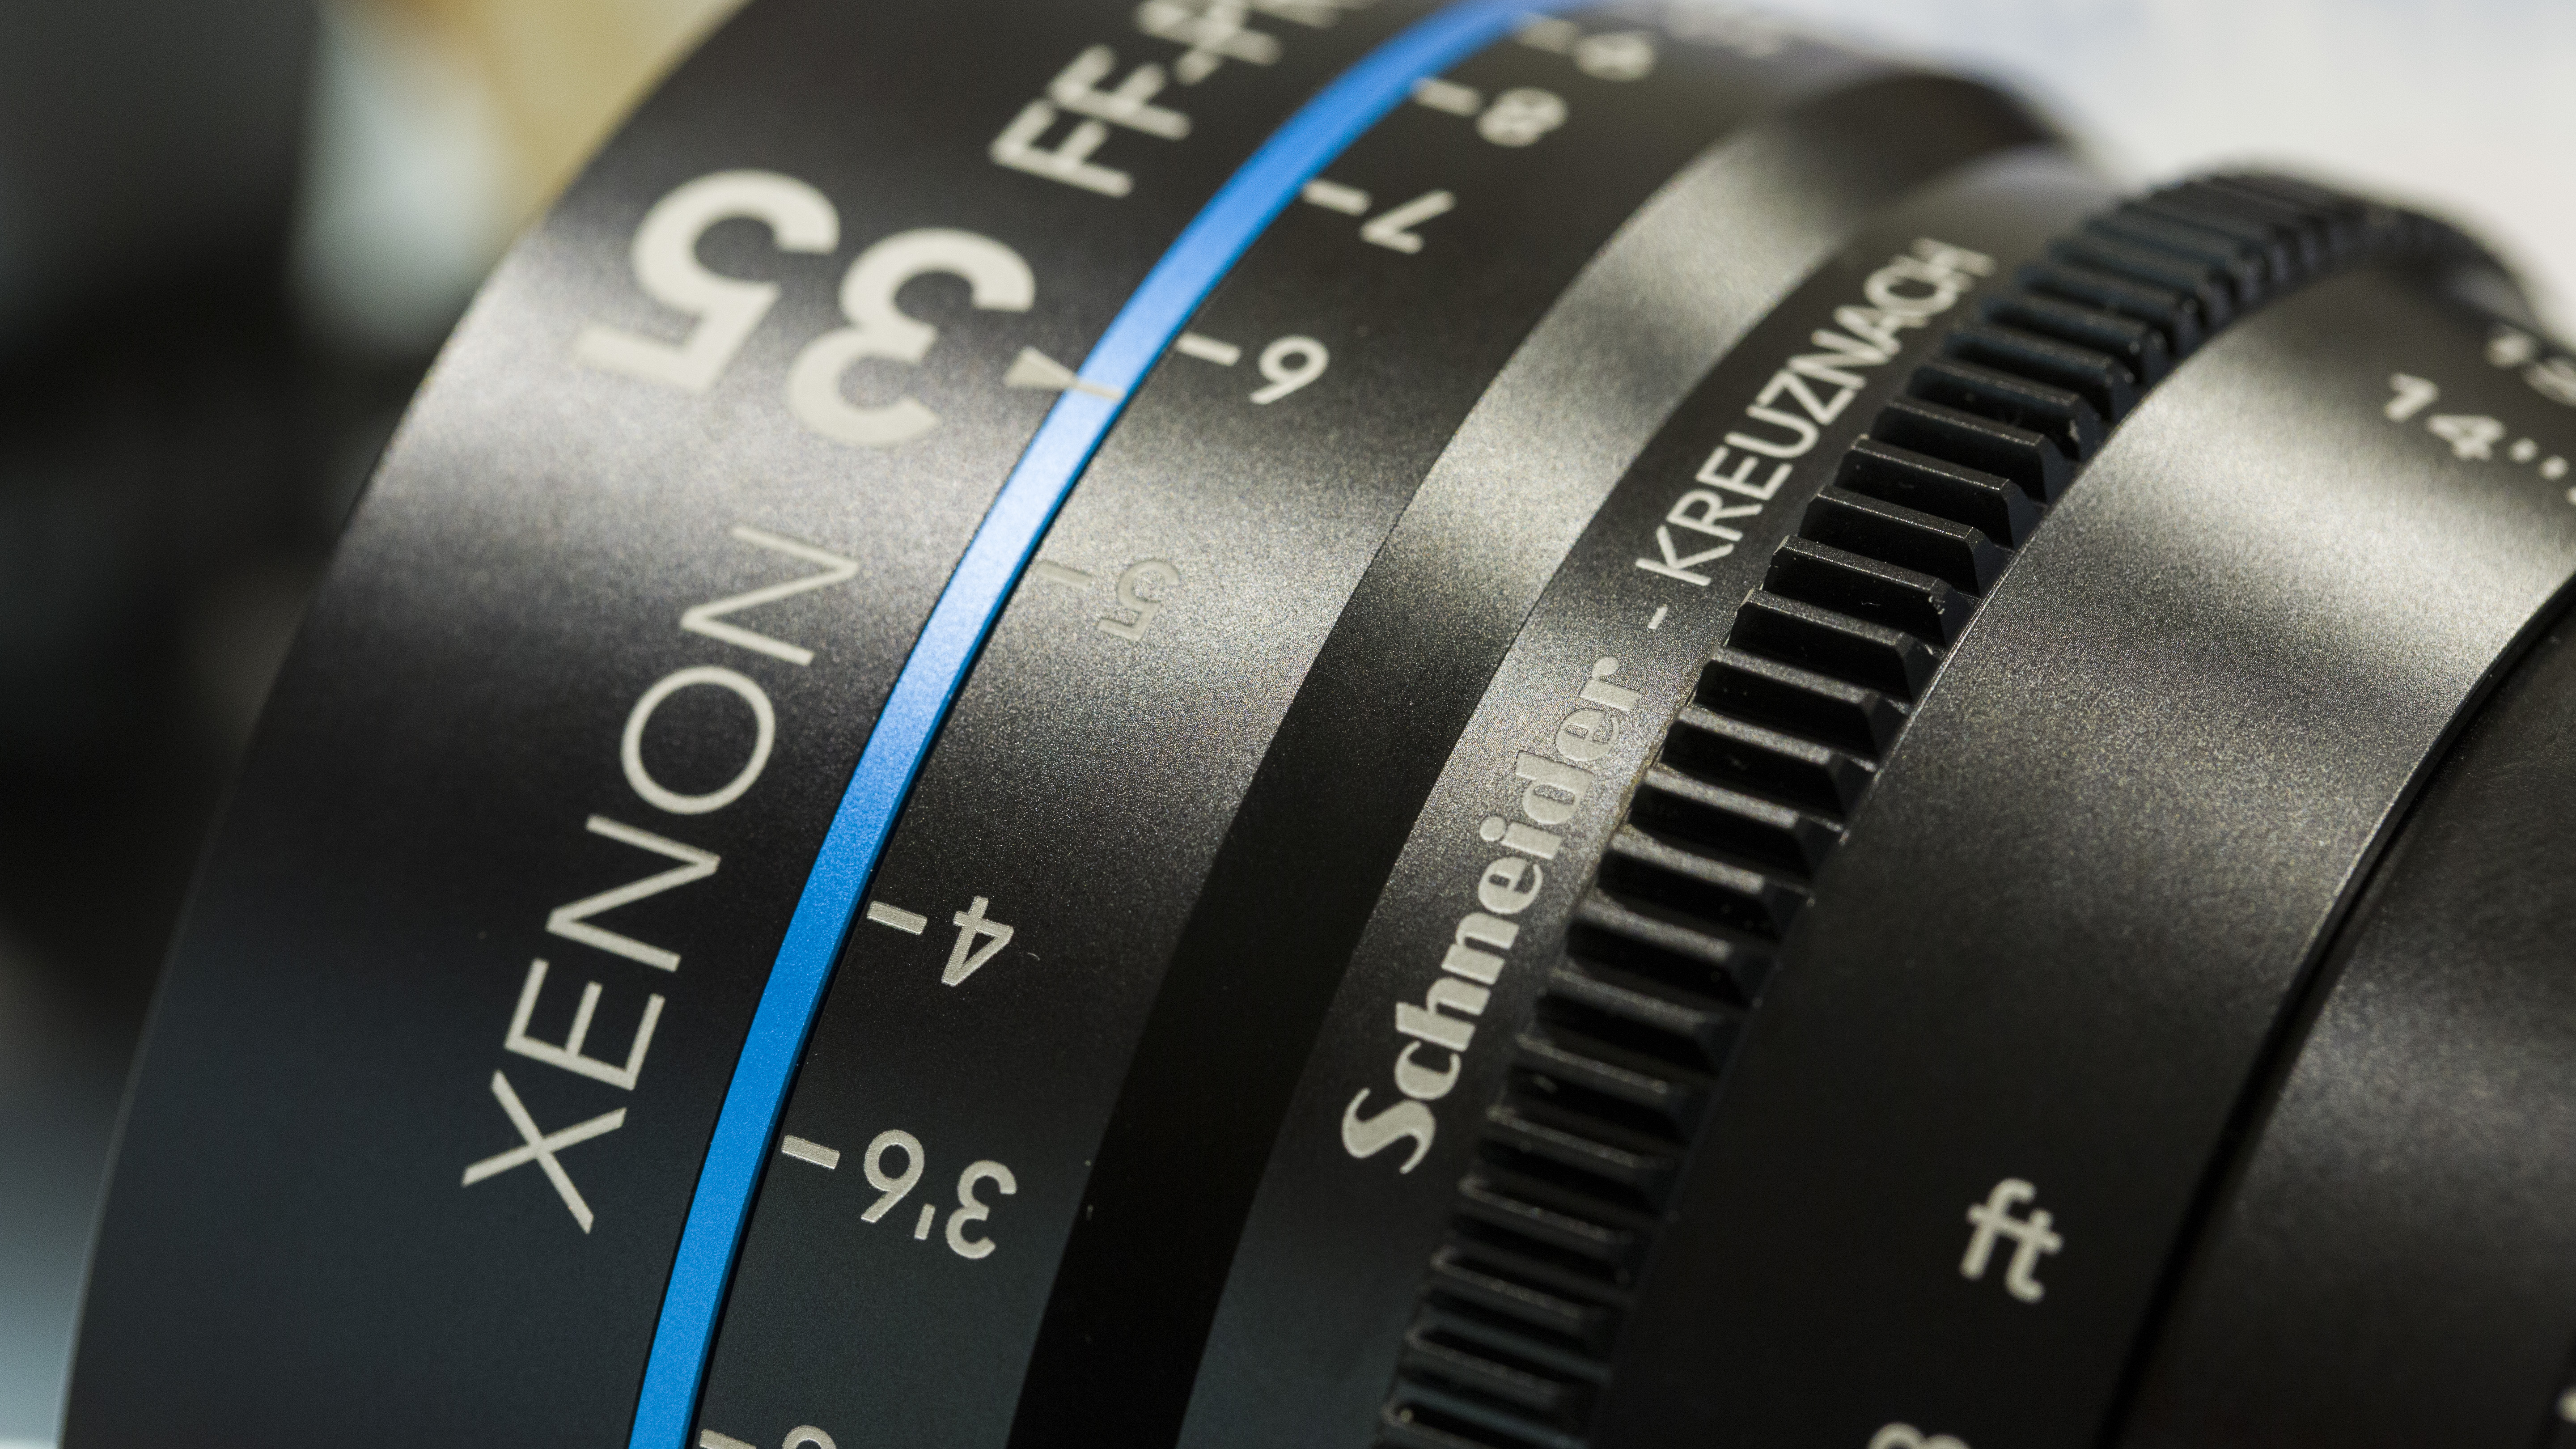
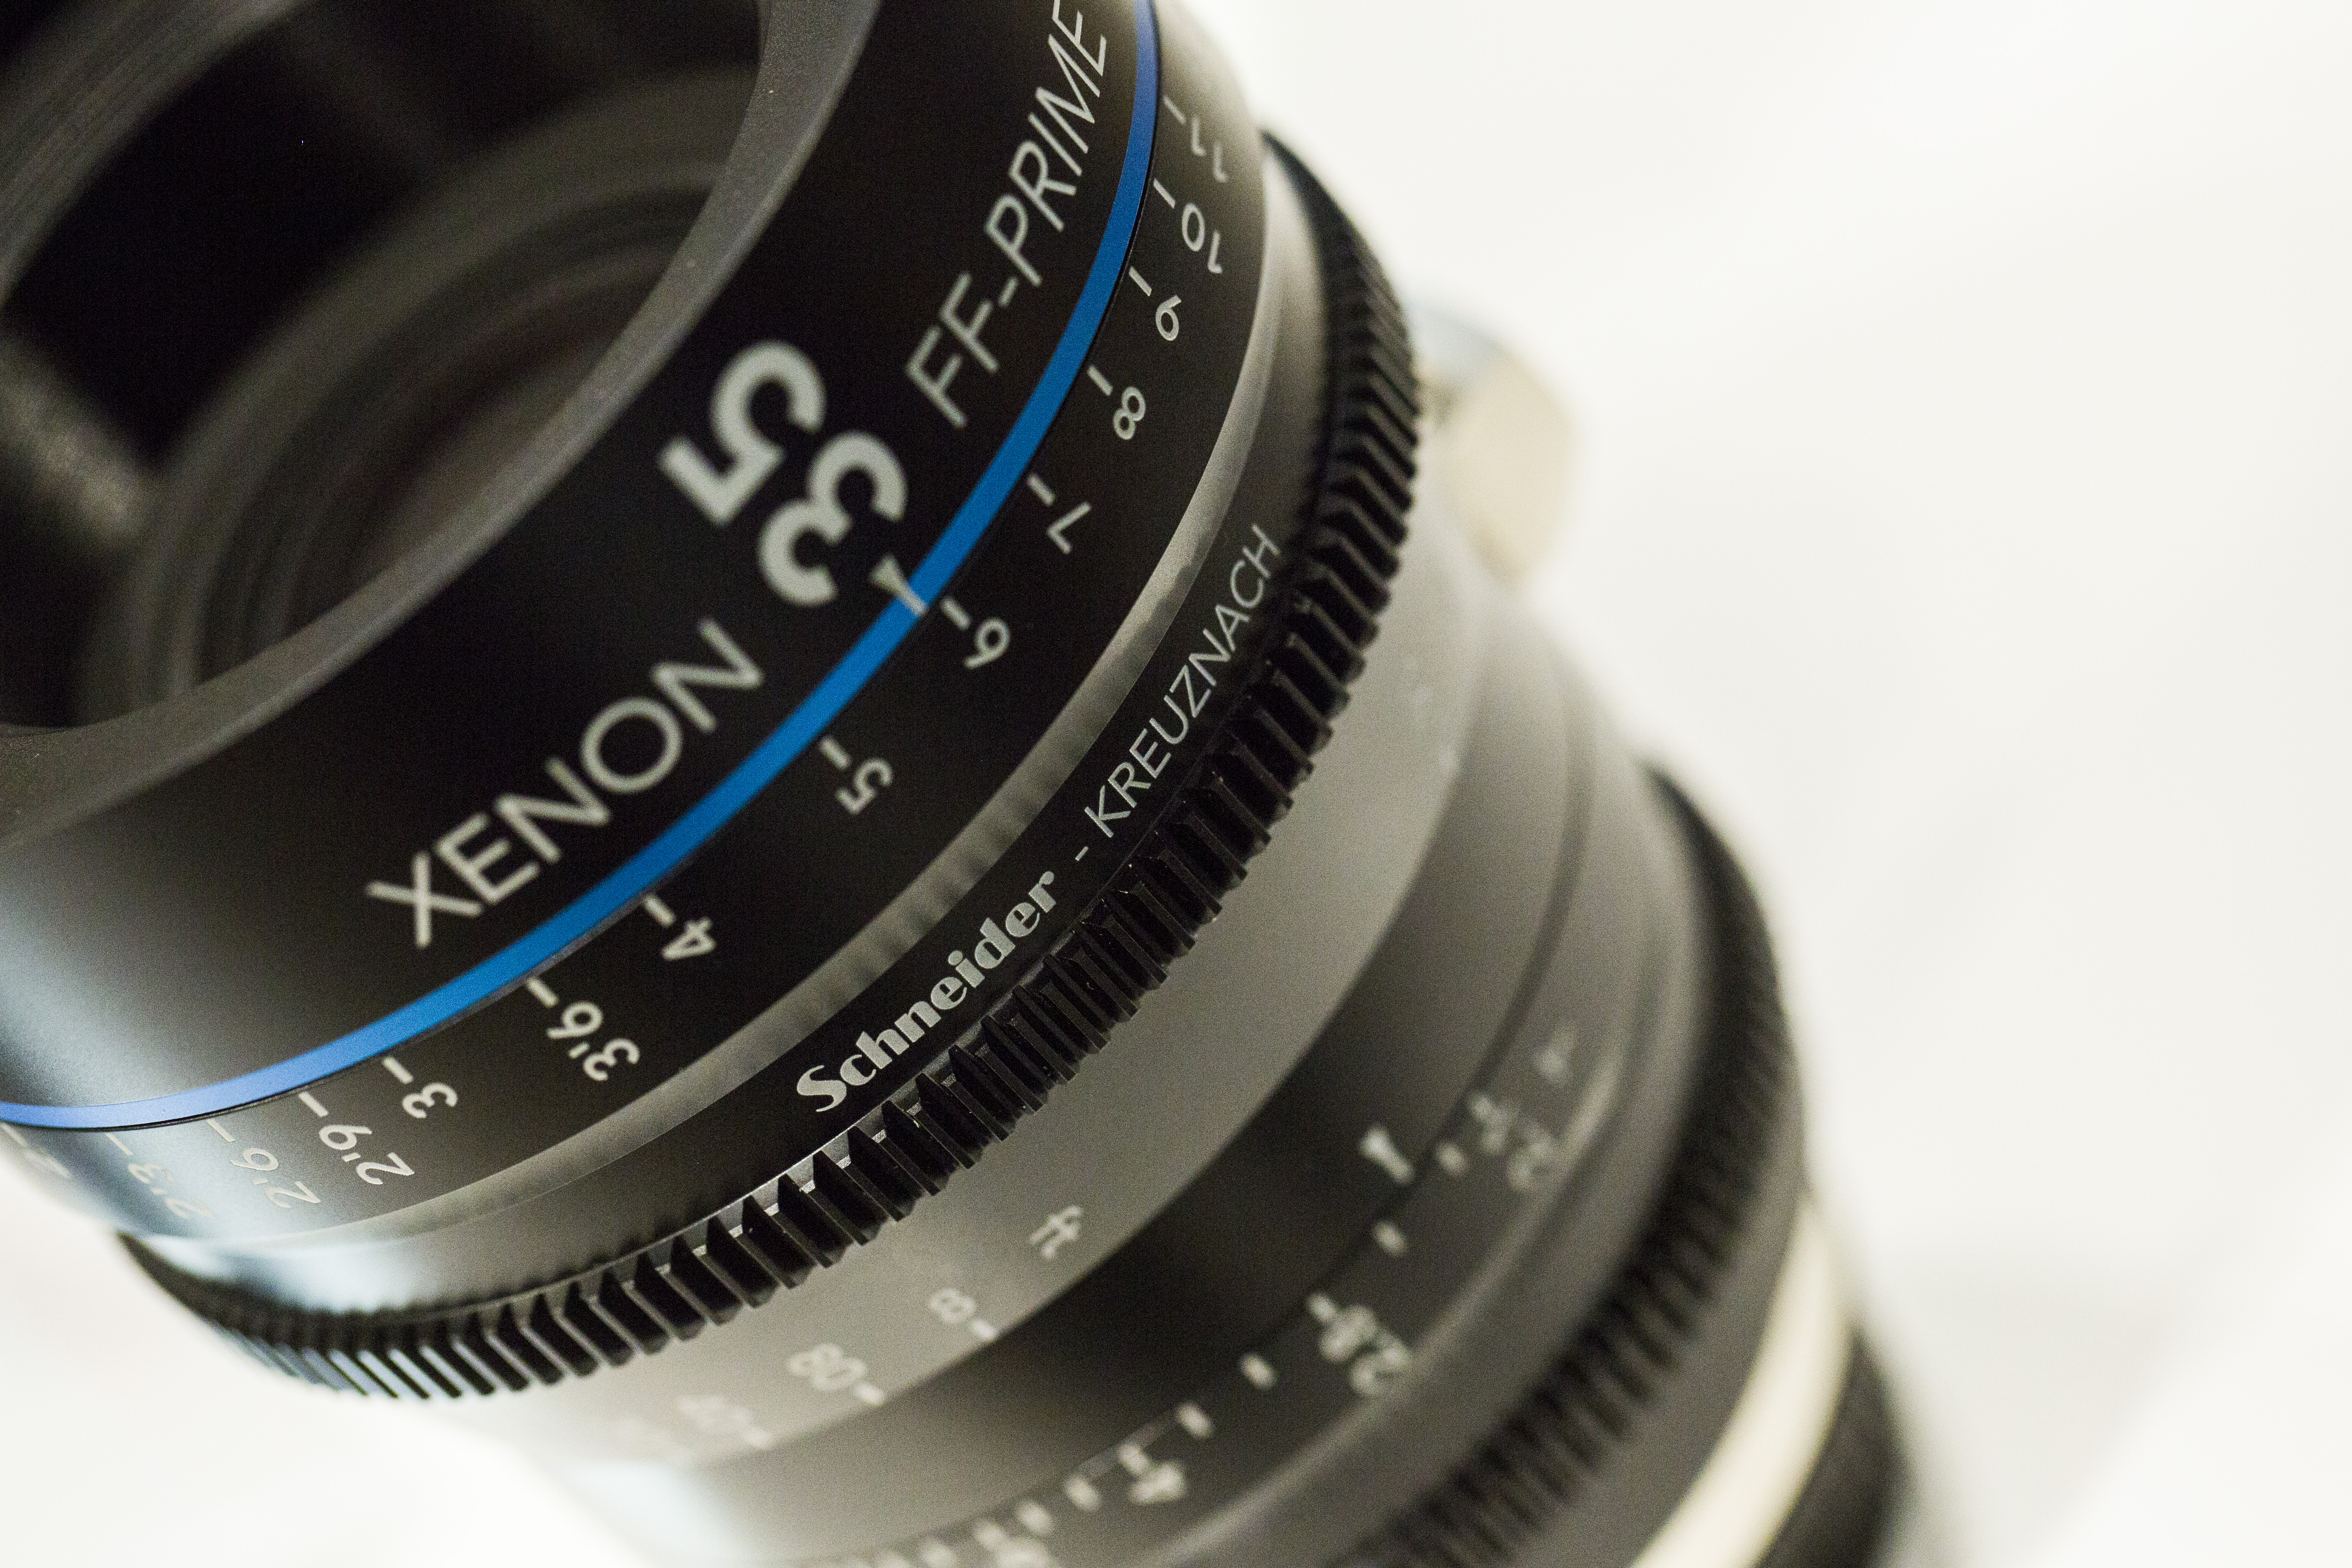
I got to test the new Schneider Xenon cinematography lenses on Wednesday too; built for 4K cine productions, the T/2.1 prime lenses have focal lengths of 35, 50 and 75mm with other models soon to be available, and I'll be using them on my productions later on down the line. I was blown away by their performance, it's like looking through a new pair of eyes.
More to come later! Keep creative!
For those that couldn't make the day, or my seminar on videography a podcast will be uploaded later when I get back from the wedding and I am putting together a highlights video of the day (shot on Panasonic GH4 in Cinema 4K and on 5D mark III with the Schneider cine optics).
What a WILD weekend!
It's been another busy one! Firstly, let me welcome all of the new followers to my blog! Thanks very much for liking previous posts and I hope you enjoy the future content and bits I post up here :)
Time is drawing closer to the Manfrotto Takeover at Park Cameras in London, I am preparing my seminar these next coming weeks so it would be great to answer any questions you may have about equipment, videography and post production; please get sending them through, and I look forward to seeing you on the 30th but remember to register!

Here are some videos I've checked out this week for some inspiration;
The style of this animation is 2D yet very much 3D in its shading and motion.
Incredible BTS showing how OKGO made their viral one shot music video.
This hilarious video is definitely up there to watch, both on the comedy and the shooting.
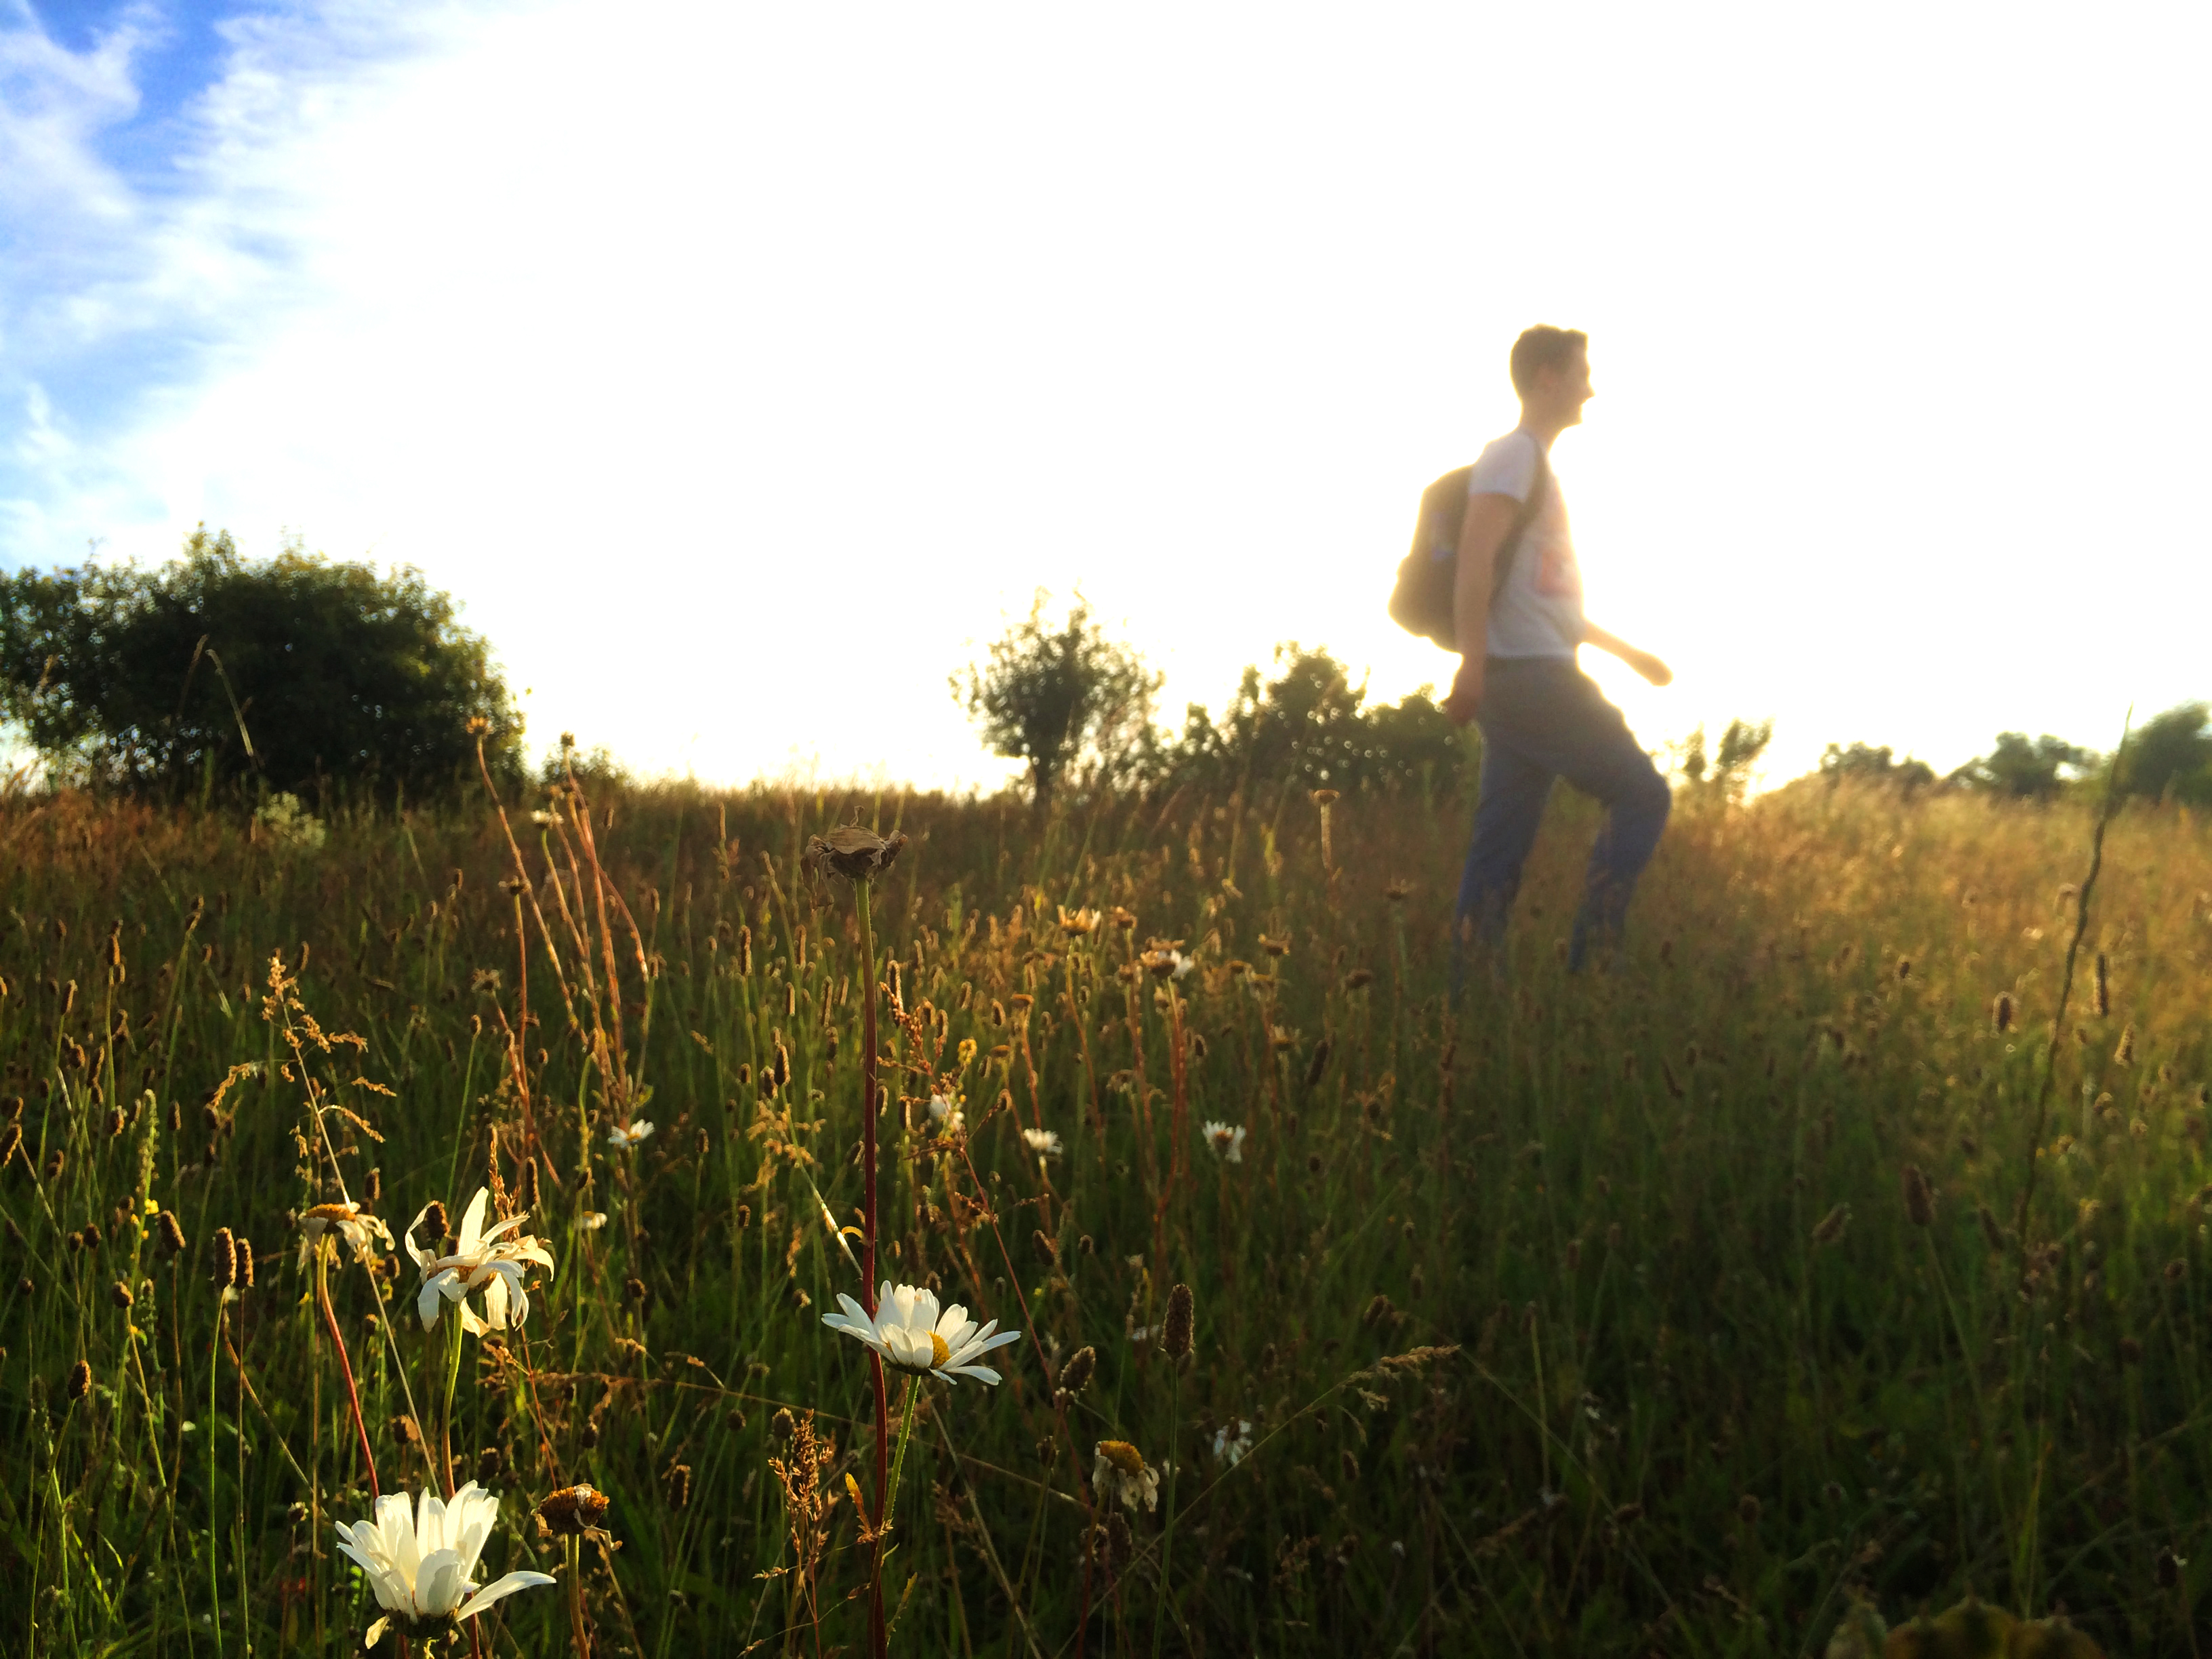
The wild weekend began with a trip to Norbury Park near Leatherhead. I'm usually one to take my camera everywhere, but I vowed against it this weekend as I (strangely speaking) wanted to get to know my iPhone camera better!
Out Geocaching with Glen, we got a number of caches along the River Mole and up towards Great Bookham. I really recommend trips like this, especially if you are stuck behind a computer for long hours.. Getting out and walking has proven to boost creativity and the imagination! So, armed with my iPhone I snapped away using the camera app, it is a challenge to get the exposure you're after with this basic camera!


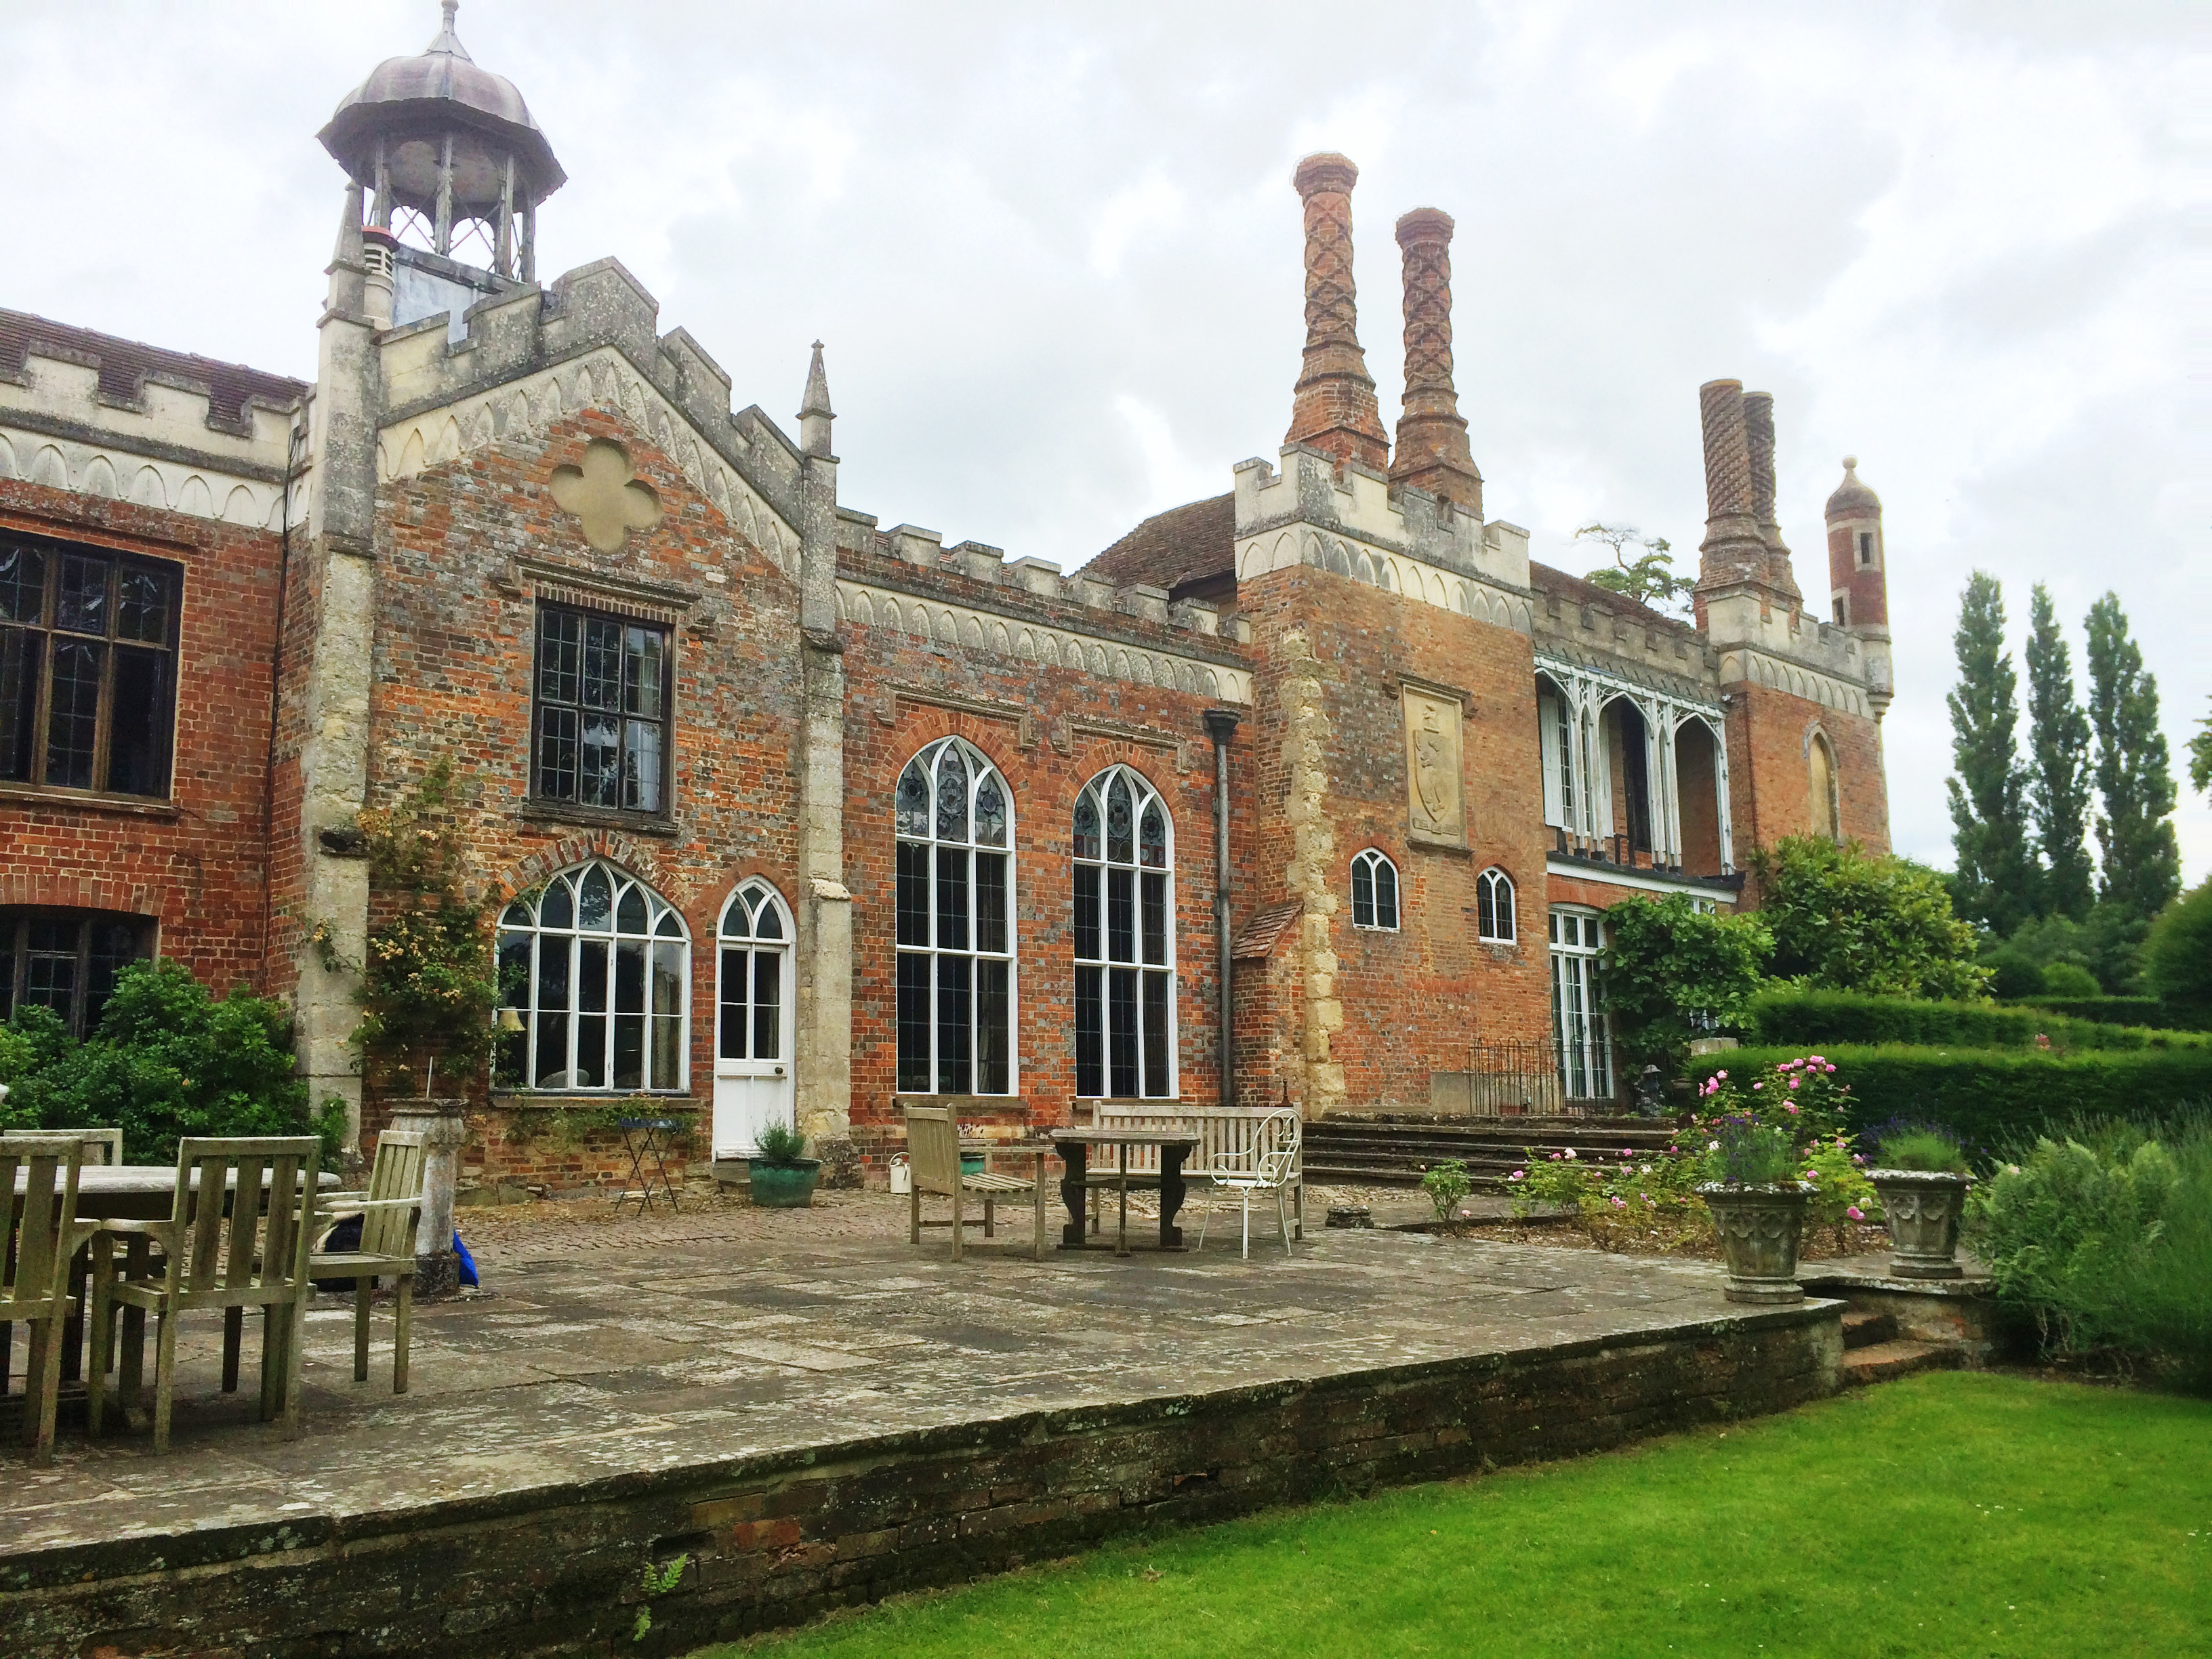
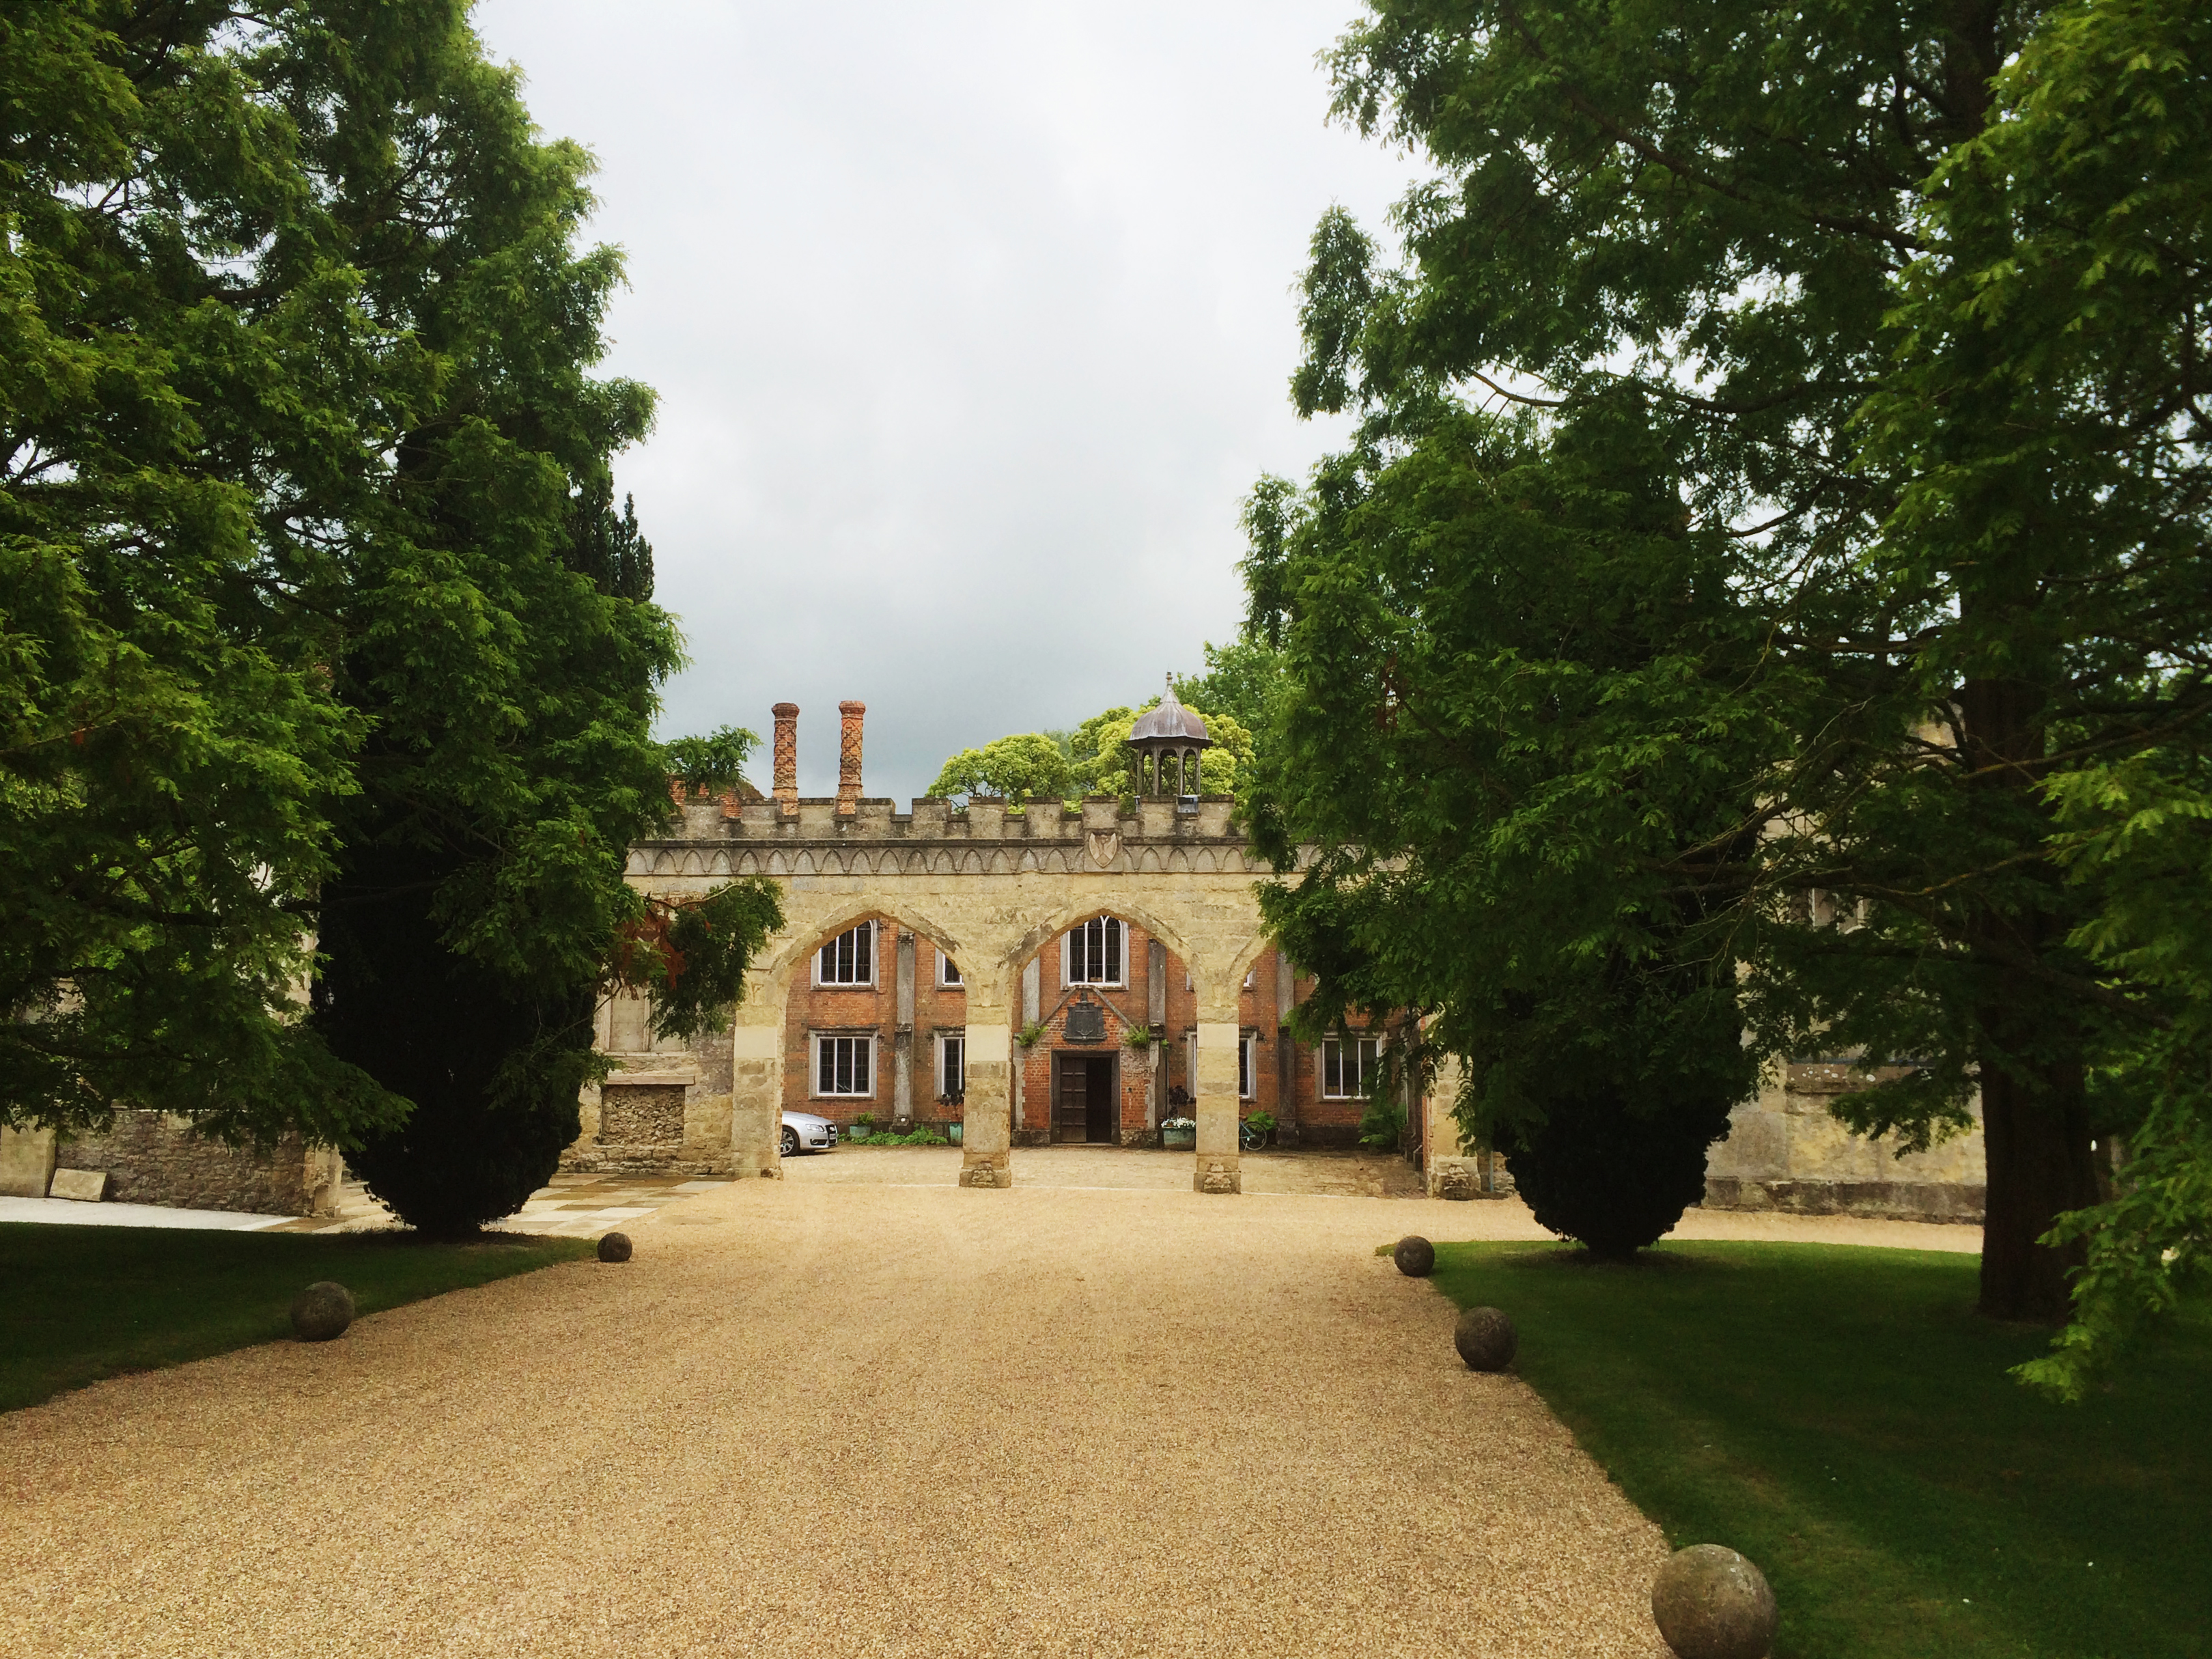
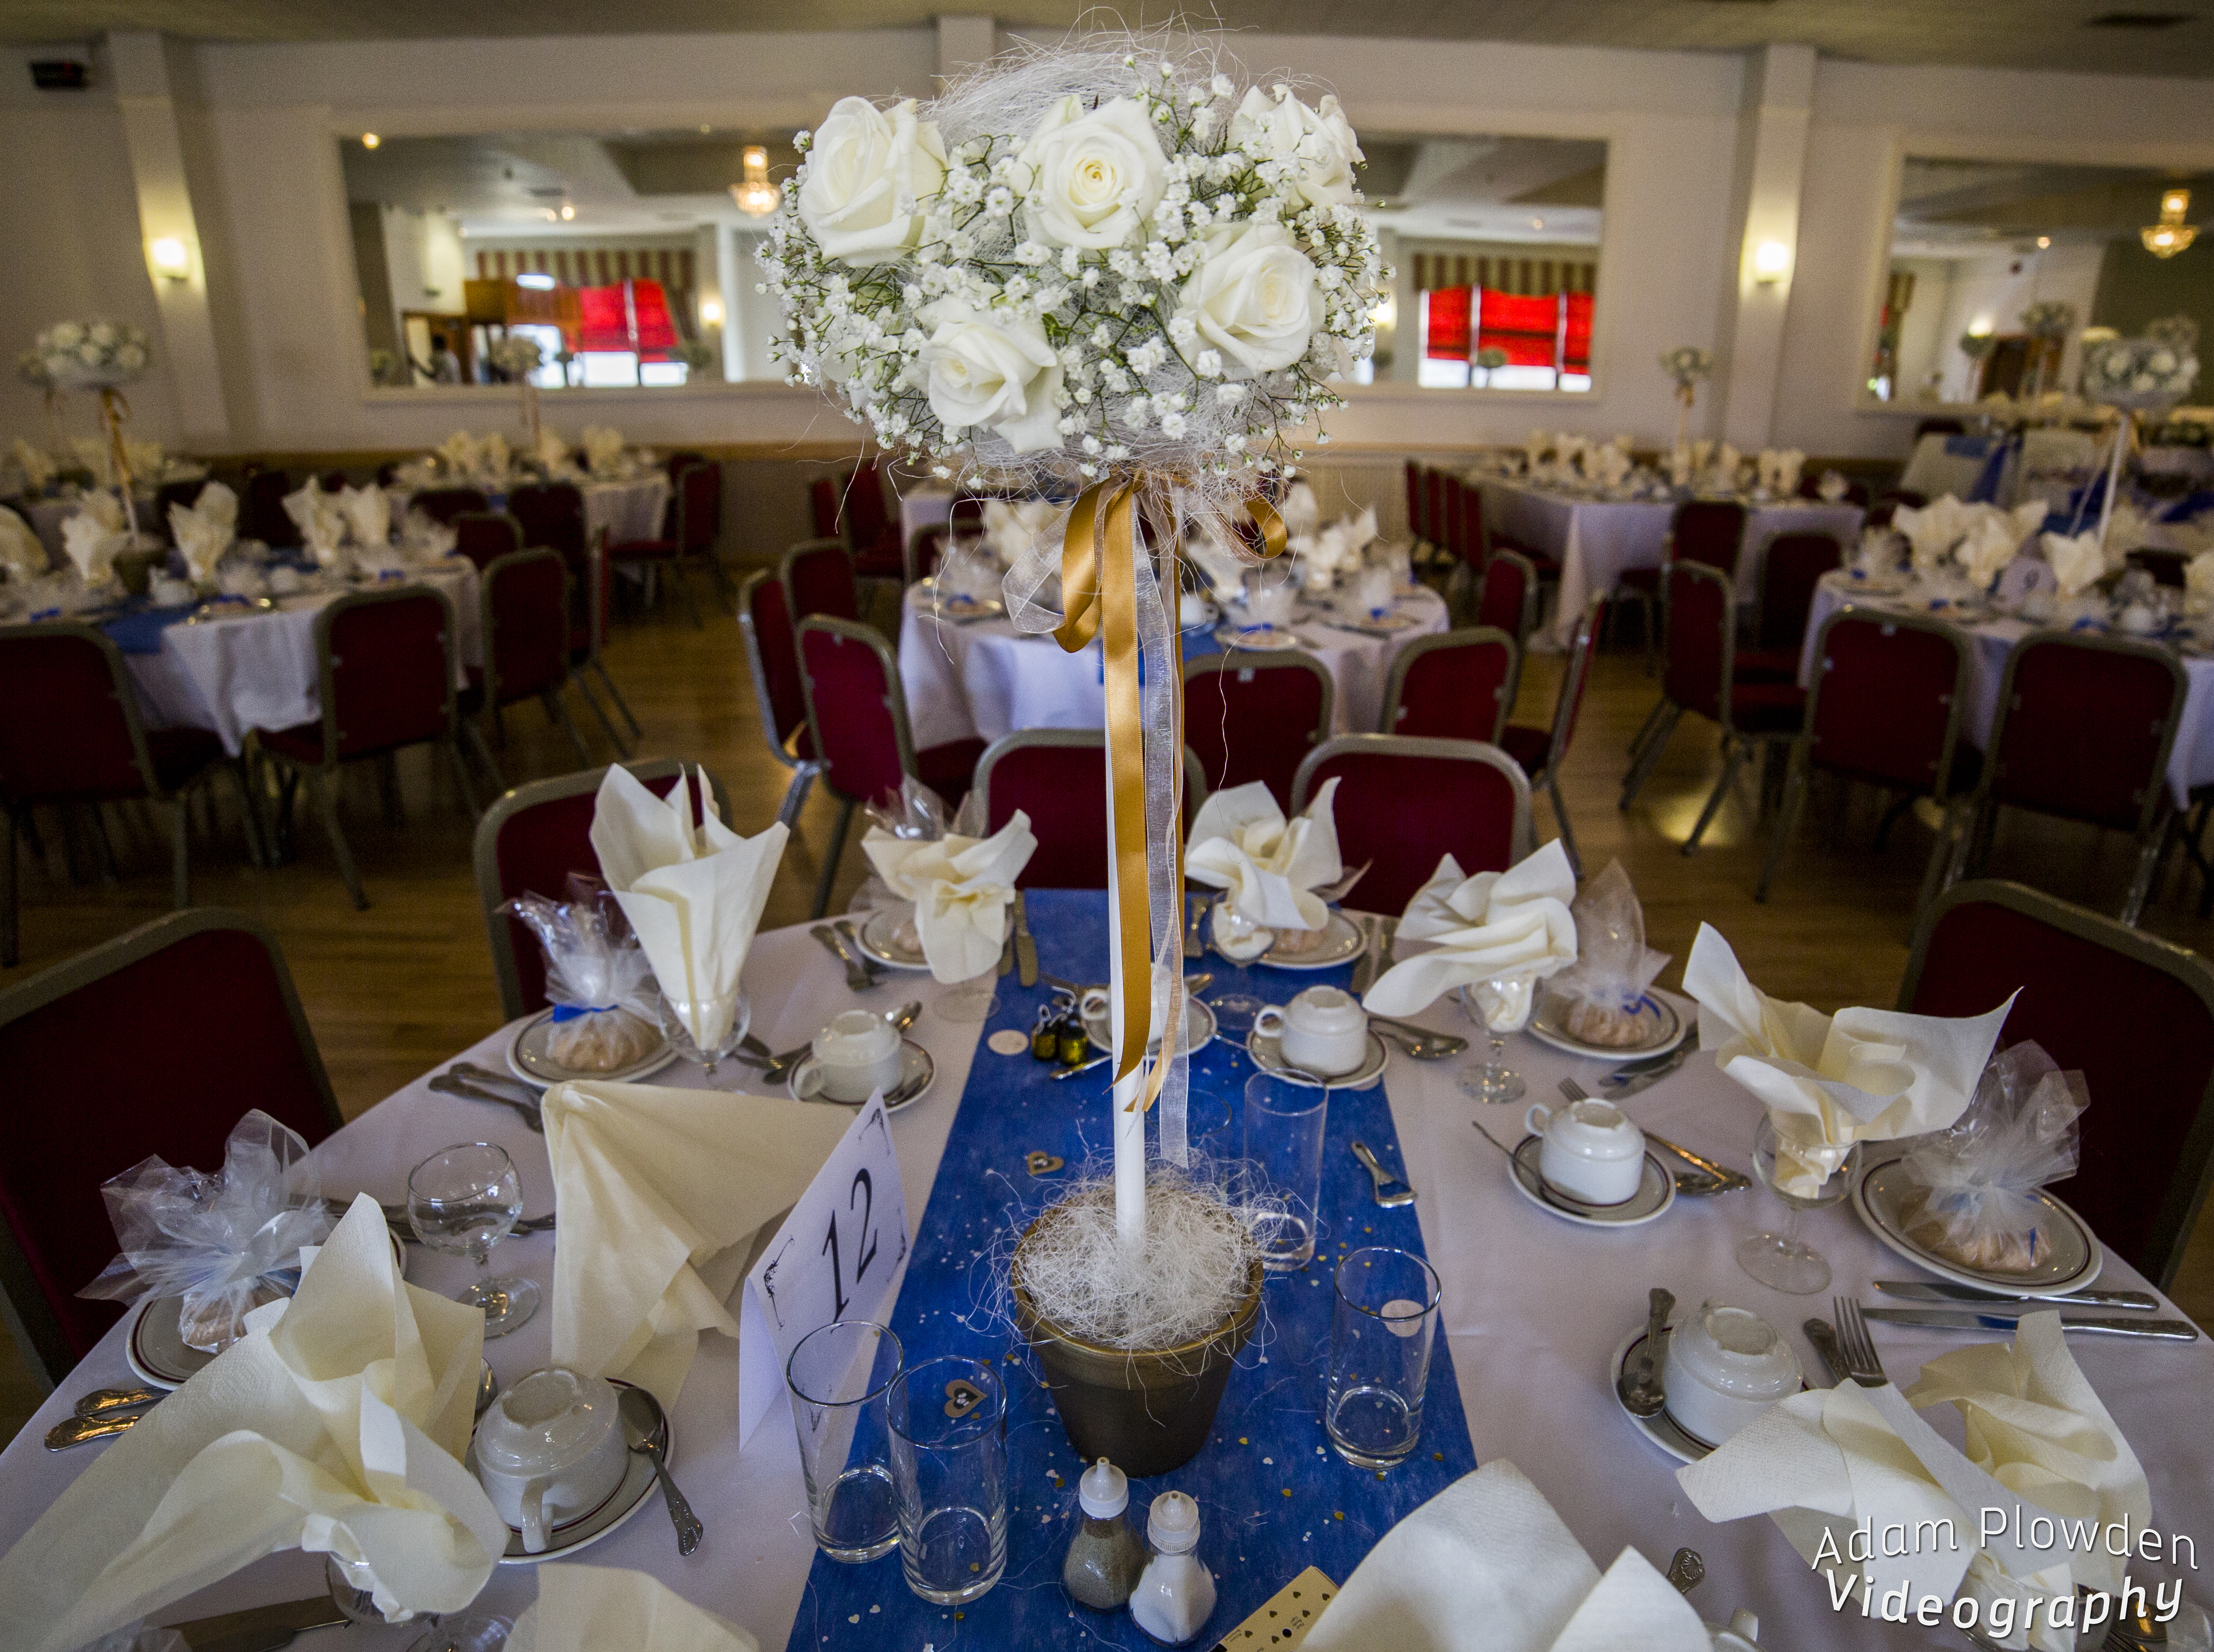
On Saturday I headed up to Nether Winchendon House with Rob to film the wedding of Lorna and Lauri. The grounds of the house were stunning, a long, treed driveway leading up to three arches. Rob captured some great aerial footage on the drone and I shot from the ground.

I used the Manfrotto 755 Aluminium tripod and the Edelkrone Slider+ v2, accompanied by the Samyang Cine primes and Tamron 24-70 on the Canon 5D mkII.
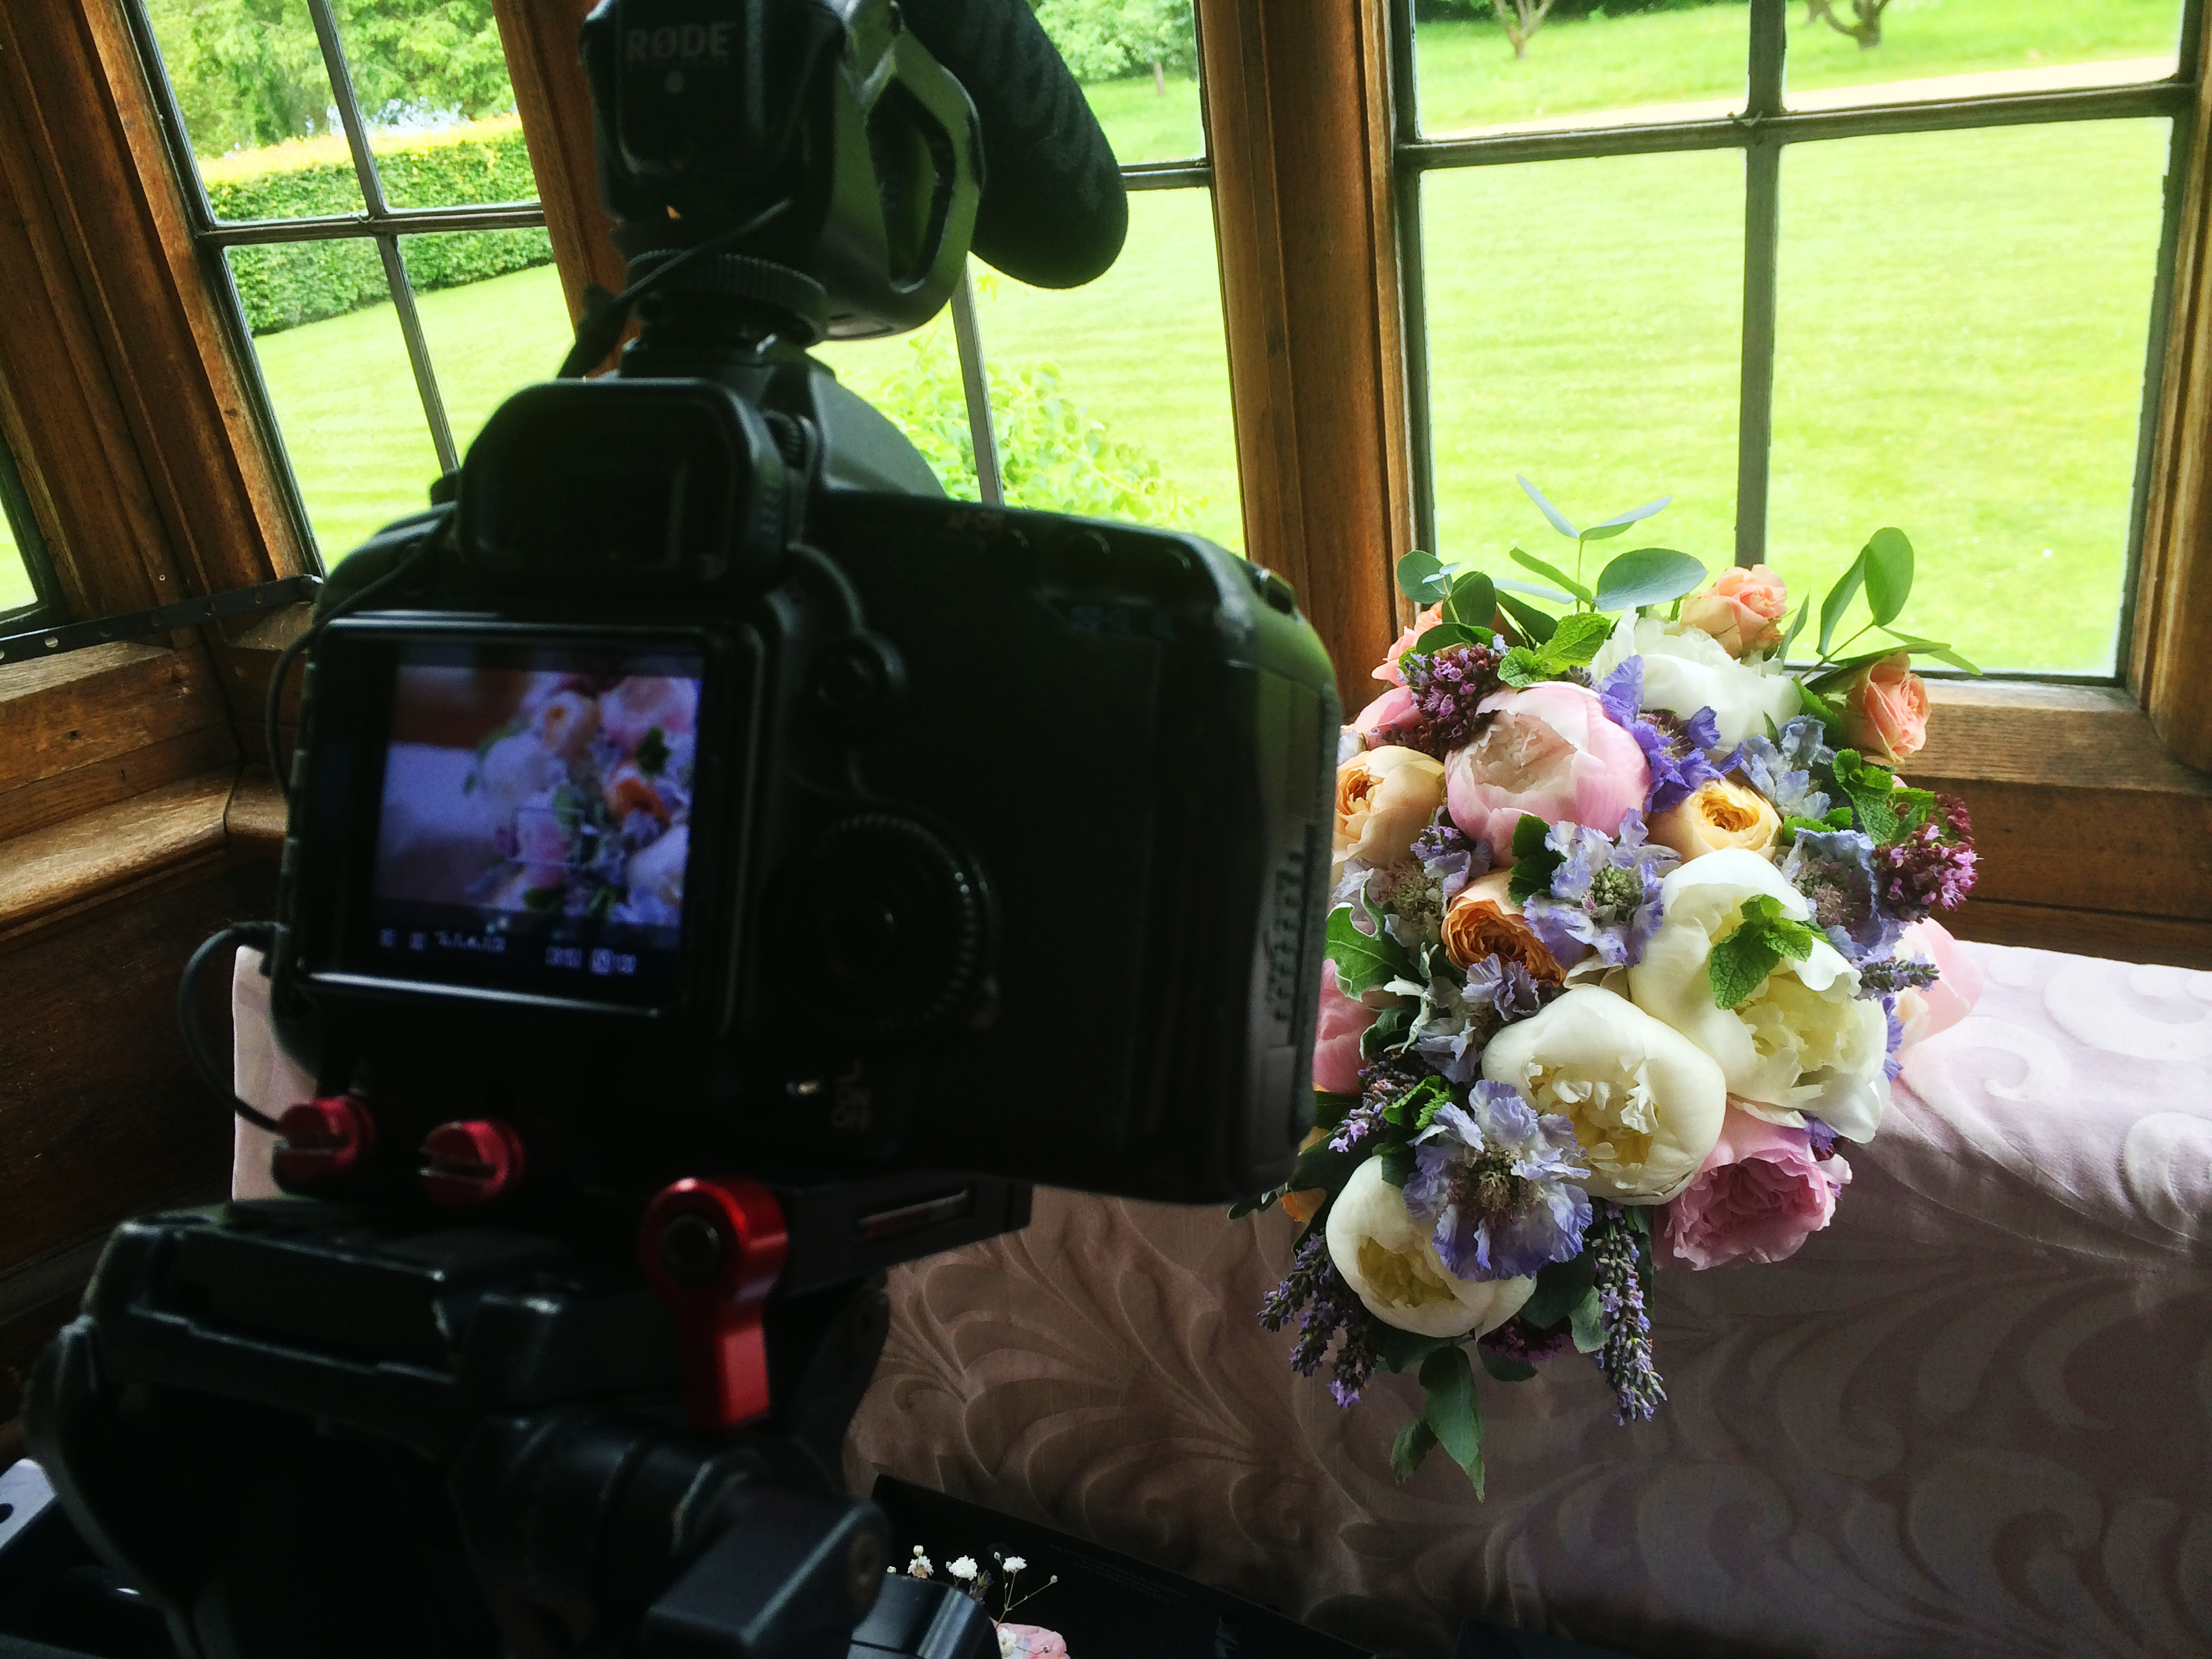
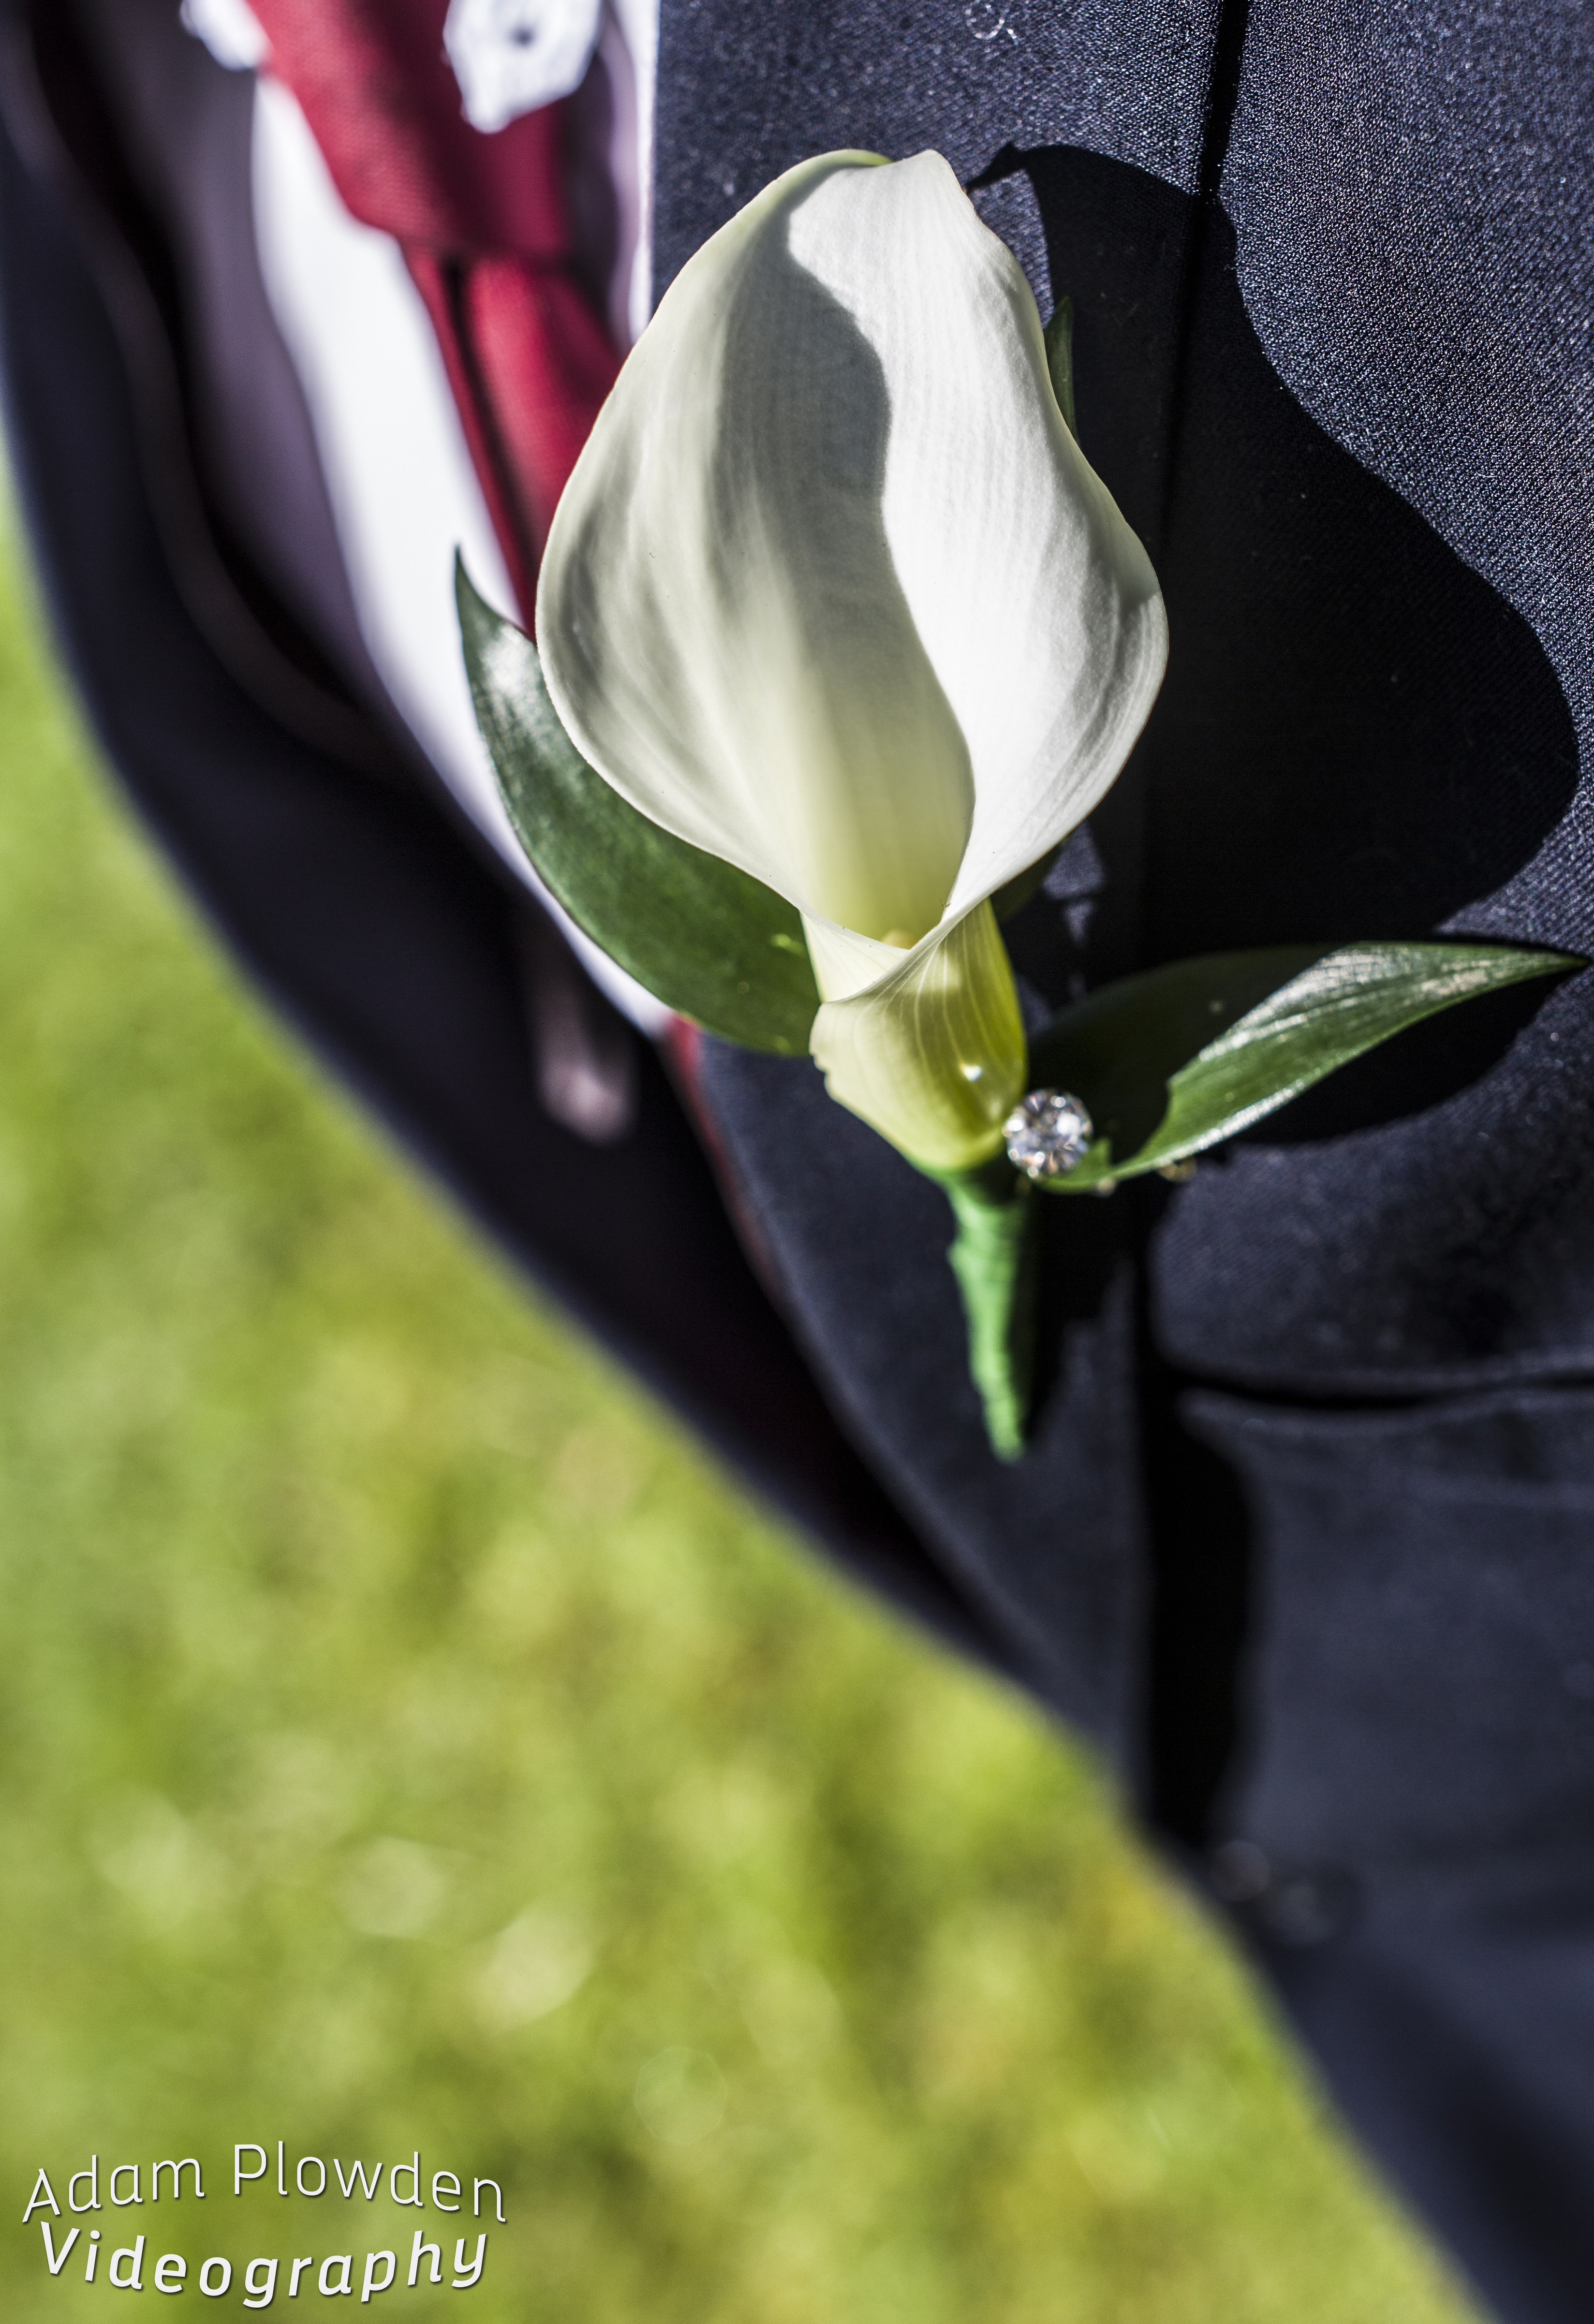
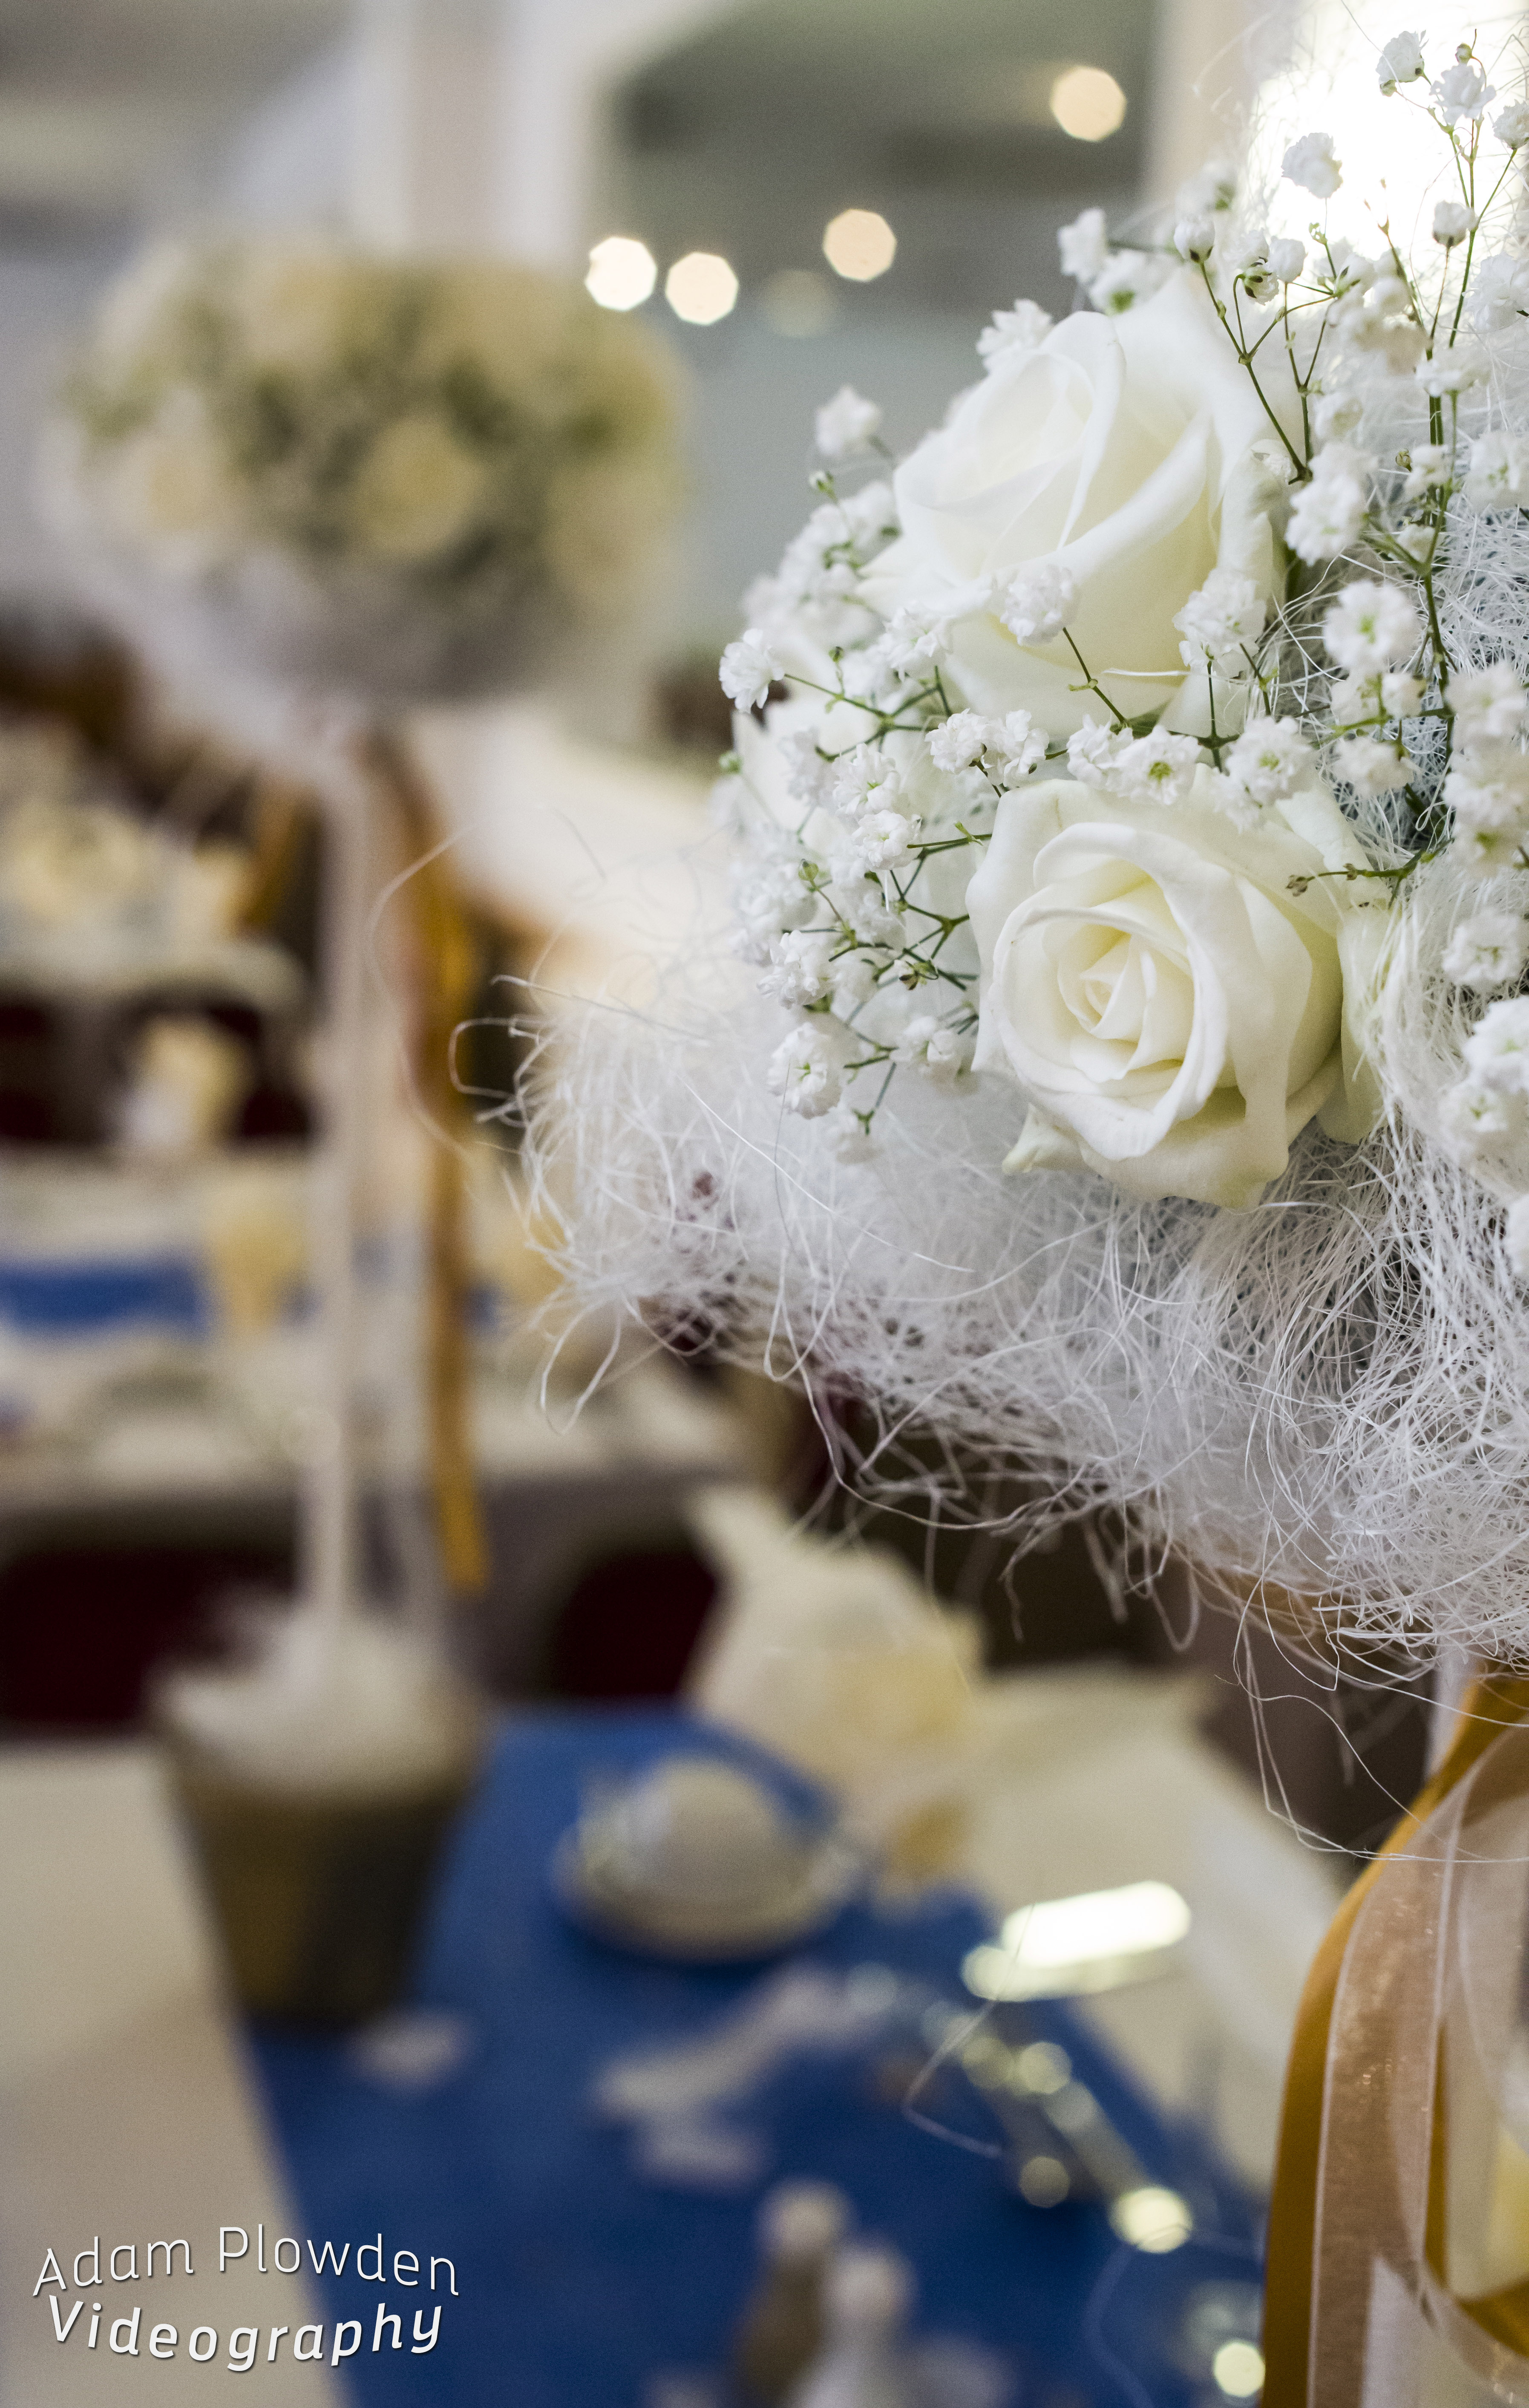
The flowers were beautiful;

The rain was not.. But didn't put a dampener on the day! Despite the rain, Lorna made it to the church for a beautiful ceremony in the village. They lead the wedding party on foot back through the country lane to Nether Winchendon House for the rest of the day! Set in a stunning location, every detail had been considered from unique signposts to bean bags and a life size Stig. The intricacy of flowers in jars, photographs and bouquets hanging from a ladder in the barn, stunning to see and wonderful to film too.

It was a dream wedding on the filming side, and I'm sure there will be a highlights video very soon of the day!
On Sunday, after getting back quite late from the wedding I headed out to Friday Street (in between Dorking, Guildford and Horsham) for the day with Glen. We are quite lucky living here, in the way that forests and rural life is only a short distance away, and I like to make the most of it! We were out Geocaching and playing with Glens new remote control helicopter, which then instantly made me want a drone.. I guess a £1000 spend for the drone, gimball and GoPro equates to a £20 hand sized RC Heli, right?

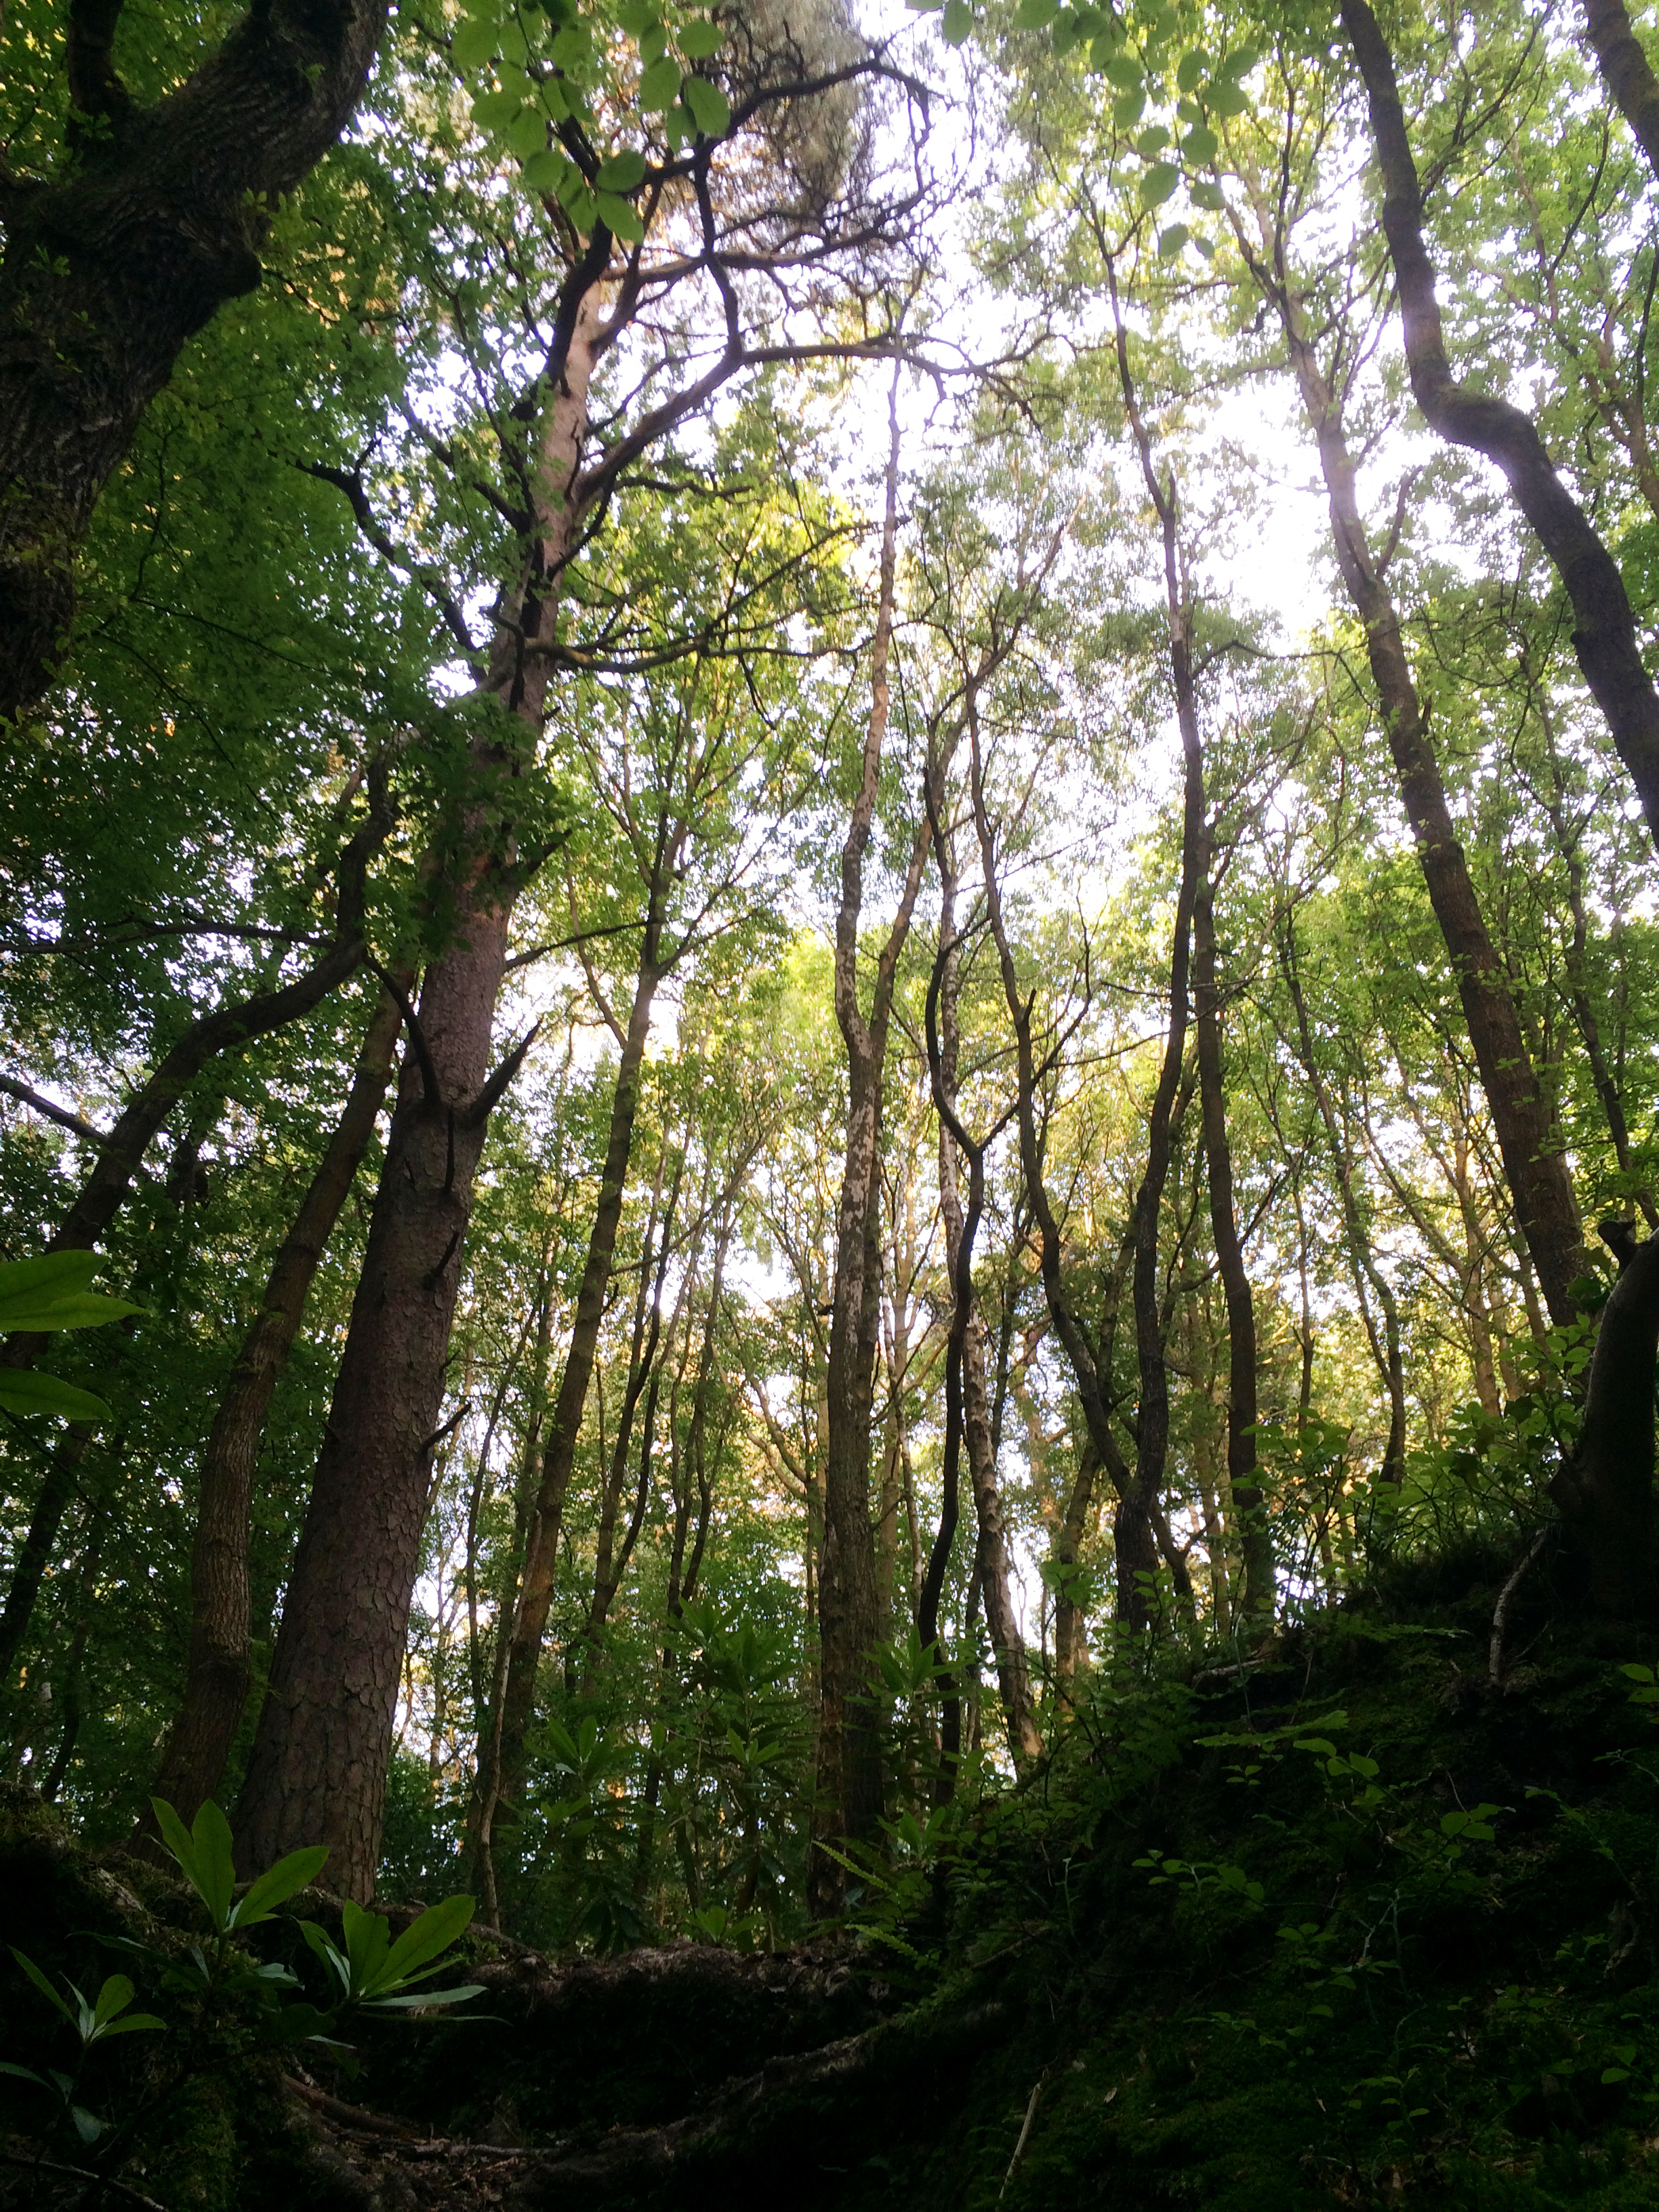
Monday rolled around pretty quickly, and I was having withdrawal symptoms from not filming or photographing anything when I was out on Friday and Saturday.. So come Monday afternoon I was back at Friday Street getting some filming done of the lush green forest that surrounded me! I used the Manfrotto 755CX tripod, Sigma 70-200 F/2.8 OS, Rotolight Roto-mic and a few more lenses.


This week I'm working on the Soundbox studios opening video that I shot a few weeks ago, it will be edited to their flagship artists new single by Rebecca James. It's going well, going for the black and white look as it works well with the dark studio atmosphere that they had going on :)
It was shot on the 5D mkIII with Samyang cine lenses, Flycam and the Edelkrone slider+ v2.

Remember, send over your video questions to get featured in my Manfrotto seminar, and share your work with me too!
New 'Waterhouse' video is up!
What a few months it has been!
Blimey, my last post was a while ago.. Honestly, since then work has got heavy and much of my time is either spent behind the camera or the screen. One exception was the Manfrotto Pro Backpack50 review, shot by Glen Symes for me where I actually appear in a video!

Some of the things I've been up to range from filming quite a few weddings [embed]https://vimeo.com/98328657[/embed] to filming and editing for a series of videos on health and wellbeing.

On the side, I've talked at EEHS about going through uni and starting a business, am preparing for my Manfrotto Tour videography seminar and other bits and bobs.. I'm sure if you follow me on twitter or facebook you'll have an idea of the things!
Going back a few weeks, my main projects have been the EEBC Health and Wellbeing video series, and an animation on Telecare. This is a predominantly piece to camera series, with additional b-roll shots to add to the videos messages which range from stopping smoking, to eating a healthy and balanced diet. The standard production of information videos ensued, editing down from around 45-50 minutes to a concise 2 minutes providing the relevant facts and summaries on prevention. Editing in Premiere Pro, I used the very good Luma Corrector tool for exposure changes and a simple RGB curves adjustment for the colour temperature.
I find the Luma Corrector better to work with, as by adjusting the Gamma control slightly, it removes the washed grey look to push out the prominent shadows and highlights meaning that it is very simple to correct/match shots; especially as I filmed using daylight as my key.

As per the clients request I have also added subtitles, which I created using the dynamic link into After Effects (noting at this point that if you're doing several stages of an edit, to duplicate the sequence you are working on before you start the next stage as Premiere and AE require you to save your work for updates to take place, meaning no Ctrl-Z/Command-Z to get back to a timeline with the clips rather than your 'replace in AE linked composition').

I was also out photographing flowers for a wedding, for the florist Madeleine Pink a few weeks ago too! Taken on a range of lenses with the Canon 5D mkIII (Tamron 24-70mm, Sigma 70-200mm, Samyang 14, 35, 85mm cine, and Nikkor 50mm).


Since then, I ventured into using Lightroom to edit the photos as well, still learning bits and bobs but found a range of fantastic presets here that create some great looks. I'd appreciate your thoughts on the photos and the looks as well, as it's mostly stab in the dark/emotive based :P
[gallery ids="4278,4279,4280,4281,4282,4283,4284,4285,4286,4287"]
A couple of weeks ago I had the pleasure of filming Dan and Kelly's wedding in Ashford + Foxhills where I met the awesome Ash; a unique wedding photographer! Check out the wedding film here [embed]https://vimeo.com/97953644[/embed], and definitely check out Ash's work over at Ash Darling Photography! Highly recommended by me :D and I believe I'll be working with Ash soon on an up coming wedding, really looking forward to it!
Believe it or not, I have been doing some videography too! In between editing the health and wellbeing videos, and on the pre-production sketches of the telecare animation I spent a couple of afternoons in The Woodland Garden in Bushy Park; one of my favorite places to go to switch off work mode, relax and shoot some video for personal projects. I've named this one 'Waterhouse', it's the name of the part of the garden where a balcony looks over a pond with a waterhouse to the left. It poses interesting thoughts to its original function, the bricks and foundations holding strong throughout years of use and bad weather. Virginia Creepers pursue to edge up its sides, gripping on to reach the sunlight through the tree canopy.
The edit is complete, but I am now working on a quirky hipster logo/title animation for the beginning of the video so as soon as it has been animated and comped into the footage I will upload!
The kit I used for the 'Waterhouse' video include; Manfrotto 755Cx-3 tripod, Edelkrone Slider+ v2, Canon 5D mkIII, Canon 100mm F/2.8 macro (hence why the shake on the slider is slightly more visible than without IS/OS, but I have used Warp Stabilizer where I can). Tamron 24-70mm, Sigma 70-200mm, Samyang 14, 35, 85mm cine, Nikkor 50mm. After using the Canon macro lens, I have totally decided to purchase the Sigma 105mm F/2.8 OS macro lens; firstly because of future video productions where a small minimum focus distance is necessary (product, people, detail shots), also it has optical stabilization which I found was needed when moving the camera and lens on the slider, and lastly its around £400.. Bargain!
Things I've learned so far from doing this kind of work;
- Shoot with a widespread histogram (unless I wish to isolate the subject from shadows behind).
- Lightroom is awesome, try playing with the presets I linked to work on the developer tools.
- Regardless if it has been a long day filming, if you want to talk to someone, always, always, always do it!
- I want a macro lens for intricate detailed shots, as my current range does not let me get close enough to the subject.
- Take some hand held lights for kicks and fills; the venue room where the table decorations were photographed was very dark. With a tripod and a couple of lights I would have had much more control over the lighting composition.
- Dabble in a variety of work types, to keep it interesting and different!
- I need a slider for cinematic moving shots; I have made my choice; not the Edelkrone! There will be a whole blog post on this coming soon.
Finishing off my showreel by creating a cinemagraph!
Inspired by Framestores recent Eastenders tv advert, in which they created cinemagraphs to depict the suspected murderers of Lucy, I decided to embark on my own cinemagraph to complete my showreel. I'm deep into After Effects, for this kind of animation I am using one still image, with no plate to make it difficult for myself. However, its a good job the subjects have high contrast against the white background or I would really struggle with this! I will be uploading more as I go, but for now I must dive back in!

Got your to do list?
I have. It is quite long too, and all the things on the 'to do' list have to be done before I start the next video production... Daunting! Easter holiday weekend as a lovely one, with warm sunshine glowing over the Surrey countryside I ventured into the great outdoors to Leith Hill for a day of walking and geo-caching . Of course, the camera came with me to capture the happenings.

 (Photos copyright Adam Plowden 2014)
I am finalizing the details of the Recycling video for my council, on Friday I'm recording the voice over, the last component needed for me to complete the video! It has been a long project, but definitely worth the hard work animating. On Monday I went into Epsom with John from JHWF to film the ending shot from the DJI Phantom drone and the GoPro Hero 2. I decided to use an aerial shot as the last one, as this reinforces the community aspect of recycling to benefit our local area, as well as seeing all of the green land that surrounds Epsom.

Photo copyright Adam Plowden 2014.
I am getting a plan together for the new Manfrotto School of Excellence video series I'm going to produce, so please send over any questions on equipment, techniques, settings, videography or DSLR that I will answer in the video series on getting started with video.
Sorry for the silence!
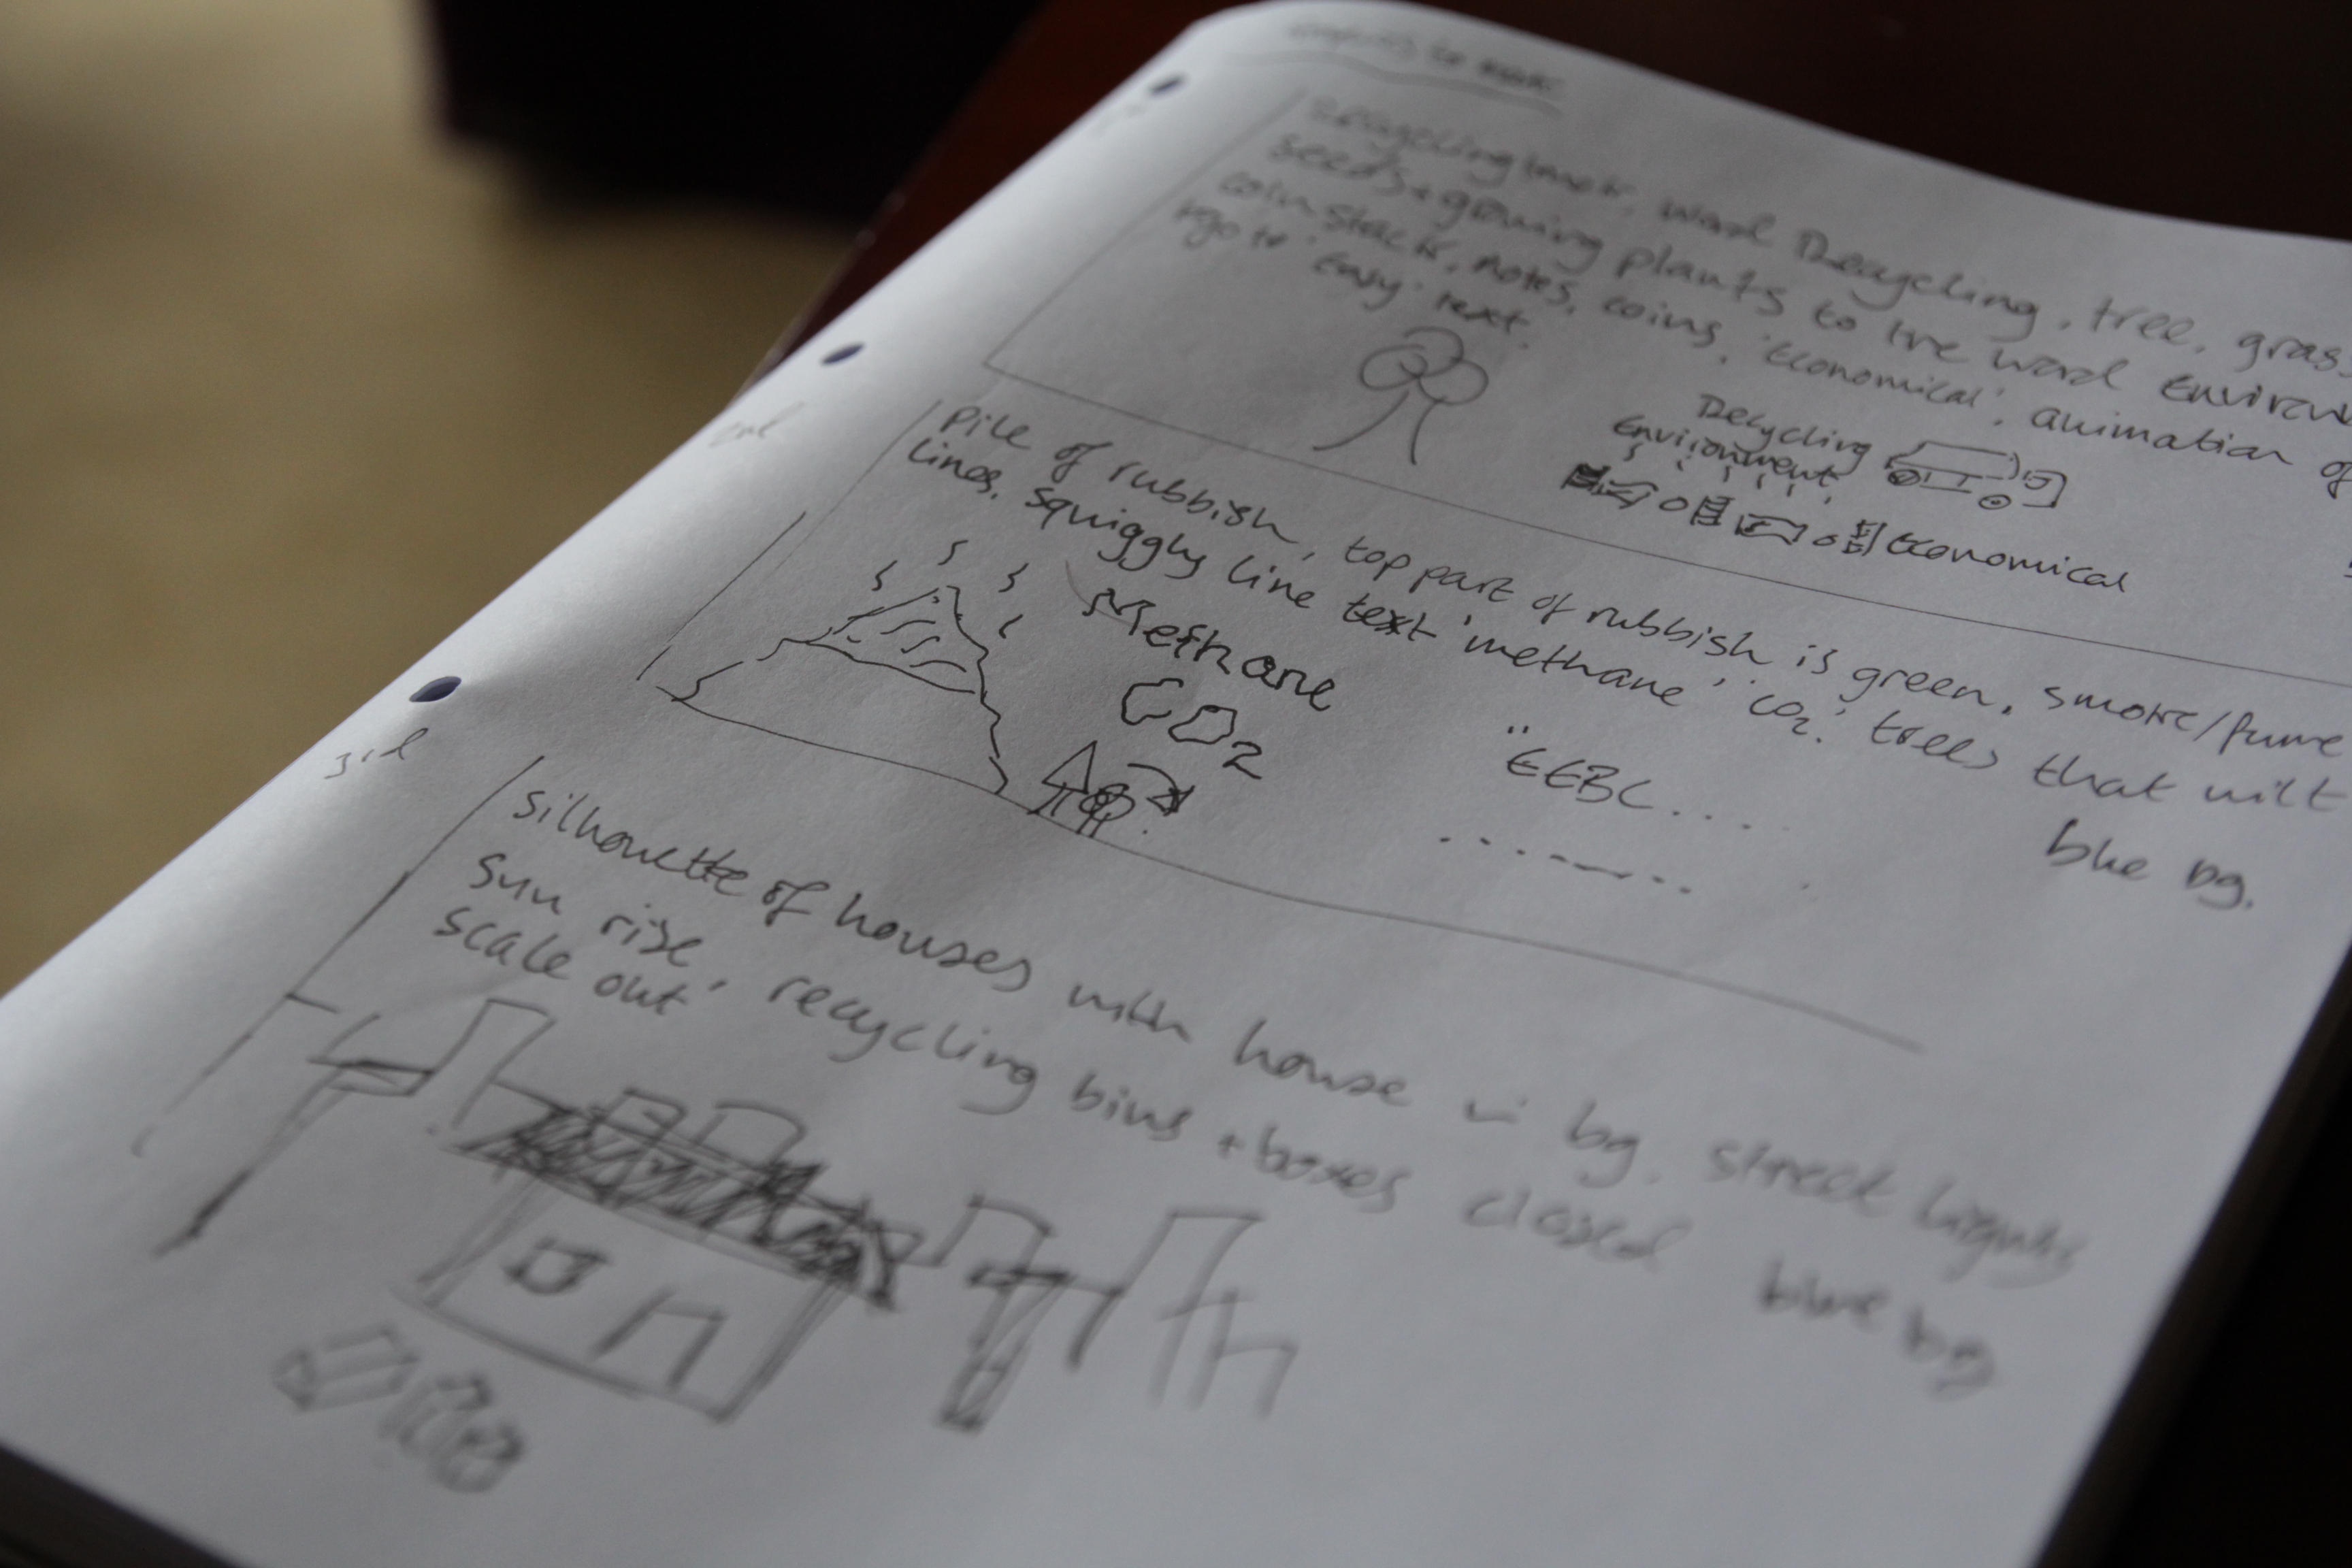
Blimey, wiping the dust from my blog I can see it has been neglected over the last couple of weeks. I can explain this, I've buried my head deep into working on a recycling video for my local council. For this I have designed and animated original graphics in Illustrator and After Effects, to be edited together in Premiere Pro. I can't give too much of what I'm working on away until the video is publicly released on the council website and other displays around the town of Epsom! But as you are a dedicated lot, and showing you the techniques I used won't do any harm!
Here's a screenshot from my AE window. Here you can see the little graphics floating around in the background, and overlaid on top is animated text.
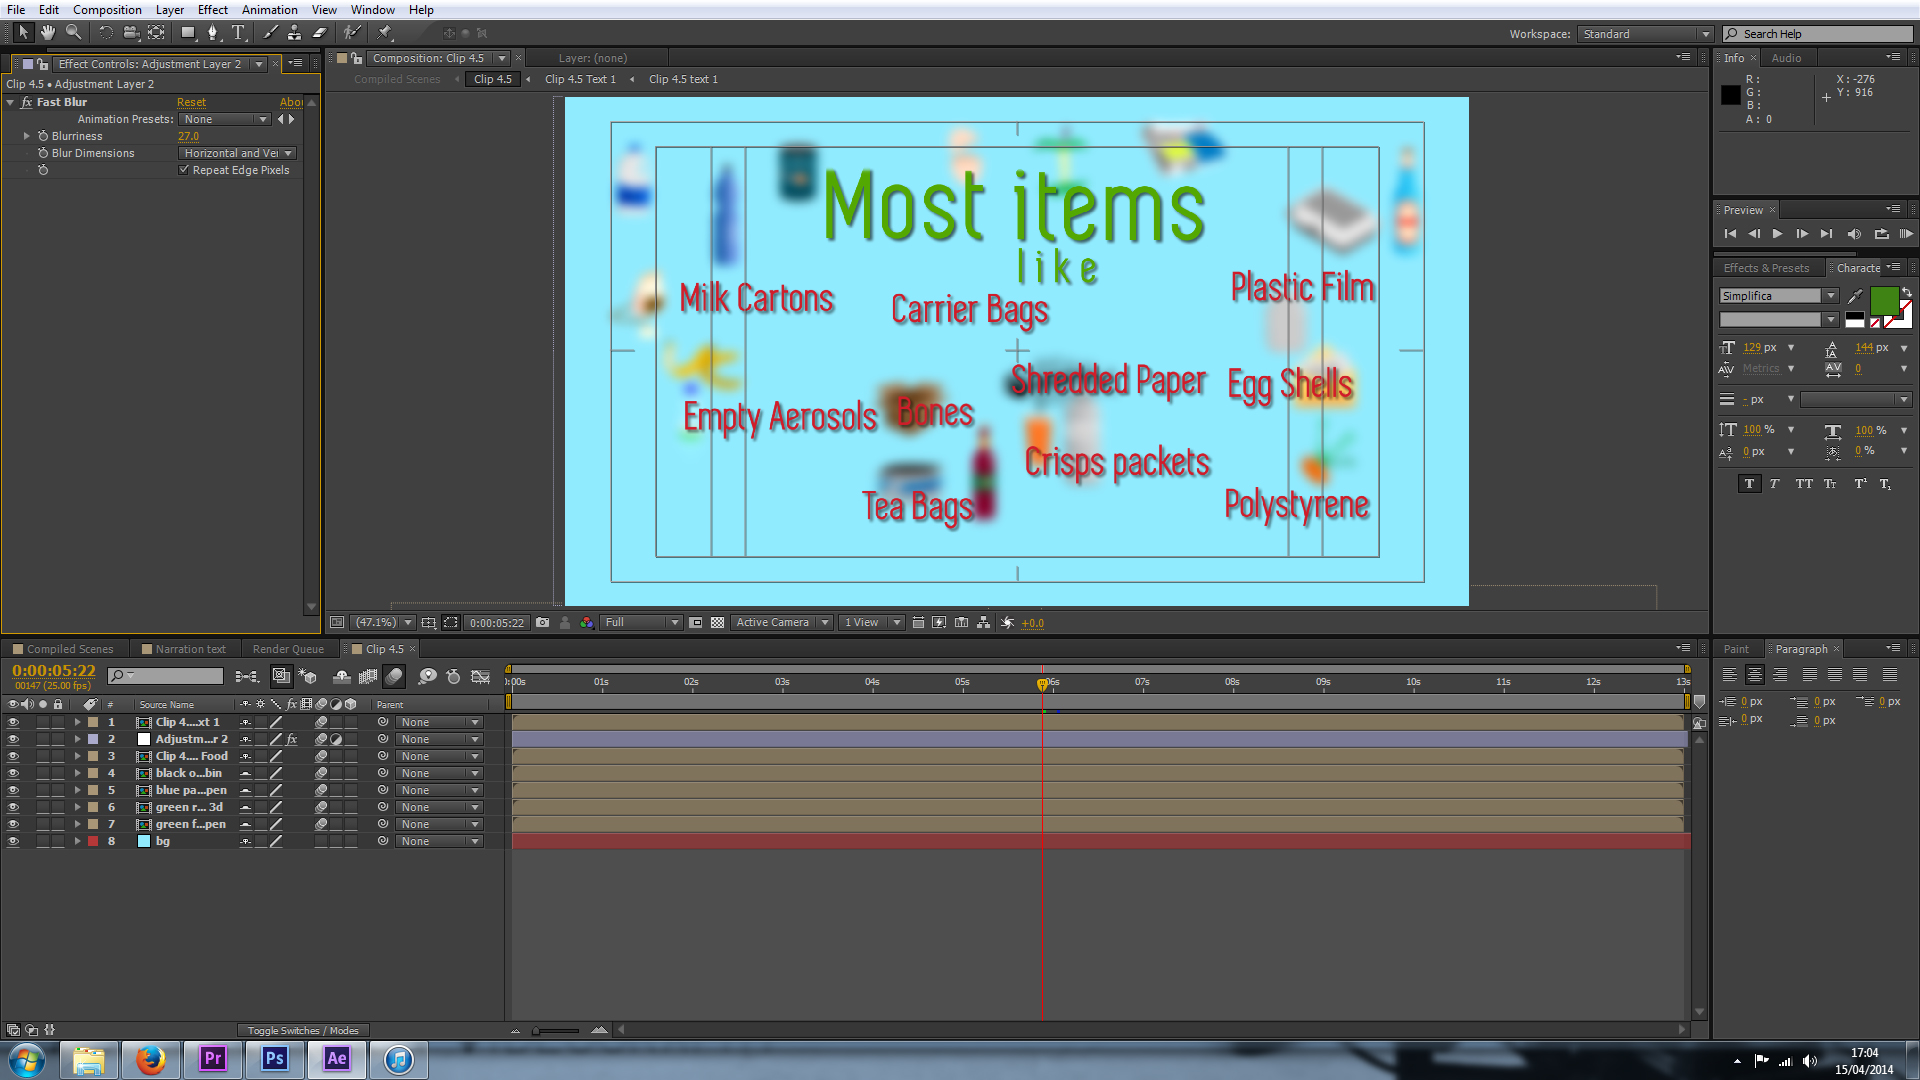 I've used pre-comps here to create different sections of each 'clip'. This allowed me to keep my timeline and frame tidy as I would only be working on specific parts of the clip at a time. For example, in the above frame the little graphics are pre-composed with their animation keyframes, so I can layer up the blur and text on top to be revealed later. For each 'clip' I also pre-composed all of the text as these are animated individually using various effects.
 Some of the more complex motion graphics, here I used falling particles (Particle World II) to fill up the alpha channel of a recyclable object, where a mask then revealed a solid; making the object look like it is filling up with the falling particles. To create this effect I changed the physics parameters to allow the particles to fall slowly, and spread as they go. Remember to use random seed when duplicating effects like this too ;)
 To add to the emotive feeling of the video, it was important to include human thoughts and processes on why recycling is important and beneficial to the environment and us! This is me interviewing Alan about how easy it is for him to recycle.
Equipment used includes: Canon 5D mkIII, Tamron 24-70mm F/2.8 VC, Zoom H6, Sennheiser ENG-G3, Rotolight RL-48, Manfrotto 755 carbon fibre pro tripod and MVH500.
This was a quick and easy shoot, using DSLR for videography means I have great light sensitivity in post places and it is easy to set up. I used the Rotolight to kick a little more into Alan's face, and recorded using a wireless lav mic and the XY stereo mic on the Zoom for a backup. Setup-interview-de-rig took one hour.
Pleased with the outcome, I got onto editing the sequences together now that the animation was looking good!
 In Premiere Pro, I used the Luma Corrector and RGB Curves to adjust the exposure and colour balance of the clips, here you can see the split view with the original on the right and the edited on the left. The Luma Corrector does a great job of removing Gamma, which takes out a gamma curve (grey) from the footage and can be used with contrast to create a really punchy, cinematic look.
With still more to go, and an aerial shot from a DJI to go and film, I am eager to see peoples reactions when the video is complete!
Fantastic Rotolight Video News - Coming To A Screen Near You!!!
The Rotolight Sound and Light kit video I produced for Rotolight featuring Josh McDonough is being taken on tour to America, where it will be shown to a live audience of 30,000 film students! If you haven't already, you can check out the video here!
[vimeo http://vimeo.com/87515700]
Check out Josh's new studio too, and get recording there - Just Jam Studios!
Got a meeting about the recycling project today, then will be getting my new iPhone (about time I know)!

Happy creating you awesome bunch of people, and thanks for all your support so far!
Adams video week roundup!
Blimey lots has been going on over the last week, I hope it has been as hectic for you as it has been for me! Monday started with continuing the design of the graphics for a recycling animation, a daunting task which put my drawing skills to the test. Bearing in mind I've spent the majority of the last year behind a camera, I took my time to learn the techniques I would need to use Illustrator properly. I would usually use Photoshop over Illustrator, but until I recently found out PS is not truly vector, and as I would be using a combination of the Pen tool and others to design the images this was very important, as I would need to transform the graphics later in After Effects.
My best mate Glen came down from Wycombe for a surprise week to, so I spent plenty of time catching up with him and chatting about work. He gave me so very important advice; "Everything is too complicated these days, you should keep it simple and your audience won't know the difference, especially if it is moving and animated anyway." True words, and I took Glens advice which not only sped up the process, but made me more confident with the work I was producing.
Here's a screenshot to show all of them! (I think I am working on a 10K canvas).

The graphics design has been on-going, I practiced when I was first commissioned, but it just shows how familiarizing yourself with the tools and applications can ease your work! A very very important part of this process was to intensively storyboard and plan each scene, so I know what graphics can be generated beforehand, so I spent a good couple of days story boarding and sketching the graphics I would need, followed by a long list of assets I would go on to to create.
Pre-vis sketches:

For the rest of the week I started importing the graphics into After Effects, and setting up the 15 scenes. I am finally starting to see progress! I am still working on this section, and it will take another week or so to complete all the animations. Again, I storyboarded this in the planning, so I know exactly what to produce for which scene which saves so much time. Also, the best thing about this planning part is that it does not have to be a work of art to depict your ideas, just a simple sketch to represent what you will need to create.
On Thursday I joined a crew of fashion designers, hair stylists and models to film a magazine photoshoot for Sherman Hawthorne (the hair stylist and creative director of the shoot) at The Lemonade Factory studios on Queenstown road. With eccentric styles and art direction, I set about to capture high contrast, dramatic footage which will compliment the photos. It was an early start, here I am waiting for my train at Clapham Junction;

I was a single shooter, I had the pleasure of transporting the equipment to the shoot which included a steadicam vest that I ended up not using. I've learned my lesson here not to take extra kit!
My kit list was as follows:
Canon 5DmkIII (A camera), Canon 60D (B camera)
Tamron 24-70 F/2.8 VC, Samyang 14mm T/3.1 cine, Samyang 35mm T/1.5 cine, Nikkor 50mm F/1.4 manual, Samyang 85mm T/1.5 cine, Sigma 70-200 F/2.8 OS
Manfrotto 755CX3, Manfrotto MVH700AH, Manfrotto Hydra arm and super clamp,
CamSmart camera rig + Lilliput field monitor, CamSmart Stabilizer vest, Flycam Nano
Zoom H6, Rotolight Roto-mic.
As with all of these shoots, time runs short so I was restricted to short burst of filming time with the models to capture the specific ethereal and industrial motif, but I also shot around the photographer to maximize my usable footage. I made use of the 50fps slow motion for the moving shots, so that the models movements are exaggerated, as well as stabilizing the shot.
As the props included wire fencing and chicken wire, aliasing was a problem when shooting shallow depth of field, or at an angle to the object. To remedy this I used a lower aperture (F/4-5.6) for some shots, but also I can add a Gaussian blur in Premiere Pro when editing to soften the lines, gently smoothing out unwanted aliasing.
A couple of frame grabs from the shoot!
 Here I'm using a moving shot to create a distorted perspective from outside of the set.
 Here I use a low angle shot, removing the identity of the model to create a 'trapped' and 'mysterious' feel to the model, and why she is in the box.
Weekends are always working weekend for creatives and freelancers. I spent yesterday working on the animation of the recycling project again, continuing to compose the scenes using simple 2D shapes and animation styles that have become very popular recently.
I also came across this post from Chase Jarvis about how to manage your time properly, its a great post with a detailed outline of 90-minute working slots that should improve your productivity, I urge you to read it if you're someone like me who can't stop working, then apply the plan to your working life. I know I will be!
Do Less = Do More by Chase Jarvis
I haven't had many #videoquestions come in recently, so please keep them coming so I can help with tips for the community of videographers and creatives! Send them over to me @Plowman91 on Twitter.
Finally, ending with a must watch video, check out Philip Bloom's video shot with the Blackmagic Production Camera, the 4K one at Miami Beach, what do you think of it? Is it worth investing now the Panasonic GH4 is on pre-order and it looks like Sony will have a 4K DSLR announcement coming at NAB2014 too..!!
Philip Blooms Four Corners Miami Beach (Blackmagic 4K camera)
That's all for now folks! Keep the creative juices flowing!
Update from Adam!
It has been a very busy couple of weeks since BVE, which by the way was great this year. I was over the moon to see the new finalized range of Manfrotto LED Spectra light panels which I got to test out a couple of years ago. Seeing products develop over a long period of time is interesting, even more so when your opinion is considered in how the final product should perform. Manfrotto also had their re-designed SIMPLA rig to demo, a much lighter and more ergonomic model I must say which is compatible with 15mm rig accessories like their matte box and electronic remote control.

As well as that, Manfrotto have also joined forces with Schneider Kreuznach optics (page in German), who have a new range of cinema lenses, specifically designed with ease of use in mind. All of the lenses from 24mm to 135mm have the same filter size, length and focus rotation to make filming with a range of the lenses effortless, simply change the lens and your peripherals stay in position. The optics of the lenses blew me away. Even in the well lit Excel, the background bokeh was stunning, soft yet so crisp. I cannot wait to get my hands on them. I think the combination of the new Manfrotto 055 tripod, the SIMPLA rig and Schneider glass will be a killer cine kit, delivering incredible visuals, making your shoot run smoothly, and at a low cost. Give it a year and this will be the go to package for production rentals, and part of every kit bag.

In other news, I've been working with EEBC on a couple of projects; a short video on recycling and another about a Wellbeing centre for those suffering with dementia and their carers. Both projects have messages that are close to me, so I've been working hard to blow my clients expectations out of the water. For the recycling video, I'm combining video with animation to show why recycling food and material waste is ever more important today; generating renewable electricity and resources. The Wellbeing centre video will be live action video, featuring the range of activities available to those in the community as well as the vast benefits to carers and visitors to the centre.
So, busy busy at the moment. I'm also meeting some designers from the fashion label ACF (Art Comes First) next week about another video featuring the design process here in London. Very exciting, I've been patiently waiting for an art-collaboration project to come along, it's what I started the business for!
I've had no #videoquestions for a while, so remember to keep them coming to @Plowman91!
Remember, inspiration is everywhere so take your camera with you!

EDIT!!!! Just remembered to include this, I spoke to an un-named informant about the new Samyang/Rokinon VDSLR cine lenses and whether any new models are going to be released. Our brief chat resulted in confirming rumours of a 50mm and 135mm cine lenses coming very soon! I think it's exactly what the lens range needs, and I will certainly be investing in the 135mm if it is at T/2.2, or pushing it at T/1.8 would be a dream come true. So hear my thoughts Samyang/Rokinon!
Silence is golden, Planning is key!
A new #videoquestions is out today on how to plan your video production so it runs smoothly, and is within your time and money budgets! I'm out for a pre-vis meeting this morning for a video that combines animation, where planning has been a very important role in creating a narrative and generating an estimate price for the production. I'll share my work with you in this#videoquestions later today!

Creating ambience in motion graphics
I've been working on the title graphic for the Rotolight BVE video, sometimes I can get going straight away with designing and animating however (and I presume this is due to getting up early to start working) I was stuck for ideas.. VideoHive is a great resource for re-made graphics sequences for After Effects, but they are also great for getting inspiration on how to create the atmosphere and effects for your own work. I spend a good half hour looking through the pre-made effects and gathered some ideas.
One key point I've found to make the graphics seem realistic, and to give it an ambience there are a couple of things you can do to make it more life like. Number one is to use a particle generator to create dust to naturally drift around the environment. The particles can be given physical attributes like gravity and wind, which makes the animation more realistic.

Number two, using light and lens flares; this leak of light appears to give the environment in which your text, graphics etc seem to be in a 3D space shot through a camera - these are naturally occurring when out filming and in our eyes, so it can be used too.
Number three; textures and patterns; for a graphic based (not so much vfx based) title, tiling textures and patterns to create a wallpaper background is visually appealing, as is only using a number of tones from a simple colour pallet.
Number four; interpolation and motion blur. Again just like in real life, our brains process the images we see at around 16 frames per second, and fills in the spaces in between. In graphics this motion blur needs to be added, to correctly interpolate the animation and blur of a subject or object. The local and global motion blur (bouncing ball) icons are easily found on the timeline so be sure to click!
Number five; depth of field. In cinematography the director uses the depth of field to move the audiences attention through the frame to reveal new parts, to uncover secrets and ideas. This can be done in motion graphics too, by using a Camera. When you have a camera in your composition, be sure to check 'enable depth of field' and to set your aperture to a low F stop (F/1.8 for example) and increase the blur amount. After Effects then generates depth of field using the camera settings; making objects close and far away from the camera blurred.

Here's a snap of the working-graphic for the title, for a cinematic look to the video I have also applied an anamorphic aspect ratio overlay. I might make some changes later, but for now it is off for comments and feedback. If you have any questions about the graphics or videography then give me a shout!
How do you make a timelapse? Video Questions
Finally got round to this!! A time lapse is a method of photography and videography that captures sequential images from a static camera over a certain period of time, and then sped up in post production to create the illusion of time moving fast.
There are so many reasons why you'd want to use time lapses in your work; from establishing locations to capturing a long event like the northern lights or sunrises and sunsets. Time lapses create a visual spectacle in which time speeds up, you see nature at work and things you would normally miss or take for granted.
If you want to check out some awesome time lapse films, please watch Ron Fricke's Samsara which includes awe inspiring cinematography captured in 70mm film.
http://www.youtube.com/watch?v=P0xVp3N-M84
There are a couple of ways you can create a time lapse, dependent on the length of time you wish to capture, the changing exposure settings of the location, and the kit you have.
Cameras and Kit
I assume that most people interested in this post own a DSLR or video camera of some kind, as it is difficult to capture a time lapse otherwise. In all honesty, what model of camera you use won't make a big difference on the overall video. Whether it is a Canon 110D, 550D or 1D-C, Nikon D3200 or D90, Sony A-7 or Olympus OM-D EM1 your photos and video will look great. Just make sure you have your exposure and focus point set correctly. In regards to what lens you use, in general wide angle lenses give a better perspective of the environment; we've all seen GoPro videos, that is ultra wide, but you don't need a fish eye or specific lenses to do this. Usually the standard kit lens that comes with your camera has a wide angle, whether it be 11mm on MFT cameras or 16mm on full frame, keeping a wide field of view is key to achieving the perspective of a time lapse.
Lets start with time. The longer you wish to capture, the more memory and battery you will need so ensure you've got a fresh card and charged batteries, or even better a battery grip. Depending on what camera you are using you may also need an intervalometer; a device that plugs into the camera and releases the shutter for a pre-set duration at a pre-set interval.
Here's one made by Canon - ![Canon-Intervalometer1[1]](http://ajp1991.files.wordpress.com/2014/02/canon-intervalometer11.jpg)
So, if you wanted to capture a sunset, you will be shooting for a couple of hours. This little device will release the shutter and take a picture for you, however you need to set the interval duration. The longer the interval, the greater the difference between each image as the objects in the frame move and change. For a sunrise or sunset, an interval of 10 seconds should suffice, as the sun and clouds move slowly.
If you were in a city shooting a TL of a busy public place, a shorter interval should be used so the objects or people move smoothly through the frame and don't jump around.
What are you capturing?
Where will you be shooting the time lapse? Bright daylight at the beach, or in arctic winter? Or star trails and fireworks at night? Your DSLR's shutter speed will allow you to control the amount of time the shutter is exposed to light, so a longer shutter speed (anything under 1/30 can be used when the sun or bright light is not available) should be used at night when light levels are low. You can also use the BULB setting I believe to capture exposures longer than 30 seconds if you are capturing star trails.In the opposite situation, you can set your shutter to a reasonable speed depending on the light available; but remember changing light is inevitable and uncontrollable in nature so using shutter priority mode (T) or aperture priority mode (A).
REMEMBER YOUR TRIPOD! Shooting for long periods of time need a steady support, to keep the camera locked off and weighed down if needs be! My Manfrotto tripods work a treat.
Experiment and test at the time to judge your exposure settings. Keep your aperture or F stop small so that all objects in the frame are in focus; something like F/11 down to F/22 if in bright light or you can increase the aperture to F/4 up to F/2.8 if you're working at night. Increasing your ISO to 1000 or 1250 is perfectly fine if your doing a night-lapse, so no worries about that.
Also use the digital zooming capabilities on the camera to get critical focus on a key static point.
If you have less time for a time lapse, then you can always hit record on your camera and film continuously for as long as it can. This is an easy option for those out and about shooting as you can simply wait for 10 minutes or so. Obviously here you have the time restriction to only 10 minutes, so this works best for short burst time lapses of clouds, people & crowds and quick changing landscapes.
For any other setting it would be better to use an invervalometer, mainly as keeping your camera recording will suck the juice out of your battery like anything.
For savvy videographers and photographers alike who may have Magic Lantern already, there is an intervalometer built into the ML firmware which acts just like an internal one. If you don't want to pay for an external device then Magic Lantern which is open source and free is your best option. Plus having ML on your camera expands its video capabilities greatly.
Post Production - If you have taken a series of photos
You've captured an amazing sunset, it has taken you hours and all you want to do is see the finished product. Some methods of editing time lapses are long, boring and not neccessary; taking the photos into After Effects for example, its not needed!
Adobe Premiere Pro is a much simpler and quicker method of getting your TL into a video. Firstly, create your project as you would normally, setting scratch disks to your project folder where the photos are stored. Next, create a sequence dependent on what resolution you would like the video to be. Nearly all photos taken on a DSLR are larger in size than 1080p high definition, so this is a good place to start.
Depending on where you are in the world, your frame rate should be 25fps for UK/EU/Rest of world, or 30fps for USA. This will play your video back at the same frame rate as television and internet, so the time lapse will be smooth.
Now you have your sequence open in the timeline, go to Edit>Preferences>General. Here you can set the default 'still frame' (picture) duration to ONE frame; in timecode this will appear like: 00:00:00:01. This sets the sequence of images to play one after the other with 25 pictures in each second.
Now you are ready to import your photos! Simply Ctrl-I or Cmd-I to open the import window, select the folder with your time lapse images and click 'Import Folder'. Premiere will now import all the photos in the folder and set the duration. You can now simply drag the folder with the photos into the sequence, and your time lapse is now a video. Make sure you render (hit Enter) and watch it back in case you need to correct any frames.
If it looks like the photos are going too quickly, you can change the duration of all the photos very simply; select all the photos in the sequence, right click > Speed/Duration. Here you can increase the frame duration from 00:00:00:01 to 02 frames instead. Here you will need to see what suits your time lapse best. One last tip is to highlight/select all the photos in the sequence, right click, and click 'Frame Blend'. This calculates the interpolation (movement) of subjects between two images, so it fills in the gaps so to speak.
Post Production - Long Video Files
So you've taken the easy road! This method is just as simple as above, and is a quick way of processing a short time lapse. Once you have followed the steps to create your sequence, you can import the video file like you would the photos, instead you simply click the video file needed and click 'Import'. Then drag the video file into the sequence; here if you have been videoing in a different video format Premiere will let you know that the video and the sequence do not match. It is easier to stick with the format of your original video, so if this happens click 'Change Sequence Settings'.

With the video now in the timeline, right click and click 'Speed/Duration'. Here you can increase the speed % to make it faster, and again will need some experimenting to see which looks the best. Remember the higher the speed increase percentage, the faster the time lapse happens.
Colour Correcting
You can add any colour correction to the time lapse by creating an 'Adjustment Layer' and adding brightness and contrast, curves, levels, tint, whatever you like to make the time lapse look great.

For a 'tilt-shift effect - like the incredible New York Sandbox video you will need to use additional plug ins like Magic Bullet, or add the effect in Photoshop before importing to premiere.
http://www.youtube.com/watch?v=Fk9EBOOAYiU
Exporting - finally creating the time lapse video!

Once you are all done, with the sequence selected go to File>Export. If you are uploading to the web, then the H.264 format will work the best for quality and compression. From the drop down menu select H.264 and the Vimeo, Youtube or any other format you wish. There are loads, and plenty of confusing settings so don't get bogged down in the different types for now. When you think you are ready, and have chosen your file destination and name, you can hit 'Export', or if you wish to carry on working in Premiere on another project you can 'Queue' to export to Adobe Media Encoder which will export it in the background!
[youtube=http://youtu.be/QMwpA02IKdI]
A little example of a video time lapse I shot at Epsom Downs!
I hope this covers your time lapse photography and videography questions? If there is anything I've missed or if you have other questions please send them in!
[contact-form][contact-field label='Name' type='name' required='1'/][contact-field label='Comment' type='textarea' required='1'/][/contact-form]
Manic at Adam Plowden Video HQ!
Its been incredibly busy over the last few weeks, so apologies for not posting for a while! Lets fill you in. February has been a tough month. Work as been here and there, it is always difficult at this time of year and made even more difficult by starting a new business. I expected a lull at the beginning, so not to lose hope I kept myself busy. Although I haven't been posting, I have been out filming all the time, especially these last couple of days.

Rotolight sent down their awesome ring light and roto-mic, which I have been testing out and reviewing in what feels like all weather conditions! One minute it is sunny, the next it is bucketing it down. A couple of times I got stranded in the downpours with my kit, a prolific moment was this, up in a quiet and forgotten playground near Epsom Downs. I only got 3 shots that day, then the rain came and we retreated.

Since then, the weather has picked up, and so has the tempo of production! I got an email from Rotolight asking if its possible to put a short video together for BVE with the footage I got when using the roto-mic and ring light. Feeling up for a challenge I accepted, and have been busy producing a music video to coincide with the video for BVE! I reeled in one of my good mates Josh McDonough is an awesome musician and producer, currently working on a new studio build to perform in the video, and in return he can have the music video to kick start his recording-producing business.

To show how you can maximize the creativity and convey the flexibility of the Rotolight Sound and Light kit, I used various techniques including mounting on a camera, hand held, and playing with the light to create unique blooming and light effects. I had a few ideas of what the visuals would look like, an intimate piece to camera in the soon to be studio, as well as getting out and using the light in low light situations to add an urban feel.
There will be much more later, but right now I need to continue with the editing and graphics for the Rotolight video!
Andrew Kramer (VideoCopilot) does it again!
I'm a big fan on Andrew Kramers work and contribution to the industry, running the After Effects tutorial and blog website, creating the title sequence for Star Trek Into Darkness film, it has had a big impact on my learning.
![tron_1[1] videocopilot](http://ajp1991.files.wordpress.com/2014/02/tron_11.jpg)
I first started using VideoCopilot when I was 16, designing a title sequence for a series of webisodes I had written and was planning to film, direct and produce. It never got made, and I'm sure I've got the original work somewhere. My point being is that to this day I still use this amazing resource for my work now, learning new techniques for effects creation. If you haven't checked it out before, I urge you to do so immediately!
Here's the latest tutorial, creating '3D' volumetric light rays which will look great in mysterious, dark trailers or titles!
http://www.youtube.com/watch?v=frXQxwMKh6c
New supercomputer is built!
I've been waiting months to finally have a computer that can handle the work that I do!! Previously working on laptops (which coincidentally die each year) I needed to step up the game to a high performance desktop which will expand my capabilities in not only video editing, but also motion graphics and compositing. I got myself an i7, NVIDIA 650TI 2Gb graphics card and all the rest to allow working speedily in Adobe applications (taking advantage of the mercury playback engines) and also allowing me to use Speedgrade and DaVinci Resolve for professional colour grading as the new graphics card is CUDA enabled!! My workflow speed will go through the roof!
Throughout all of January, the components dribbled in one by one, until it was only the PSU to come. Amaz0n buggered up my order, which I was expecting in 2-4 weeks. The order then got pushed back another 2-4 weeks, which I was furious about, so got on to Amazon support who clarified the 'warehouse' issue.. Everything is computerized these days so I don't understand how a major marketplace cannot get there warehouse stock levels and back order numbers right!!
I cancelled my order with Amazon, and put it through Scan instead, who delivered the Corsair 1000w PSU in only 2 days. Top service!
Being impatient (eager), I wanted to get the new computer going as quickly as possible so I begun assembling the components in the case. I had never done this before so the nerves were running riot, washing my hands every couple of minutes to make sure I wasn't getting grease or dirt on the motherboard. It was stressful, but I managed to get most of the bits it, bar the CPU and hard drives.
Yesterday Sam helped me put together the rest of the components and the cabling, and the building of my new workstation - could not have done it without him!
 The blank canvas of my computer.
Now all I have to do is fill it up with my work and data, install Adobe and then I can get working!
And no I haven't forgotten about new videos!
It hasn't slipped my mind that a number of new videos are on the horizon showing you guys my videography setup, going through the equipment and techniques to set up for a reliable interview scene using the new Rotolight LED ring light and the Rotolight microphone. The weather has been terrible here over the last week so I haven't had a chance to get out and do much filming and testing out of the new Rotolight products, but this is the job for today and next week!
Watch this space for plenty of 'Video Questions' videos and samples using the Rotolight kit!


Video Questions; Choosing the right camera, picture profiles and using ND filters!
Heyo all! Thanks for sending in your questions, I will try to answer as many as I can will practical, real world examples! If you have any more, please send them my way! Question from Chris via Facebook: "Can you recommend any camcorders for HD video and good low light performance?"
Answer: A DSLR for video is not the right choice everytime. Why do you think television broadcasters use camcorders and system cameras? For broadcasting, there are regulations and legal limits that must be followed for the final video to be shown live; there are many including the compression of the video signal, the black and white level (check out waveform monitors and video signal) to name a couple. DSLR's do not adhere to these regulations hence we don't see TV crews running around with 5D's in London.
Where DSLR's produce a great image due to the large CMOS sensor, they have big restrictions such as needing to change lenses, poor audio support (unless you invest in audio equipment), rolling shutting, aliasing, moire.. I could keep going.
So, taking camcorders in the equation; most have long zoom ranges (20x and more!) at wide apertures, with additional digital gain, in built ND filters, built in stereo microphone and audio in/out. The sensors are different too, some using CCD (which splits the 3 colour channels) for better colour rendition and less compression.
These days, manufacturers such as Sony, Canon, JVC produce ENG (electronic news gathering) camcorders with those above features, meaning no extra kit to carry, most are hand held or shoulder mount for ease of use. Therefore it is seemingly easier to video on a camcorder, until you require a large sensor camera for artistic video.
Product recommendations for camcorders - Sony AX and VG range, Canon Legria, XA and XF range, JVC produce great camcorders too and have stepped up their game over the last year with the GM-HY range including a 4K model too.
If you want to spend a little more, the Sony HXr-NX3 (recently reviewed by Den Lennie) looks incredible for what you get in one camera - http://www.sony.co.uk/pro/article/broadcast-products-get-close-up-hxr-nx3
Next question from SAHIB on Twitter: "Do you use a neutral picture style when shooting, and do you use neutral density filters?"
Answer: For those unaware of picture profiles on your camera, check them out in the 3rd section of the movie shooting (red) menu (for Canon users). There are a number of options listed, which alter the way the picture is recorded depending on your choice, you can also customize these profiles too using the INFO button.
Canon picture styles - Standard, Portrait, Landscape, Neutral, Faithful, Monochrome.
I will not be detailing the ins and outs of all the picture styles, more of a visual comparison.
What does a picture profile do? Much like LUTS, picture styles adjust the intensity level of the; Sharpness, Contrast, Saturation and Colour Tone in the image, so what picture profile you use can change the 'look' of the video you capture.
Check out this video I put together today showing the results of the cameras picture profiles, and others I have loaded onto the camera. You can see a clear change in the image, but it is subtle differences that will make your video work stand out.
I previously used the Neutral picture profile, customized to reduce the contrast, saturation and colour tone to produce a very grey and flat image. I was using this profile to achieve this look, as it is how RAW footage is captured to then be graded in post production. Neutral does replicate this 'flat' look, but after doing research into other profiles, Neutral reduces the data that is required in the picture (the contrast and saturation) that I would then put back in in post. This causes noise to be generated in the image, and can cause it to look unnatural and crushed, as the contrast and saturation that had been removed by the picture profile is being added back in later in the workflow.
That was long, but I hope it makes sense. If you compare the 'Standard' to 'Neutral' there is an evident drop in saturation and contrast, with a loss of detail in the top of the trees. If you compare 'Neutral' to 'VisionColor', there is an increase in saturation and contrast in the shadows and highlights.
The 'Neutral' picture style, similar to Technicolor CineStyle reduces the data the sensor captures, so I would not recommend using it if you plan to do colour correction and grading in your workflow. REMEMBER - whatever you capture when out filming will 'burn in' the detail, colours, sharpness and contrast into the image, making it harder to edit and remove unwanted errors. So, it would be better to use a profile that holds the data and detail so if wanted, you could work on grading the footage later.
From tests and experimenting, I favor the VisionColor profile; it is not as destructive as Neutral, holding colour and contrast without making the image flat. I definitely recommend checking them out here.
Next Question from SAHIB on Twitter: "Can ND filters change the style of video?"
Answer: This does depend on what and where your video shoot is. If you are working indoors, or with lighting that can be controlled by you then neutral density filters may not be required as you can alter the brightness of the scene by reducing the intensity of the lights. However, if you're out filming in a situation where you have little to no control over the lighting, then ND filters are key.
Personally I use variable ND filters, currently from Polaroid but much better filters are available from Hoya & Tiffen. The function of these filters is to reduce the light entering the lens, meaning camera settings can be kept the same. This allows you to follow the 180 degree shutter rule, which means keeping your electronic shutter speed at 1/50th to reproduce film-like and realistic motion blur.
So, with your shutter speed locked at 1/50, and your chosen aperture has been set, the only other exposure altering options you have is to ride the camera ISO to make the image brighter or darker.
PROBLEM!
With a fast aperture of F/2.8, and you are currently shooting in sunny daylight, your image is going to be very over exposed. Reducing the aperture to F/8 or F/11 may correctly expose the image but you have lost your depth of field! What to do!
Get some Variable ND Filters!
These ND filters rotate, allowing a variable ND amount to be set externally, without changing your cameras settings! This means that you can keep your cinematic depth of field and realistic motion blur without reducing the shutter speed to 1/250th or your aperture to F/11.
I recently shot this video using an ND filter on an 85mm T/1.5, which allowed me to shoot continually at T/1.5 for extreme shallow depth of field.
Making a quick edit: Variable ND filters are one of many options. ND Filters also come in stops; increasing by a factor of doubling so 2, 4, 8 etc. If you can stretch to separate stop ND filters they work just as well, and with the lower end (under £100 products) they will be better quality than one under £100.
In videography and cinematography, ND filters are applied in the matte box in front of the lens. So if you plan to use one, look in to matte boxes with the ability to add filters, but prepare to pay for it!
Well, that covers Video Questions for today! I hope to have answered and covered all bases, and remember they are from my personal knowledge and experience.
Got any more? Send them my way!