questions

Thinking of making the jump to 4K?

You are in the same boat as me.. Having bought my 5D mkIII last December, there was no accessible 4K option until the Panasonic GH4 made its appearance in the Spring. I was devastated. Having invested heavily in Canon gear, any future move I make will need to fit with my current EF mount lenses, not to mention everything else such as batteries, memory cards and my overall production workflow.

http://www.eoshd.com/2014/04/panasonic-gh4-vs-sony-a7s-compared-wins-4k-battle-paper/

(EOS HD comparison between the cameras).

At the moment, there are two options on the table. Said to be like comparing apples and oranges, the Sony A7s and GH4 are the current competing professional cameras that offer 4K functionality, however for people that own the cameras and have been comparing the two have found it difficult. This is for a few reasons:

Sensor size: The A7s is full frame, the GH4 is MFT.

4K in camera: The GH4 can record 4K internally, the A7s requires an external recorder such as an Odyssey or Shogun.
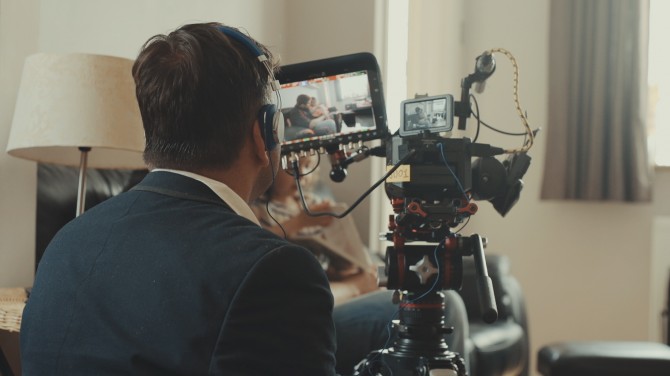
Philip Bloom using the Q7, from: http://philipbloom.net/2014/07/19/magician/

Jeromy, CEO of Atomos talking to me and Sam from The IABM about new products and the IBC Show.

Now, many people will be arguing that what does the increased resolution allow you to do, that HD doesn't? The image produced from the 5D is great; good in low light, versatile, fits my style of filming... But it also has big downfalls for being a DSLR, and not a video camera.

Something that is unique about these two cameras is that their 'out of the box' functionality has been fine tuned for video applications, as well as high end photography. This is what Canon has left behind in their non Cinema line cameras, and Magic Lantern has struck gold on with their firmware hack enabling awesome video functions.

I have only recently installed ML on my 5D mkIII due to the current firmware on the camera. It was shipped with version 1.2.3, I was hesitant to downgrade the firmware and was patient in waiting for ML to develop a tested and working version for 1.2.3. Now having access to on screen aid such as waveform monitors and audio levels make such a difference, and restart movie for the longer filming durations is great. It turns your 'photography' camera into basically a video camera.

From: About DSLR (Youtube).

For my type of videography, the benefits of having not only 4K, but a wider range of options for recording will allow me to crop and downscale any 4K acquisition to HD and hold incredible picture detail, dynamic range and depth of field.

The recording bit rates are higher, meaning more data is stored for post production editing, compositing or grading.

Lastly, it should increase the production value of what I produce. Now, I am not stating that better equipment makes better videos. It does give you the opportunity to step up with what you can do in your work, and especially as it keeps you up to date in a world of ever changing and improving technology.

So, what is my investment cost?

This is dependent on your current shooting kit, and whether you can merge your current system with a new one. Perhaps you already shoot Sony or Panny, so you're in luck.

For me, all my lenses are Canon EF mount, some are electronic, others are manual, so an adapter would be needed in my case. The price of this is dependent on the glass you use, or are going to use.

Let's look at the Panasonic GH4 to start with.

Panasonic GH4 (body only) - £1296.00

Metabones Speedbooster EF to MFT (smart with electronics) - £468.00

GH4 batteries x 2 -£130

Transcend 600x ultimate SD card x 2 (Amazon price) - £36

Now, as the GH4 is MFT, I might purchase a wide angle lens because my current ultra wide angle 14mm T/3.1 would be almost 28mm T/6 due to the sensor equivalence. So, my options would be either:

Panasonic 12 - 35mm F/2.8 - £829.00

I did have the Samyang 12mm T/2, realizing it does not come in MFT mount.. So the above would be my option. I have used it before, it has great OIS and has a decent depth of field for an F/5.6 equivalent lens.

Total GH4 investment inc extra lens - £2759.00 (excluding extra lens - £1930.00)

That £1930 was pretty much the same price I paid for the 5D mkIII body only.
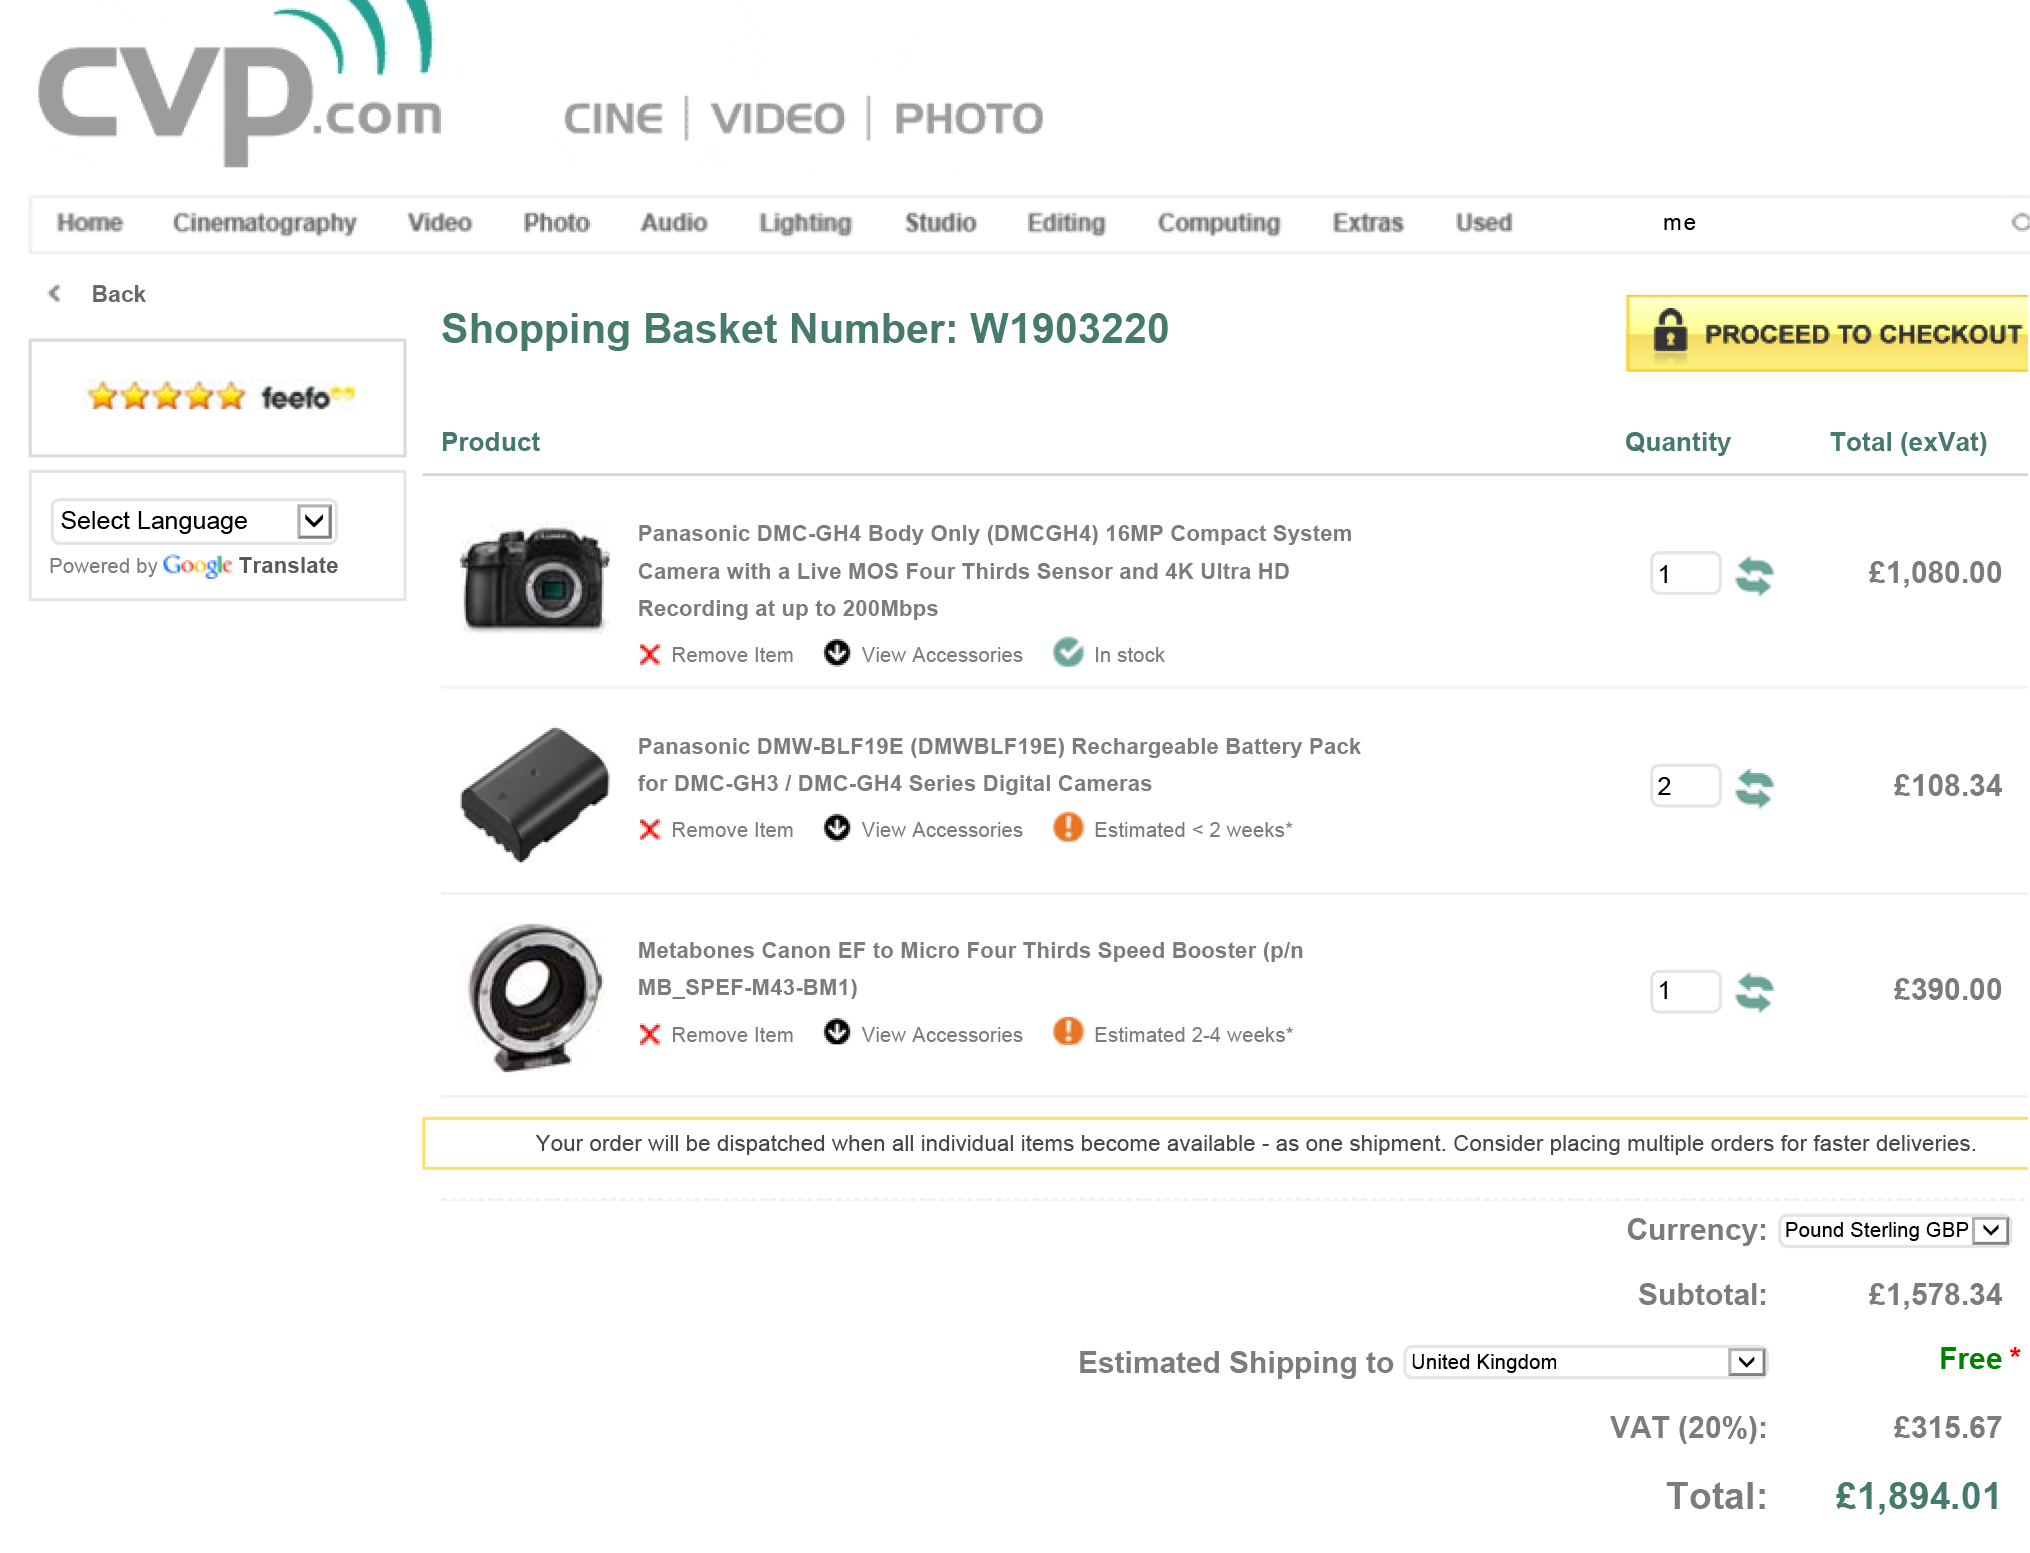
Panasonic GH4 basket

Now the Sony A7s.

Sony A7s (body and battery/PWR kit) - £2034.00

Metabones Speedbooster EF to E (smart with electronics) - £316.46

Transcend 600x ultimate SD card x 2 (Amazon price) - £36

The A7s does not record 4K internally, so I would need to purchase the Atomos Shogun recorder at - £1464.00

Also, as the A7s is compact in size, a cage is required to make it more accessible with the recorder and mics etc.

Movcam A7s cage - £148.02

Total A7s investment - £3998.48

(All prices are including VAT from CVP).
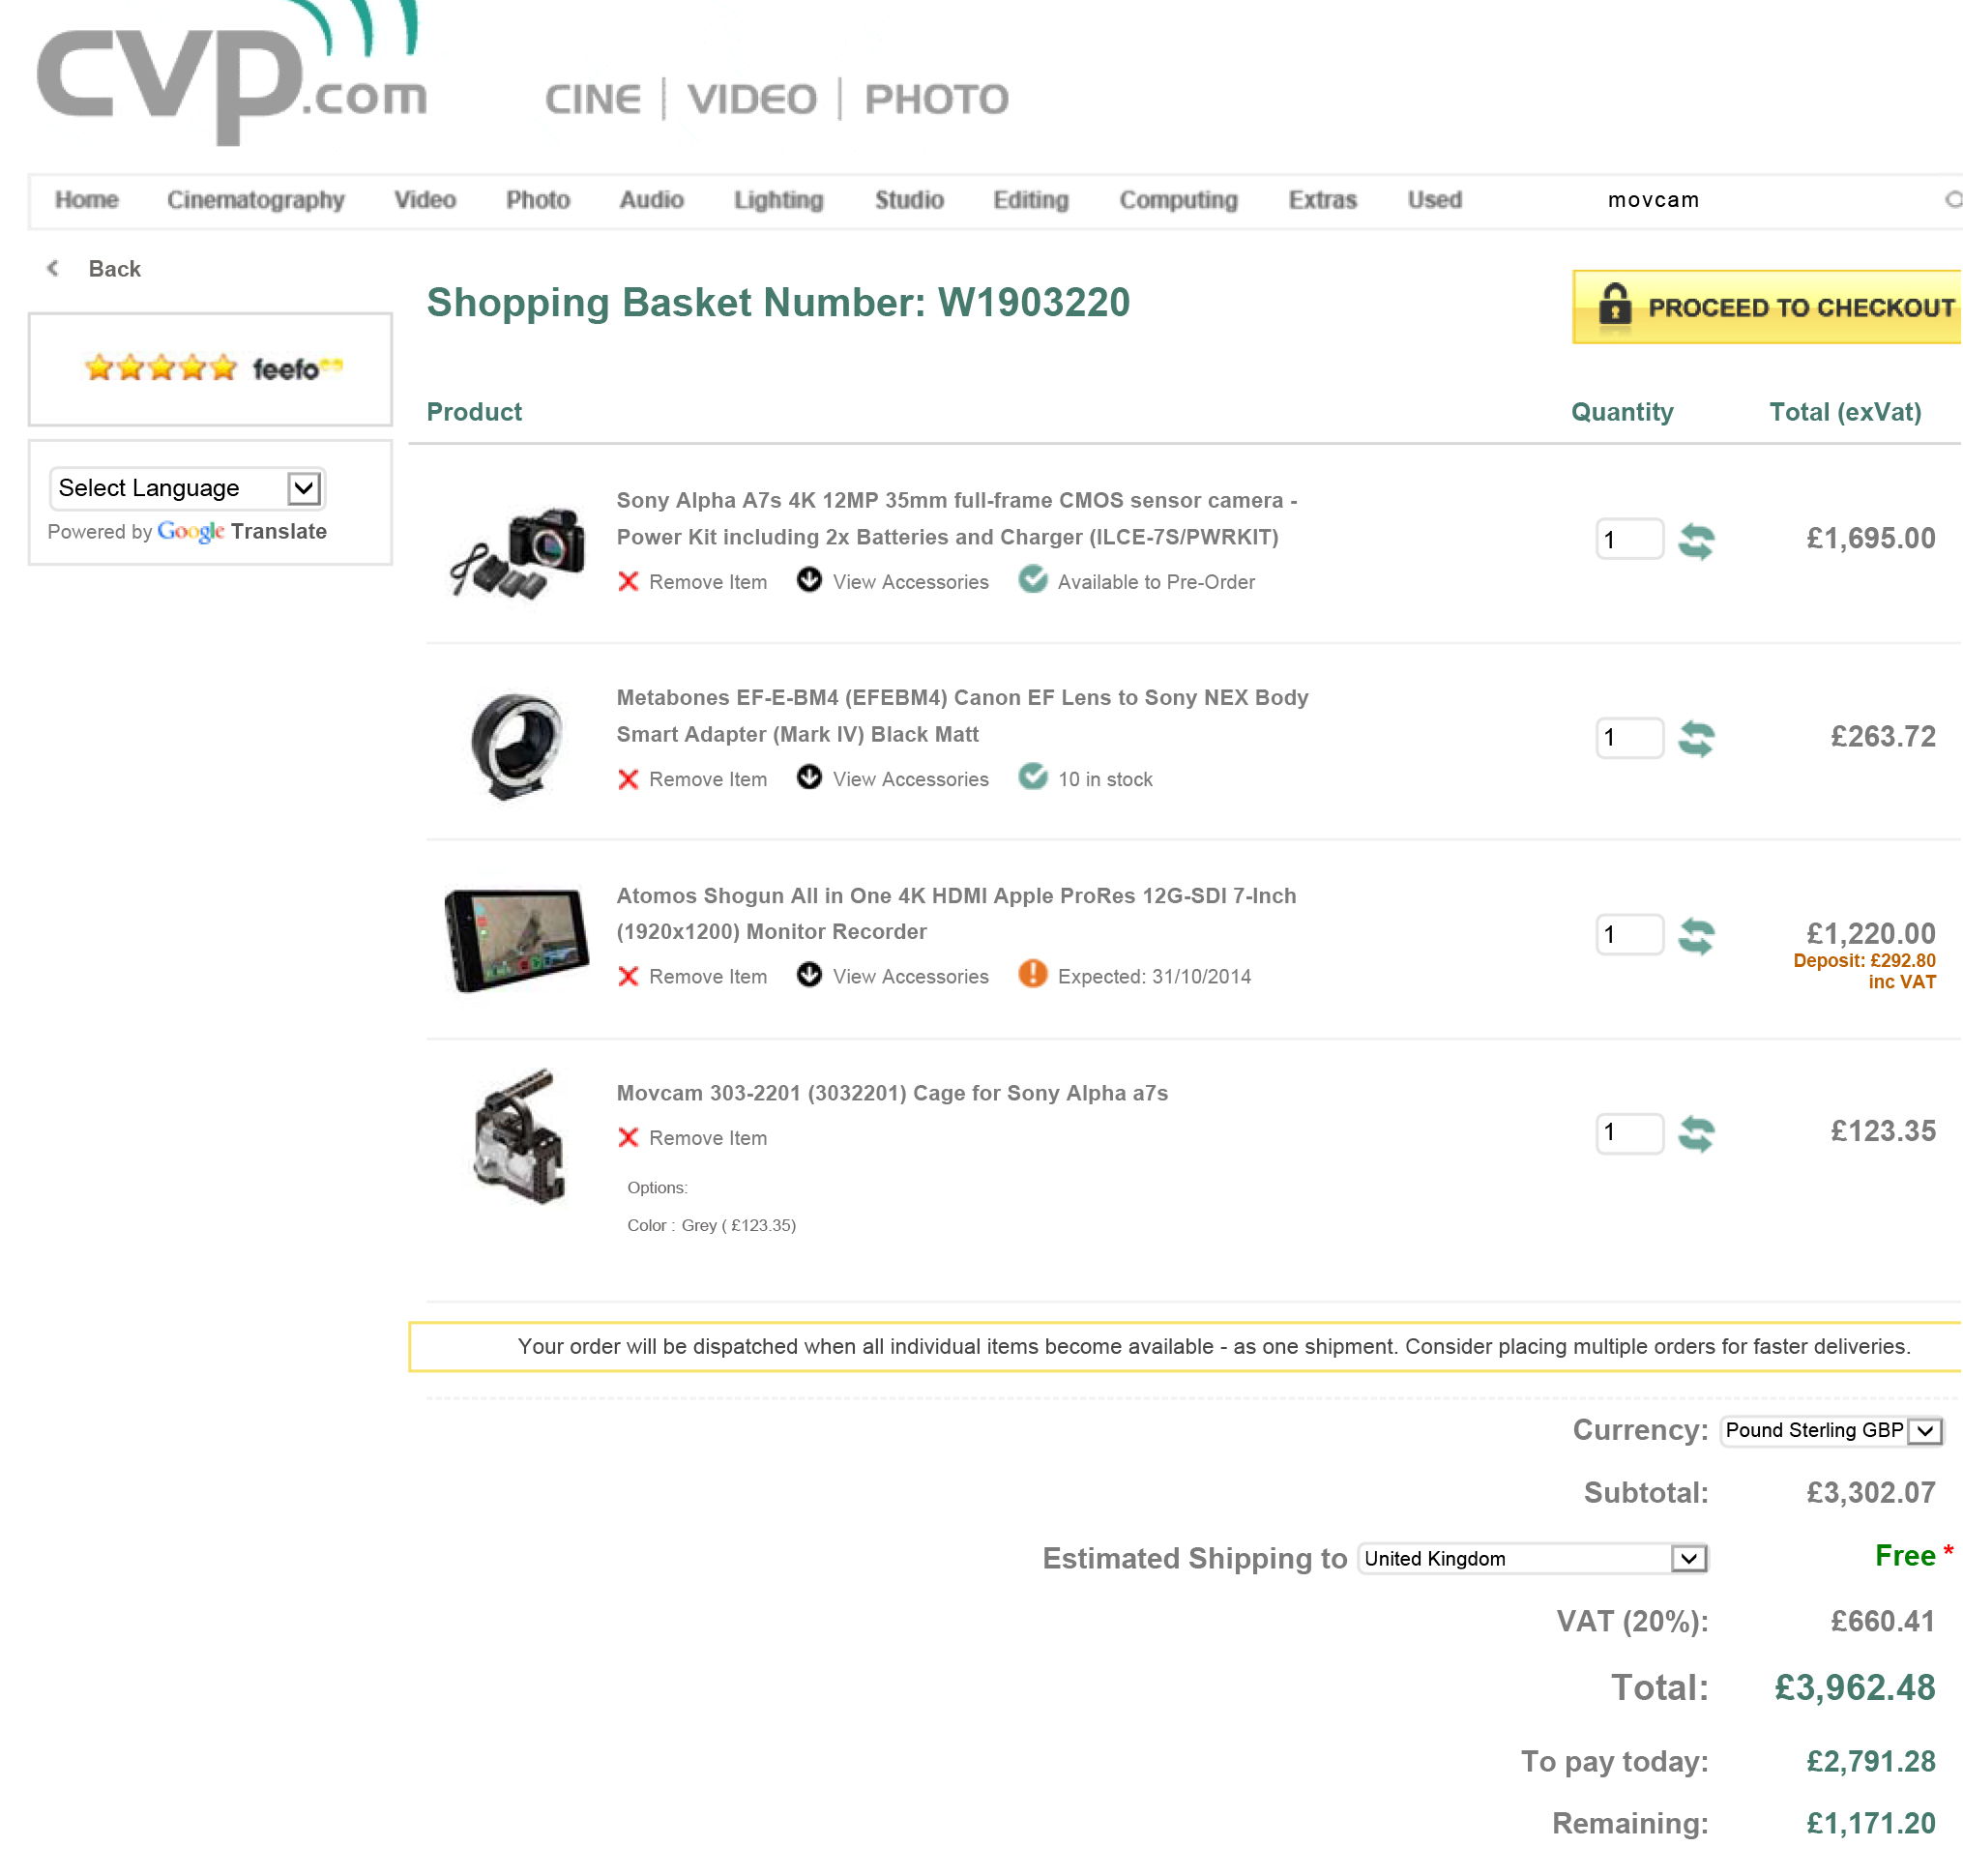
Sony A7s basket
Adam using the Panasonic GH4

Now.. I've shot on the Panasonic GH4 and I like it. When I've talked to Panasonic reps about the product they all had the same comment that Panasonic listened to videographers, and you can tell. The available recording formats and codecs allow a range of uses for the camera, and the features it packs into its tiny form are perfect for those that already utilize DSLR for video.

(Look back to earlier this year to the Park Camera's Panasonic open day - https://ajp1991.wordpress.com/2014/03/16/meet-the-panasonic-gh4/)

Personally, and this is very subjective to the way I was filming when using the camera, the captured video looked like video. Some will understand what I mean, others won't, but for those that have been shooting on a full frame camera, the 'look' is there. Obviously the sensor plays a large part in that, but if I purchased a GH4 kit outright (disregarding my current EF mount lenses).. I would purchase the Voightlander 25mm and the trusted Samyang cine lenses which might just combat the 'look' issue I feel like I have. As well as high quality ND filters so my shutter can remain at 1/50th.

Really quick GH4 test:

Trying out the 4K, and again a basic test:

(Please if you have experience, tips, footage or photos that you would like to share, please do!)

What am I going to do then?

My dad taught me something really great; good things come to those who wait. In other words, have patience.

As others test out, review and produce videos using the GH4 and A7s (and other cameras that pop up here and there), I will be closer to making my decision. For now, I know to hold off. A good thing for me to do would be to road test both cameras, work it with all of it's video functions and produce a couple of vids that I can look back on. The folks at Park Camera's are great at in store demos, but I can also wait for BVE in Feb 2015.

So, I can frustratingly wait a little longer for my jump to the next innovation of video production and delivery.

In the mean time I can always look at Blackmagic Design's options that shoot 4K, as well as the Apertus AXIOM modular camera, and keep the new Arri Alexa 65 and RED Dragon for my dreams.

axiom-modules-06[1]

From - https://www.apertus.org/

Update from Adam!

It has been a very busy couple of weeks since BVE, which by the way was great this year. I was over the moon to see the new finalized range of Manfrotto LED Spectra light panels which I got to test out a couple of years ago. Seeing products develop over a long period of time is interesting, even more so when your opinion is considered in how the final product should perform. Manfrotto also had their re-designed SIMPLA rig to demo, a much lighter and more ergonomic model I must say which is compatible with 15mm rig accessories like their matte box and electronic remote control.

schneider kreuznach optics lens for cinematography bve 1

As well as that, Manfrotto have also joined forces with Schneider Kreuznach optics (page in German), who have a new range of cinema lenses, specifically designed with ease of use in mind. All of the lenses from 24mm to 135mm have the same filter size, length and focus rotation to make filming with a range of the lenses effortless, simply change the lens and your peripherals stay in position. The optics of the lenses blew me away. Even in the well lit Excel, the background bokeh was stunning, soft yet so crisp. I cannot wait to get my hands on them. I think the combination of the new Manfrotto 055 tripod, the SIMPLA rig and Schneider glass will be a killer cine kit, delivering incredible visuals, making your shoot run smoothly, and at a low cost. Give it a year and this will be the go to package for production rentals, and part of every kit bag.

schneider kreuznach optics lens for cinematography bve 2

In other news, I've been working with EEBC on a couple of projects; a short video on recycling and another about a Wellbeing centre for those suffering with dementia and their carers. Both projects have messages that are close to me, so I've been working hard to blow my clients expectations out of the water. For the recycling video, I'm combining video with animation to show why recycling food and material waste is ever more important today; generating renewable electricity and resources. The Wellbeing centre video will be live action video, featuring the range of activities available to those in the community as well as the vast benefits to carers and visitors to the centre.

So, busy busy at the moment. I'm also meeting some designers from the fashion label ACF (Art Comes First) next week about another video featuring the design process here in London. Very exciting, I've been patiently waiting for an art-collaboration project to come along, it's what I started the business for!

I've had no #videoquestions for a while, so remember to keep them coming to @Plowman91!

Remember, inspiration is everywhere so take your camera with you!

excel centre bve london photo camera dslr inspiration

EDIT!!!! Just remembered to include this, I spoke to an un-named informant about the new Samyang/Rokinon VDSLR cine lenses and whether any new models are going to be released. Our brief chat resulted in confirming rumours of a 50mm and 135mm cine lenses coming very soon! I think it's exactly what the lens range needs, and I will certainly be investing in the 135mm if it is at T/2.2, or pushing it at T/1.8 would be a dream come true. So hear my thoughts Samyang/Rokinon!

All new #VideoQuestions is live!

Todays VideoQuestions - Image Stabilization

Image stabilization, vibration control, optical stabilization or whatever you wish to call it is an -in lens- operation that reduces pan and tilt vibrations and shake that would blur the captured image. It works by using electromagnets to align a floating lens element, which corrects the shake and vibration over the two axis; left and right, up and down. Image stabilization is included in a range of lenses from manufacturers, but you will notice the heftier price tag in comparison to a non-IS version due to the extra element in the lens. I will try to clarify the importance of using IS when you're out filming, and why I use IS lenses for my work.

ef_70-200mmf4_lusm[1] The Canon 70-200mm F/4 without IS = £519

ef-70-200mm-f-4l-is-usm-fsl---1258b005aa[1]This Canon 70-200mm F/4 with IS = £894

When choosing your camera body, tripod, mic and all of the other accessories that seem to be required for DSLR videography, one of the hardest will be choosing the right lenses for what work you would like to do, to cover a wide range of focal lengths and apertures, and how much money you want to spend. All three of those points will affect each other in your final purchase choice, but I hope to help narrow down your choices.

What will you be filming?

One key point to consider, as if you are filming live action sports you will require a different set of tools compared to model and fashion videos. Both however will benefit from at least one IS lens in your kit bag. I work in many different areas and styles of videography, so the kit I carry is an all round solution to whether I'll be at the back of a conference hall, or only centimeters away from my subject so being prepared before you know what you are shooting on the day is key - also where IS lenses come in handy!

It isn't recommended to use Image Stabilization when you are filming on a tripod as this can cause frame-by-frame jitter, where the lens attempts to correct smooth movement. But for all the times the camera is not on a steady support like a tripod, having IS will correct any major shake and blurring that occurs in the lens.

So, imagine holding the camera on a monopod with a lens and then tilting or panning. Inherently some shaking will occur from you moving the camera. Depending on your focal length or how far you have zoomed in, this will also multiply the visible blur, also remember DSLR's rolling shutter which will also be added too if you're not careful! Is that too much to think about when shooting video? Yeah it sure is. But having an IS lens will correct a good portion of the errors.

Another great example is sports, and running and gunning with the camera (wedding videography for example) where you are moving around a lot.

What focal lengths are you working with?

IS lenses come in a range of focal lengths; the standards are the 24-70 range and 70-200 range. If you are working with subjects closer to you, in the wide and portrait range, then having a 24-70mm with IS can be operated pretty well hand-held or on a monopod (I'd always recommend using at least one support method to achieve steady shots, either a tripod, monopod, rig etc). However if you are going to be further away from your subject then the longer focal length of 70-200 will work better for your needs.

The focal ranges in between the wide and telephoto can be achieved either by zooming, or by using prime lenses which traditionally do not have IS so will have more shake regardless of your mounting or grip method.

Price

You will have to pay more for an IS lens, it is an additional function that works to correct the image before it is recorded, but it is worth the cost. You may only end up purchasing one lens with IS, but I recommend choosing the lens you will use the most to future-proof your purchase.

Models of Lenses and Manufacturers

Presumably, if you are filming on a DSLR you'll have a Canon body with an EF-mount for the lenses. Canon manufacture very high quality L series lenses with IS, but if you are starting out in this game they will blow your budget immediately. 3rd party manufacturers like Sigma, Tamron, Tokina and Samyang produce incredible quality lenses too, and just because they aren't Canon doesn't mean you can't use them with the camera you have; many 3rd parties allow you to choose the correct lens mount for the camera.

I went down this route when choosing my new equipment, and after plenty of testing and research I chose the Tamron 24-70 F/2.8 VC and the Sigma 70-200 F/2.8 OS, and for me they perform outstandingly.

In many cases you will be using an APS-C size sensor camera like the 60D, 600D, 70D which also have their own range of lenses that are considerably cheaper than their full-frame brothers, some that I have worked with in the past that I can recommend are -

Budget solution - Tamron 17-50mm F/2.8 VCNext best thing if you have the money - Canon 17-55 F/2.8 IS

For a longer focal length, above 100mm you'll have to dig a little deeper in your pocket to get a good quality lens with IS. I did purchase this lens when I started, but because I purchased the NON-OS version it has pretty much been gathering dust in my bag, as at 200mm the image was too shaky and had quite a bit of chromatic aberration. Sigma 18-200 F3.5 to 6.3.. a semi pointless purchase for me, so follow this lesson!

How does using a steadicam affect the stabilization?

Good question. A steadicam is a device that counter balances the weight of the camera and lens to achieve a smooth flowing motion to movement, and takes lots of practice. Using a stabilizer won't imitate image stabilization, or make the image less shaky - so to speak. This depends on the lenses you are using, how fast you are moving and the experience of the steadicam operator. Using an IS lens on a steadicam will certainly correct shake over the two axis, but a steadicam works on 3 axis so shake and blur is inherent unless you shoot at a higher frame rate or apply stabilization correction in post production.

I tend to shoot most of my steadicam footage at 50fps, capturing double the frames which when played back in slow motion smooths out any jitter or quick movement. Shooting in slow motion is a really cool and creative tool, so it is worth playing around with, but remember you will be recording at a lower resolution of 720p, not 1080p (darn you Canon hurry up and give me this!!).

I shot the example material today, so will top and tail the clips and get them up tomorrow, so watch this space!

Conclusion

Get a lens with IS, or VC or OS as your standard, go-to lens. If you're going to use a steadicam too, having stabilization on a wide angle lens will be doubly effective and means less stabilization in post!

Silence is golden, Planning is key!

A new #videoquestions is out today on how to plan your video production so it runs smoothly, and is within your time and money budgets! I'm out for a pre-vis meeting this morning for a video that combines animation, where planning has been a very important role in creating a narrative and generating an estimate price for the production. I'll share my work with you in this#videoquestions later today!

saul bass alfred hitchcock psycho shower storyboard

How do you make a timelapse? Video Questions

Finally got round to this!! A time lapse is a method of photography and videography that captures sequential images from a static camera over a certain period of time, and then sped up in post production to create the illusion of time moving fast.

There are so many reasons why you'd want to use time lapses in your work; from establishing locations to capturing a long event like the northern lights or sunrises and sunsets. Time lapses create a visual spectacle in which time speeds up, you see nature at work and things you would normally miss or take for granted.

If you want to check out some awesome time lapse films, please watch Ron Fricke's Samsara which includes awe inspiring cinematography captured in 70mm film.

http://www.youtube.com/watch?v=P0xVp3N-M84

There are a couple of ways you can create a time lapse, dependent on the length of time you wish to capture, the changing exposure settings of the location, and the kit you have.

Cameras and Kit

I assume that most people interested in this post own a DSLR or video camera of some kind, as it is difficult to capture a time lapse otherwise. In all honesty, what model of camera you use won't make a big difference on the overall video. Whether it is a Canon 110D, 550D or 1D-C, Nikon D3200 or D90, Sony A-7 or Olympus OM-D EM1 your photos and video will look great. Just make sure you have your exposure and focus point set correctly. In regards to what lens you use, in general wide angle lenses give a better perspective of the environment; we've all seen GoPro videos, that is ultra wide, but you don't need a fish eye or specific lenses to do this. Usually the standard kit lens that comes with your camera has a wide angle, whether it be 11mm on MFT cameras or 16mm on full frame, keeping a wide field of view is key to achieving the perspective of a time lapse.

Lets start with time. The longer you wish to capture, the more memory and battery you will need so ensure you've got a fresh card and charged batteries, or even better a battery grip. Depending on what camera you are using you may also need an intervalometer; a device that plugs into the camera and releases the shutter for a pre-set duration at a pre-set interval.

Here's one made by Canon - Canon-Intervalometer1[1]

So, if you wanted to capture a sunset, you will be shooting for a couple of hours. This little device will release the shutter and take a picture for you, however you need to set the interval duration. The longer the interval, the greater the difference between each image as the objects in the frame move and change. For a sunrise or sunset, an interval of 10 seconds should suffice, as the sun and clouds move slowly.

If you were in a city shooting a TL of a busy public place, a shorter interval should be used so the objects or people move smoothly through the frame and don't jump around.

What are you capturing?

Where will you be shooting the time lapse? Bright daylight at the beach, or in arctic winter? Or star trails and fireworks at night? Your DSLR's shutter speed will allow you to control the amount of time the shutter is exposed to light, so a longer shutter speed (anything under 1/30 can be used when the sun or bright light is not available) should be used at night when light levels are low. You can also use the BULB setting I believe to capture exposures longer than 30 seconds if you are capturing star trails.In the opposite situation, you can set your shutter to a reasonable speed depending on the light available; but remember changing light is inevitable and uncontrollable in nature so using shutter priority mode (T) or aperture priority mode (A).

REMEMBER YOUR TRIPOD! Shooting for long periods of time need a steady support, to keep the camera locked off and weighed down if needs be! My Manfrotto tripods work a treat.

Experiment and test at the time to judge your exposure settings. Keep your aperture or F stop small so that all objects in the frame are in focus; something like F/11 down to F/22 if in bright light or you can increase the aperture to F/4 up to F/2.8 if you're working at night. Increasing your ISO to 1000 or 1250 is perfectly fine if your doing a night-lapse, so no worries about that.

Also use the digital zooming capabilities on the camera to get critical focus on a key static point.

If you have less time for a time lapse, then you can always hit record on your camera and film continuously for as long as it can. This is an easy option for those out and about shooting as you can simply wait for 10 minutes or so. Obviously here you have the time restriction to only 10 minutes, so this works best for short burst time lapses of clouds, people & crowds and quick changing landscapes.

For any other setting it would be better to use an invervalometer, mainly as keeping your camera recording will suck the juice out of your battery like anything.

For savvy videographers and photographers alike who may have Magic Lantern already, there is an intervalometer built into the ML firmware which acts just like an internal one. If you don't want to pay for an external device then Magic Lantern which is open source and free is your best option. Plus having ML on your camera expands its video capabilities greatly.

Post Production - If you have taken a series of photos

You've captured an amazing sunset, it has taken you hours and all you want to do is see the finished product. Some methods of editing time lapses are long, boring and not neccessary; taking the photos into After Effects for example, its not needed!

Adobe Premiere Pro is a much simpler and quicker method of getting your TL into a video. Firstly, create your project as you would normally, setting scratch disks to your project folder where the photos are stored. Next, create a sequence dependent on what resolution you would like the video to be. Nearly all photos taken on a DSLR are larger in size than 1080p high definition, so this is a good place to start.

Depending on where you are in the world, your frame rate should be 25fps for UK/EU/Rest of world, or 30fps for USA. This will play your video back at the same frame rate as television and internet, so the time lapse will be smooth.

Now you have your sequence open in the timeline, go to Edit>Preferences>General. Here you can set the default 'still frame' (picture) duration to ONE frame; in timecode this will appear like: 00:00:00:01. This sets the sequence of images to play one after the other with 25 pictures in each second.

Now you are ready to import your photos! Simply Ctrl-I or Cmd-I to open the import window, select the folder with your time lapse images and click 'Import Folder'. Premiere will now import all the photos in the folder and set the duration. You can now simply drag the folder with the photos into the sequence, and your time lapse is now a video. Make sure you render (hit Enter) and watch it back in case you need to correct any frames.

If it looks like the photos are going too quickly, you can change the duration of all the photos very simply; select all the photos in the sequence, right click > Speed/Duration. Here you can increase the frame duration from 00:00:00:01 to 02 frames instead. Here you will need to see what suits your time lapse best. One last tip is to highlight/select all the photos in the sequence, right click, and click 'Frame Blend'. This calculates the interpolation (movement) of subjects between two images, so it fills in the gaps so to speak.

Post Production - Long Video Files

So you've taken the easy road! This method is just as simple as above, and is a quick way of processing a short time lapse. Once you have followed the steps to create your sequence, you can import the video file like you would the photos, instead you simply click the video file needed and click 'Import'. Then drag the video file into the sequence; here if you have been videoing in a different video format Premiere will let you know that the video and the sequence do not match. It is easier to stick with the format of your original video, so if this happens click 'Change Sequence Settings'.

video time lapse adobe premiere tutorial

With the video now in the timeline, right click and click 'Speed/Duration'. Here you can increase the speed % to make it faster, and again will need some experimenting to see which looks the best. Remember the higher the speed increase percentage, the faster the time lapse happens.

Colour Correcting

You can add any colour correction to the time lapse by creating an 'Adjustment Layer' and adding brightness and contrast, curves, levels, tint, whatever you like to make the time lapse look great.

timelapse videography adobe premiere pro colour correction

For a 'tilt-shift effect - like the incredible New York Sandbox video you will need to use additional plug ins like Magic Bullet, or add the effect in Photoshop before importing to premiere.

http://www.youtube.com/watch?v=Fk9EBOOAYiU

Exporting - finally creating the time lapse video!

timelapse premiere pro export settings tutorial video

Once you are all done, with the sequence selected go to File>Export. If you are uploading to the web, then the H.264 format will work the best for quality and compression. From the drop down menu select H.264 and the Vimeo, Youtube or any other format you wish. There are loads, and plenty of confusing settings so don't get bogged down in the different types for now. When you think you are ready, and have chosen your file destination and name, you can hit 'Export', or if you wish to carry on working in Premiere on another project you can 'Queue' to export to Adobe Media Encoder which will export it in the background!

[youtube=http://youtu.be/QMwpA02IKdI]

A little example of a video time lapse I shot at Epsom Downs!

I hope this covers your time lapse photography and videography questions? If there is anything I've missed or if you have other questions please send them in!

[contact-form][contact-field label='Name' type='name' required='1'/][contact-field label='Comment' type='textarea' required='1'/][/contact-form]

And no I haven't forgotten about new videos!

It hasn't slipped my mind that a number of new videos are on the horizon showing you guys my videography setup, going through the equipment and techniques to set up for a reliable interview scene using the new Rotolight LED ring light and the Rotolight microphone. The weather has been terrible here over the last week so I haven't had a chance to get out and do much filming and testing out of the new Rotolight products, but this is the job for today and next week!

Watch this space for plenty of 'Video Questions' videos and samples using the Rotolight kit!

canon 5dmkIII with samyang 85mm moda camera rig Canon 5DmkIII with Samyang 85mm cine lens