slr

New photos from the new A7S - A-MAZING

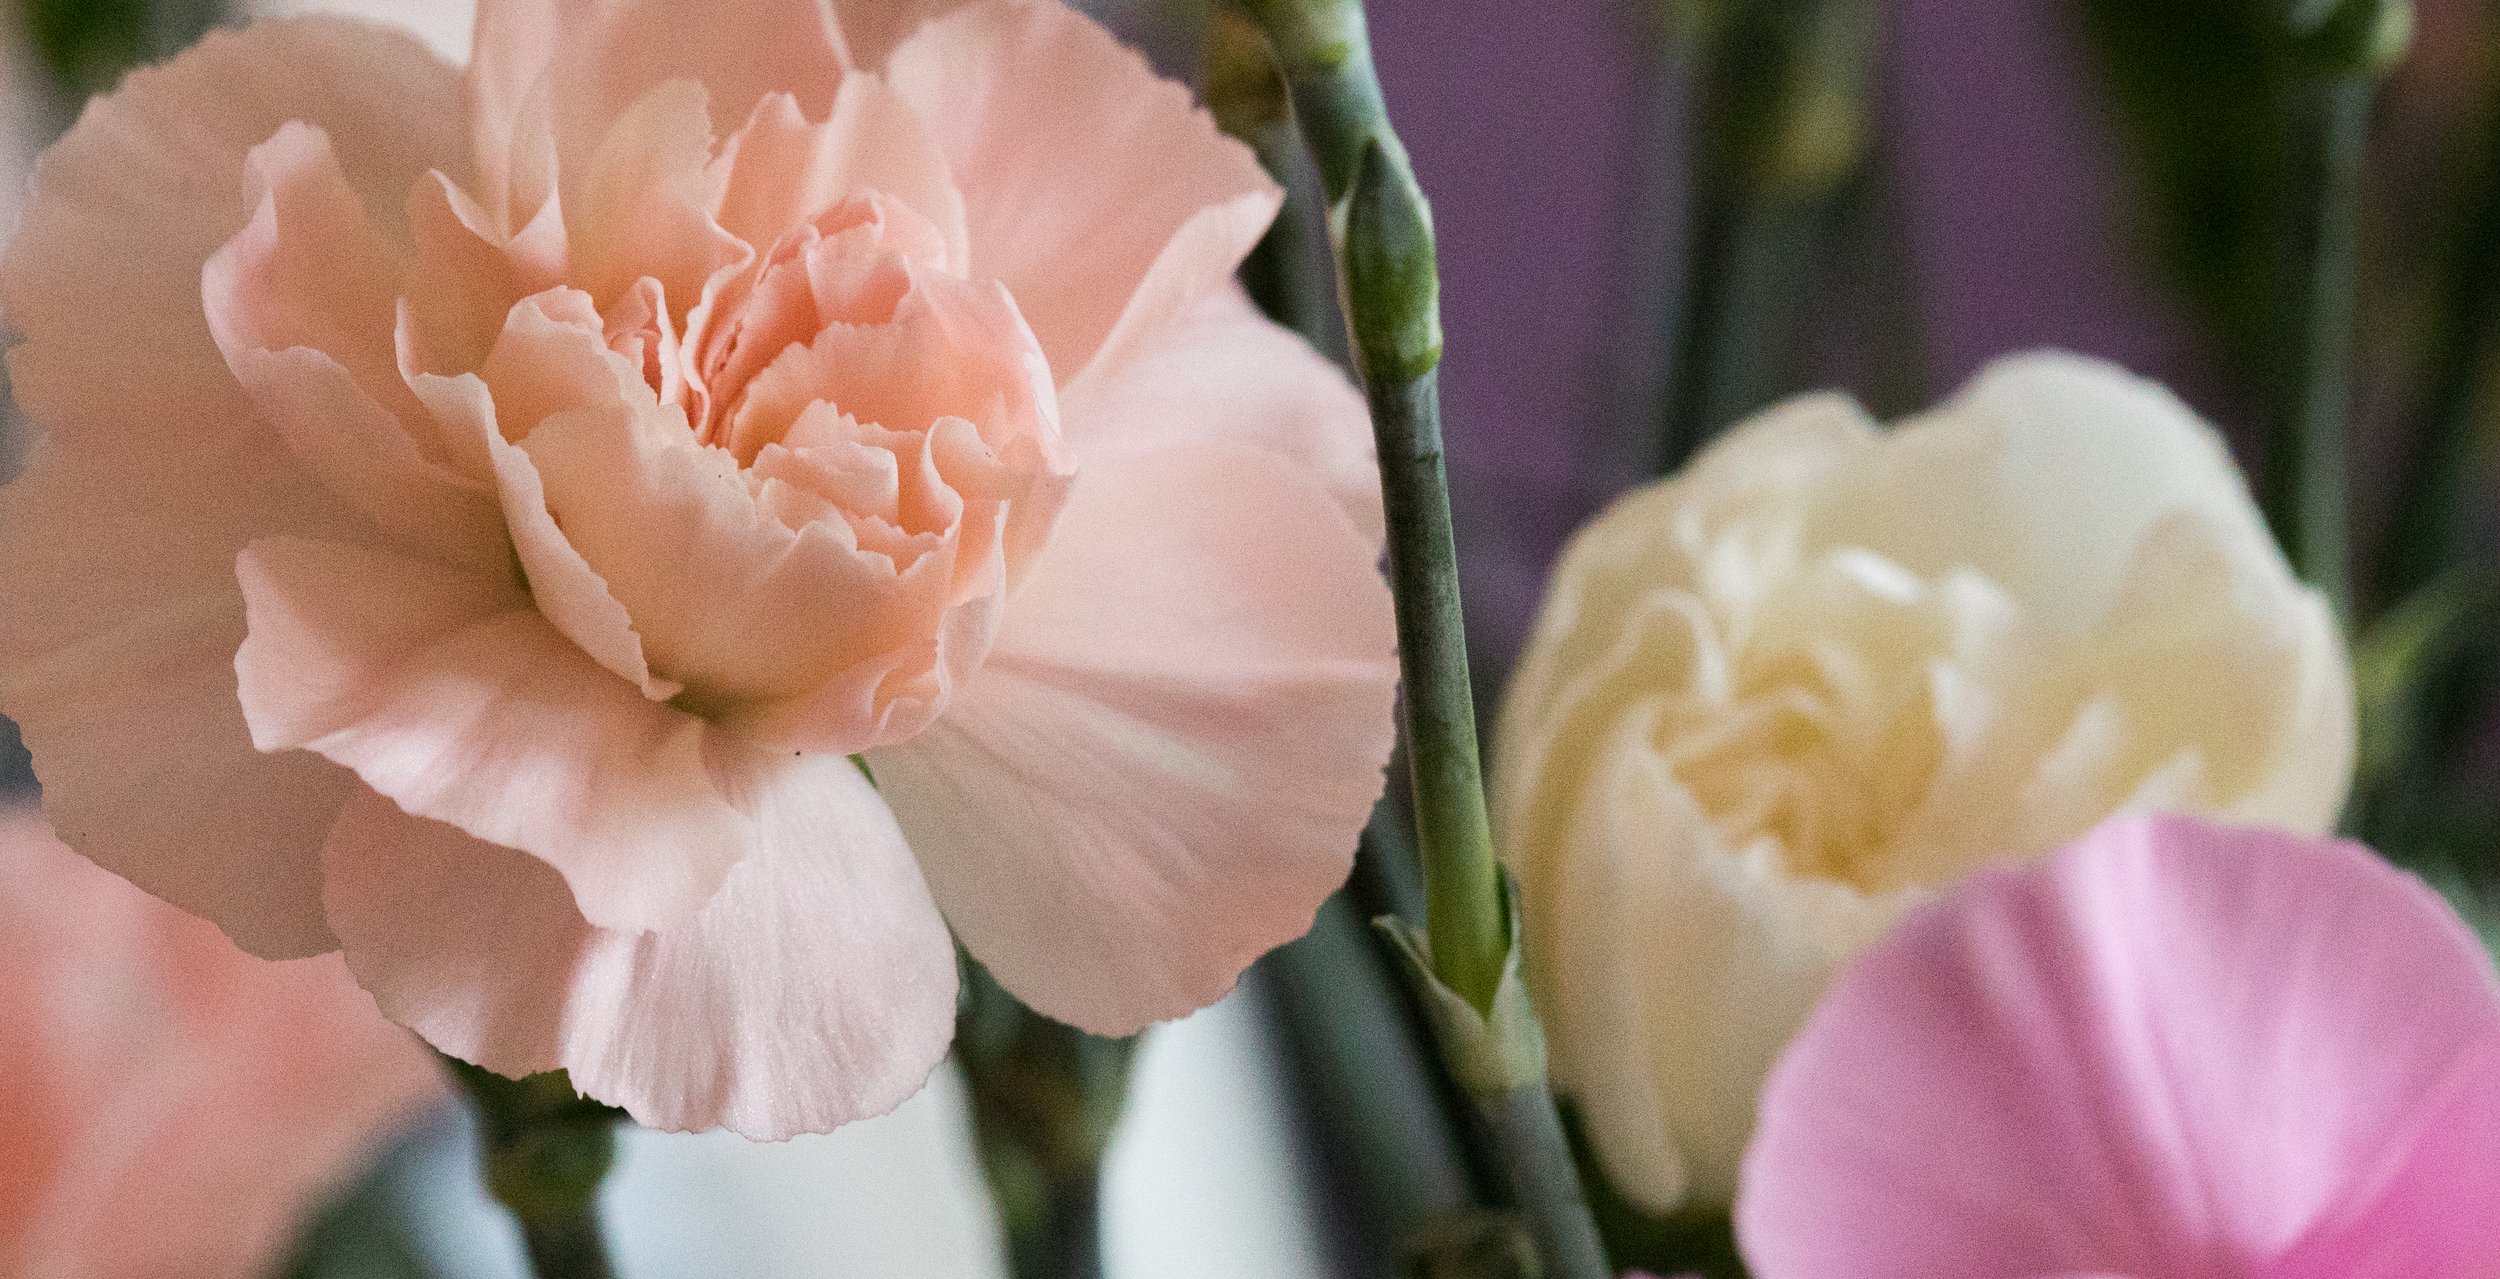
A selection of stills from the Sony A7S of my little vegetables growing in the greenhouse, Sam's new car, some flowers (Orchids and Carnations) in the house and olives from The Queen Adelaide!

Sony A7S, PP6, taken on Canon 100mm F/2.8L and Tamron 24-70 F/2.8 with a range of settings.

Samyang leak/announce the 135mm F/2 lens!

As I've been writing for a while about new Samyang lenses, we've expected a 135mm since the 50mm cine lens announcement. I even had a chat with the execs of Walimex/Rokinon (also Samyang) about the mystery lens in their line up, the hints were pointing towards the 135mm then too.

Samyang 135mm F/2 lens

I shared the leak from the US eBay site last night, but here's more details on the lens, following suit of the preceding high quality manual lenses. Here's the specs for the full frame -

  • 1:2.0 135mm ED UMC
  • Aperture Range: F2.0 ~ 22
  • Optical Construction: 11 Elements in 7 Groups
  • Min Focusing Distance: 0.8mm (2.62ft)
  • Filter Size: 77mm
  • Max Diameter: 82mm
  • Full-frame coverage
  • Angle of View: 18.8° / 11.7°
  • Length: 122.1mm
  • Weight: 830g
  • Price: Under $600

As always, the great optical quality and price are paramount for Samyang's customers, so I'm glad to see they have another affordable lens to add to the lineup!

Fill Samyang 135mm F/2 lens


Welcome to the boardroom

I'm doing a few productions for the IABM in the lead up to their annual conference in December, which included a video shoot in London at IBM; a panel discussion on the key topics of the conference, and the industry at the moment.

John Ive, the director of business and technology at the IABM chaired the discussion, with six of the top decision makers in the industry around the table, which included: Dominic Stone (Our host at IBM and multimedia executive), Rob Roberts (Avid), Marc Risby (Boxer), David Peto (Aframe), Chris Steele (Marquis), Paul Glasgow (Chyron Hego).

It was an early start for myself and Glen, to get a head start in the traffic heading up to the South Bank. Usually I would get the train, but as this was a full setup I required my little cars assistance to get the equipment there!

Glen at IBM

Glen at IBM

Me at IBM!

Me at IBM!

We arrived at the IBM office on the South Bank with plenty of time to spare, and after unloading the equipment in the loading bay we parked up in the National Theater and met our host for the day, Dominic. A wonderful chap with a wealth of experience as a television producer, many thanks for your hospitality throughout the day!

Trolley fulla gear!

Trolley fulla gear!

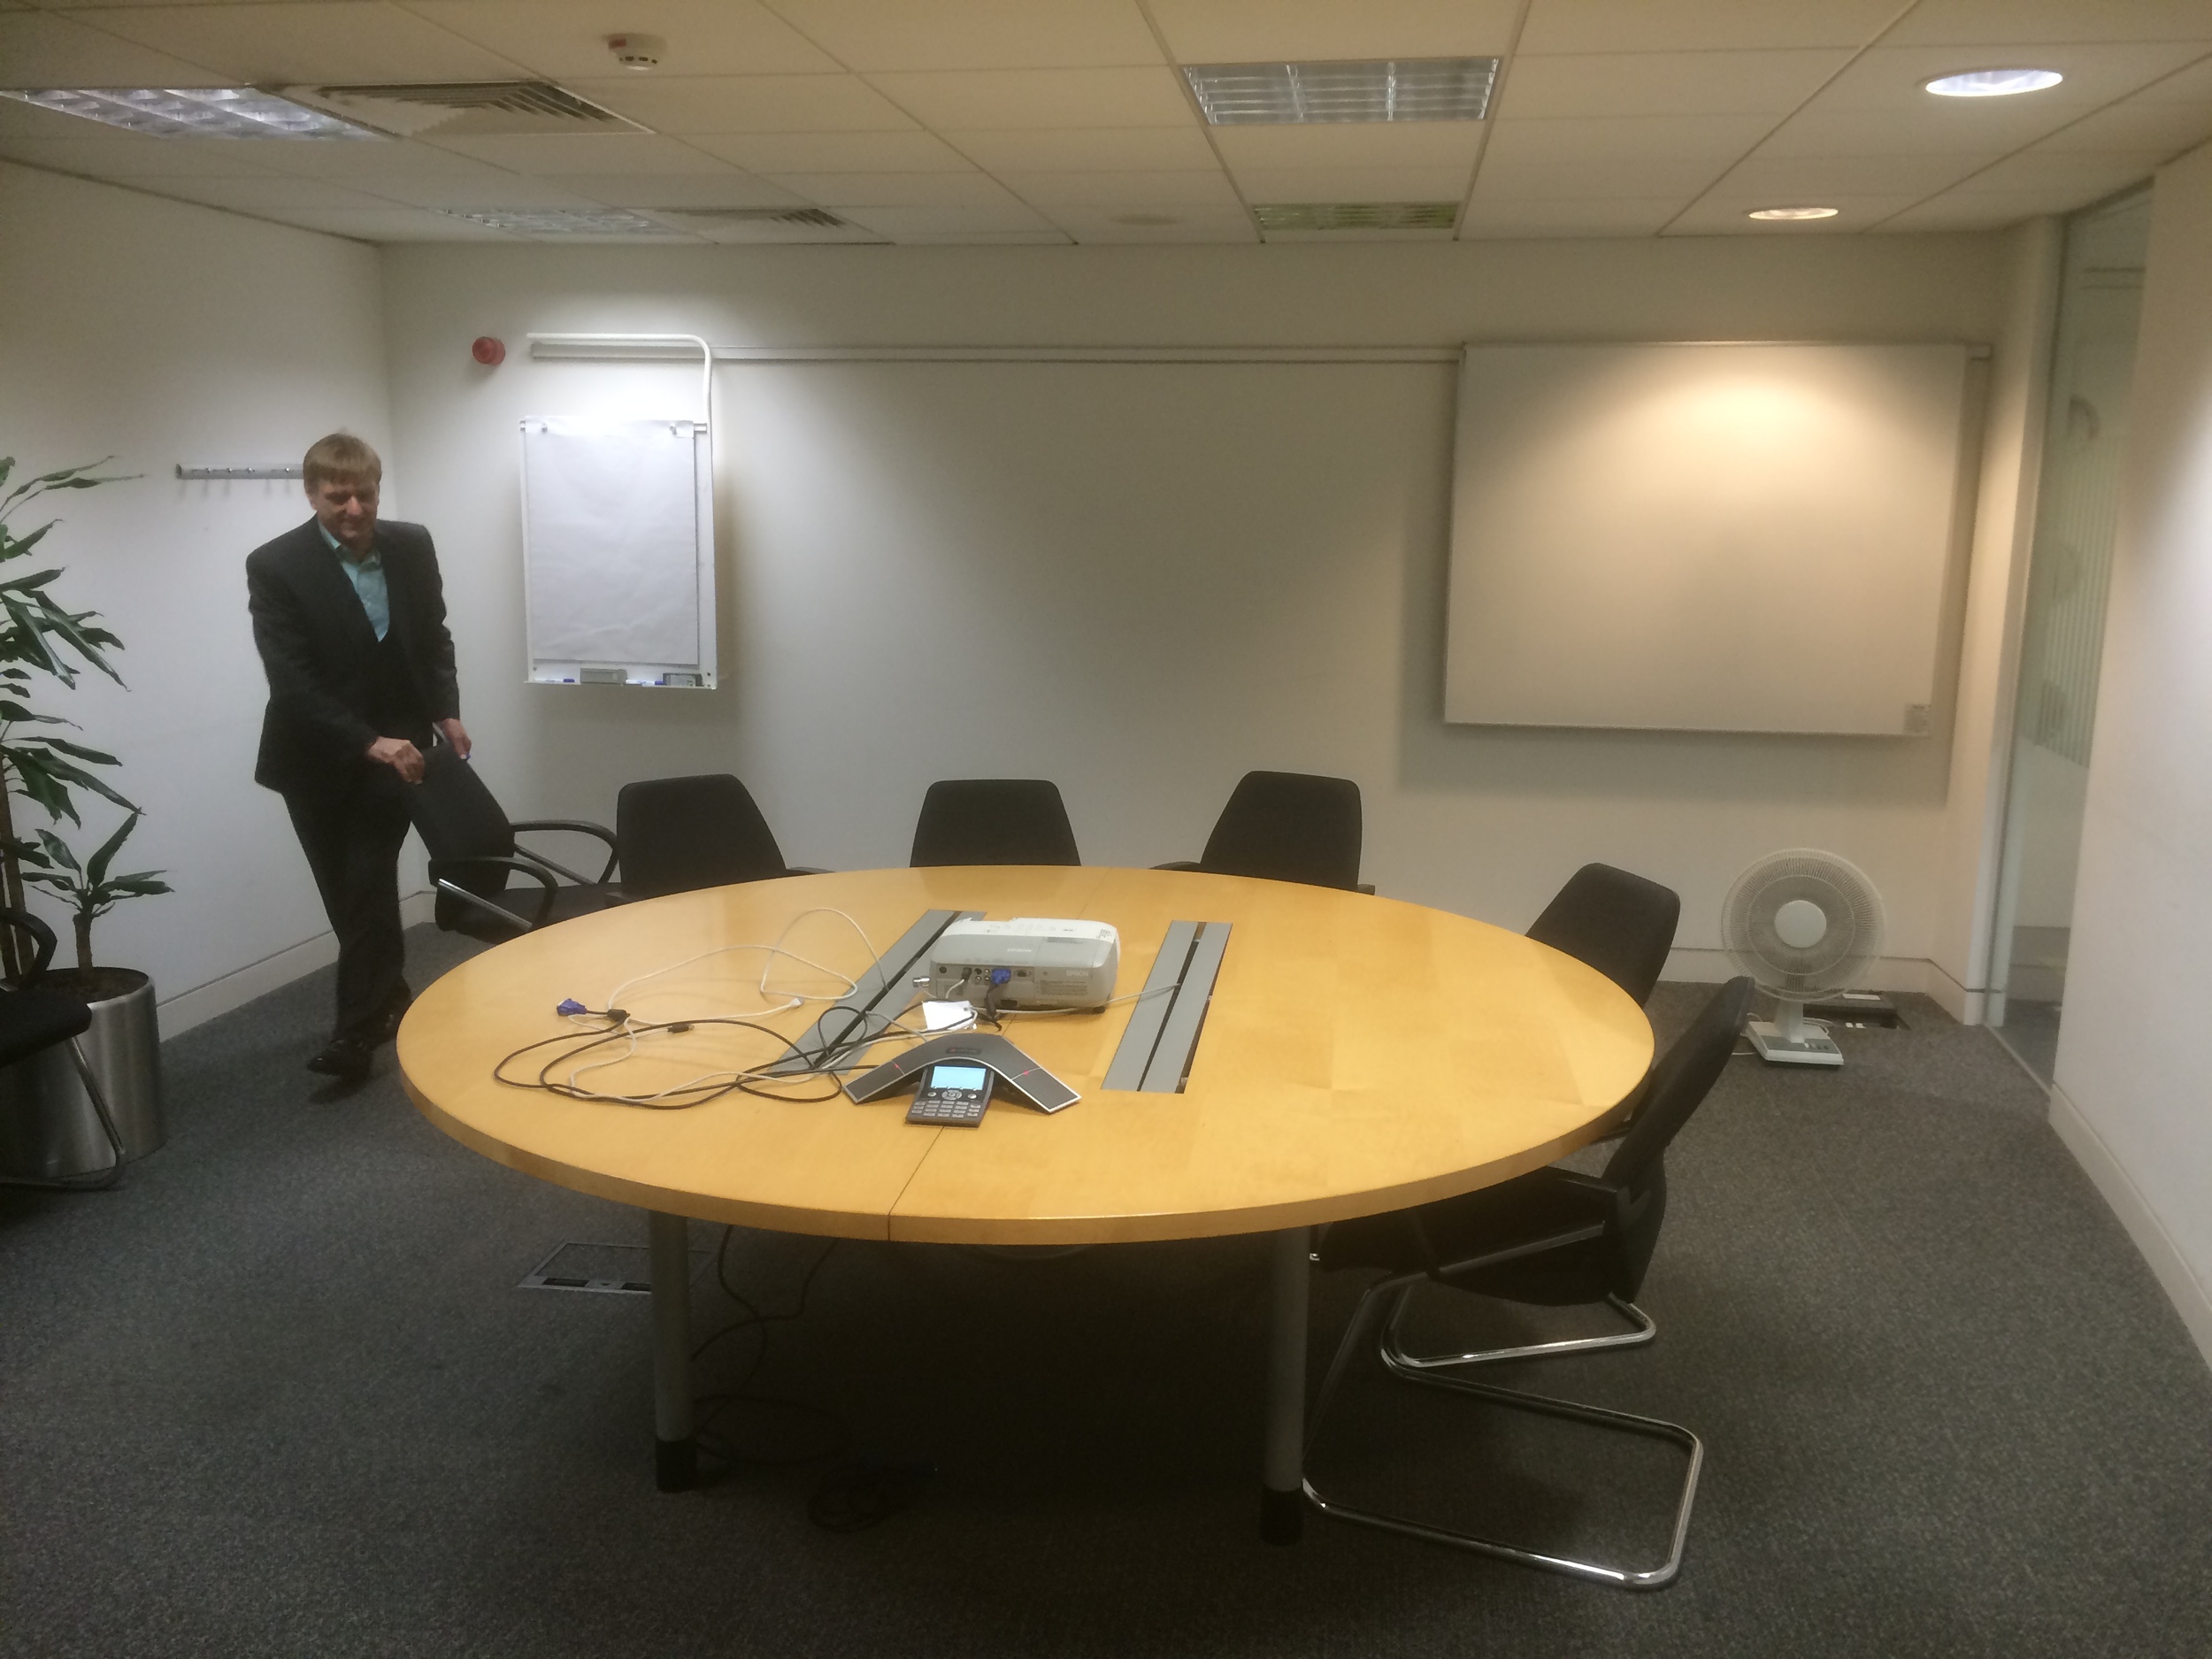
What the conference room at IBM looked like before we got our hands on it!

What the conference room at IBM looked like before we got our hands on it!

Once we had access to the conference room, we began the setup and moved any unnecessary furniture out of the way. Manfrotto has greatly helped me on this as much of the kit is new and definitely new to this kind of video environment too, and after IBC I was very keen to try out the new tripods; which now can be lowered to almost ground level with innovative locking joints. Also, although I'm using a 5D and telephoto lenses to shoot with (so the load is not very heavy), but having steady and smooth shots are imperative to keeping a good composition, both the tripod and video head allow me to achieve shake free pans and tilts, which can be counter balanced depending on your camera, lens and accessory setup.

The new light stands are awesome. I know it is something simple, but it makes a massive difference. Stands and poles can often get mislaid, damaged in transit or in use, or simply can't withhold a wide variety of lights and accessories. These on the other hand have a brilliant locking system to hold multiple stands together, meaning they can be carried and transported very easily. They are not heavy, and can take a heavy load (not that these SPECTRA 1X1 LED panels are that heavy)!

Panel video setup with Manfrotto 1x1 bi-colour LED light

Panel video setup with Manfrotto 1x1 bi-colour LED light

After lunch, we checked the colour temperature on the four lights; the two front facing the panel, one giving a back light onto the speakers and background, and a smaller 900 panel to push a little extra light into the right panelists. All of the lights are bi-colour, which gives maximum flexibility when the video scenario changes so frequently.

The lights I used were: Manfrotto Spectra 1x1FT x 3, Spectra 900FT and the 1004BAC pro light stands.

To make sure all of the cameras were exposed and set correctly, we did a custom white balance and orientated around the cameras and lights to make sure we achieved the best out of the setup.

I transported the camera and audio equipment in the Manfrotto Pro Backpack50 as its large capacity was required for the amount of kit I needed which included:

  • Canon 5D mkIII
  • Canon 60D
  • Tamron 24-70
  • Sigma 70-200
  • Samyang 35mm
  • Samyang 14mm
  • Zoom H1
  • Zoom H6
  • Sennheizer ENG-G3
  • Rode Lavalier
  • Roto-mic
  • Canon batteries, AA batteries for microphones and audio recorders, chargers for all.

I also had the Manfrotto 536 MPRO tripod and 504 HD video head in the large tripod bag, and the ProCX-3 and Pro-B for the other cameras.

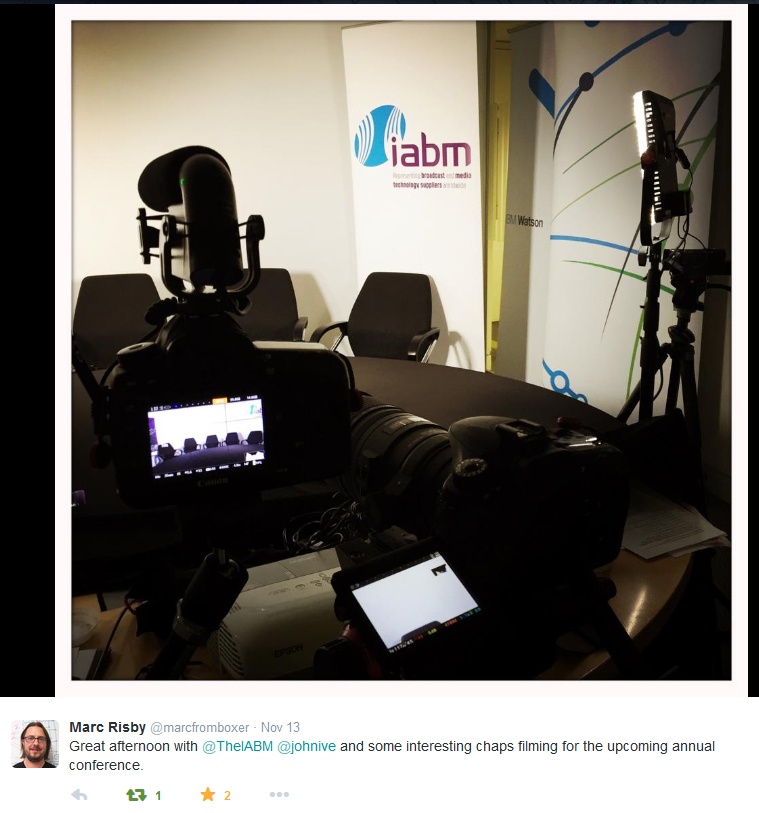
Marc Risby, one of the panelists tweets about his experience!

Marc Risby, one of the panelists tweets about his experience!

While we were setting up!

Adam Plowden Video setup

Shortly after our panelists arrived, and they were eager to get started in discussion; I put the lapel mics on and plugged them into the H6. John kindly allowed us to use a couple of cameras and microphones for the extensive number of panelists. The Sony ECM-77 are great lav mics with good audible response, as is the Rode Lavalier which I used with the MiCon-1 connector into the ENG-G3 wireless kit.

I got the panel talking for a practice run through while I checked the audio levels on the H6, which was placed under John's chair (due to the cable length I could not monitor the camera from my filming position).

If you've been following me on Twitter, you'll have seen I have been looking for a wide angle lens for both an APS-C and FF sensor (so far Canon's 16-35 F/2.8 is best), so I was without my Tamron 17-50mm (my standard lens on the 60D as a wide). To compensate for this, I alternated my usual video setup from 5D and Sigma 70-200mm for an MCU and 60D and 17-50mm for a wide to; 5D and Tamron 24-70mm for a wide and 60D and 70-200mm for an MCU which allowed me to capture a good wide angle of the whole panel, as well as a great MCU on the speaker.

The 504HD video head has integrated fluid drag and resistance which makes panning and tilting a dream for video; it is smooth, yet easily changed depending on the subject and timing of the camera moves. A large pan-handle makes the motion firm and steady throughout.

With a vast experience in broadcasting from all of the panelists, it was difficult not to get distracted into the conversation. After each discussion we shot some VoxPops for the conference with the other panelists that did not participate in that panel, which will be used throughout the presentations and panels at the IABM annual conference in December.

Unlike the Zoom H4N, the H6 has an incredible power consumption rate meaning on four AA batteries it can record multiple channels (four in this care) for a good 2 hours without needing to change! This meant I could rely on it recording stand-alone under Johns seat without monitoring, after each channel was correctly set (with a general limiter on).

In terms of the camera settings I was using:

 - VisionTech2 Picture Profile

 - F/4.5 on the MCU so focusing between panelists was minimum

 - Because of light setting, as well as not much fast motion happening I reduced the electronic shutter to 1/33.

 - ISO between 400 and 640 due to the good light produced from the 1x1's!

Once the filming was complete, we quickly de-rigged the setup so we could get out of London as quickly as possible; not to get held up with traffic queues etc.. Thankfully, all of the Manfrotto gear we had is fast to setup and tear down so we were ready to leave within half an hour or so!

Once I got back home, I begun the ingest and backup process; remembering to have 3 copies of the footage and audio on separate drives in case any fail. I also began re-naming the files so it is easier for me to locate specific panelists microphones when doing the audio mix-down.

Although the Zoom H6 is an awesome recorder, it for some reason records track 3 and 4 together (as a stereo channel) so I had to split the Tr3-4 into separate Track 3 and Track 4 files using Audition. This is a simple process, but I wonder if this can be changed in the device itself?

splitting stereo track mix adobe audition APV

Here you can see the top track is different to the other, this is because the T3 and T4 inputs were from different speaker microphones, but recorded together. To resolve this, I simply solo'd the track I needed, selected ALL and copied, created a new audio stereo track and pasted the track there; this creates a Left or Right track for you in the new audio file.

replaced stereo audio file APV

Here, I've created a new stereo audio track and pasted the solo'd track into it. The new stereo audio file then replicated the audio on both tracks. I then saved this as a new audio track.

In Pluraleyes, I created the four camera sources and imported their respective video files, and then singularly imported each audio track into a new audio recorder as a new audio source (instead of importing the five tracks into the same audio recorder). This would allow me to control not only each track individually, but also when I separate the four sections into their own multi-camera sequences I have separate audio tracks rather than one reallyyy long one.

importing footage to pluraleyes APV
separate audio recorder devices per microphone APV

You can see here that the audio tracks from each microphone are separated in the sync.

video audio sync pluraleyes complete APV

I was amazed at the speed of the sync, only 1 minute 8 seconds to sync all of the video and audio from many different sources! I then exported the sync as both an XML and XML with replaced audio from Pluraleyes, and created a new Premiere Pro project for this production.

I imported the XML file into the new project, which imports and creates a new sequence with the synced footage in place. So easy! I then placed the footage into their respective sequences depending on the discussion topic, and prepared them for multi-camera editing!

adobe premiere pro sync footage edit APV
synced footage adobe premiere pro APV

The sequences are now ready to be cut using the Multi-camera interface! Unfortunately I can't show anymore as this is an IABM member exclusive video, but I hope you have enjoyed seeing how videos like this are produced on a small scale!

Canon countdown - 23 hours remaining!!!

What what what are Canon up to?! With the announcement of the 7D mkII at Photokina, it seems odd to plump for a mid-weed, October day to tell the world about a new product?!

Check out Canon See Impossible for the cryptic message and countdown, could it be a 5D mkIV, with internal full frame 4K? We will have to wait to find out!

Click the pic to visit the page!

Click the pic to visit the page!

What are your thoughts on Canons ad-hoc announcement? Got any rumors you wish to share?!

Thinking of making the jump to 4K?

You are in the same boat as me.. Having bought my 5D mkIII last December, there was no accessible 4K option until the Panasonic GH4 made its appearance in the Spring. I was devastated. Having invested heavily in Canon gear, any future move I make will need to fit with my current EF mount lenses, not to mention everything else such as batteries, memory cards and my overall production workflow.

http://www.eoshd.com/2014/04/panasonic-gh4-vs-sony-a7s-compared-wins-4k-battle-paper/

(EOS HD comparison between the cameras).

At the moment, there are two options on the table. Said to be like comparing apples and oranges, the Sony A7s and GH4 are the current competing professional cameras that offer 4K functionality, however for people that own the cameras and have been comparing the two have found it difficult. This is for a few reasons:

Sensor size: The A7s is full frame, the GH4 is MFT.

4K in camera: The GH4 can record 4K internally, the A7s requires an external recorder such as an Odyssey or Shogun.

Philip Bloom using the Q7, from: http://philipbloom.net/2014/07/19/magician/

Jeromy, CEO of Atomos talking to me and Sam from The IABM about new products and the IBC Show.

Now, many people will be arguing that what does the increased resolution allow you to do, that HD doesn't? The image produced from the 5D is great; good in low light, versatile, fits my style of filming... But it also has big downfalls for being a DSLR, and not a video camera.

Something that is unique about these two cameras is that their 'out of the box' functionality has been fine tuned for video applications, as well as high end photography. This is what Canon has left behind in their non Cinema line cameras, and Magic Lantern has struck gold on with their firmware hack enabling awesome video functions.

I have only recently installed ML on my 5D mkIII due to the current firmware on the camera. It was shipped with version 1.2.3, I was hesitant to downgrade the firmware and was patient in waiting for ML to develop a tested and working version for 1.2.3. Now having access to on screen aid such as waveform monitors and audio levels make such a difference, and restart movie for the longer filming durations is great. It turns your 'photography' camera into basically a video camera.

From: About DSLR (Youtube).

For my type of videography, the benefits of having not only 4K, but a wider range of options for recording will allow me to crop and downscale any 4K acquisition to HD and hold incredible picture detail, dynamic range and depth of field.

The recording bit rates are higher, meaning more data is stored for post production editing, compositing or grading.

Lastly, it should increase the production value of what I produce. Now, I am not stating that better equipment makes better videos. It does give you the opportunity to step up with what you can do in your work, and especially as it keeps you up to date in a world of ever changing and improving technology.

So, what is my investment cost?

This is dependent on your current shooting kit, and whether you can merge your current system with a new one. Perhaps you already shoot Sony or Panny, so you're in luck.

For me, all my lenses are Canon EF mount, some are electronic, others are manual, so an adapter would be needed in my case. The price of this is dependent on the glass you use, or are going to use.

Let's look at the Panasonic GH4 to start with.

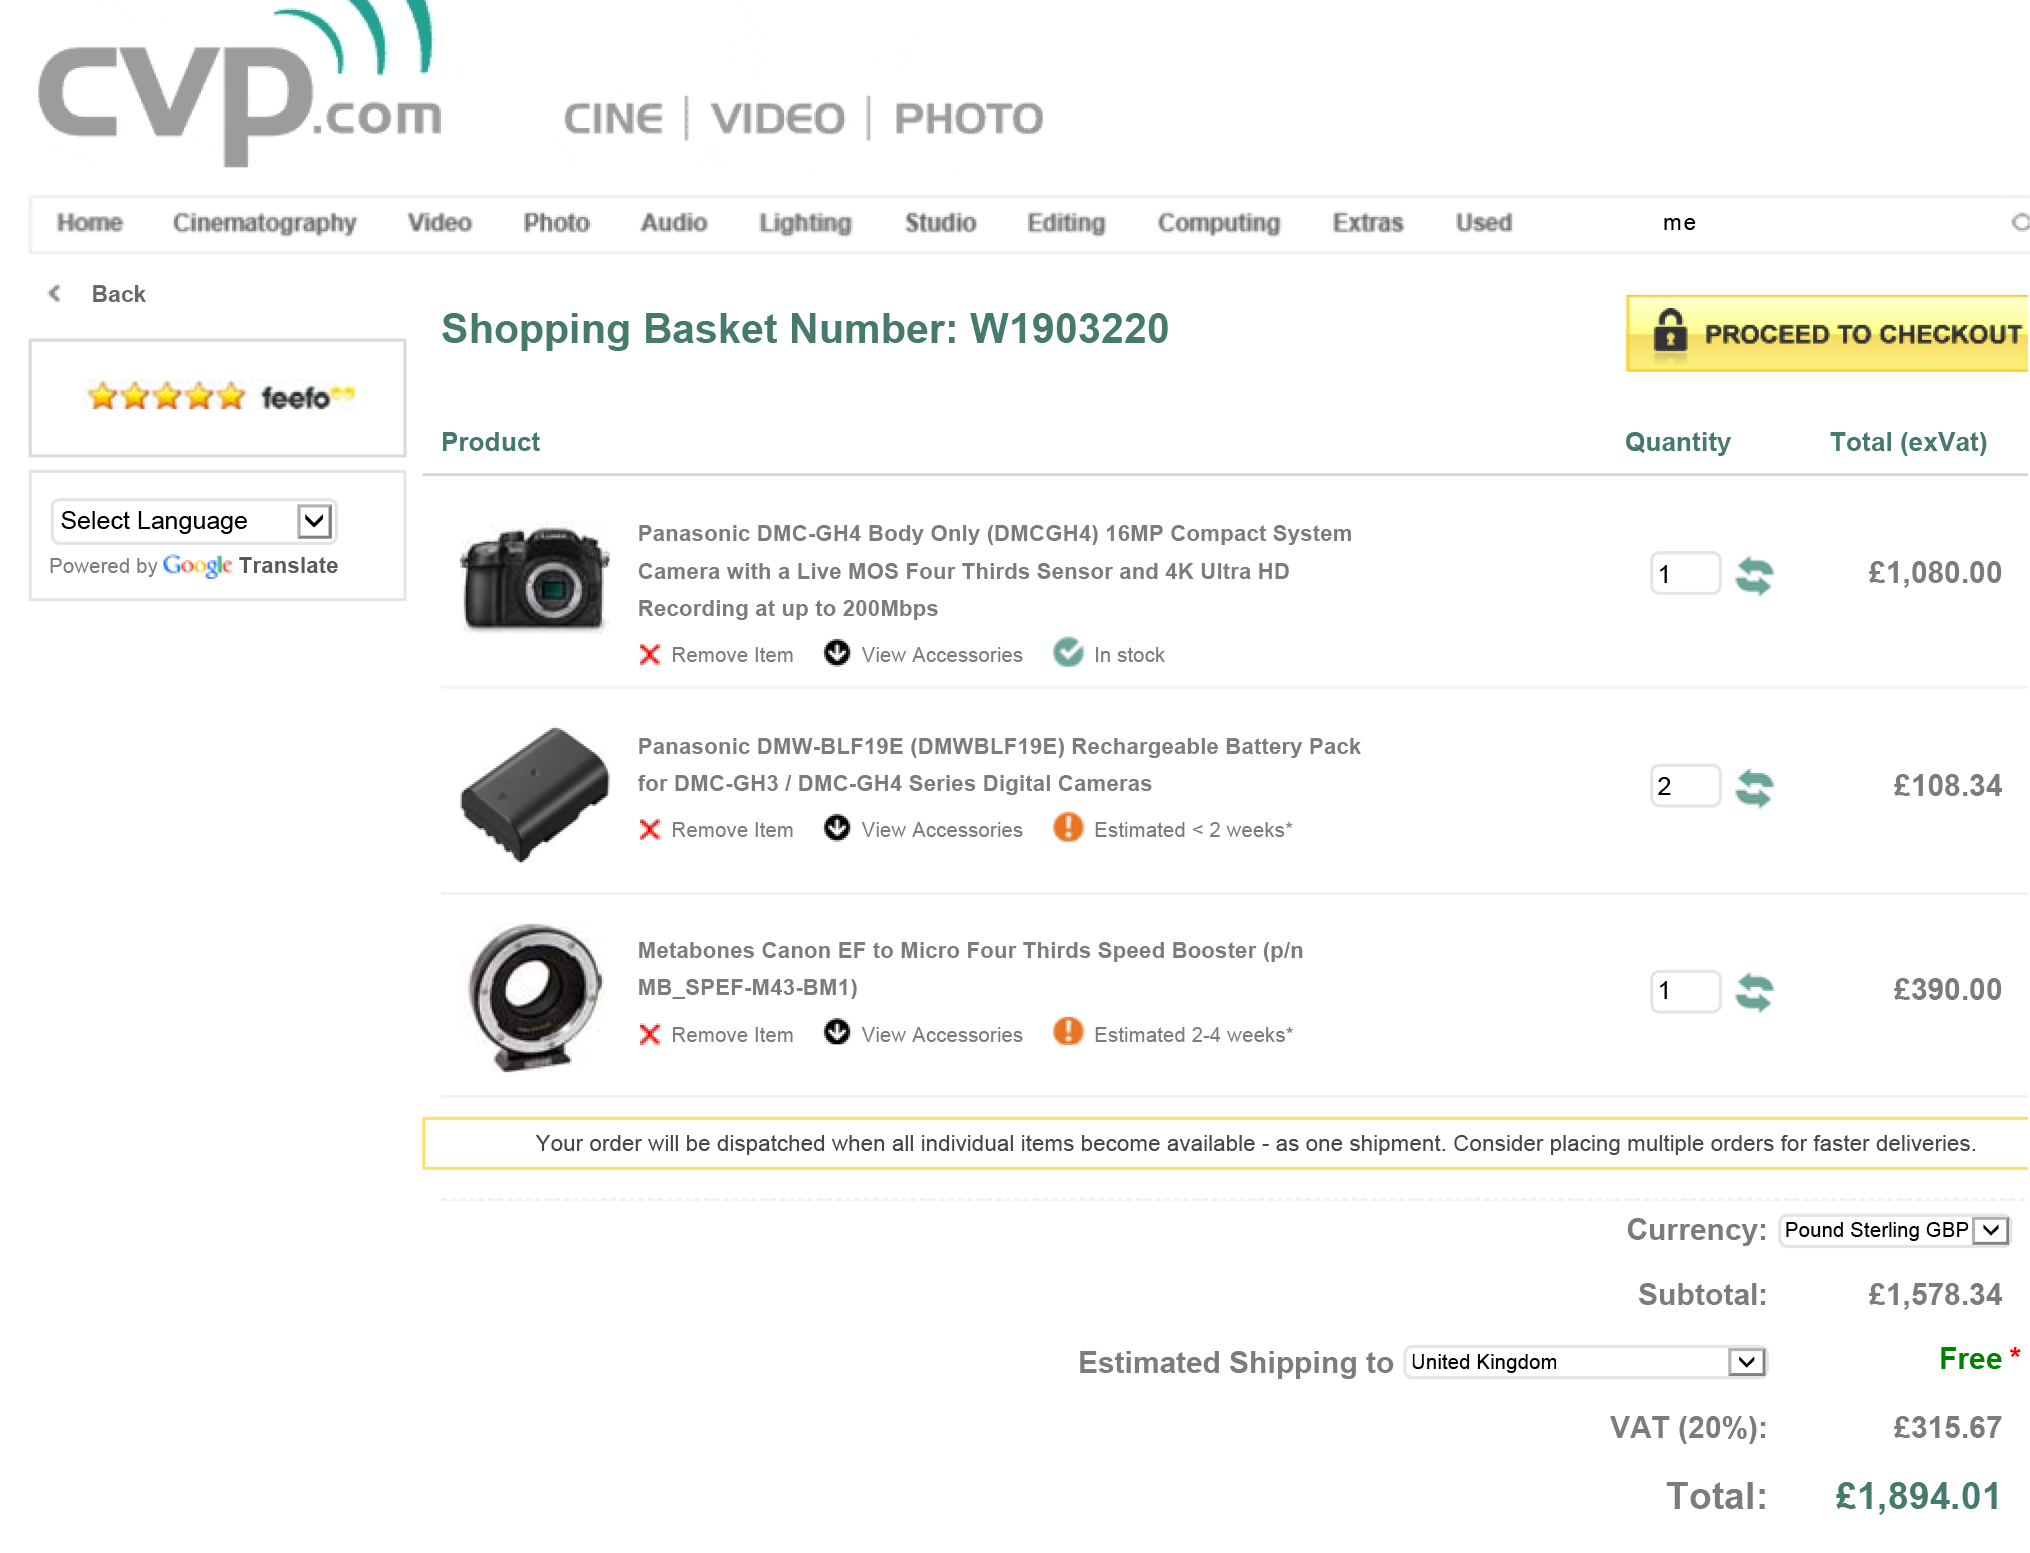
Panasonic GH4 (body only) - £1296.00

Metabones Speedbooster EF to MFT (smart with electronics) - £468.00

GH4 batteries x 2 -£130

Transcend 600x ultimate SD card x 2 (Amazon price) - £36

Now, as the GH4 is MFT, I might purchase a wide angle lens because my current ultra wide angle 14mm T/3.1 would be almost 28mm T/6 due to the sensor equivalence. So, my options would be either:

Panasonic 12 - 35mm F/2.8 - £829.00

I did have the Samyang 12mm T/2, realizing it does not come in MFT mount.. So the above would be my option. I have used it before, it has great OIS and has a decent depth of field for an F/5.6 equivalent lens.

Total GH4 investment inc extra lens - £2759.00 (excluding extra lens - £1930.00)

That £1930 was pretty much the same price I paid for the 5D mkIII body only.

Panasonic GH4 basket

Now the Sony A7s.

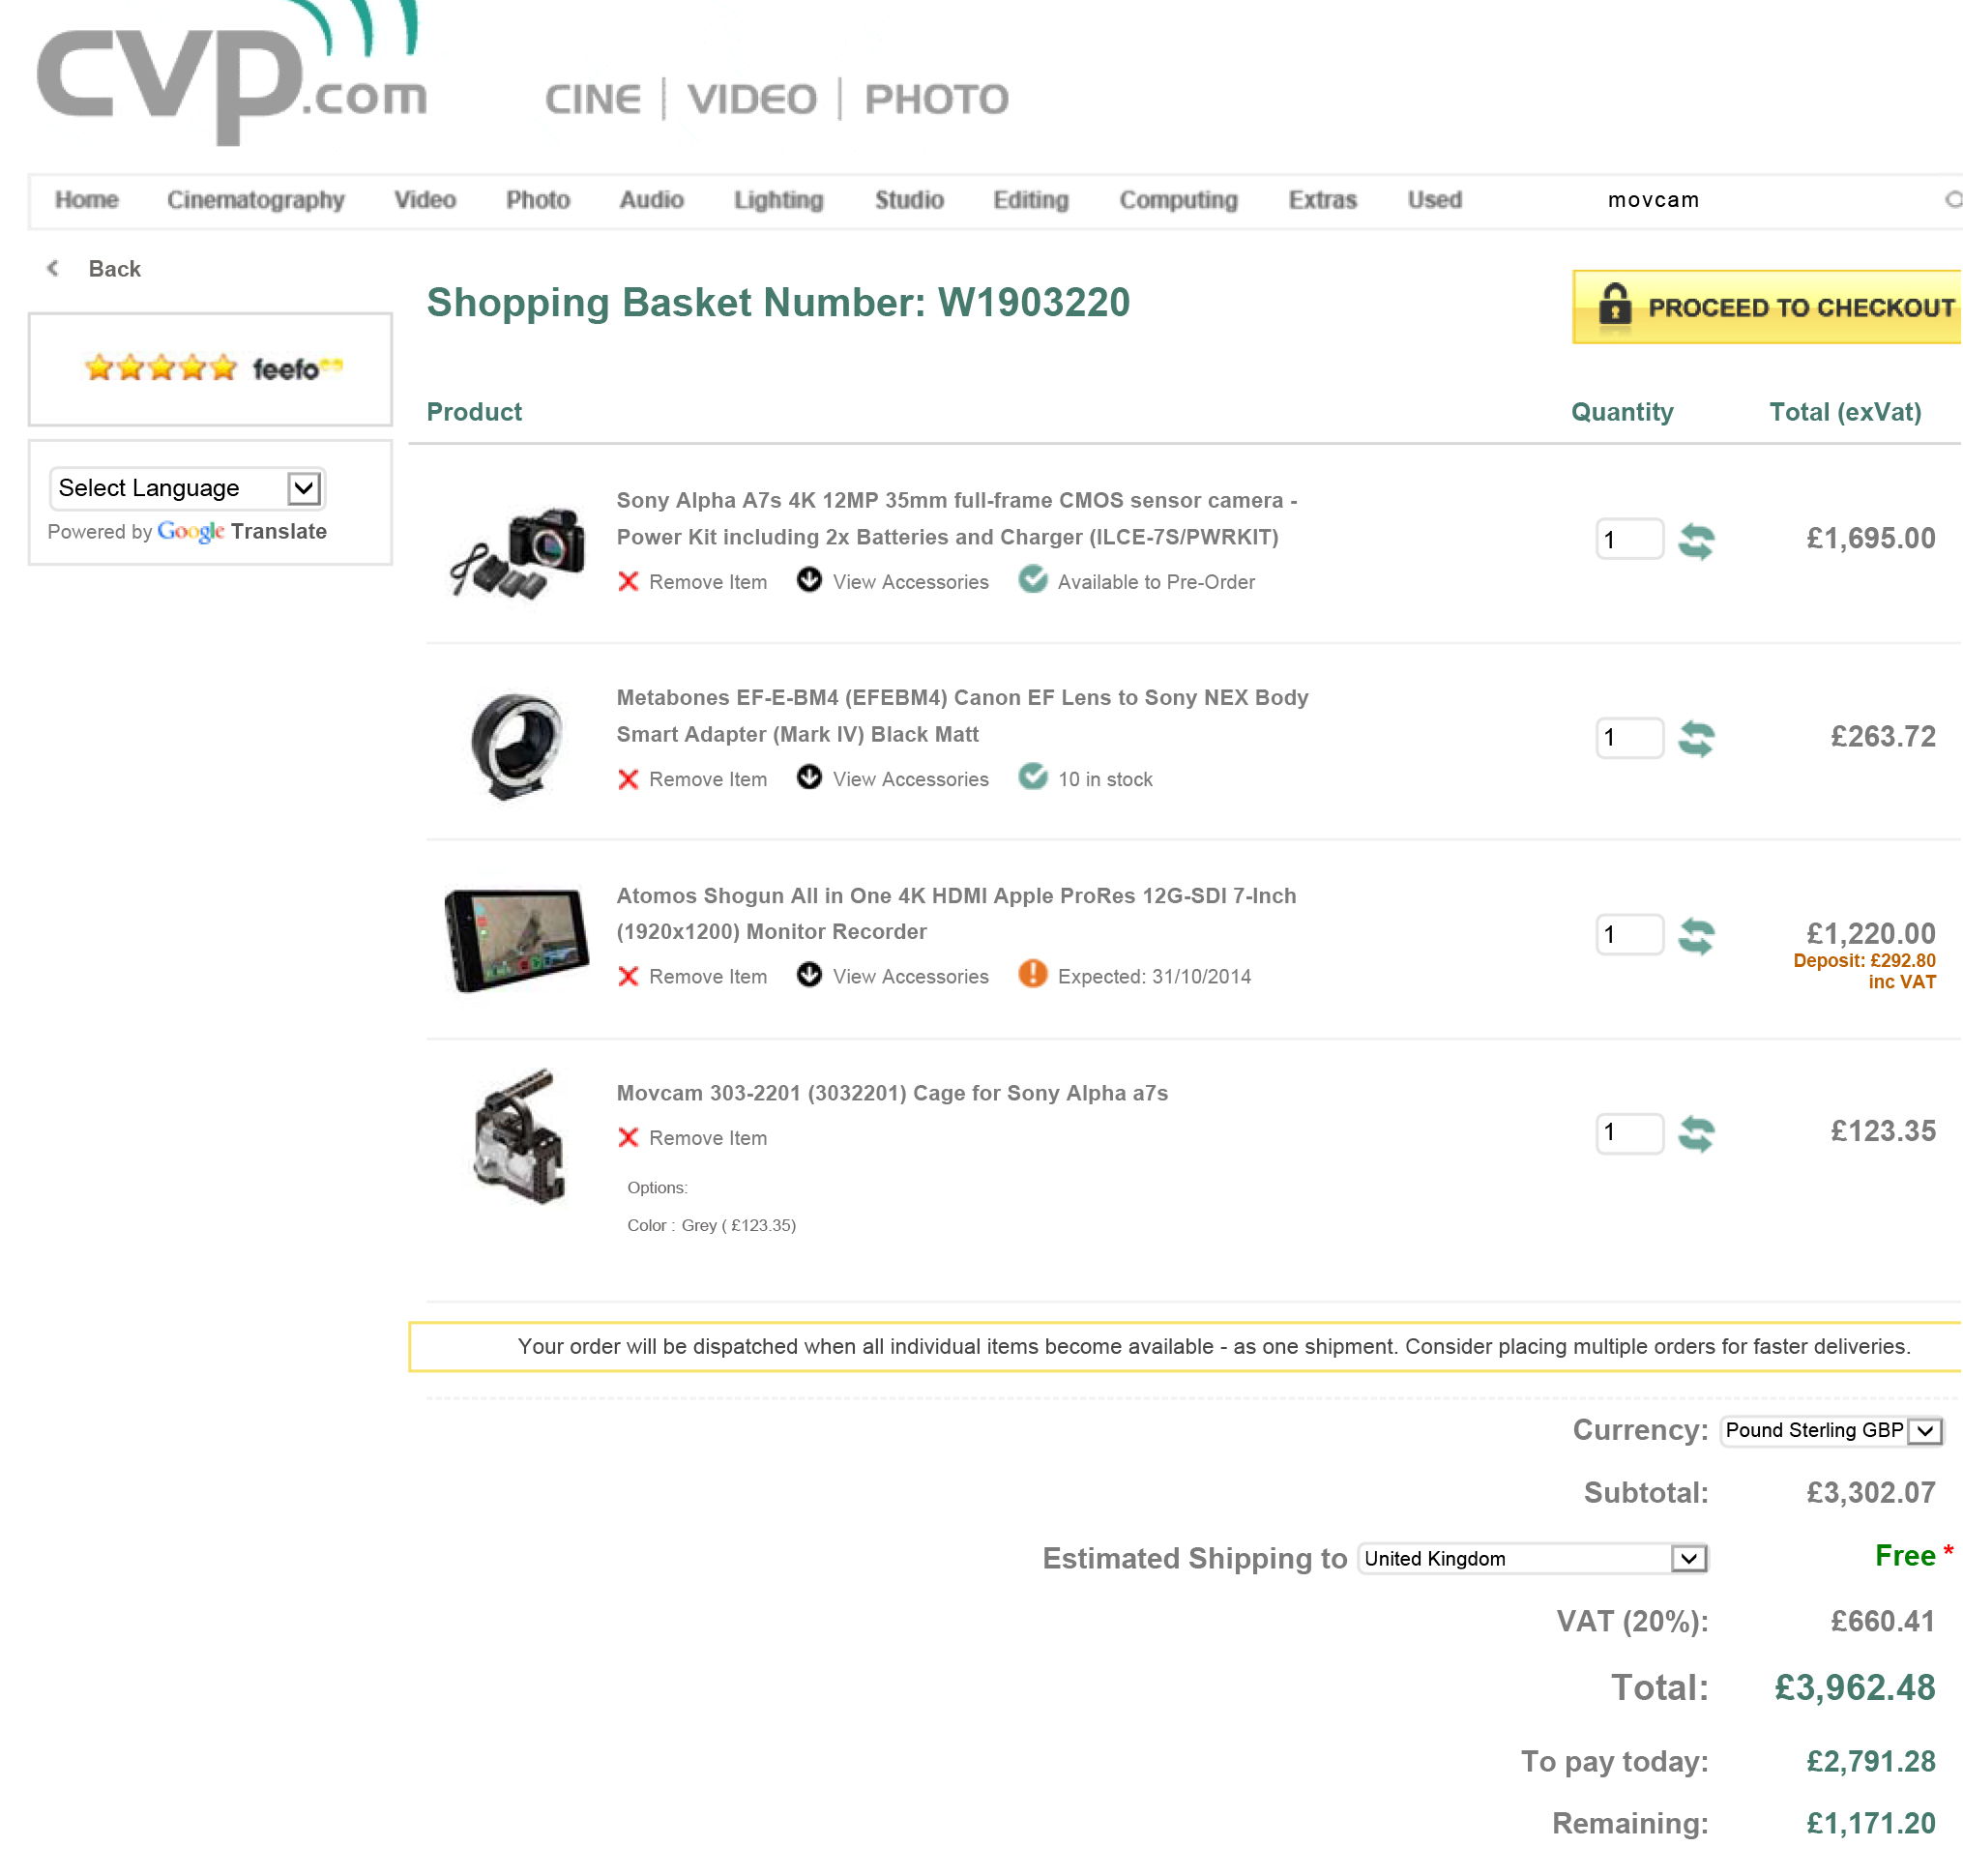
Sony A7s (body and battery/PWR kit) - £2034.00

Metabones Speedbooster EF to E (smart with electronics) - £316.46

Transcend 600x ultimate SD card x 2 (Amazon price) - £36

The A7s does not record 4K internally, so I would need to purchase the Atomos Shogun recorder at - £1464.00

Also, as the A7s is compact in size, a cage is required to make it more accessible with the recorder and mics etc.

Movcam A7s cage - £148.02

Total A7s investment - £3998.48

(All prices are including VAT from CVP).

Sony A7s basket
Adam using the Panasonic GH4

Now.. I've shot on the Panasonic GH4 and I like it. When I've talked to Panasonic reps about the product they all had the same comment that Panasonic listened to videographers, and you can tell. The available recording formats and codecs allow a range of uses for the camera, and the features it packs into its tiny form are perfect for those that already utilize DSLR for video.

(Look back to earlier this year to the Park Camera's Panasonic open day - https://ajp1991.wordpress.com/2014/03/16/meet-the-panasonic-gh4/)

Personally, and this is very subjective to the way I was filming when using the camera, the captured video looked like video. Some will understand what I mean, others won't, but for those that have been shooting on a full frame camera, the 'look' is there. Obviously the sensor plays a large part in that, but if I purchased a GH4 kit outright (disregarding my current EF mount lenses).. I would purchase the Voightlander 25mm and the trusted Samyang cine lenses which might just combat the 'look' issue I feel like I have. As well as high quality ND filters so my shutter can remain at 1/50th.

Really quick GH4 test:

Trying out the 4K, and again a basic test:

(Please if you have experience, tips, footage or photos that you would like to share, please do!)

What am I going to do then?

My dad taught me something really great; good things come to those who wait. In other words, have patience.

As others test out, review and produce videos using the GH4 and A7s (and other cameras that pop up here and there), I will be closer to making my decision. For now, I know to hold off. A good thing for me to do would be to road test both cameras, work it with all of it's video functions and produce a couple of vids that I can look back on. The folks at Park Camera's are great at in store demos, but I can also wait for BVE in Feb 2015.

So, I can frustratingly wait a little longer for my jump to the next innovation of video production and delivery.

In the mean time I can always look at Blackmagic Design's options that shoot 4K, as well as the Apertus AXIOM modular camera, and keep the new Arri Alexa 65 and RED Dragon for my dreams.

axiom-modules-06[1]

From - https://www.apertus.org/

Rotolight Sound and Light Kit Review!

I have had the Rotolight Sound and Light kit for a little while now, and I like it. I like it even more so because Rotolight has been the only manufacturer to really think about what consumers moving into the industry, and already established creatives would need from the outset. Without light you have no picture, and without sound you only have 50% of that video.Videos with bad or unprepared sound are noticeable, just if the subject of the video was not lit correctly. Unfortunately we are now used to watching and seeing very high quality, glossy pictures with filmic motifs, and excellent sound including orchestral scores. We aspire to work on these 'big budget' productions, or to make videos that look like them, but without thinking about your lighting and sound, you are very far off. I produced this review and the music video using the Canon 5D mark III, and a range of Samyang Cine lenses. To keep the light source and sound as pure as possible, I only used the Rotolight RL-48 B ring light and Roto-Mic. I also used my custom camera rig, which is manufactured by CamSmart, as well as a 5" Lilliput field monitor. I used Adobe Premiere Pro, After Effects and Speedgrade to edit and post-produce the videos.

rotolight sound and light videography video kit review led ring light

RL-48 B LED Ring Light

Out of the box, you get everything you need (apart from batteries) to start shooting straight away. The inclusion of a Rotolight belt-bag is fantastic for getting the light out quickly if you are shooting on the run, and for storage while traveling and keeping the batteries, light and accessories safe. One pain I always have, as I am a single shooter is that to change parts of my equipment setup; which means opening my big bag, routing through to find the bit I need and then carrying on. With Rotolights ingenious solutions they have removed that need entirely!

Inside the LED light is a set of ND, skin, colour and minus green filters that can be applied directly inside the housing of the unit itself; no need to carry around filters, gels and pegs to achieve your desired brightness and tone. This is great as no longer do you rely on a bag of old gels to adjust the temperature and brightness of the light source, and all filters are supplied by LEE, so you know you can trust them. The LED's being naturally daylight at 5600K, you are set to use the light in most conditions! For photography and video with people and models, Rod from Rotolight recommended using a softening ND and the skin filter which gently soft lights the subject, with a peachy, wrapping beam. There are no shadows, and the result is a beautiful glimmer of light in the subjects eyes giving them emotion and life.

rotolight sound and light videography video kit review music video filmmaking shoot videography model light

During my time with the Sound and Light kit, I tested out its practicality when out filming indoors and out on location. Above is a still grab from the indoor shots of Josh performing his lines to the camera; you can see a hint of light in his eyes, and a soft-neutral coverage of his face. This was the look I wanted to achieve; an intimate piece-to-camera. I used the ring light and mic mounted on the hot shoe of my camera setup, this gave a direct beam onto the subject, and would work for any subjects in front of the camera. Indoors the RL-48 ring light gives out a beautiful 140 degree beam of light that wraps around your subject, without any hot spots (usually on the forehead). I was filming a music video, but would work exceptionally well in model and fashion work, where beauty is exaggerated through the images.

rotolight sound and light videography video kit review music video filmmaking shoot videography

It took some innovative thinking to get the lighting right for this continuous tracking shot. Although I was shooting in the afternoon sun, I still needed a key light to keep Josh's face illuminated throughout. The night before we were at the location shooting the same scene, but had the ring light mounted on the camera. This time I needed the source to be much closer, so I whipped out the Manfrotto Magic Arm and Superclamp and clamped the light to the boot of my car. In the still grab above, the light is only a foot away from the left of Josh!

What I found here was the need for a brighter light. The 48-LED ring light provided great overall coverage of my subject, but I required a brighter beam to achieve the desired soft-skin and glimmer in the eye look. Although Rotolight produce large LED lights (Anova) for videography and cinematography, I didn't need that much more power. I think for video it would be great to see this model brighter, or have different brightness levels, as usually you require more light than less - especially when adhering to the 180 degree shutter rule. Once your shutter and aperture are set, the only exposure controlling parameters you have is the ISO/ASA or your light sources brightness, and where you're unable to move the light closer or further away from the subject; having a brighter light from the outset is more beneficial.  This is a small niggle from myself, but can be shown with examples in these still grabs -

rotolight sound and light videography video kit review music video filmmaking shoot videography night videoshoot filming car tracking model dark (Here the light from a street lamp came in very handy.)

rotolight sound and light videography video kit review music video filmmaking shoot videography night videoshoot test greet tint

This shot was taken on a 14mm T/3.1 lens at ISO 1250. Although I have remedied the low light in Adobe Speedgrade, a green tint is visible across the frame. A minus green filter is included in the kit which can be used where the green spike (due to LED technology) is prominent, but as I was filming in near darkness I chose not to use the filter to get maximum light output, which by the way is 100w! During the shoot I also used the light hand-held to get intimate with my subject, but not blasting them in the face with an offensive flash gun or LED panel light.

Roto-Mic

Like I mentioned earlier, video is (in most cases) useless without good quality sound. Imagine watching a film or TV program and the sound is noisy and fades in and out as the presenter moves around the frame. It is distracting and essentially draws the audience away from the video, it is suddenly and mostly subconsciously hard to watch and enjoy. With current trends in pro-sumers moving to DSLR to make films and video, there is more pressure on achieving good quality sound when acquiring your footage; the built-in mic does not do your pictures justice.

rotolight sound and light videography video kit review on camera dslr microphone

Here, Rotolight have entered the sound game by producing an on camera directional shotgun mic, with excellent pickup response and sound to noise ratio. When I first started out in freelance videography 3 years ago, I got myself the original Rode VideoMic; it was the best I could afford at the time, and it did the job I needed - to capture good quality audio that will enhance my video. Since then, Sennheizer, Audio-Technica, Hama and many more brands have seen the need for on camera mics for DSLR videographers, and a competitive market has emerged. One that the Roto-Mic will compete very well in due to its superb signal processing and price - an attractive offer to anyone seeking to invest in a cost-effective solution. You will need a 9V battery to power the Roto-mic, but it will last you a good 100 hours.

One very annoying problem with on camera microphones is noise added by the mic's shock mount. The Rode VideoMic I have is notorious for that, creating a squeaking noise as you move or walk with the camera that was audible and therefore recorded into the sound of the video - very unwanted! The Roto-Mic shock mount has been specially designed to minimize any movement the mic may be affected by, holding the capsule stiff, without wobbling on the mount; keeping unwanted noise out.

Rotolight considered many filming scenarios when designing the new mic; it includes a gain adjustment of -10dB to +10dB which is very handy when you are far away from the subject or action, or are filming in a loud and noisy environment. A two step high pass filter is also built into the body of the mic which removes any wind noise and rumbles from the captured sound; perfect when filming outdoors. These small but important features show that Rotolight have done their research into where DSLR videographers are working, and how they need to use their kit.

I was really pleased with the results of the sound recorded with the Roto-Mic, I was expecting another Rode VideoMic moment but it never came. The mic surprised me with its quality recording, and with a little noise reduction in post production the final sound recording is clean and crisp.

rotolight sound and light videography video kit review music video filmmaking shoot videography night led light mic kit

Rotolight has also been innovative in their mounting options, considering many different setups with the light and mic together. This makes a lovely change from complex accessories hanging off the camera to use two hot shoe mounts. The option to use the light mount, or to mount the light on the microphone gives you many different setup options that doesn't restrict your shooting, and is not fiddly or complicated to change! I was using the mic and light together; here the mic mounts onto the camera hot shoe, and then the light can be pushed onto the barrel of the microphone. Although I was dubious of this at first, as it would add extra weight to the shock mount and possibly interfere with the sound recording; it has proved me wrong with being fully functional no matter how the light and mic is set up.

rotolight sound and light videography video kit review music video filmmaking shoot videography night videoshoot filming car tracking

My verdict

  • Fantastic kit if you are starting out in DSLR videography - a must have kit to get you started.
  • Ring light provides excellent soft light for work with models, people, macro and prominent subjects.
  • Filters included is really handy, although as I am heavy handed they are sometimes difficult to apply.
  • Battery life is second to none - 4 hours with recommended lithium AA batteries (x3) or regular lithium AA (x3) for 3 hours.
  • Various mounting options means shooting is not restricted.
  • Mic is broadcast quality - remember sound is just as important as video.
  • Gain adjustment is handy in quiet and noisy locations.
  • The Rotolight bag keeps your hands free!

Of course with every review there are some constructive criticism comments, but not many for me as my experience working with the Rotolight Sound and Light kit has been very pleasant. Firstly, a higher power portable light would be ideal for video, with intensity control. Secondly, now Rotolight has entered the sound game it would be great to see other microphones like hand held bi-directional or even lav mics, and a boost in the recording quality (maybe a Zoom competitor??!). Thirdly, and this isn't criticism, more a request for a flexible light stand or arm so the light can be positioned in extreme and unusual angles.

I am recommending you to go out and get this kit if you're into your DSLR video and photography and need a light source and microphone that you can take to every shoot you go to! It will definitely be coming with me in the future, and I can imagine the RL-48 LED light working fantastically for wedding films and interviews, teamed up with the Roto-Mic and you have a perfect, all in one, on camera 'run and gun' solution to your filmmaking and photography.

You can check out the video I produced for Rotolight demo'ing the new Sound and Light Kit here, and the music video will be released very soon!

[vimeo http://vimeo.com/87515700]

Meet the Panasonic GH4

We've been waiting a few months for more info on the Panasonic GH4. It briefly appeared at BVE, and only 8 were shown at The Photography Show. Due to Panasonic UK announcing the launch of the GH4 early from the trade show and professional demand, more people are asking the whats and hows of the GH4's video capabilities; in regards to 4K. It is the first consumer DSLR to offer 4K, which is a fantastic leap forward into the future of video production that will inevitably get bigger (Moore's law). We have seen recent demonstrations of Super Hi-Vision (8K) at the London Olympic games from collaboration between NHK and The BBC, but for the first time have we seen 4K possibilities coming home with us. It is now in reach.

Today, John from JHWF, his son Sam and myself headed down to Park Cameras in Burgess Hill for the Panasonic GH4 demo. Eager to try out the camera, and by that I mean actually get your hands on it and play with it, checking out the range of functions and lenses that can be used (something not so easy at trade shows), it was the perfect opportunity to get a glimpse into the reachable future for us as producers. Even more so for John, as he as already invested!

panasonic gh4 demo day dslr 4k camera dslm video

Adam from Panasonic was on hand to answer our many questions, and to demonstrate the innovative features the camera has to offer, which include continuous auto-focus in video mode, as well as how the 4K is achieved from an MFT sensor, and many more..

First of all, the body is tiny. If you compare the body to that of my Canon 5DmkIII it could easily be half the size; which for run and gun videographers, and to keep discreet is a perfect solution. Not only that, but like the Sony A7, you have a large pixel count/density sensor so regardless of the body size the image result will be incredible.

panasonic gh4 demo day dslr 4k camera dslm video recording format screen

The sensor offers the two 4K resolution standards; cinema 4K at 4096 x 2160 and UHD 4K at 3840 x 2160 up to 30fps at either 200Mbps (All-intra compression) or at 100Mbps (IPB compression), which is much better in terms of .mov image quality in comparison to the 5D mkIII max 90Mbits at All-Intra compression. Essentially this means that your image is being recorded in a better quality format, giving richer colours, wider dynamic range and more latitude for grading in post. The HD video format is top notch, offering up to 200Mbps in MP4 format, much better than nearly all DSLR's on the market today.

Due to the MFT sensor, the focal length of the lenses you mount are doubled for the equivalent. For example a 12-35mm F/2.8 is equivalent to  24-70MM f/2.8 ON A Micro Four Thirds sensor. This means that suddenly the size of the lenses you use get greatly reduced, meaning a smaller kit bag and less back ache at the end of the day.

panasonic gh4 demo day dslr 4k camera dslm video recording format screen mft lens 100 300mm

A run and gun kit using the GH4 could include the 12-35mm as mentioned above, and the 14-140mm F/3.5-5.6 is enough to cover your indoor and outdoor shots, and can fit in a small shoulder bag. What more could you ask for?

The dual OLED screens replicate the live sensor beautifully, with such clarity too. Now a live view finder has been implemented into the view finder, you get an incredible 10,000:1 contrast ratio which is extremely high speed, unlike LCD which refresh rate is much slower. No need for a Z-finder anymore! Oh by the way it is touch screen too, and you can focus and take a photo by tapping the area of the screen you would like to focus on!

IMpanasonic gh4 demo day dslr 4k camera dslm video recording format screen mft lens OLED dual live view finder touch screen

Another incredible feature was the built in Wi-Fi which can be used to control most of the cameras functions INCLUDING touch sensitive focusing and recording (in 4K) via your Apple of Android device! So, leave your camera set up with the Wi-Fi connected to your device and set up your shot from elsewhere! In the right situation, this feature could be killer, much like the GoPro's wi-fi function for those awkward and obscure shots!

panasonic gh4 demo day dslr 4k camera wi fi

More professional video features include; zebra bars for setting exposure, center marker for image composition, colour bars and 1KHz tone, synchro scan which is useful for suppressing TV and fluorescent light flicker and a Cinelike gamma curves which can be applied. This would come in handy for productions where heavy grading and LUT's can be applied.

There is also the YAGH interface, which was not at the demo, but its functionality is to provide a DC-12V power input to the camera and interface, which allows 4:2:2/10 bit recording with XLR inputs, timecode, VU meters, which turns the camera from a pro-videography/cine camera to a full system camera for broadcasting. Adam showed us some setups on his phone from recent Hollywood productions using the GH3.

As you may know, I purchased my 5D mkIII in December, for videography/cinematography. To me, I don't know if I should feel pissed off that I should have waited for the GH4 to be released so I can future-proof my productions, or whether I should jump in and get another A camera right there and then. But then I thought, I have an incredible camera system right here already, and just because this (yes rather amazing) new resolution has become available, doesn't mean my potential clients will want it. At the moment the current structure and system for broadcasting 4K in the mainstream media of television is non-existent, until the big change happens which means either updating current HD systems to cope with the greater requirements of 4K, or a completely new 4K network is created, the only channel for viewing will be the internet, or cinema. So, if your deliverables are all for YouTube, then go for it, you have a way to get your work out there in its native resolution already. Otherwise, be prepared to down-scale to 1080 HD for normal playback. This may have fantastic results for you, and keeps the incredible clarity, colour richness and the 'wow' factor that 4K is now being renown for.

http://www.youtube.com/watch?v=hHKJ5eE7I1k

If you are a current Canon/Nikon or other brand shooter, then the answer to your question is not "You will need to buy new lenses for this camera". A few manufacturers haave designed and produced many workarounds to lens to mount converters; famously Metabones, but also LensAdaptor are worth checking out if you currently shoot with non-MFT lenses. These adapters fit onto the body and lens and effectively allow the lens to be used with a different lens mount.

To conclude, if I had the money I would happily invest in the Panasonic GH4 and not only for the 4K. The high data rates even for 1080p HD are high enough to be broadcasted which opens up what I can deliver for my clients, the kit is smaller so I get less back ache, the Depth From Defocus system allows continuous auto-focus during video, up to 96fps slow motion recording in 1080p HD, Wi-Fi control. I'd be really interested in testing this camera out in a 'Great Camera Shootout' review, so clear up the rest of the questions I have about not only capturing video in 4K, but also to see how the MFT 16Mp sensor holds up against the Canon 5D mk III which with Magic Lantern can record RAW.. We shall see, only the future will tell!

panasonic gh4 4k dslr camera demo test day park cameras 1

Please bear in mind that I have never captured footage in 4K, or worked with a 4K camera, footage or system. So what knowledge I am basing this on is my university dissertation in implementing 4K programming into the current UK broadcasting industry, copious research into 4K cameras, technology and productions, attending IBC and many other trade shows to understand the up-to-date technology available.


Todays VideoQuestions - Image Stabilization

Image stabilization, vibration control, optical stabilization or whatever you wish to call it is an -in lens- operation that reduces pan and tilt vibrations and shake that would blur the captured image. It works by using electromagnets to align a floating lens element, which corrects the shake and vibration over the two axis; left and right, up and down. Image stabilization is included in a range of lenses from manufacturers, but you will notice the heftier price tag in comparison to a non-IS version due to the extra element in the lens. I will try to clarify the importance of using IS when you're out filming, and why I use IS lenses for my work.

ef_70-200mmf4_lusm[1] The Canon 70-200mm F/4 without IS = £519

ef-70-200mm-f-4l-is-usm-fsl---1258b005aa[1]This Canon 70-200mm F/4 with IS = £894

When choosing your camera body, tripod, mic and all of the other accessories that seem to be required for DSLR videography, one of the hardest will be choosing the right lenses for what work you would like to do, to cover a wide range of focal lengths and apertures, and how much money you want to spend. All three of those points will affect each other in your final purchase choice, but I hope to help narrow down your choices.

What will you be filming?

One key point to consider, as if you are filming live action sports you will require a different set of tools compared to model and fashion videos. Both however will benefit from at least one IS lens in your kit bag. I work in many different areas and styles of videography, so the kit I carry is an all round solution to whether I'll be at the back of a conference hall, or only centimeters away from my subject so being prepared before you know what you are shooting on the day is key - also where IS lenses come in handy!

It isn't recommended to use Image Stabilization when you are filming on a tripod as this can cause frame-by-frame jitter, where the lens attempts to correct smooth movement. But for all the times the camera is not on a steady support like a tripod, having IS will correct any major shake and blurring that occurs in the lens.

So, imagine holding the camera on a monopod with a lens and then tilting or panning. Inherently some shaking will occur from you moving the camera. Depending on your focal length or how far you have zoomed in, this will also multiply the visible blur, also remember DSLR's rolling shutter which will also be added too if you're not careful! Is that too much to think about when shooting video? Yeah it sure is. But having an IS lens will correct a good portion of the errors.

Another great example is sports, and running and gunning with the camera (wedding videography for example) where you are moving around a lot.

What focal lengths are you working with?

IS lenses come in a range of focal lengths; the standards are the 24-70 range and 70-200 range. If you are working with subjects closer to you, in the wide and portrait range, then having a 24-70mm with IS can be operated pretty well hand-held or on a monopod (I'd always recommend using at least one support method to achieve steady shots, either a tripod, monopod, rig etc). However if you are going to be further away from your subject then the longer focal length of 70-200 will work better for your needs.

The focal ranges in between the wide and telephoto can be achieved either by zooming, or by using prime lenses which traditionally do not have IS so will have more shake regardless of your mounting or grip method.

Price

You will have to pay more for an IS lens, it is an additional function that works to correct the image before it is recorded, but it is worth the cost. You may only end up purchasing one lens with IS, but I recommend choosing the lens you will use the most to future-proof your purchase.

Models of Lenses and Manufacturers

Presumably, if you are filming on a DSLR you'll have a Canon body with an EF-mount for the lenses. Canon manufacture very high quality L series lenses with IS, but if you are starting out in this game they will blow your budget immediately. 3rd party manufacturers like Sigma, Tamron, Tokina and Samyang produce incredible quality lenses too, and just because they aren't Canon doesn't mean you can't use them with the camera you have; many 3rd parties allow you to choose the correct lens mount for the camera.

I went down this route when choosing my new equipment, and after plenty of testing and research I chose the Tamron 24-70 F/2.8 VC and the Sigma 70-200 F/2.8 OS, and for me they perform outstandingly.

In many cases you will be using an APS-C size sensor camera like the 60D, 600D, 70D which also have their own range of lenses that are considerably cheaper than their full-frame brothers, some that I have worked with in the past that I can recommend are -

Budget solution - Tamron 17-50mm F/2.8 VCNext best thing if you have the money - Canon 17-55 F/2.8 IS

For a longer focal length, above 100mm you'll have to dig a little deeper in your pocket to get a good quality lens with IS. I did purchase this lens when I started, but because I purchased the NON-OS version it has pretty much been gathering dust in my bag, as at 200mm the image was too shaky and had quite a bit of chromatic aberration. Sigma 18-200 F3.5 to 6.3.. a semi pointless purchase for me, so follow this lesson!

How does using a steadicam affect the stabilization?

Good question. A steadicam is a device that counter balances the weight of the camera and lens to achieve a smooth flowing motion to movement, and takes lots of practice. Using a stabilizer won't imitate image stabilization, or make the image less shaky - so to speak. This depends on the lenses you are using, how fast you are moving and the experience of the steadicam operator. Using an IS lens on a steadicam will certainly correct shake over the two axis, but a steadicam works on 3 axis so shake and blur is inherent unless you shoot at a higher frame rate or apply stabilization correction in post production.

I tend to shoot most of my steadicam footage at 50fps, capturing double the frames which when played back in slow motion smooths out any jitter or quick movement. Shooting in slow motion is a really cool and creative tool, so it is worth playing around with, but remember you will be recording at a lower resolution of 720p, not 1080p (darn you Canon hurry up and give me this!!).

I shot the example material today, so will top and tail the clips and get them up tomorrow, so watch this space!

Conclusion

Get a lens with IS, or VC or OS as your standard, go-to lens. If you're going to use a steadicam too, having stabilization on a wide angle lens will be doubly effective and means less stabilization in post!

CamSmart 2014 Road Map

For those unaware, I have spent the last 18 months working with a photography and videography equipment company in China, called CamSmart! Many of you may have bought their DSLR Camera Rig from Amazon..

I am their European Rep, and product developer. I designed the professional camera rig that will be available to buy in February 2014, focusing on the different scenarios you will use a camera rig for, no matter what camera, location or type of shoot!

Michael is visiting England for the first time this week, with his wife Kaitlyn, we spent yesterday discussing the future plans for our products, marketing, advertisement and much much more, and topped it off with a wonderful meal in the Hilton.

I am ever more excited to receive the camera rig (which is currently on its journey from China to me), as it is the physical representation of the hard work and effort that has gone into 18 months of work. A product that I hope to share with every video producer that needs an alternative solution to a camera rig, at a fantastic price.

Image