Part 2 of the filmmaking masterclass behind the scenes production!

Our Video Production Blog
Way back in November, myself and Dick Hobbs began the pre-production of a new training video covering the behind the scenes of a television studio for the IABM. Unfortunately for me, it was difficult to pin down a location that close to Christmas and New Year with access to studios, galleries and other areas. Dick luckily got the go ahead for filming at the Corrie studios mid-way through BVE, so prep quickly began after.
My trusty crew was Glen, who operated the AutoScript for our presenter Georgie, and John Harris on audio (from JHWF). Dick made sure we were all in check with the script while I lugged around the camera and prompter :)
As there were three of us travelling up to Manchester on the Monday night, I chose to drive from Surrey, which was pretty straightforward, just a heck of a long journey to make at the end of the day. We arrived after a couple of toilet and coffee stops at 9:30, dropped the gear and headed to the table Georgie and Dick had. Beer was served and all was well!
As Dick and myself had planned the shoot well, I selected just the right amount of equipment needed. We were on a restricted budget so I opted to stick with my camera and audio setup rather than hire in a camera. We also borrowed an AutoScript from Vitec, to relay the rather technically heavy (at some points) script to our brilliant presenter.
The equipment list (rather sparing for this shoot!):
Canon 5D mk III
Canon 60D
Sigma 70-200mm F/2.8 OS
Tamron 24-70mm F/2.8 VC
Tamron 17-50mm F/2.8 VC
Canon 50mm F/1.8
Manfrotto 536 Carbon Fibre tripod
Manfrotto 755CX3 Carbon fibre tripod + MVH500 AH head
Manfrotto Spectra 900FT LED light
Zoom H6 audio recorder
Rode Lavalier microphone
Sennheiser ENG-G3 wireless RxTx for lav mic
AutoScript prompter
All of camera and audio kit fitted into the AWESOME Manfrotto Pro Light 35 Backpack: I use the top compartment for the audio gear and accessories, the main sections for camera storage, and the back compartment for my laptop. It's a very comfortable carry regardless of the weight, and if I was walking/traveling for a longer time I just strapped on the waist support to take the weight off my shoulders. The front pockets are especially handy for grabbing memory card wallets and batteries quickly, as that is the most common thing I go to my bag for! Glen wheeled the prompter station around on it's pelicase, there was no way all of that could have fitted in! I did check the other day for AutoScript on tablets, which would be a much more viable solution for me.
In the MF bag for the big tripod I also brought a set of rails (just in case we needed them for the prompter) and the hydrostatic arm with the super clamp attached. You never know when they will come in handy, and when we were there I spotted one on the set!

For anyone working at MediaCity needing to spend the night somewhere, the Holiday Inn right in the center is perfect. From above the first floor is the dock10 studios, offices and editing HQ, but you would have no idea it was there when you reach the 8th - 15th floor for your room. Plushly furnished, executive desk/workspace and a wonderful bathroom. One of the best I've been in!!
Day 1
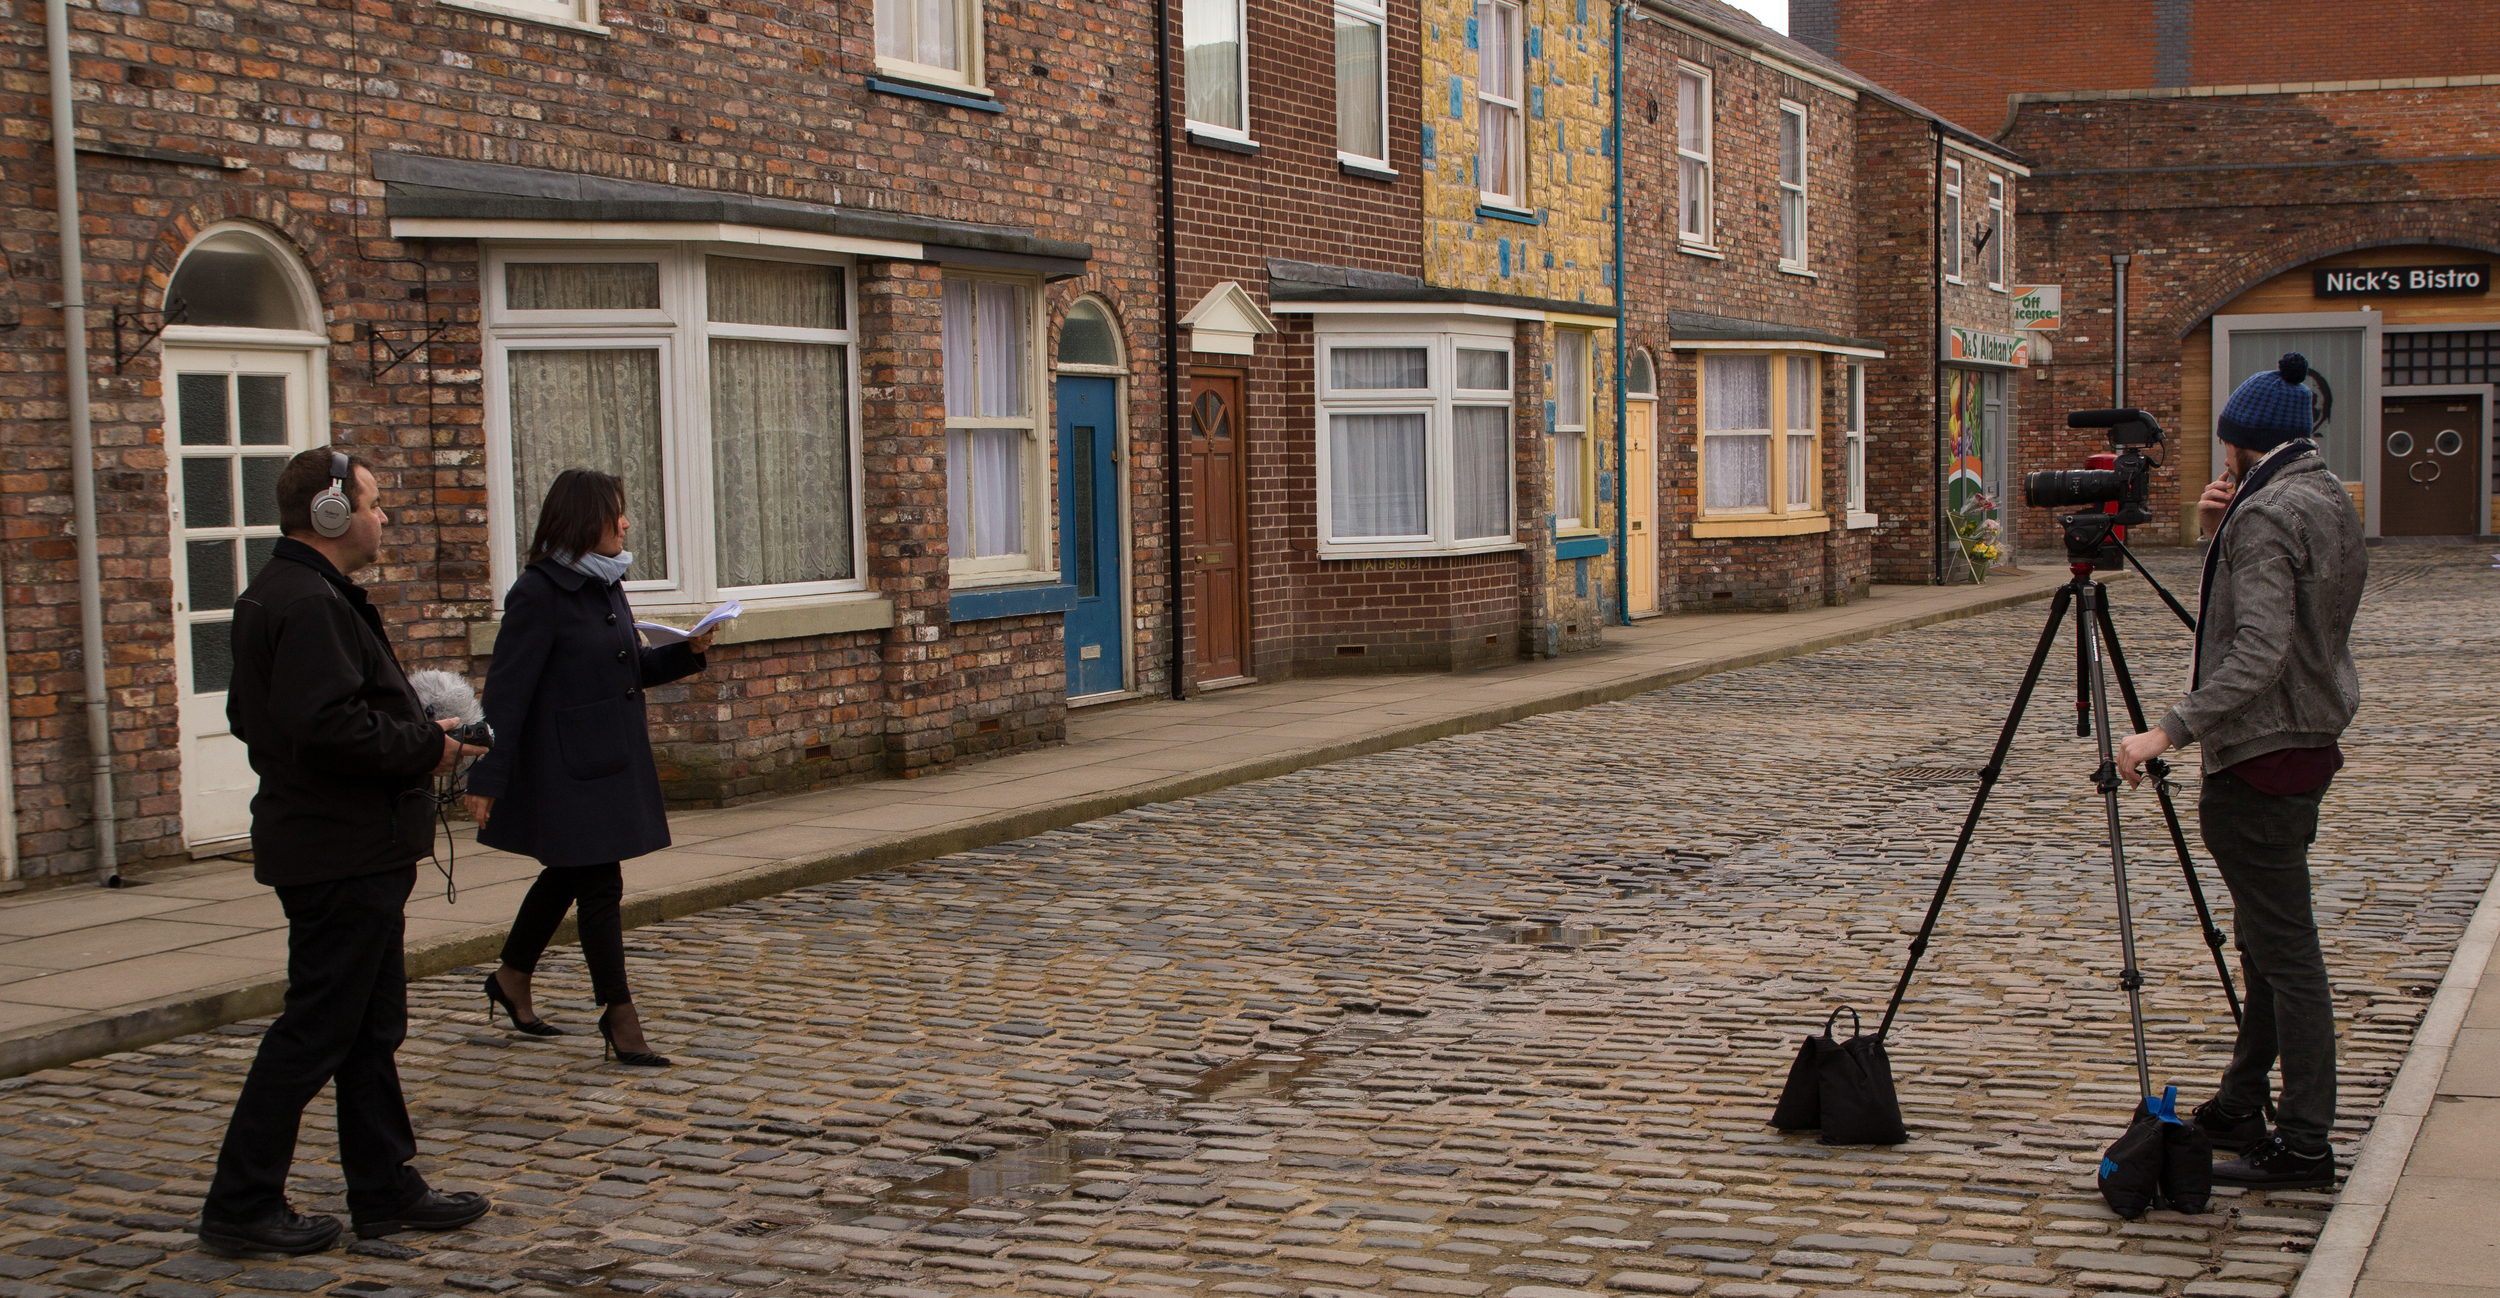
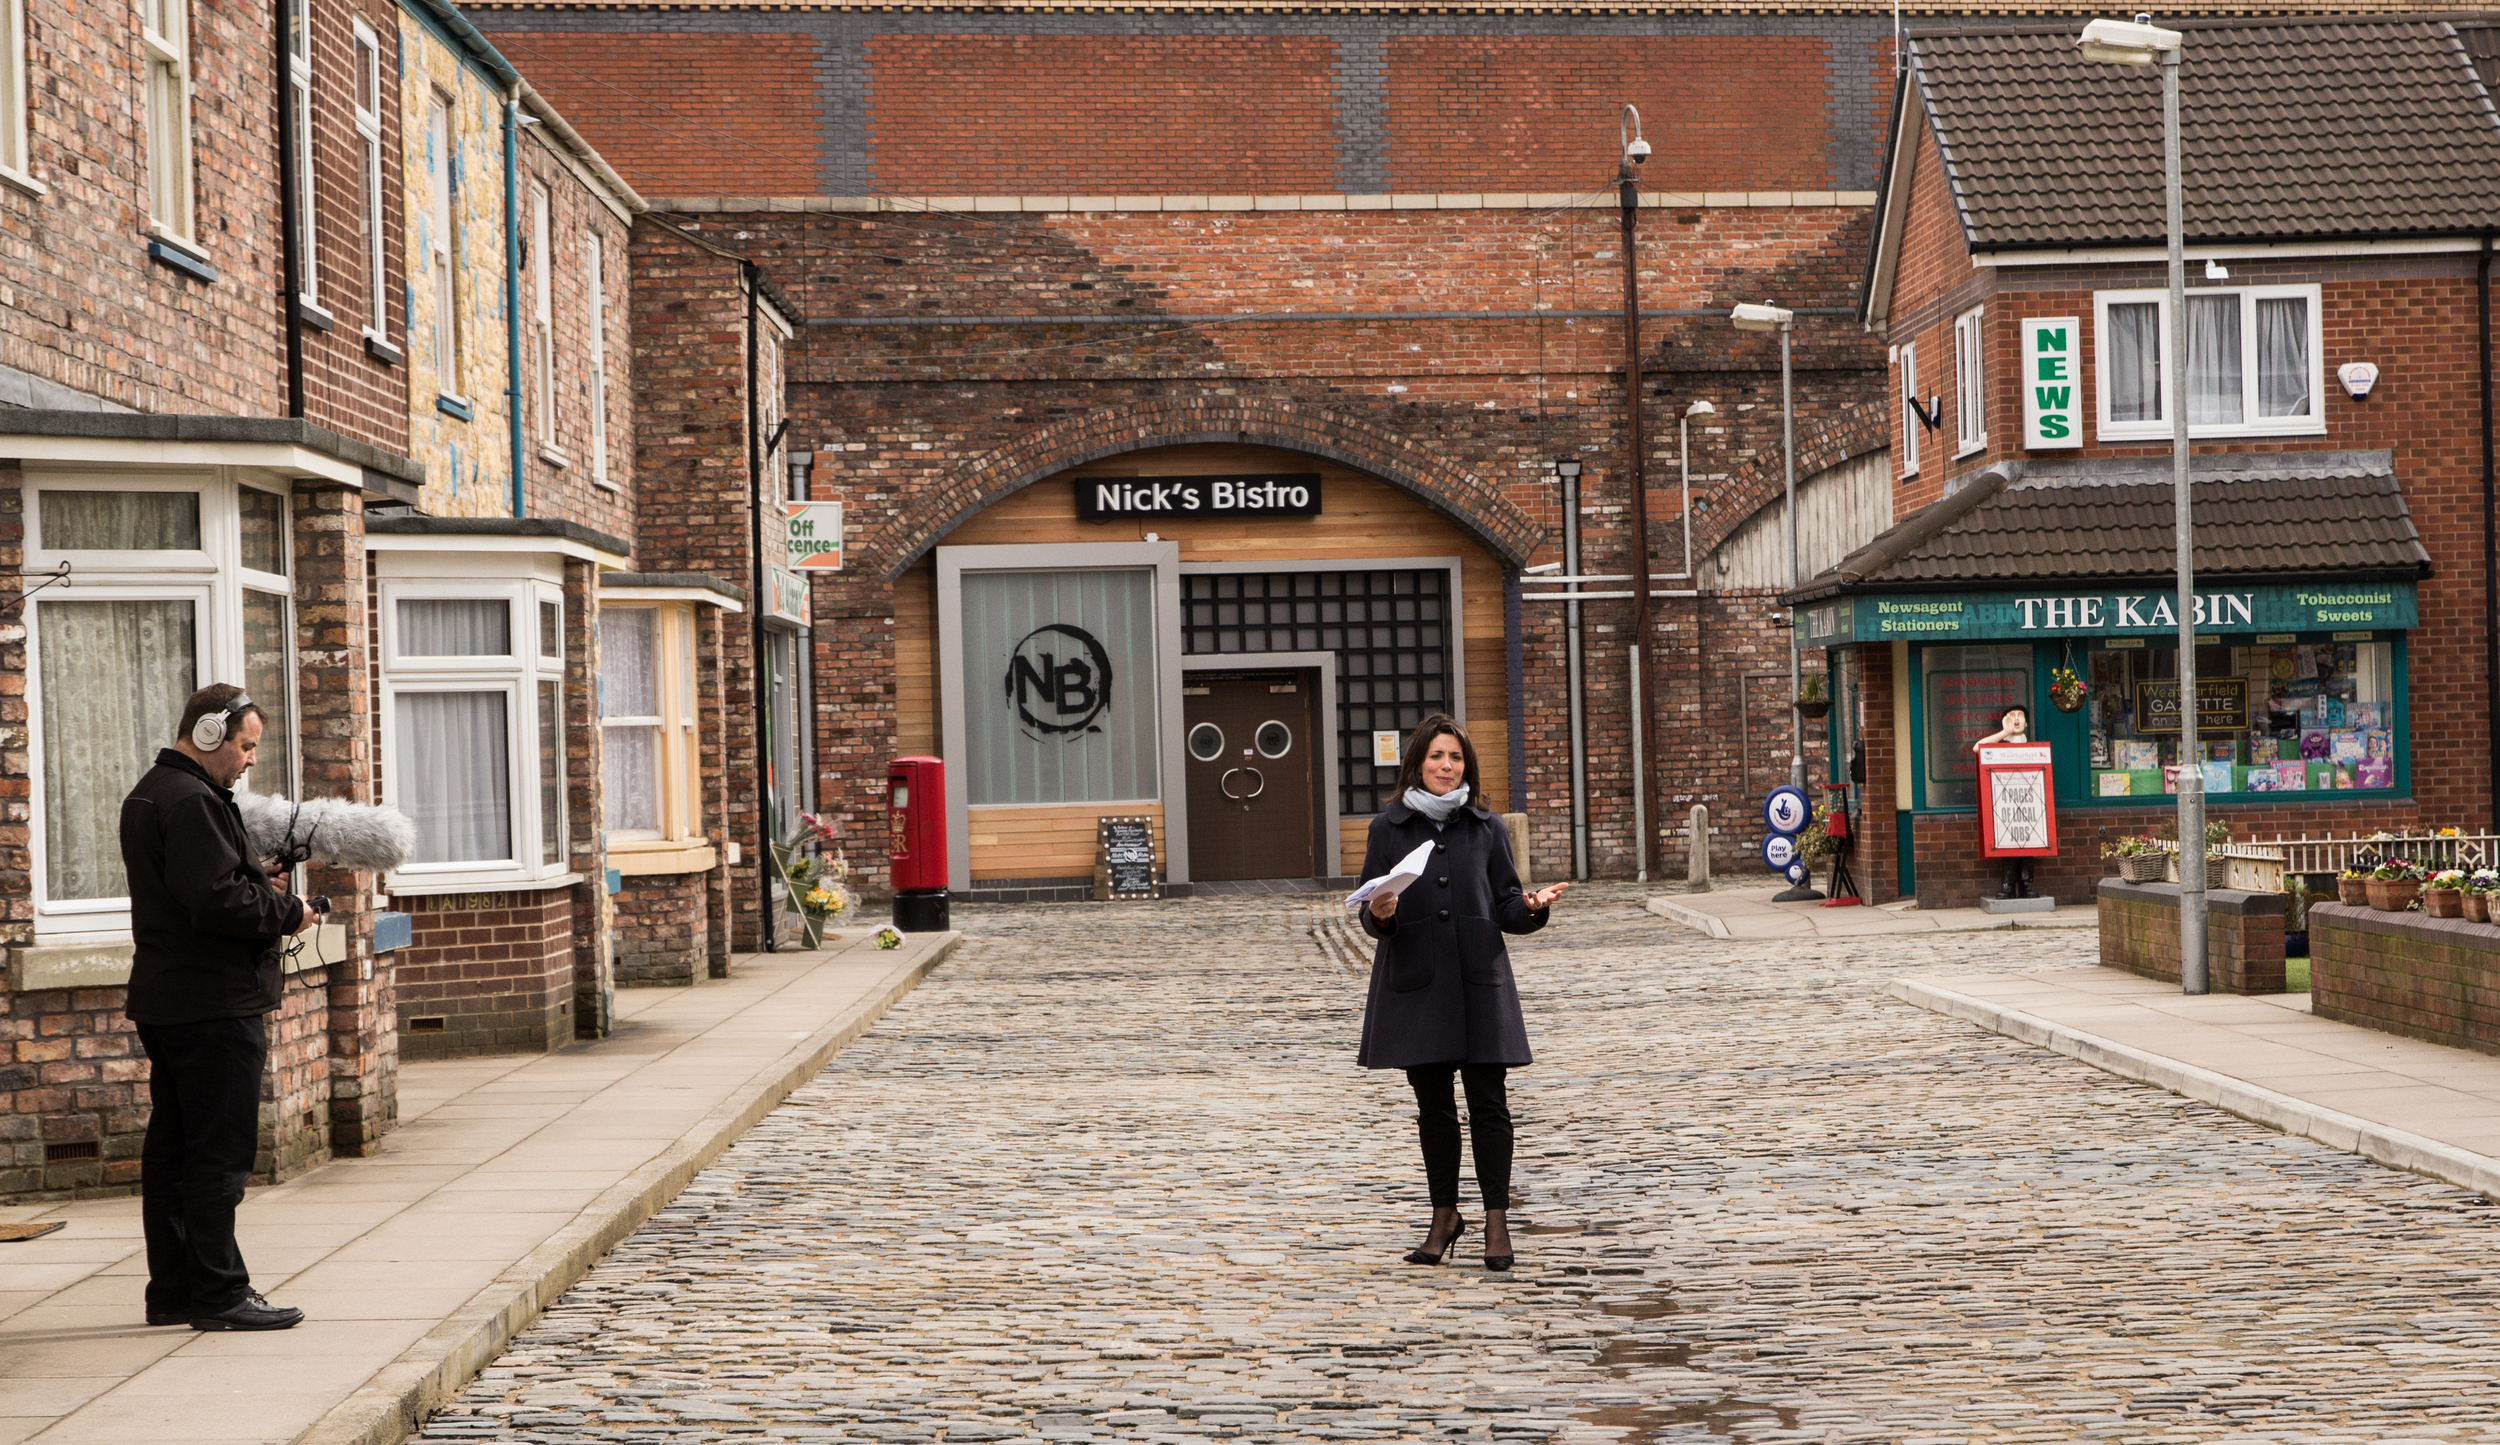
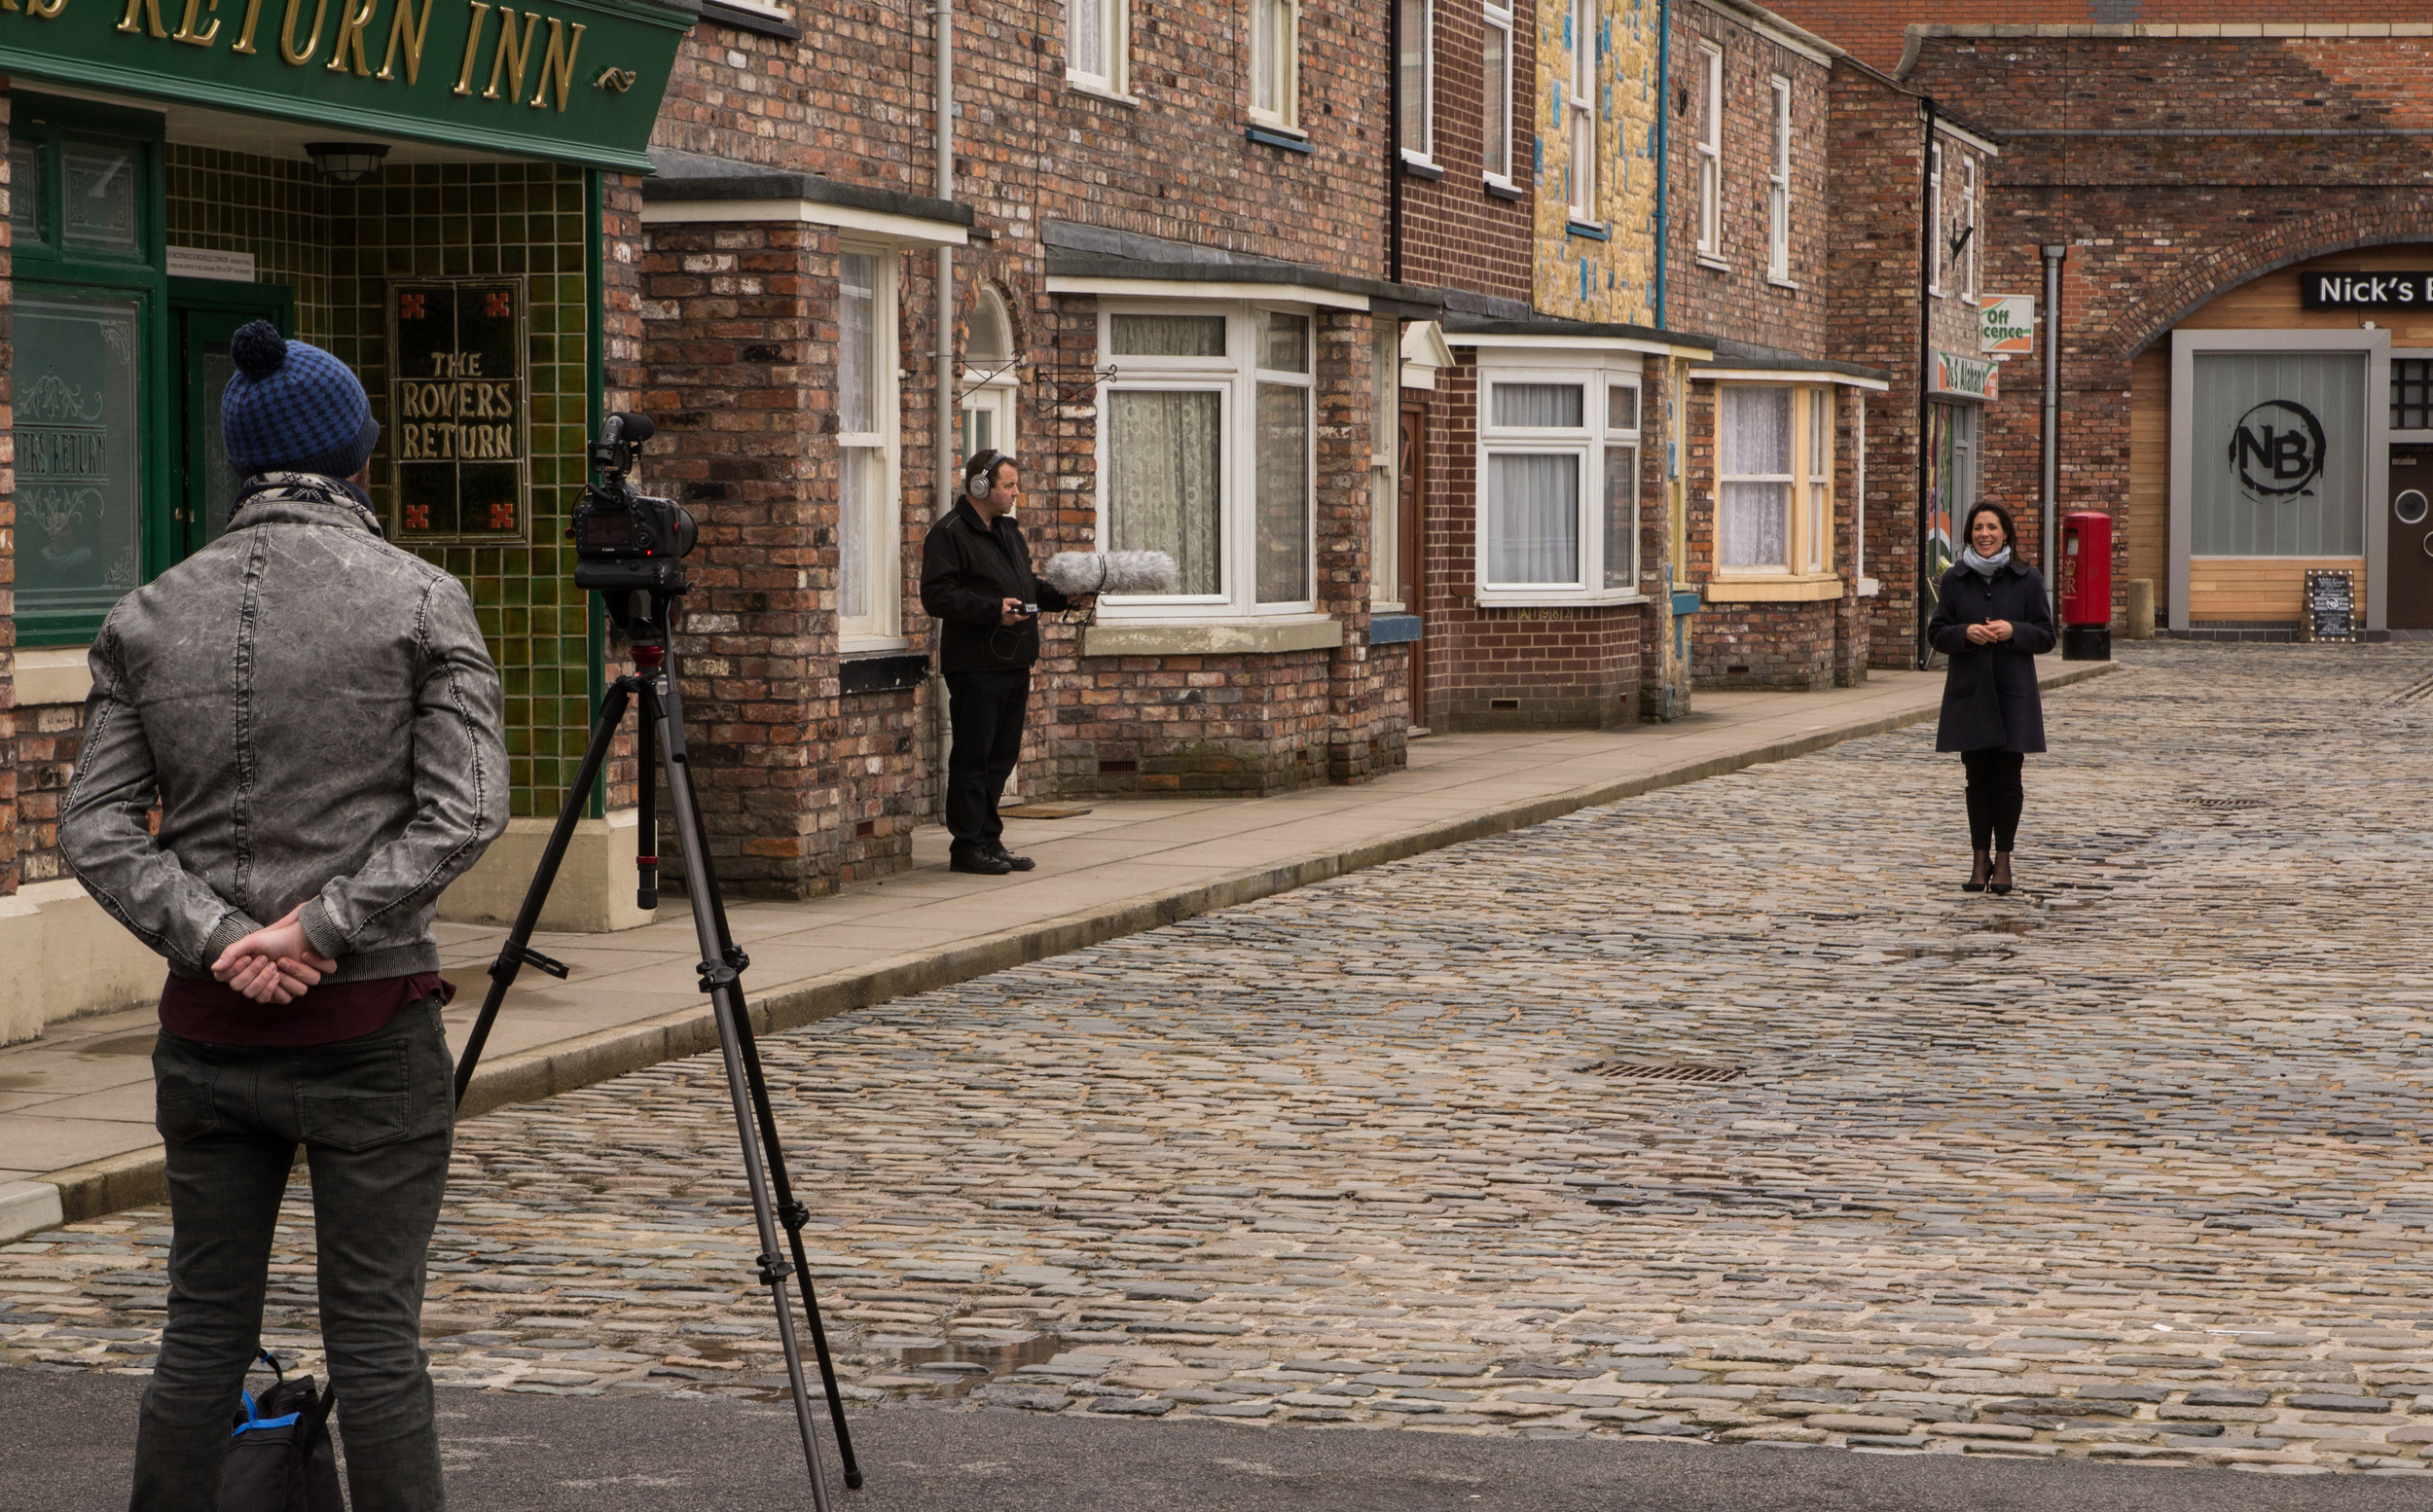
We had a talk about the shoot ahead, as it would be hit and miss on the locations we were aiming to film in due to working around the current productions at Corrie (4 different crews filming that day), we needed to make the most of our available time. After a short walk across the quay, opposite Old Trafford stands the new Coronation Street and ITV Studios.
Upon arrival, we were greeted with coffee, then a guided tour of the facility to get to grips with our new location for the next two days. It was quite nerve-racking for me being a tiny video producer in the shadow of ITV, but I was also in awe of the scale and technology that has been used to make Coronation Street such an iconic television program.
We began the filming in what I now know as the 'Windas' flat, capturing some GV and B-roll of the system cameras, microphone booms, lighting setups and the set itself, clips that would be used throughout the video.
“Camera settings: Tungsten white balance to match set lights, sticking to 1/50 shutter, aperture of F/5.6 and ISO ranging from 400-1600.
Mostly shot on Tamron 24-70 F/2.8 and Sigma 70-200 F/2.8.”
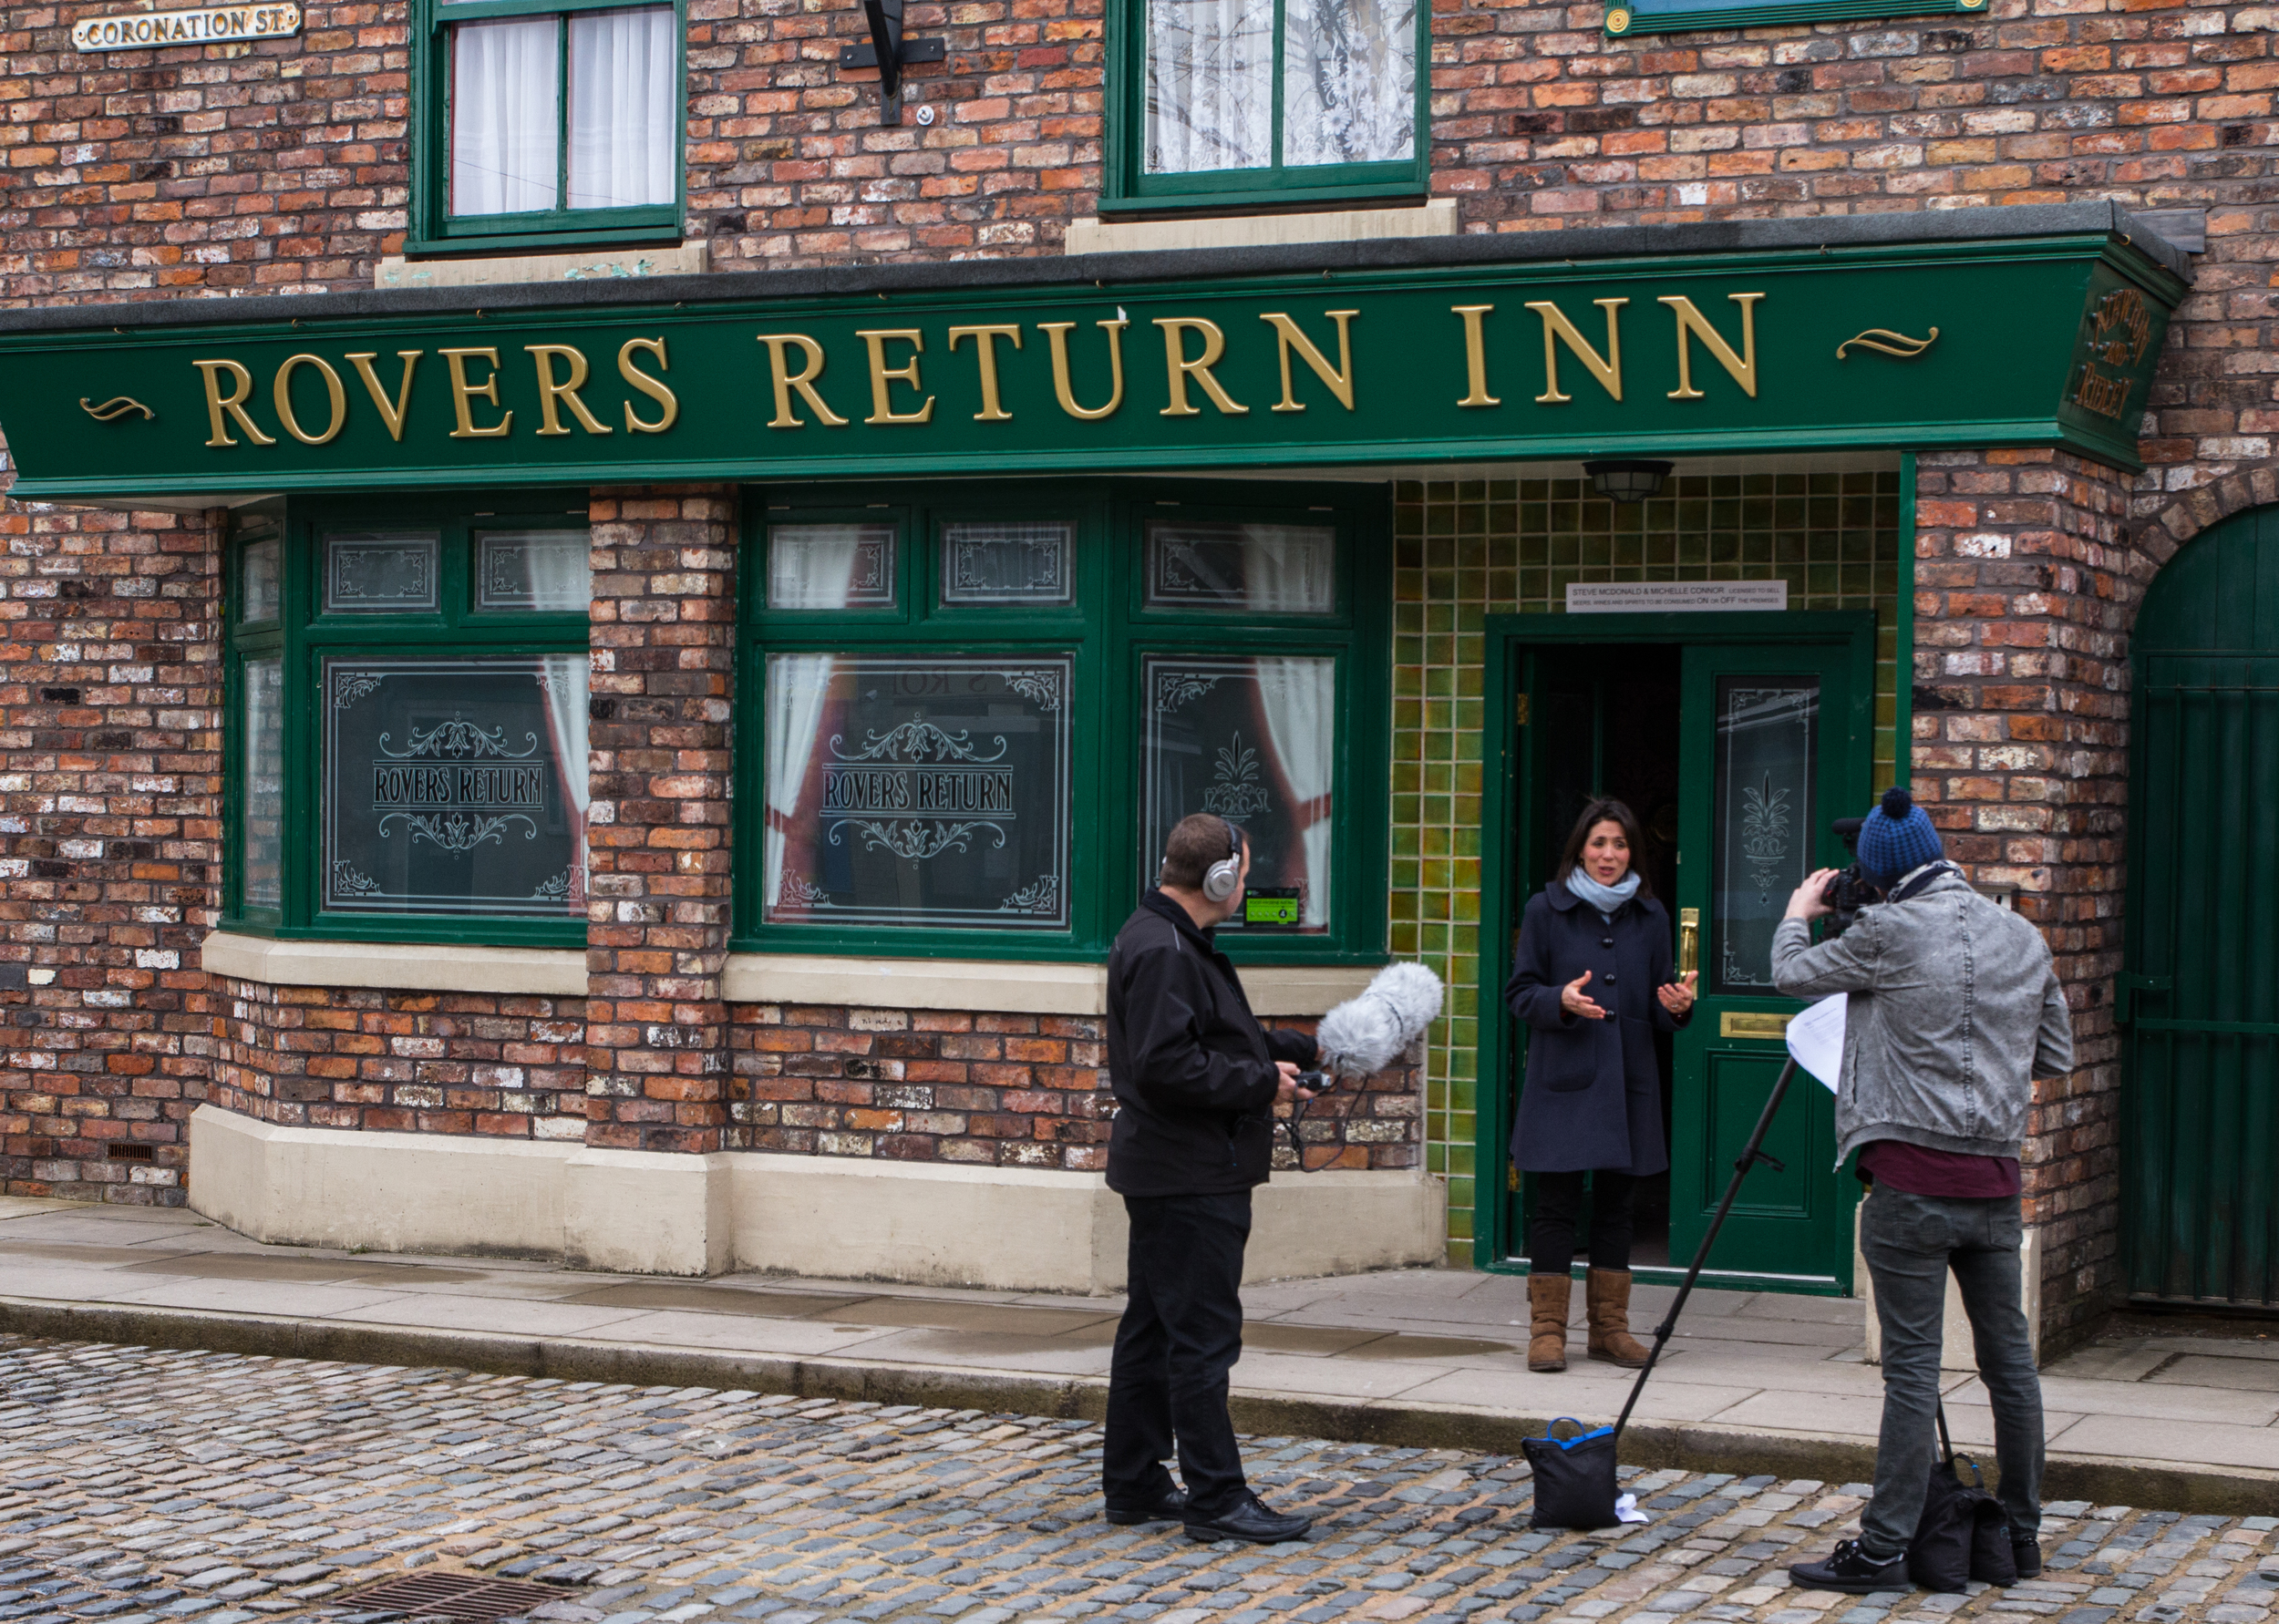
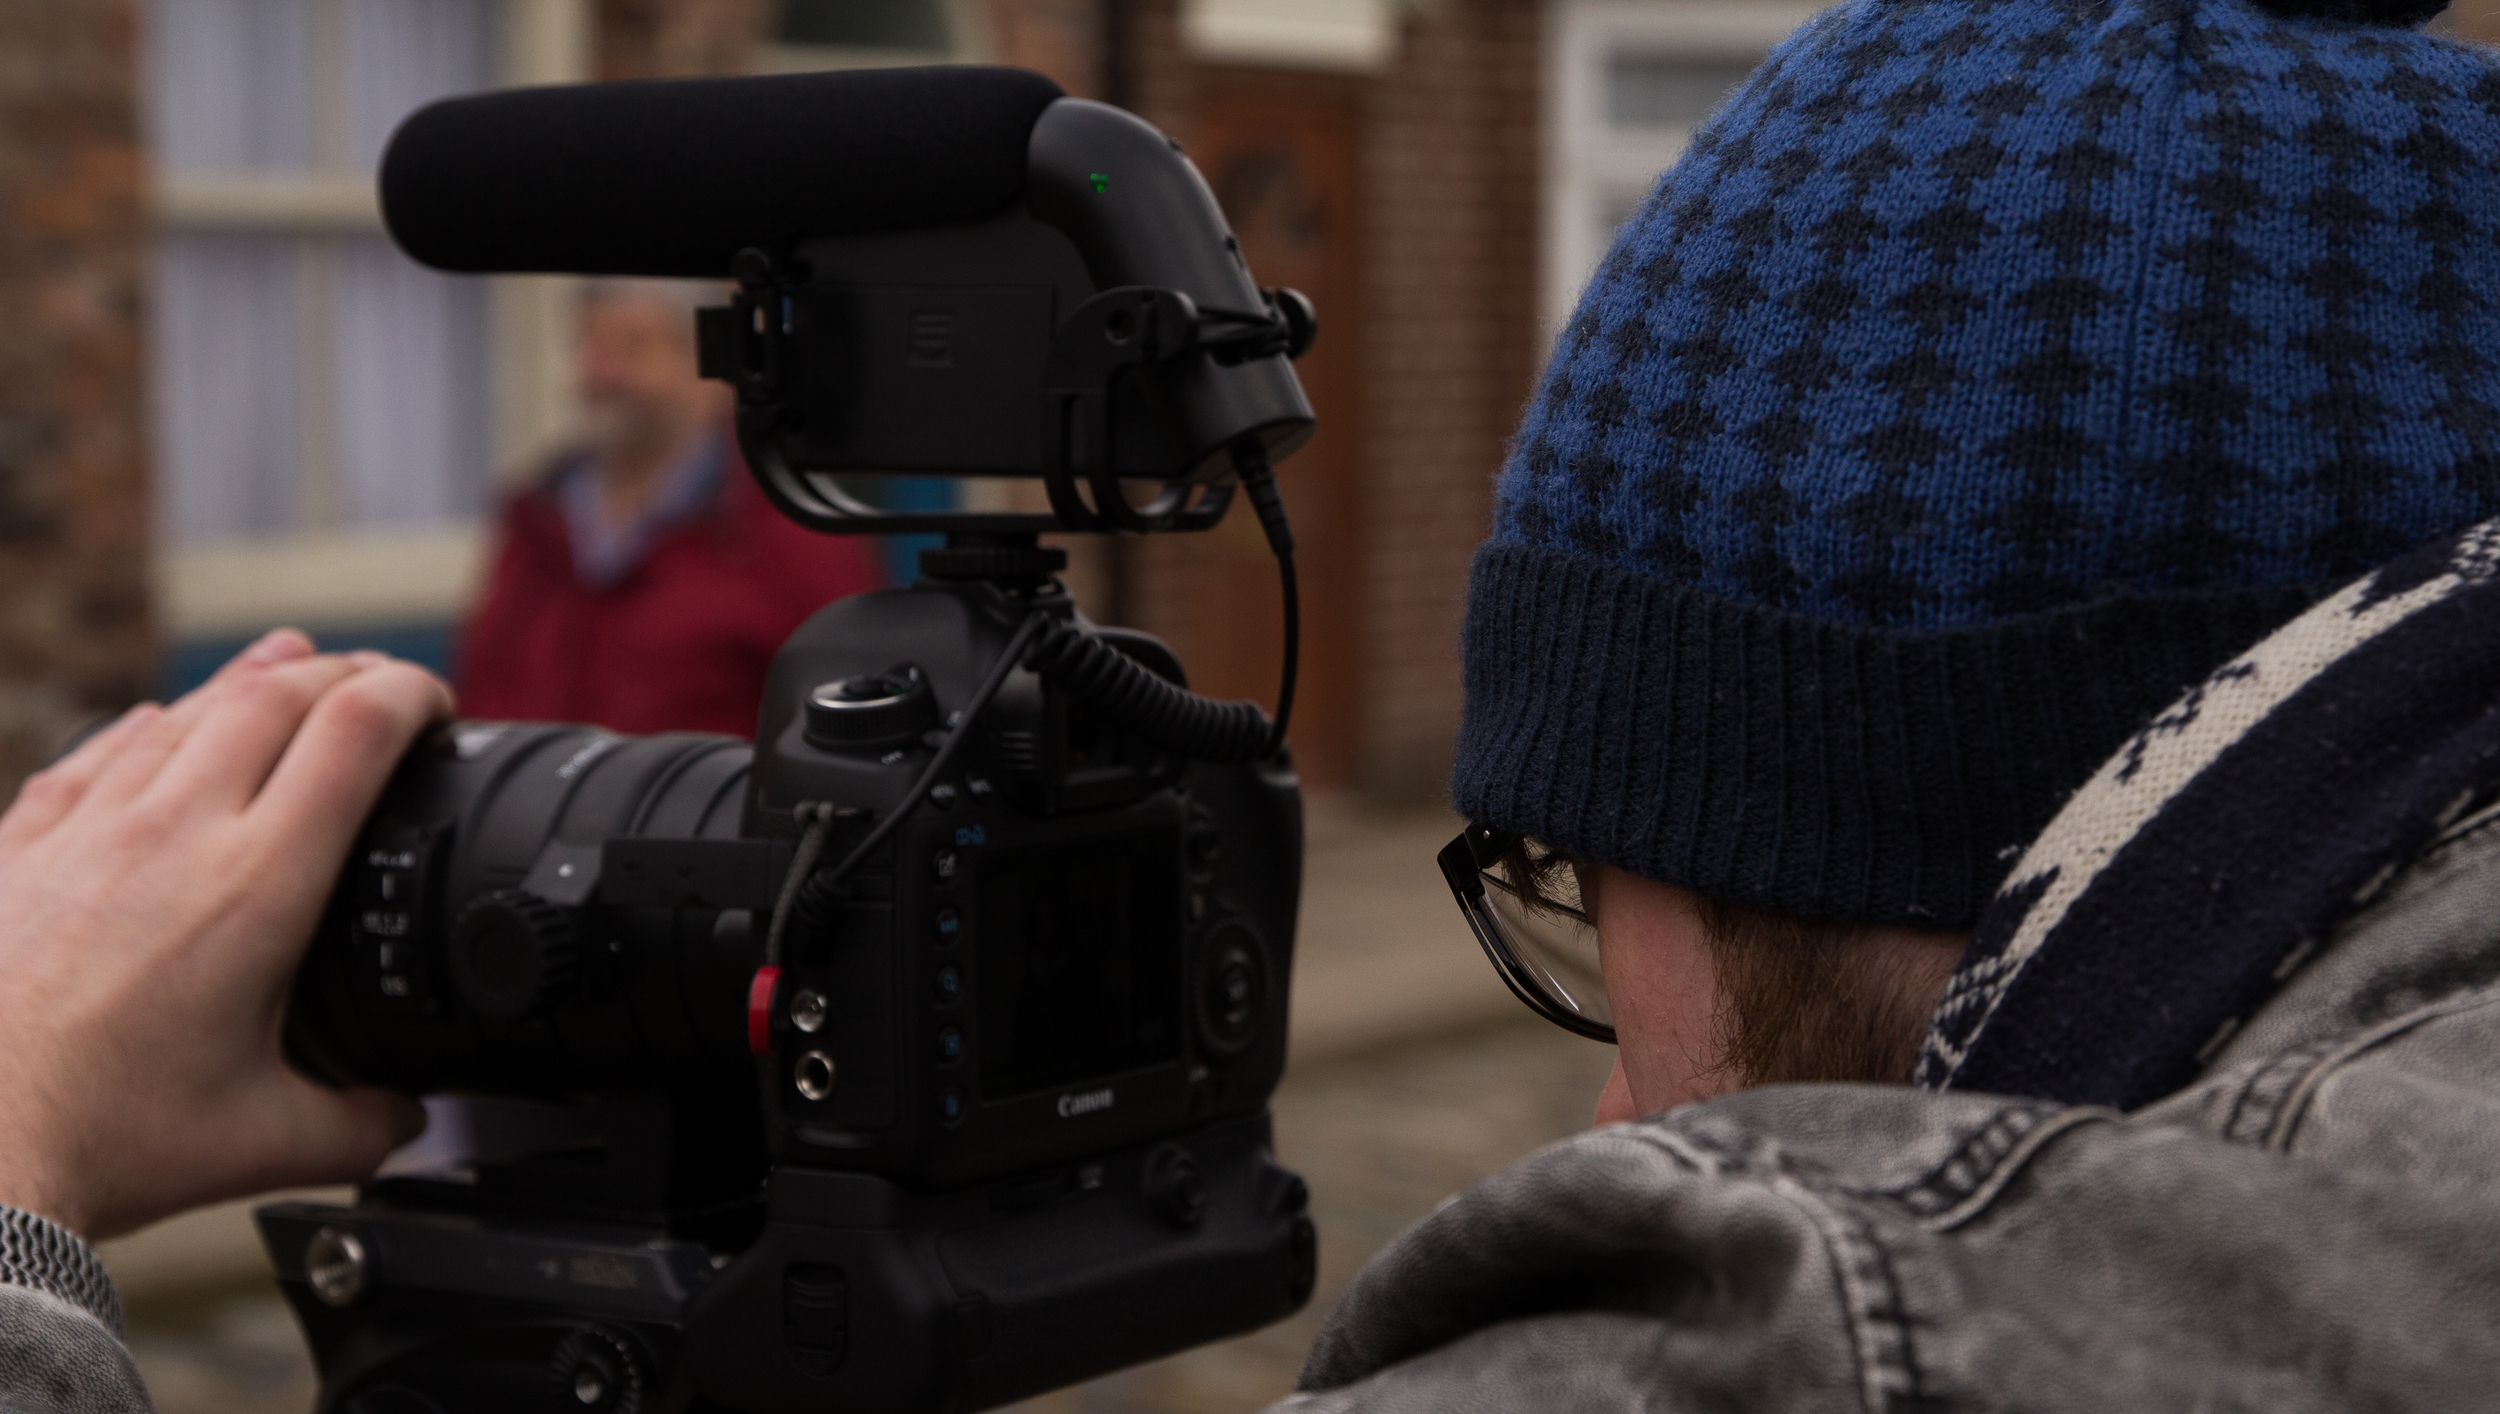
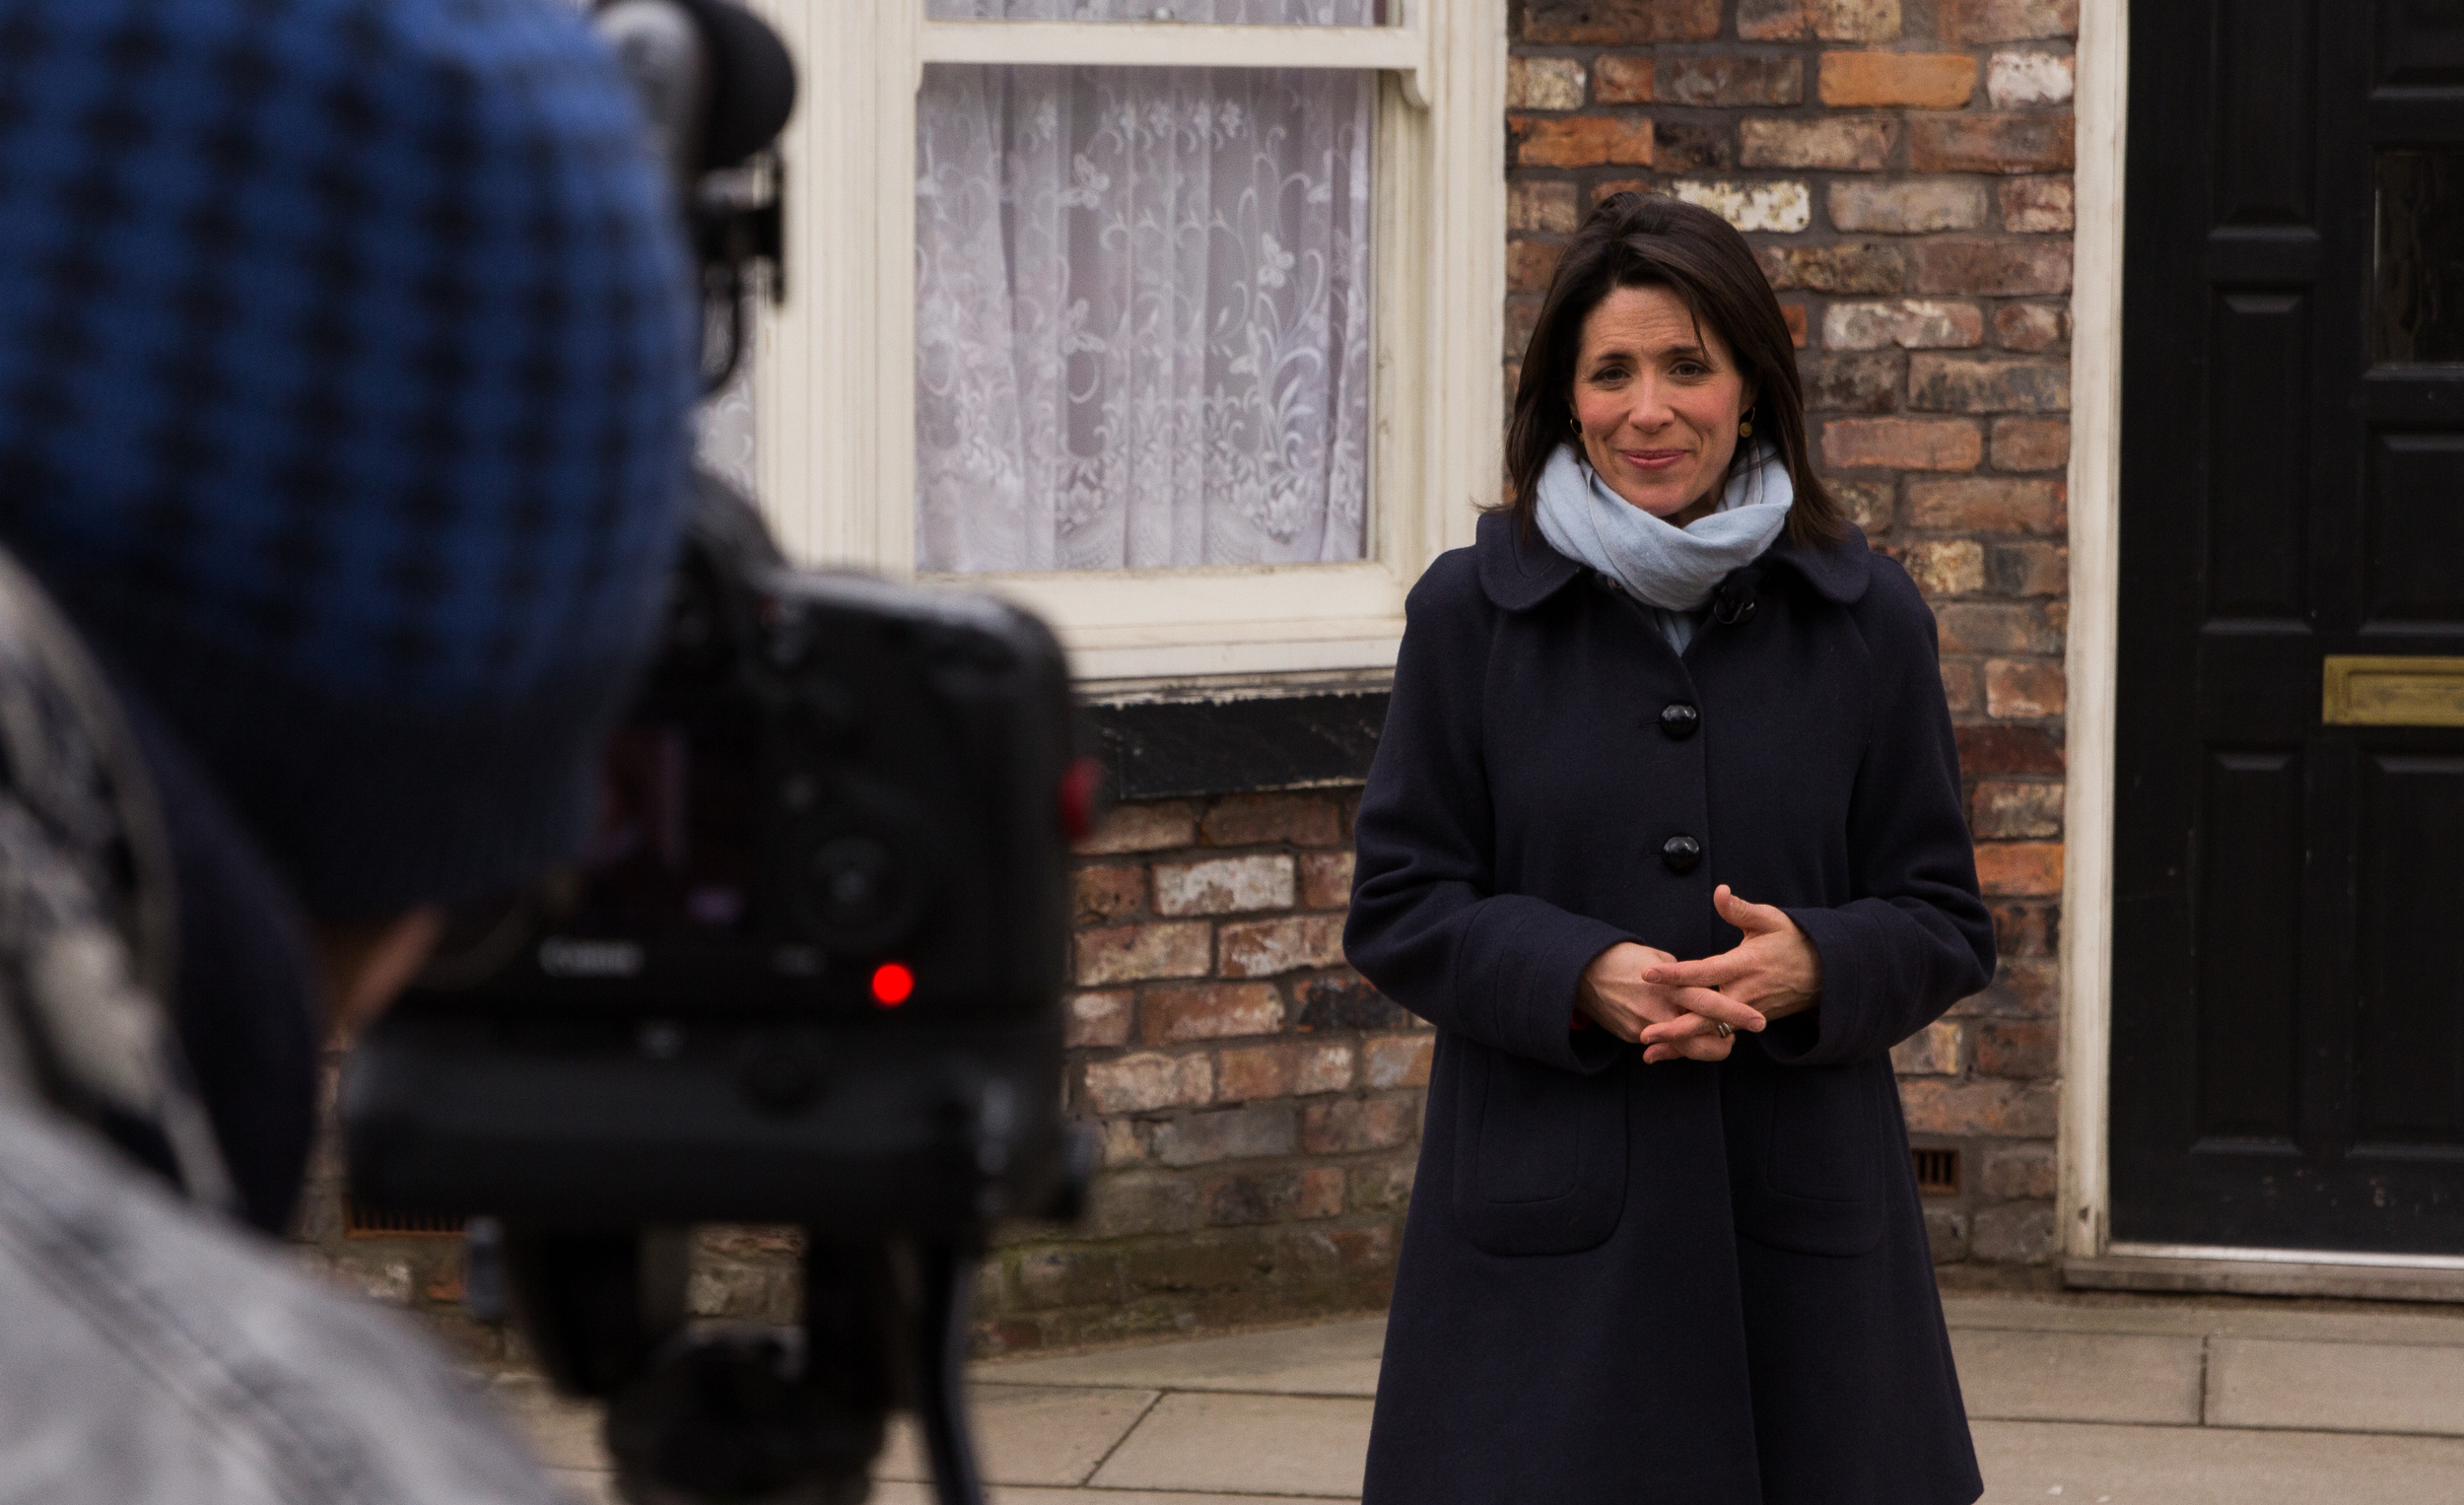
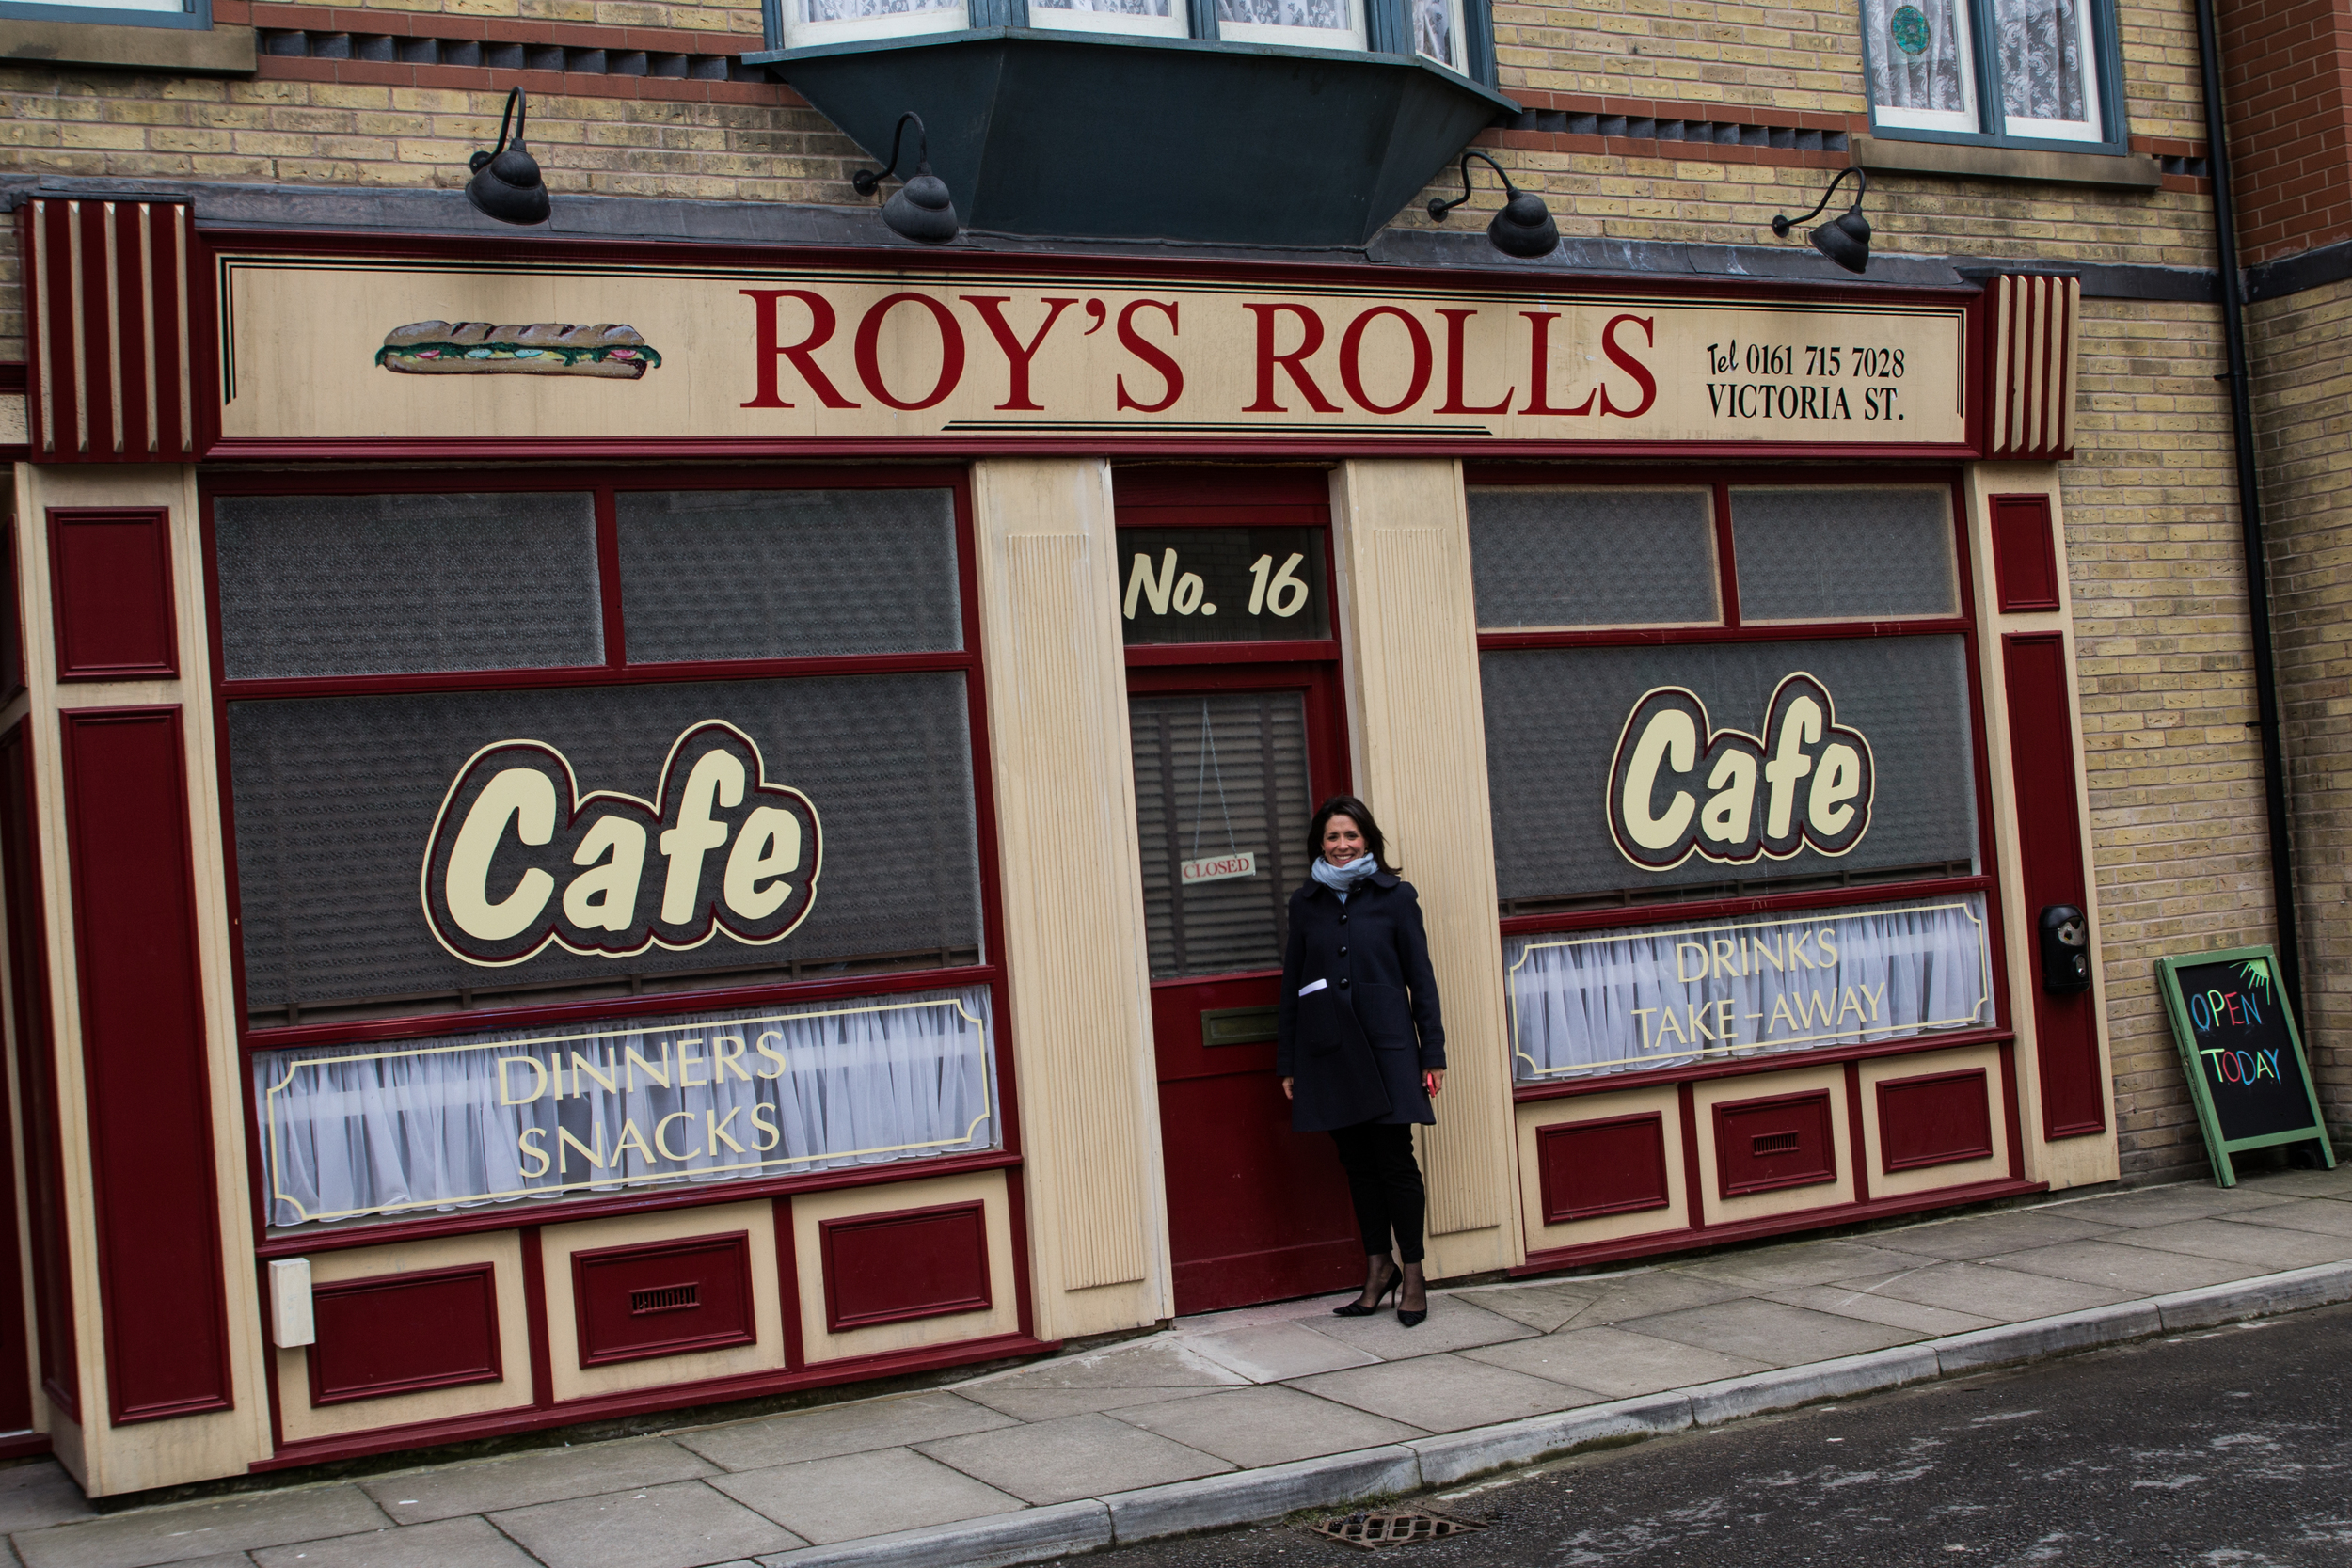
I also shot some more material in the Rovers interior set, which has a new LED lighting rig, in comparison to the other tungsten lit sets. It was impressive being in there, and was much smaller in reality, but we pulled up a chair at one of the booths and started recording the voice overs as the prompter hadn't arrived for the shoot yet!
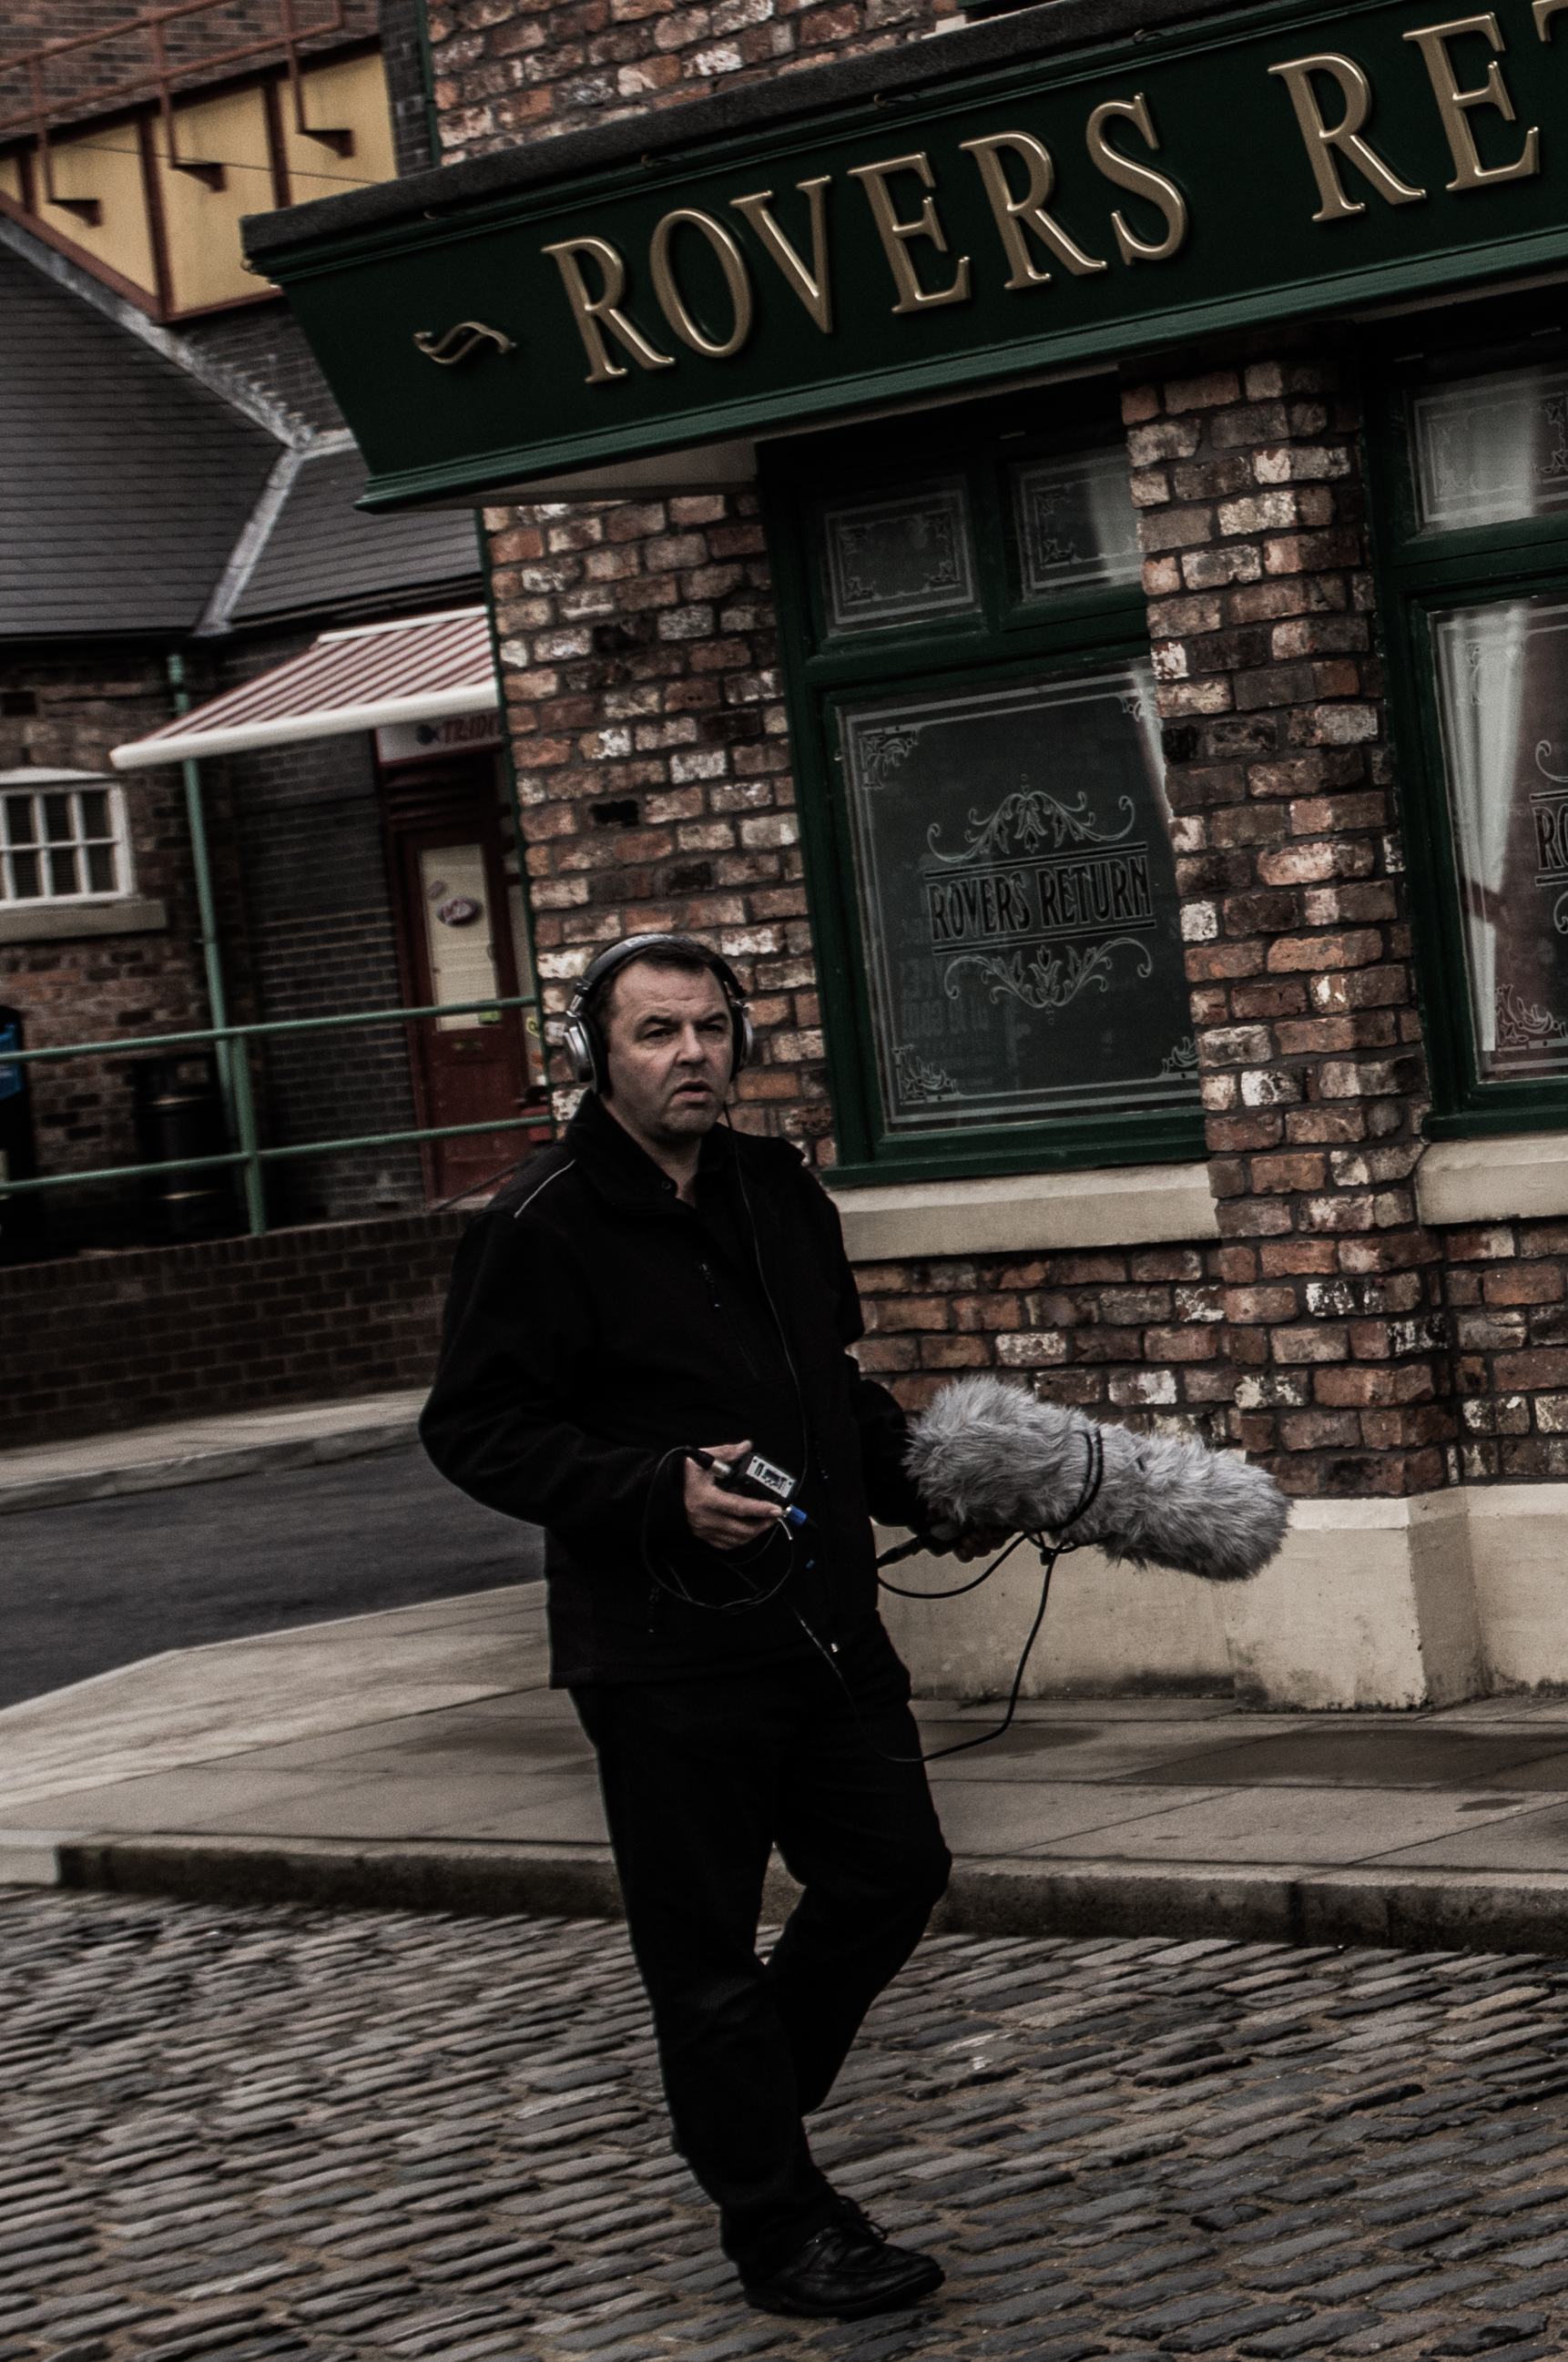
For lavalier microphones, remember to attach them upwards or downwards depending on your subjects speech to avoid pops and hisses. Try to always record a back up audio track too, just in case your plan fails. Here we have 3 separate tracks recording on the H6: lavalier on presenter, gun mic and the mid side mic attachment on the device.
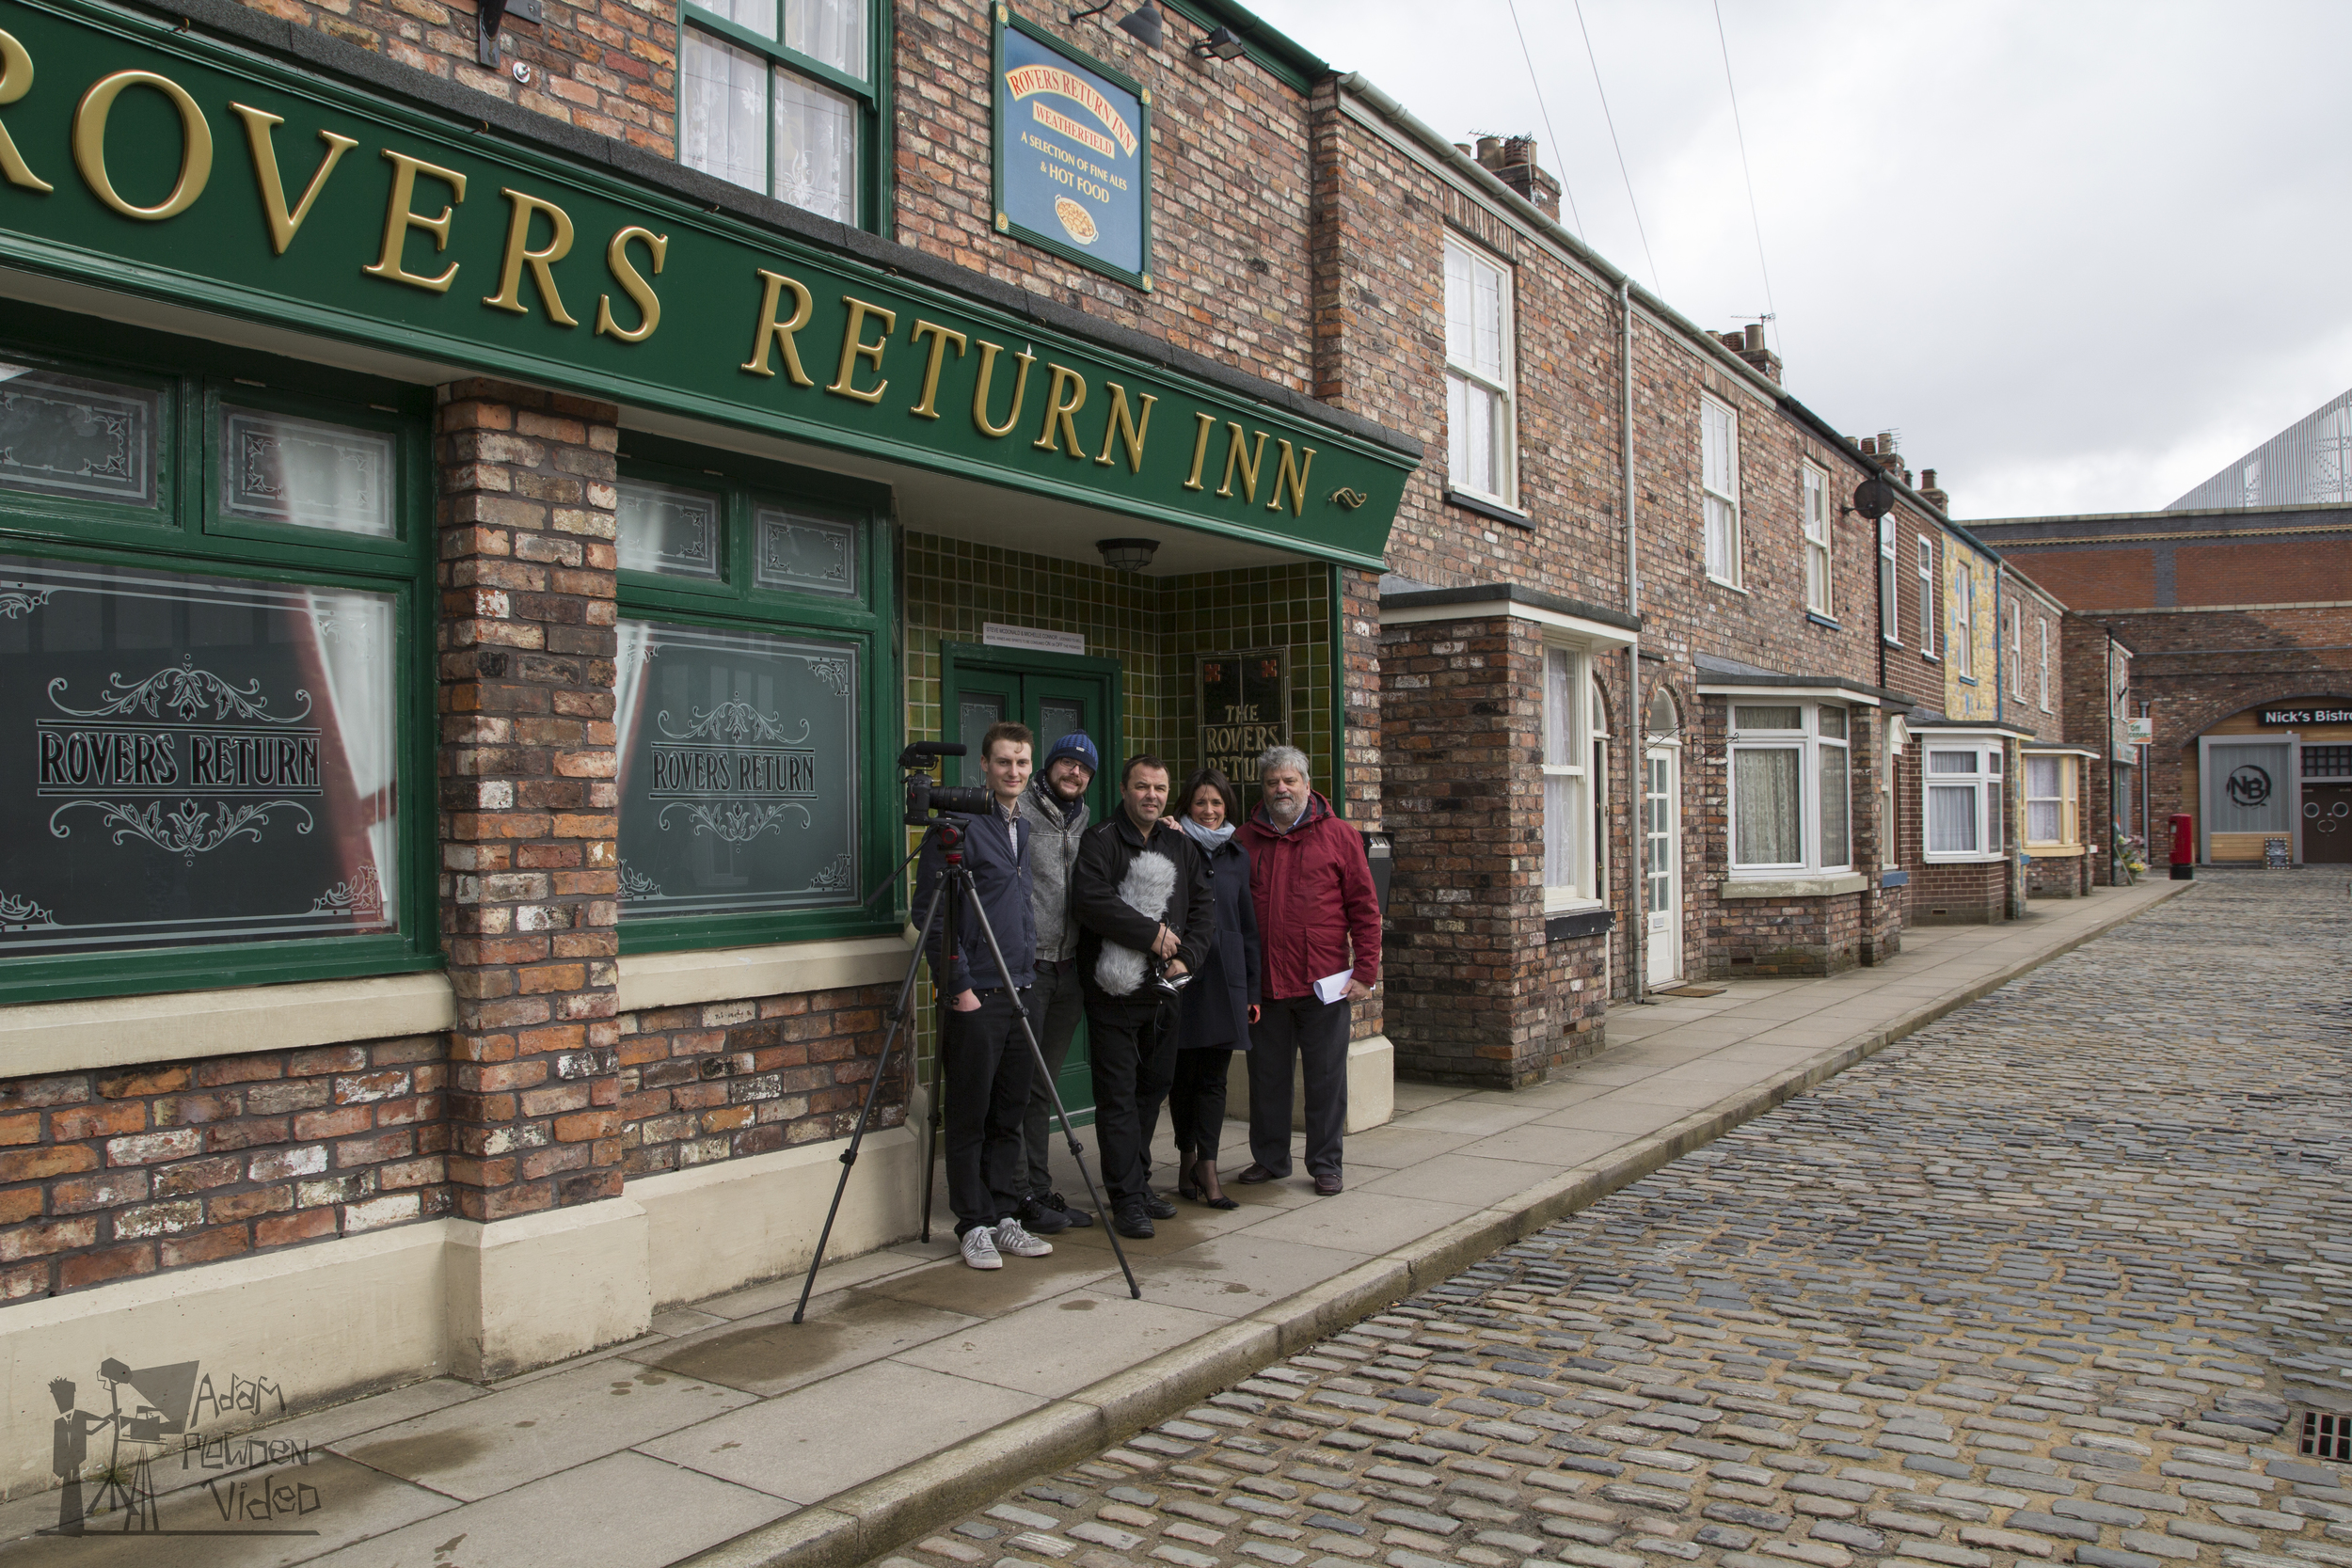
After recording all of the VO, we headed to the lot of the cobbled streets where a scene was being filmed as we overlooked and walked through! I shot some more cutaways of the street and crew in action on the 5D and 70-200. We had a fantastic guide who gave us many technical secrets into the new production facility, it was fantastic!!

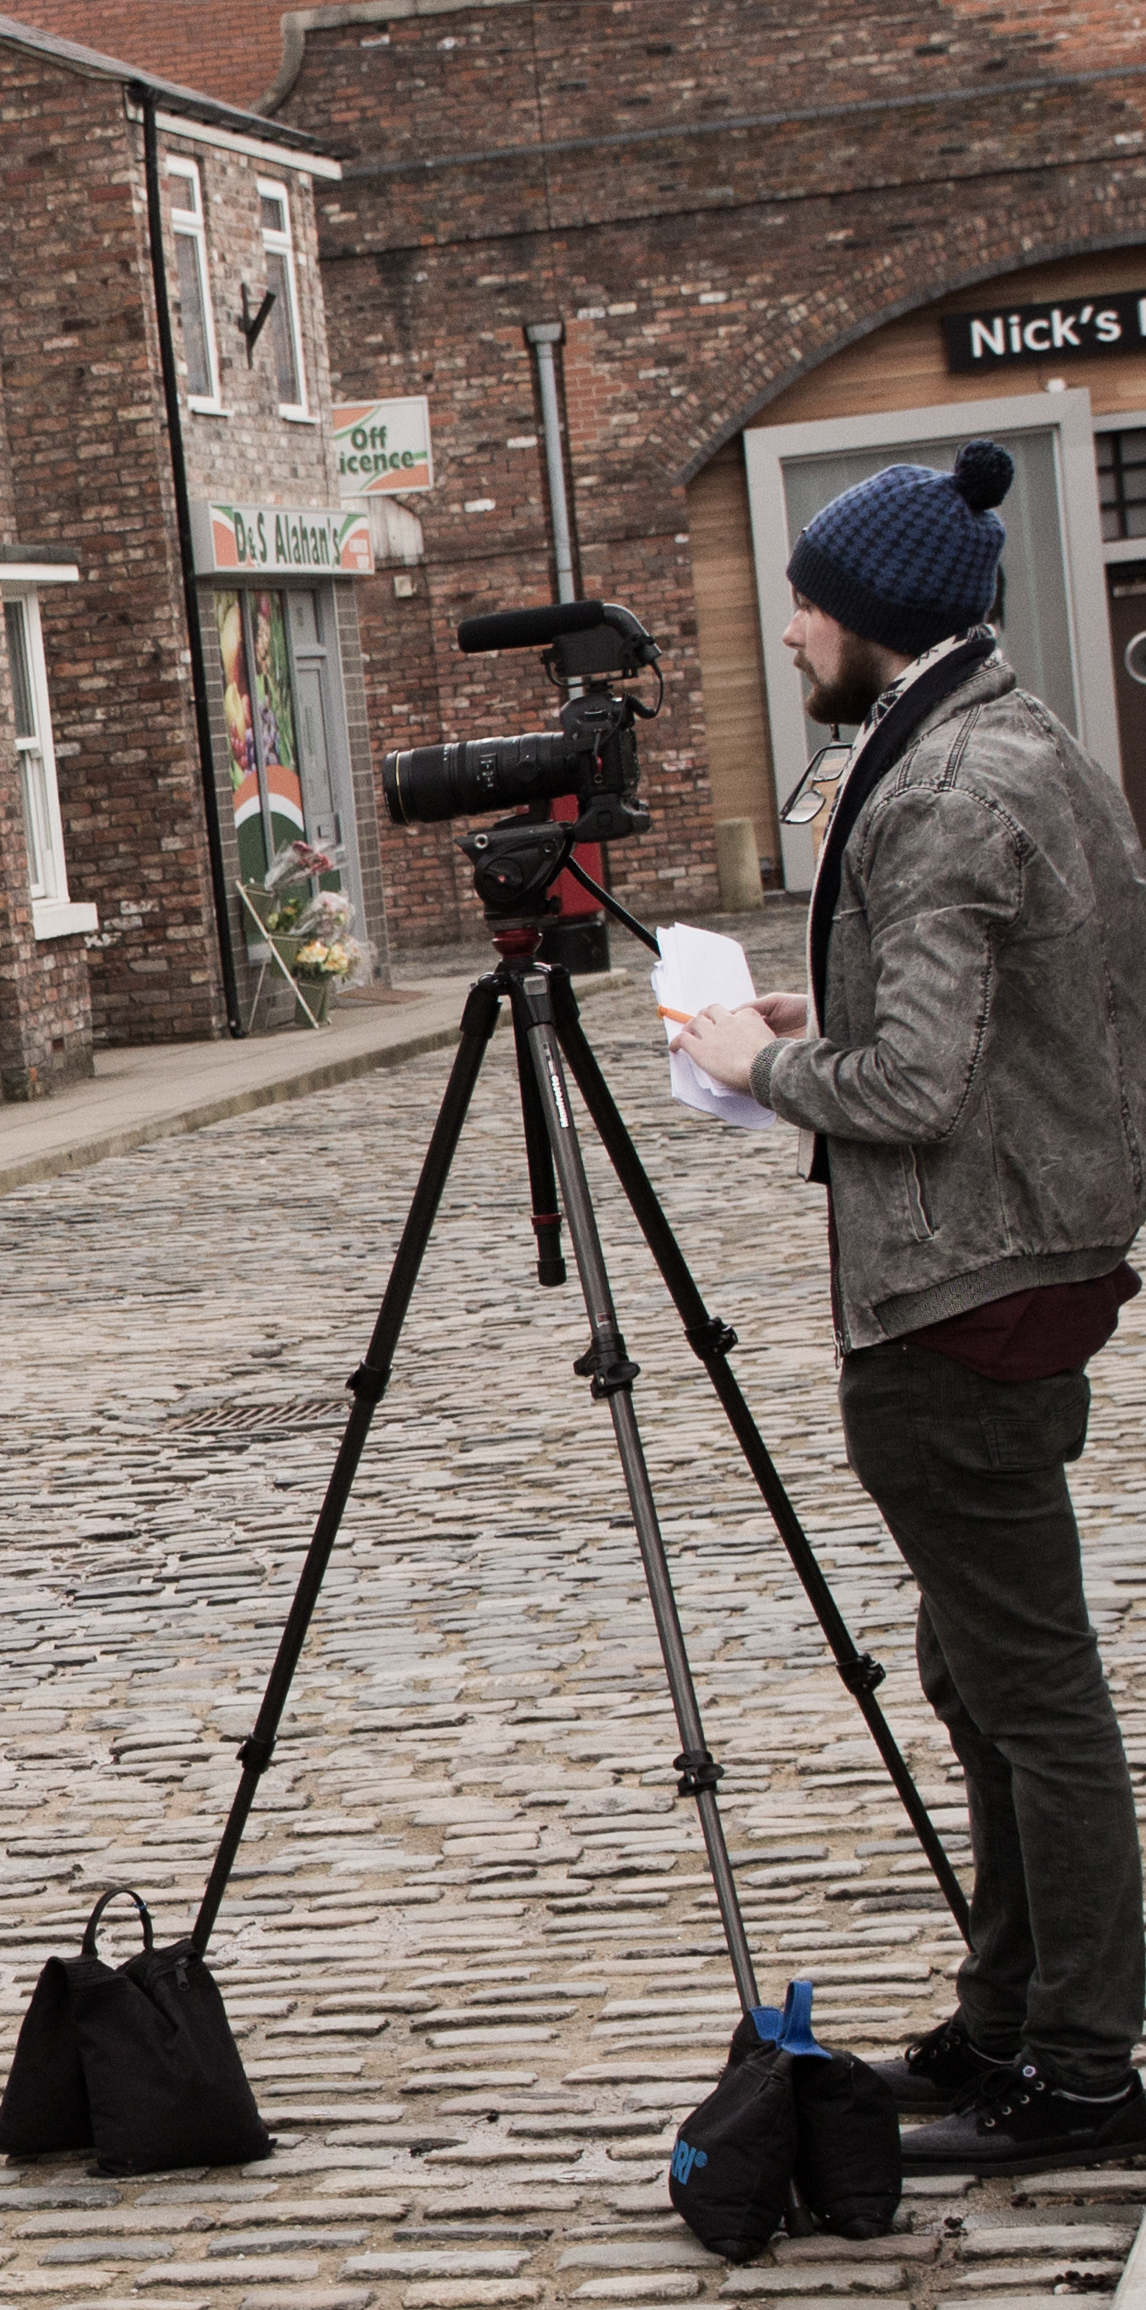
The AutoScript had arrived!!! We quickly got set to putting it together, however John, Glen and myself had no experience in putting one together, so to the internet it was! A few minutes later we had the prompter up and running, the camera set, working lights on, microphone levels set and were ready to roll.
As you can see, the normally small 5D and 70-200 filming combo goes out the window when using a prompter. Very front heavy!
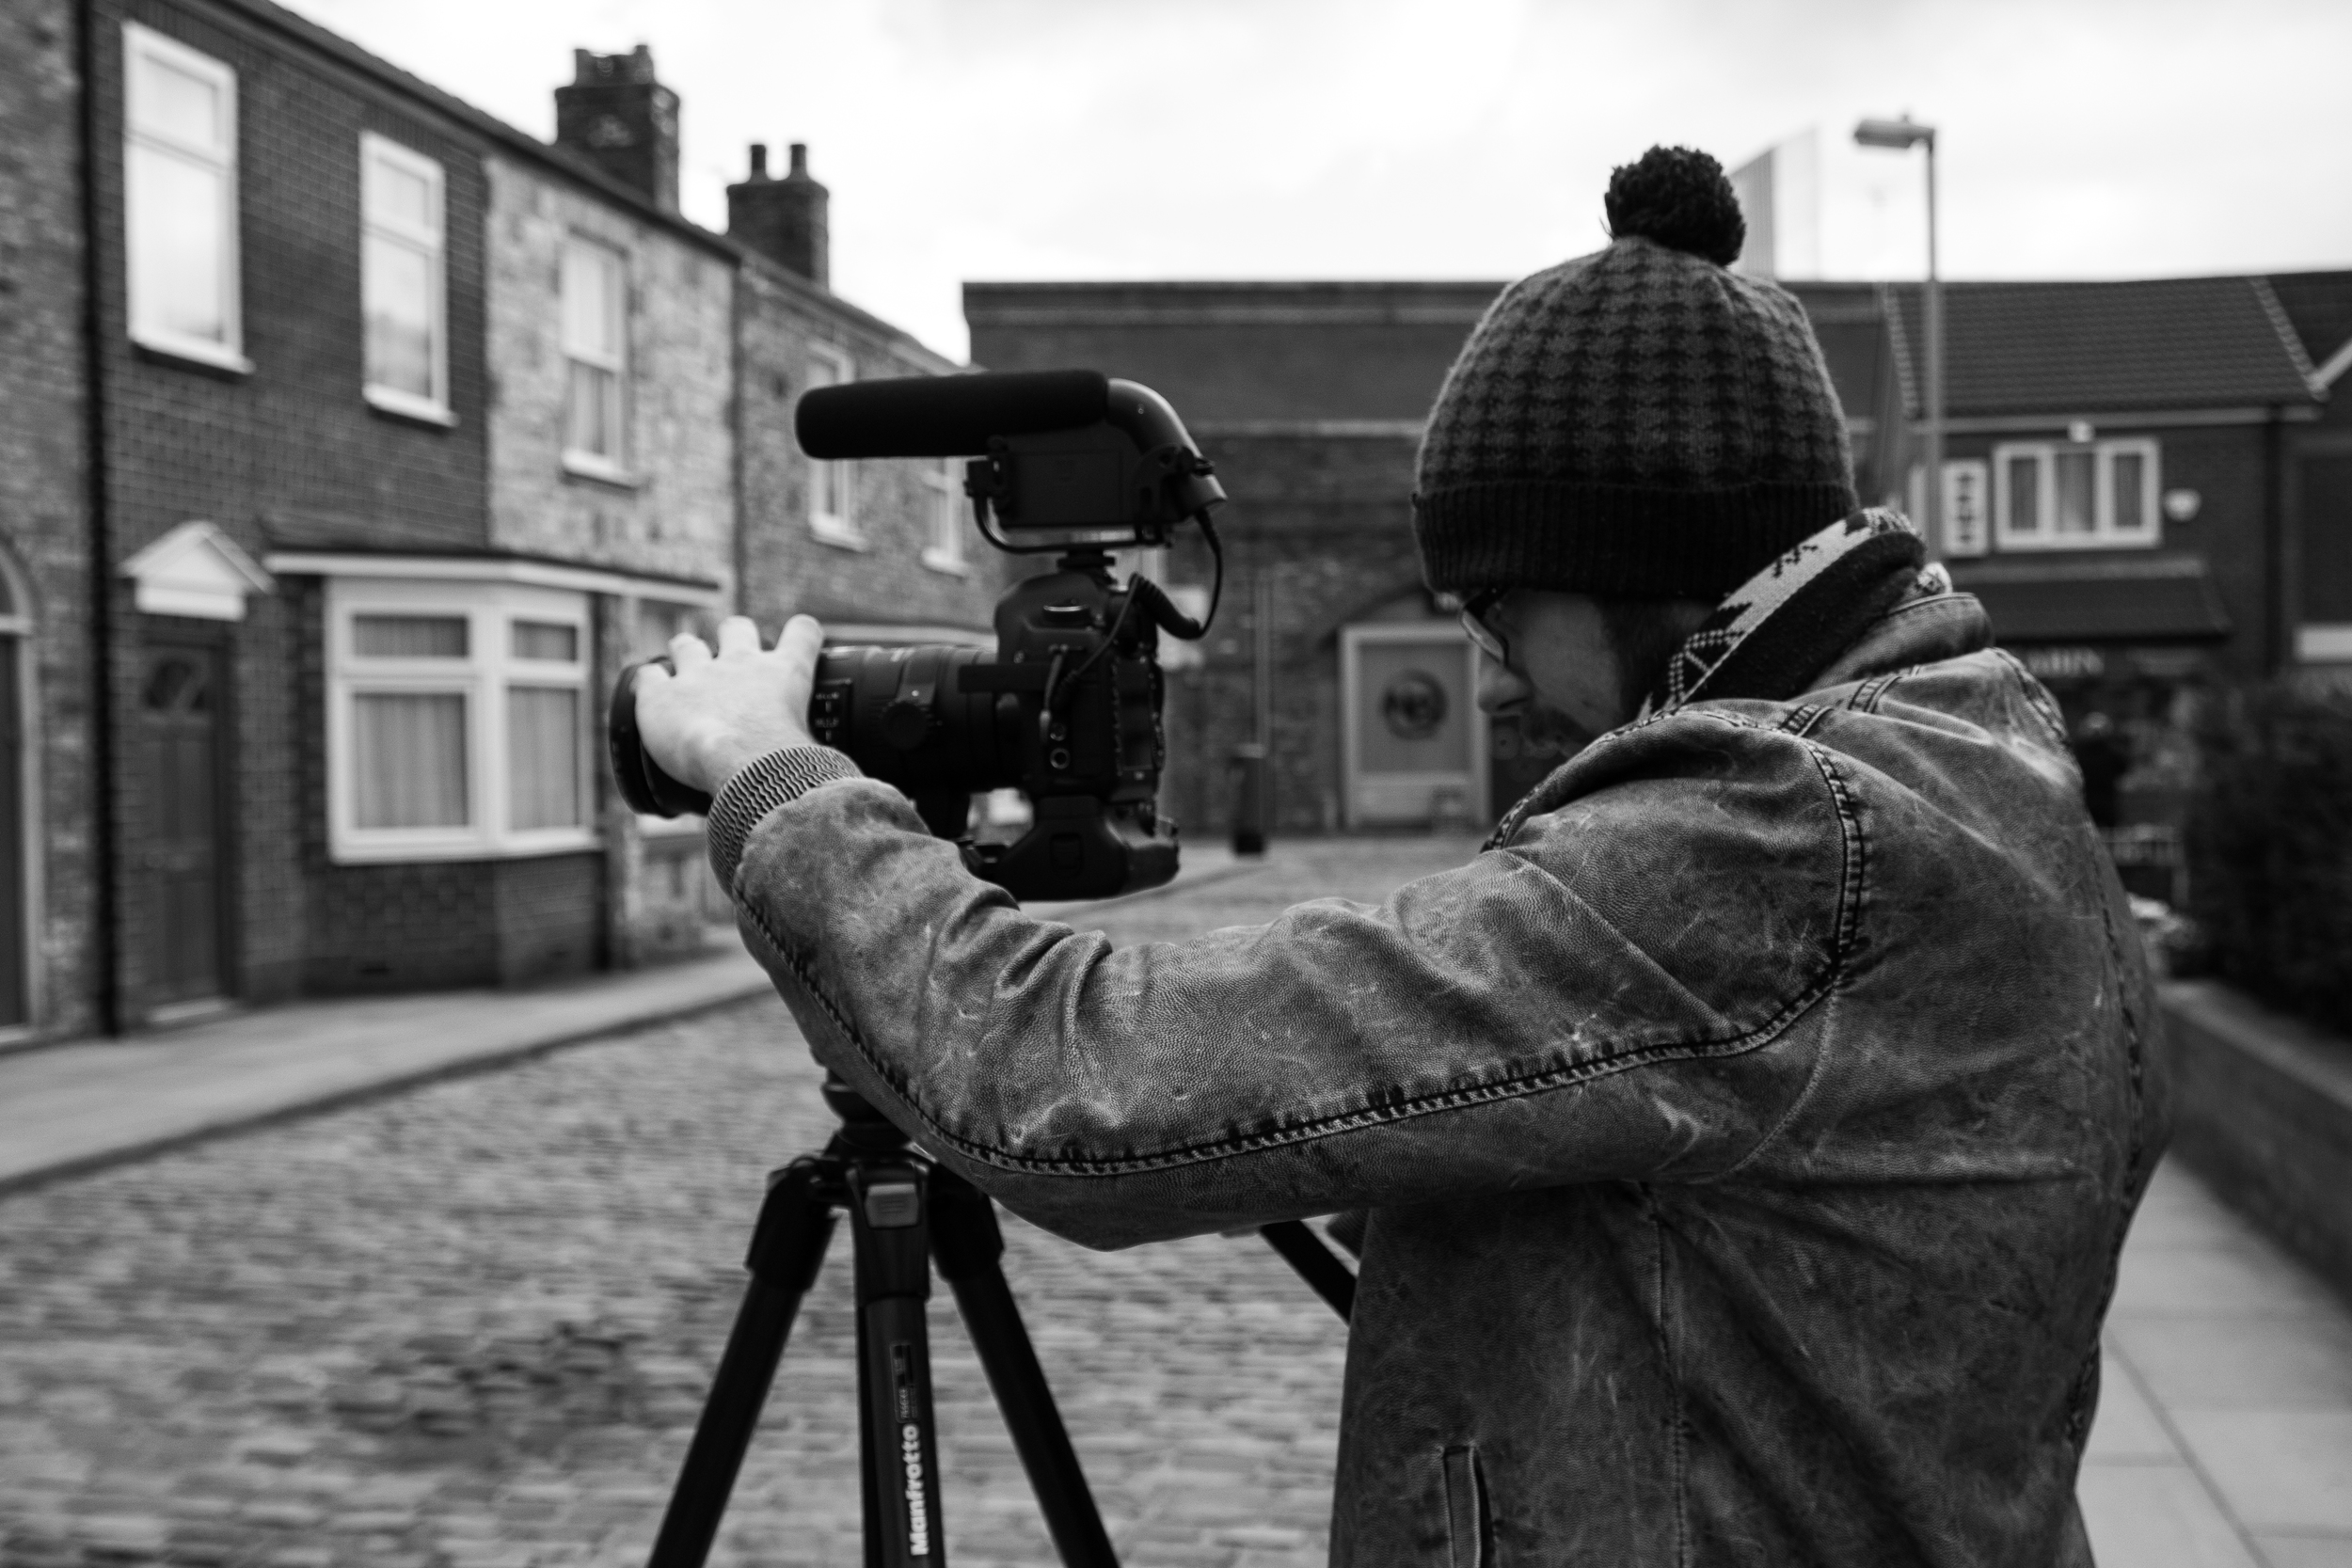
Our filming took us all around the studios including Roy's Rolls and the Rovers, showing how a drama program is produced. Our access also allowed us into the production galleries, editing and grading suites for more 'piece to camera' filming as well as capturing plenty of GV showing the equipment in action.
We wrapped up day 1 late that evening which allowed us to capture most of the content for the video: we shot scenes 1 through to 7, great progress and took the pressure off day 2 as we didn't know what access we would have.
When we got back to the hotel, the importing and backing up began. I like to play the 'guess the gigabyte' game, simply guessing the total file size of the captured material. Although we were working loads throughout the day, I think the day 1 total was around 60Gb all in all. I backed up onto 3 drives that night just in case.
Day 2
We started a little later to recover from the long day before, enjoyed a big breakfast, plenty of coffee and headed over to the studios with our suitcases as it was our last day. We had access to the edit and grading suites in the morning, where I shot plenty of B roll just in case, as it turned out we wouldn't get access to the finishing or dubbing suites so this came in handy.
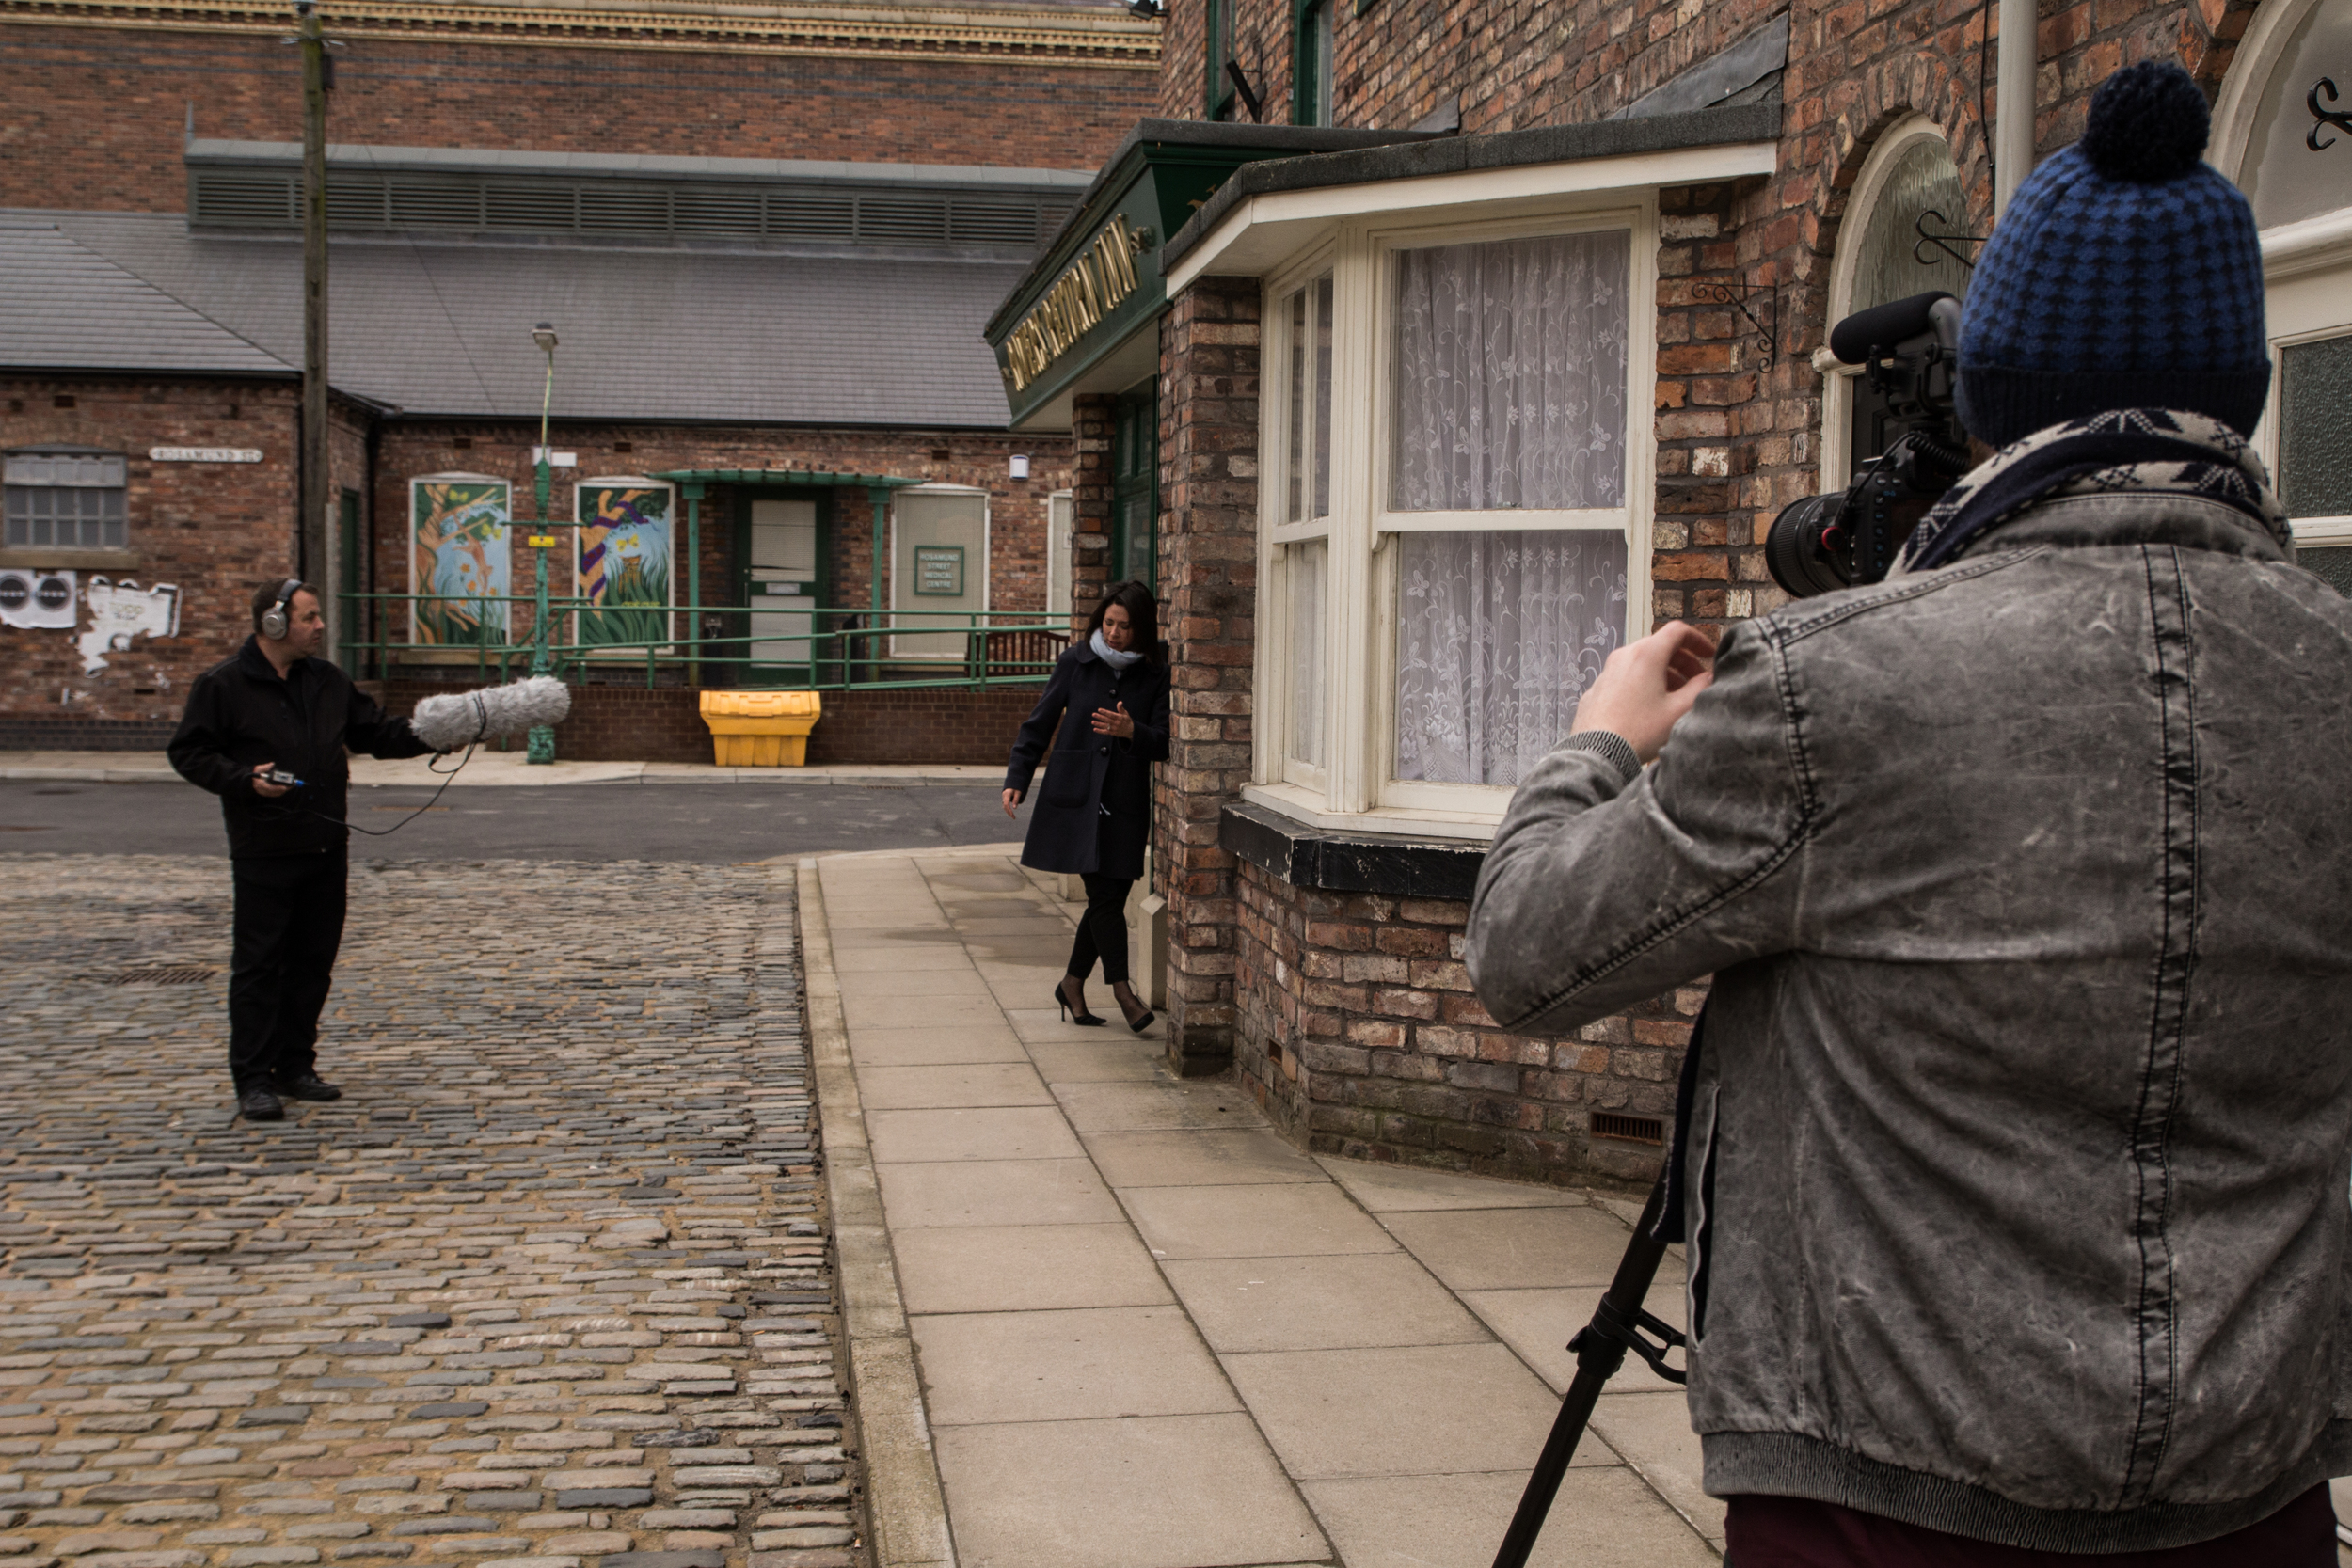
As Corrie filming had finished on the street, we quickly went out to shoot the final 'conclusion' scene of the training video outside the Rovers and on the cobbles. The prompter required a power supply, so we de-rigged it for this scene, I used the 5D and 70-200 only for these shots. Most of the time I shot at around F/11-16 as it was rather bright outside, but it also keeps some of the background visible instead of blowing it out with bokeh.
The machine room was a challenge due to the heavy air conditioning for the racks and racks of networking, storage and server equipment to keep it cool. Not particularly for the vision, but John did a great job of operating the H6 and monitoring the audio with so much background noise. The gun mic was out of the question, so we captured solely using the Rode Lavalier mic, which worked well for this environment.
As a back up I also captured plenty of B roll, and John captures a voice over from Georgie of the machine room scene just in case the native sound was too distracting. Luckilly, the Rode lavalier coped well!!
I had access to the working production galleries as scenes were being recorded under Tony Warren, Coronation Streets award winning director. It was amazing to watch him and his team work! I'm not allowed to talk about what I saw being captured though :)
That was the last filming stop at Corrie before we departed, saying a massive thank you to our guide and staff at the facility who were so welcoming and helpful. It was a breezy walk back to the Holiday Inn, as I thought I had lost my car keys, before the very long drive home!
The team did a fantastic job over the intense two day shoot, it was Glen's first job operating a prompter and although it was a challenge putting it together he quickly picked up the operation. For me, it was awesome seeing the technology behind a drama serial that captures its programs like live television. Being a completely new facility, the studios had brand new vision mixers, racks, lighting and sound control which was fascinating to see and learn more about.
Highlights/reel of the Coronation Street video shoot coming soon!
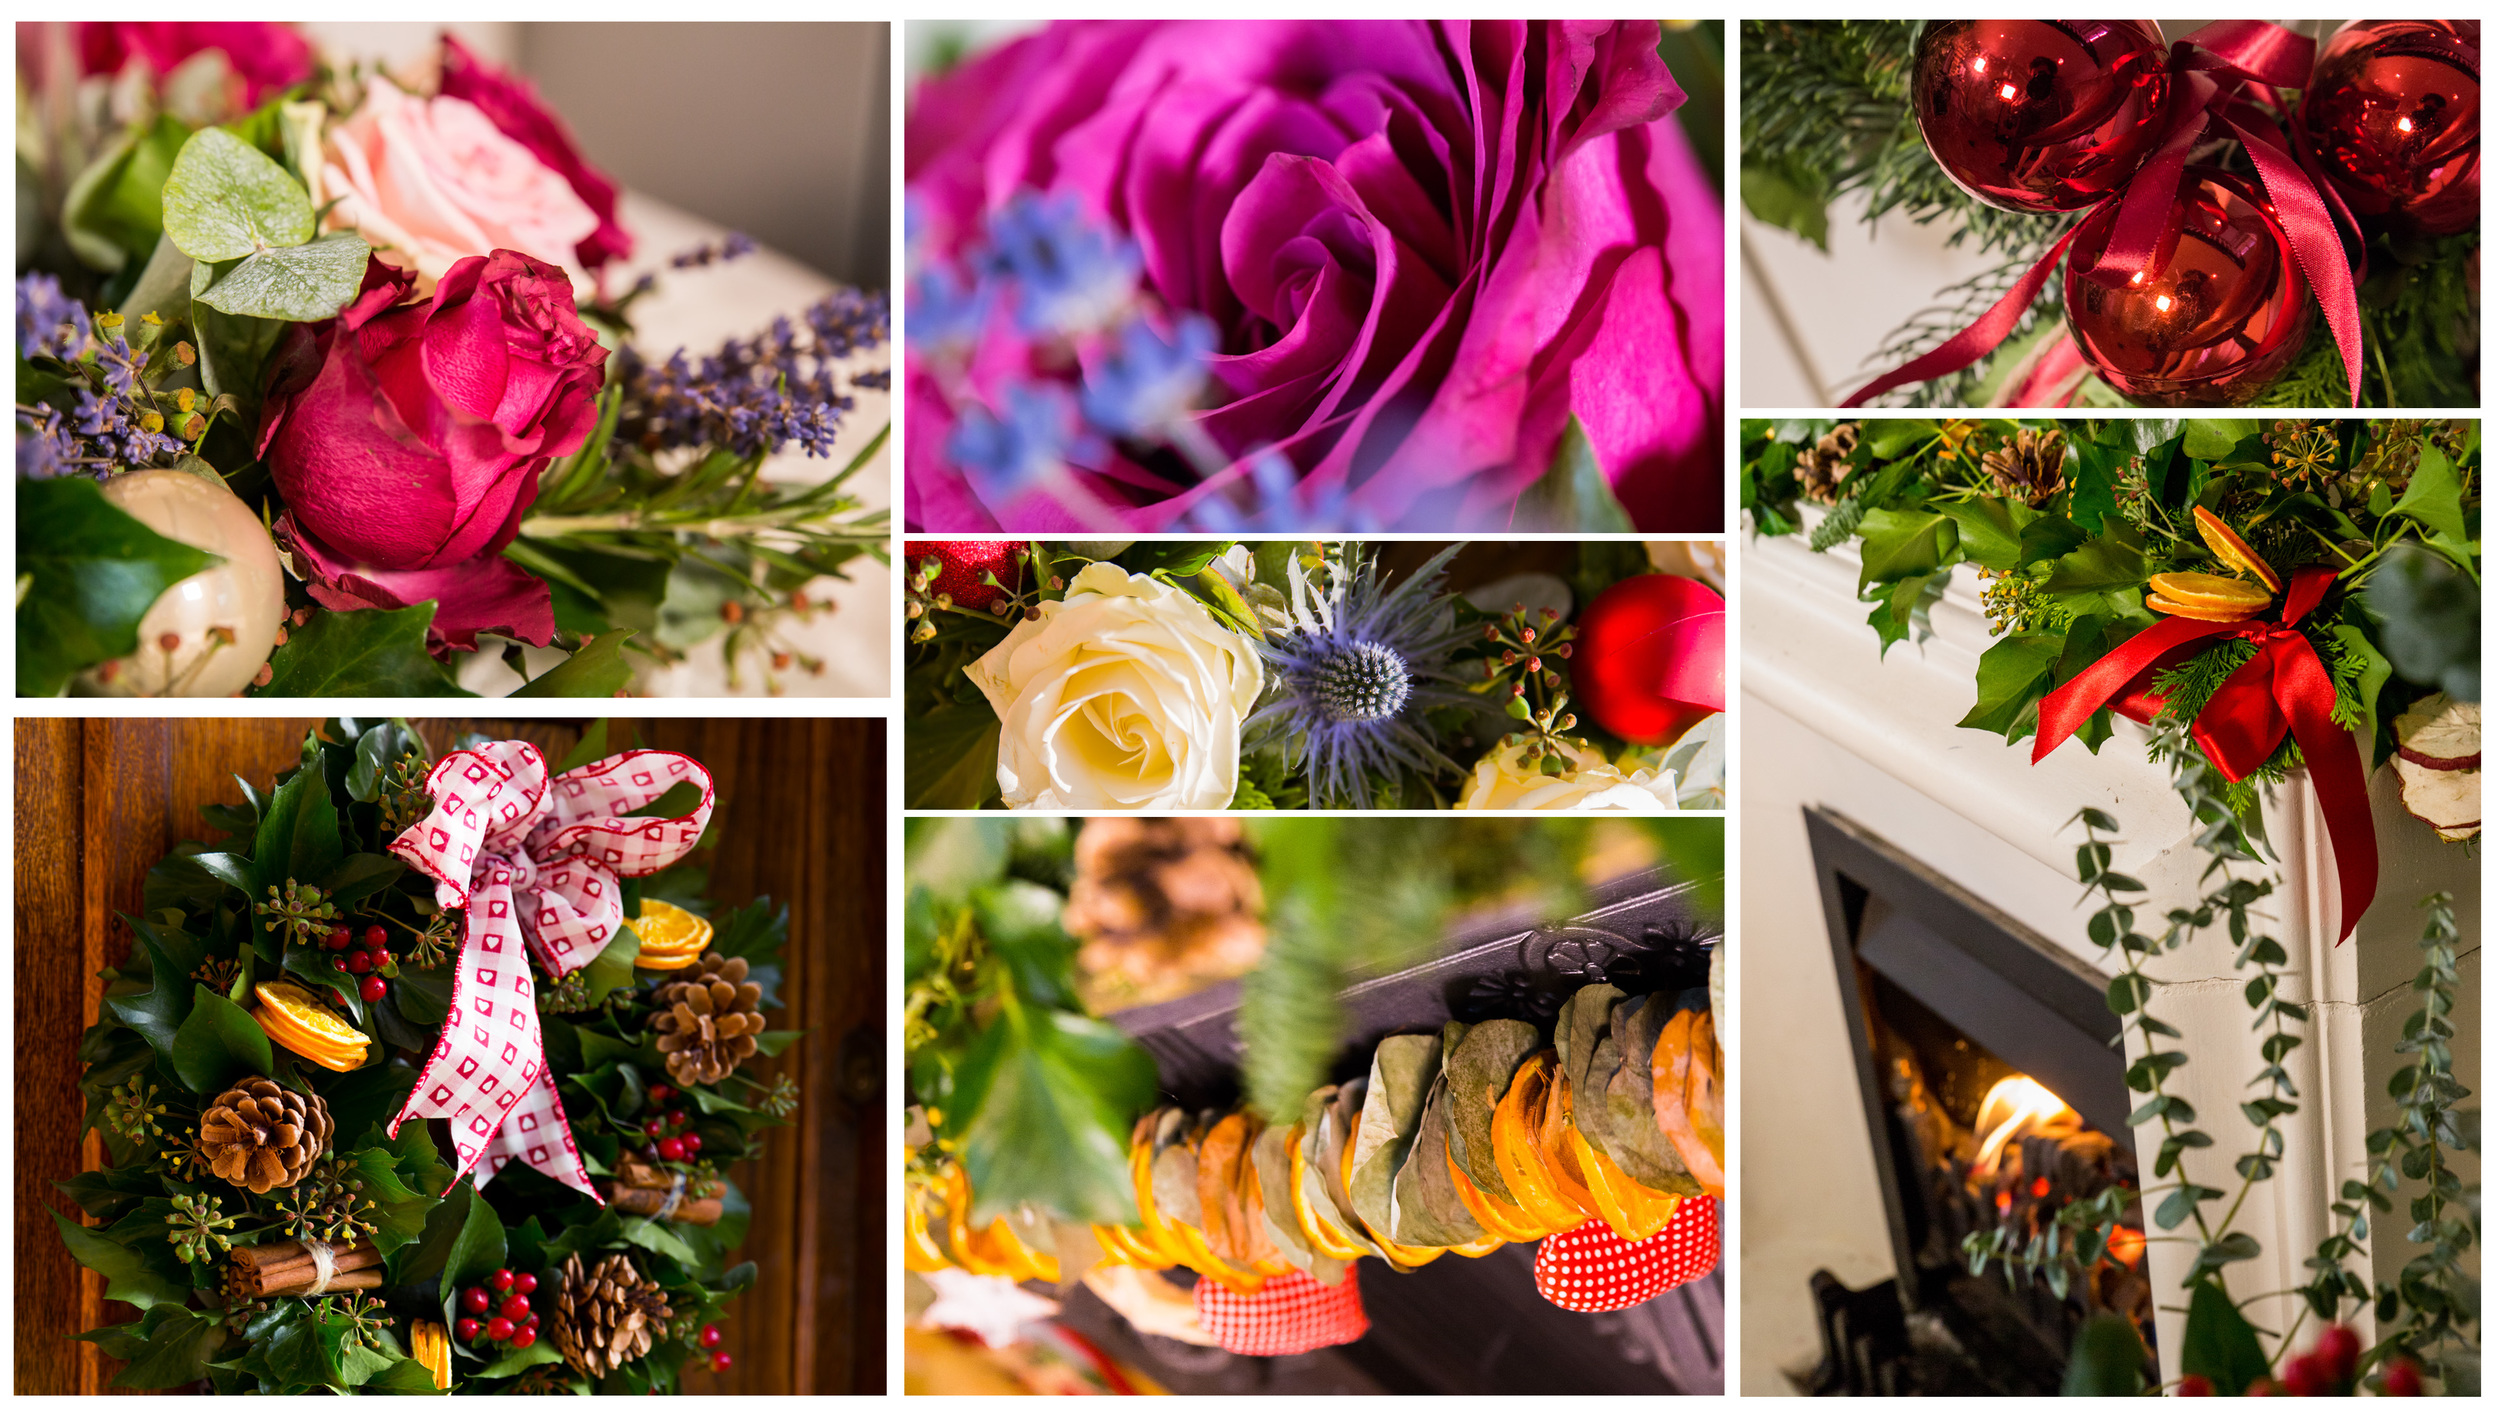
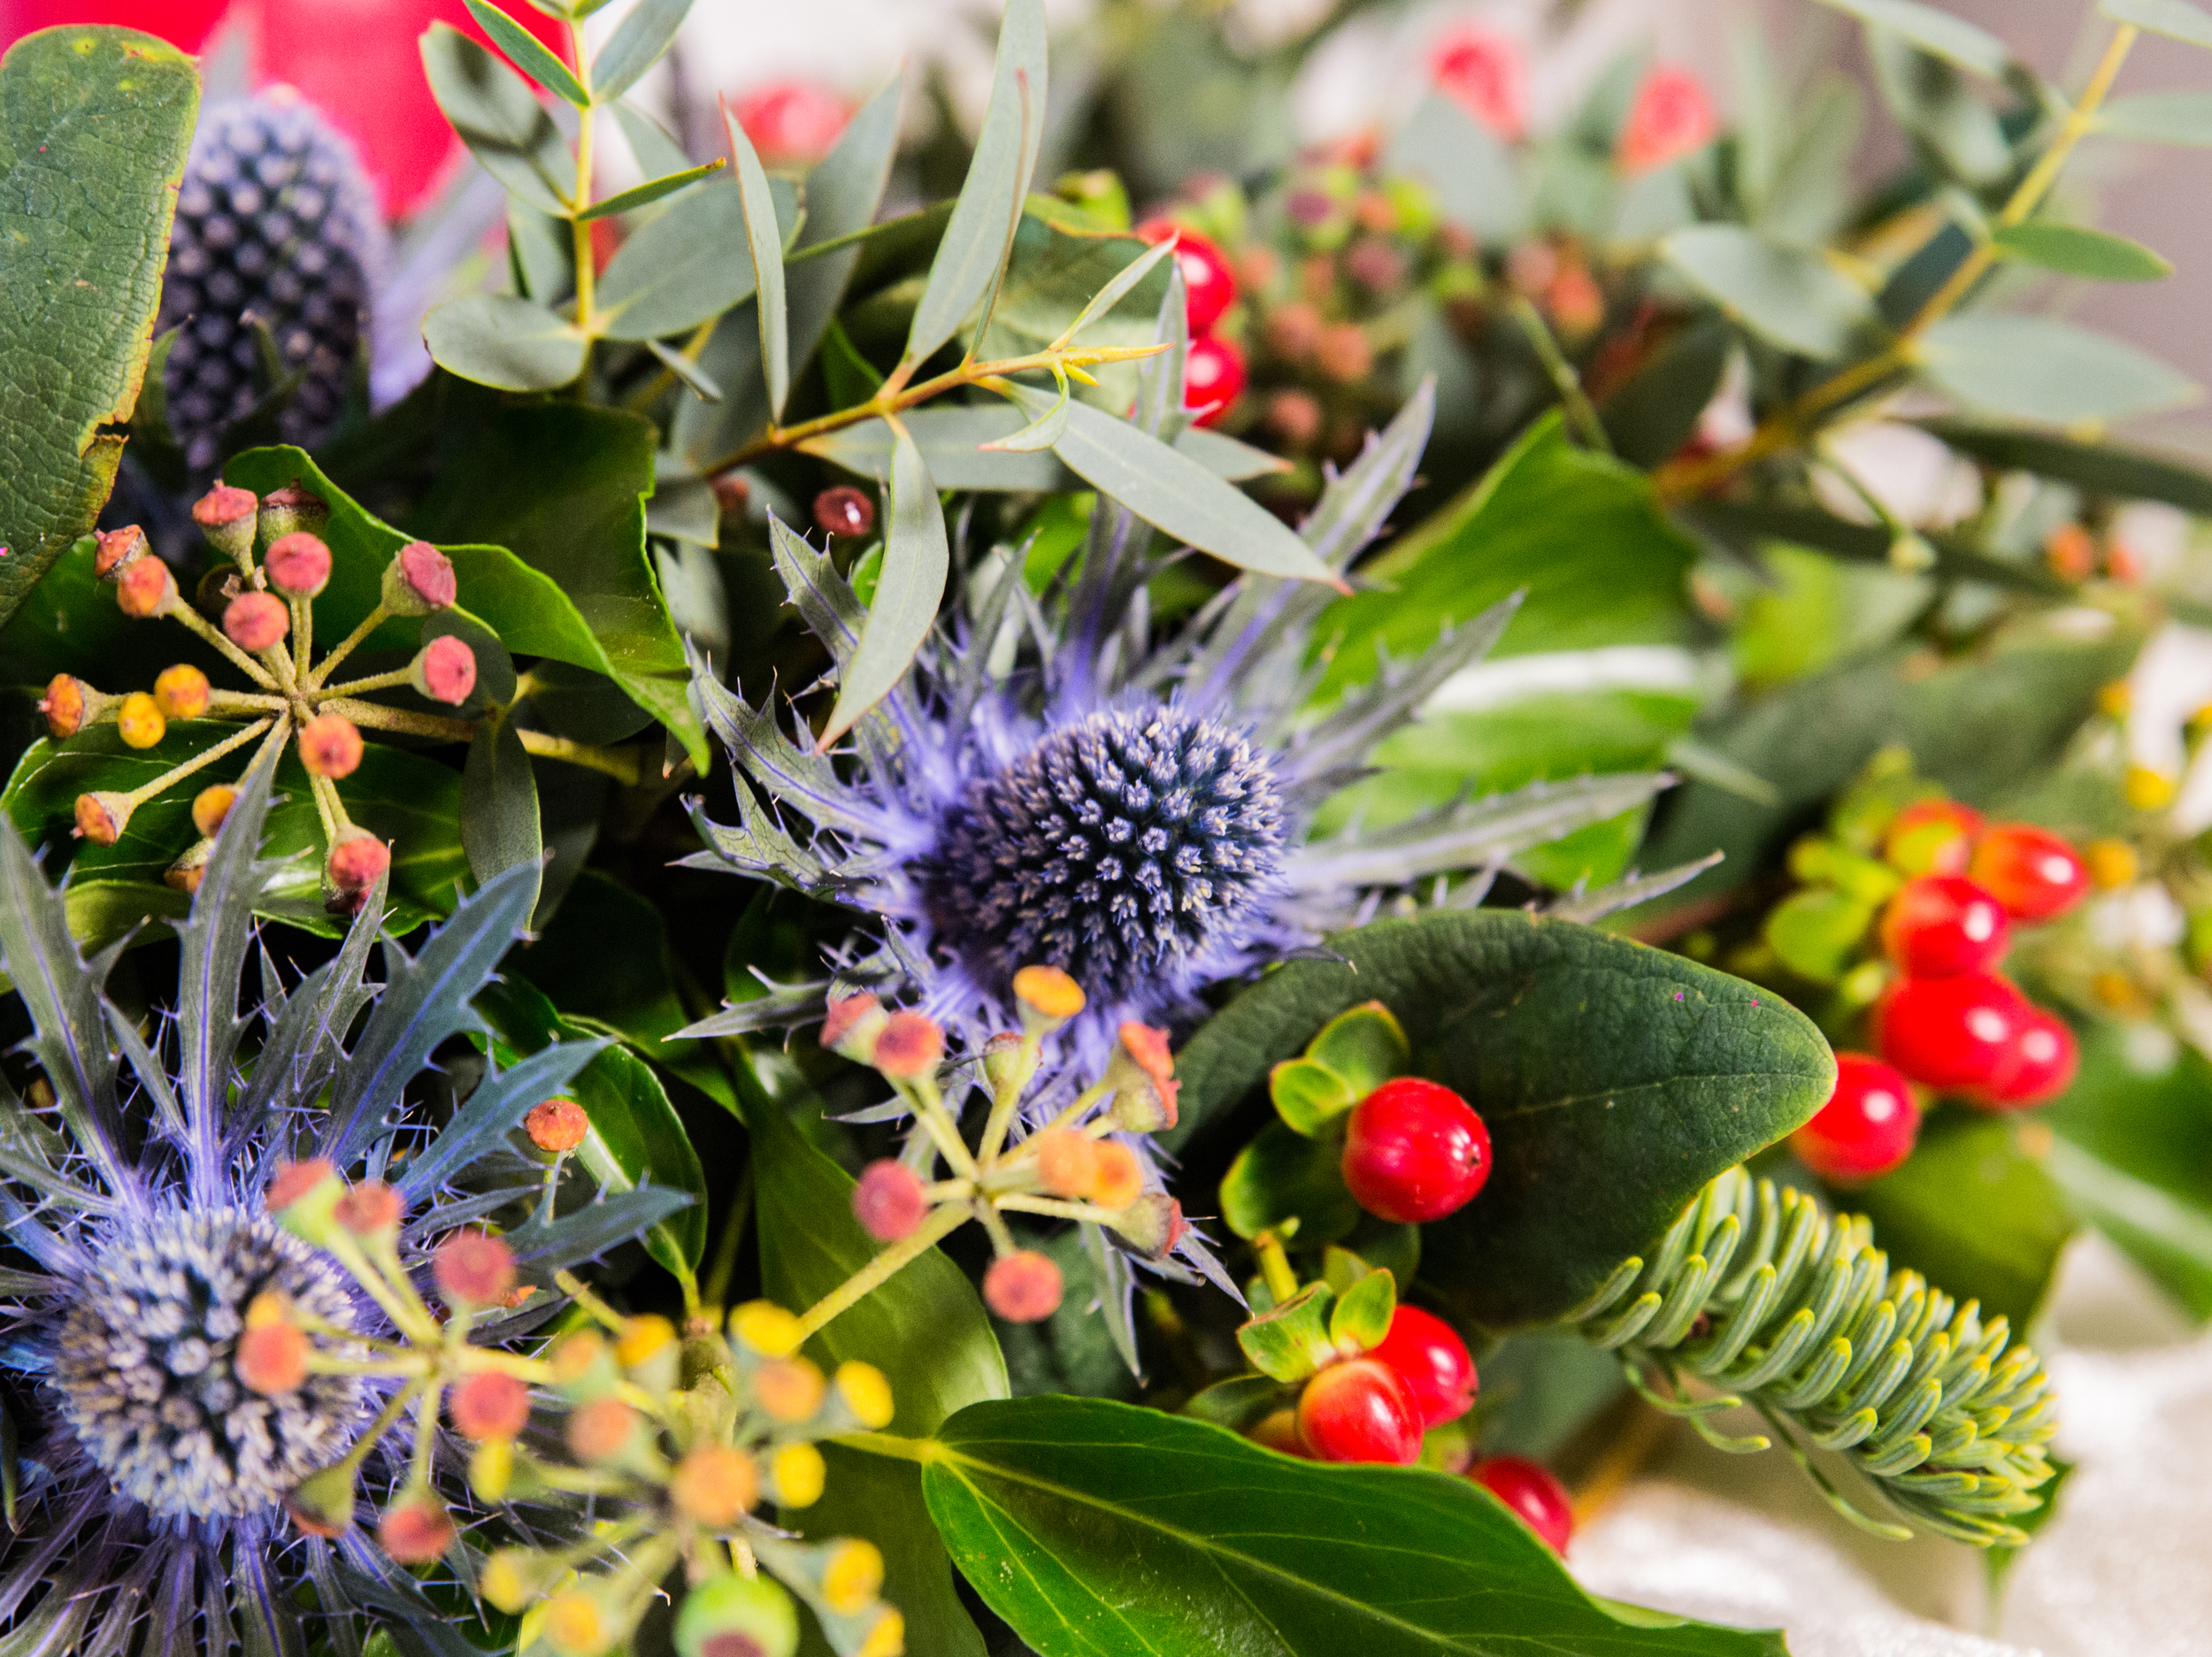
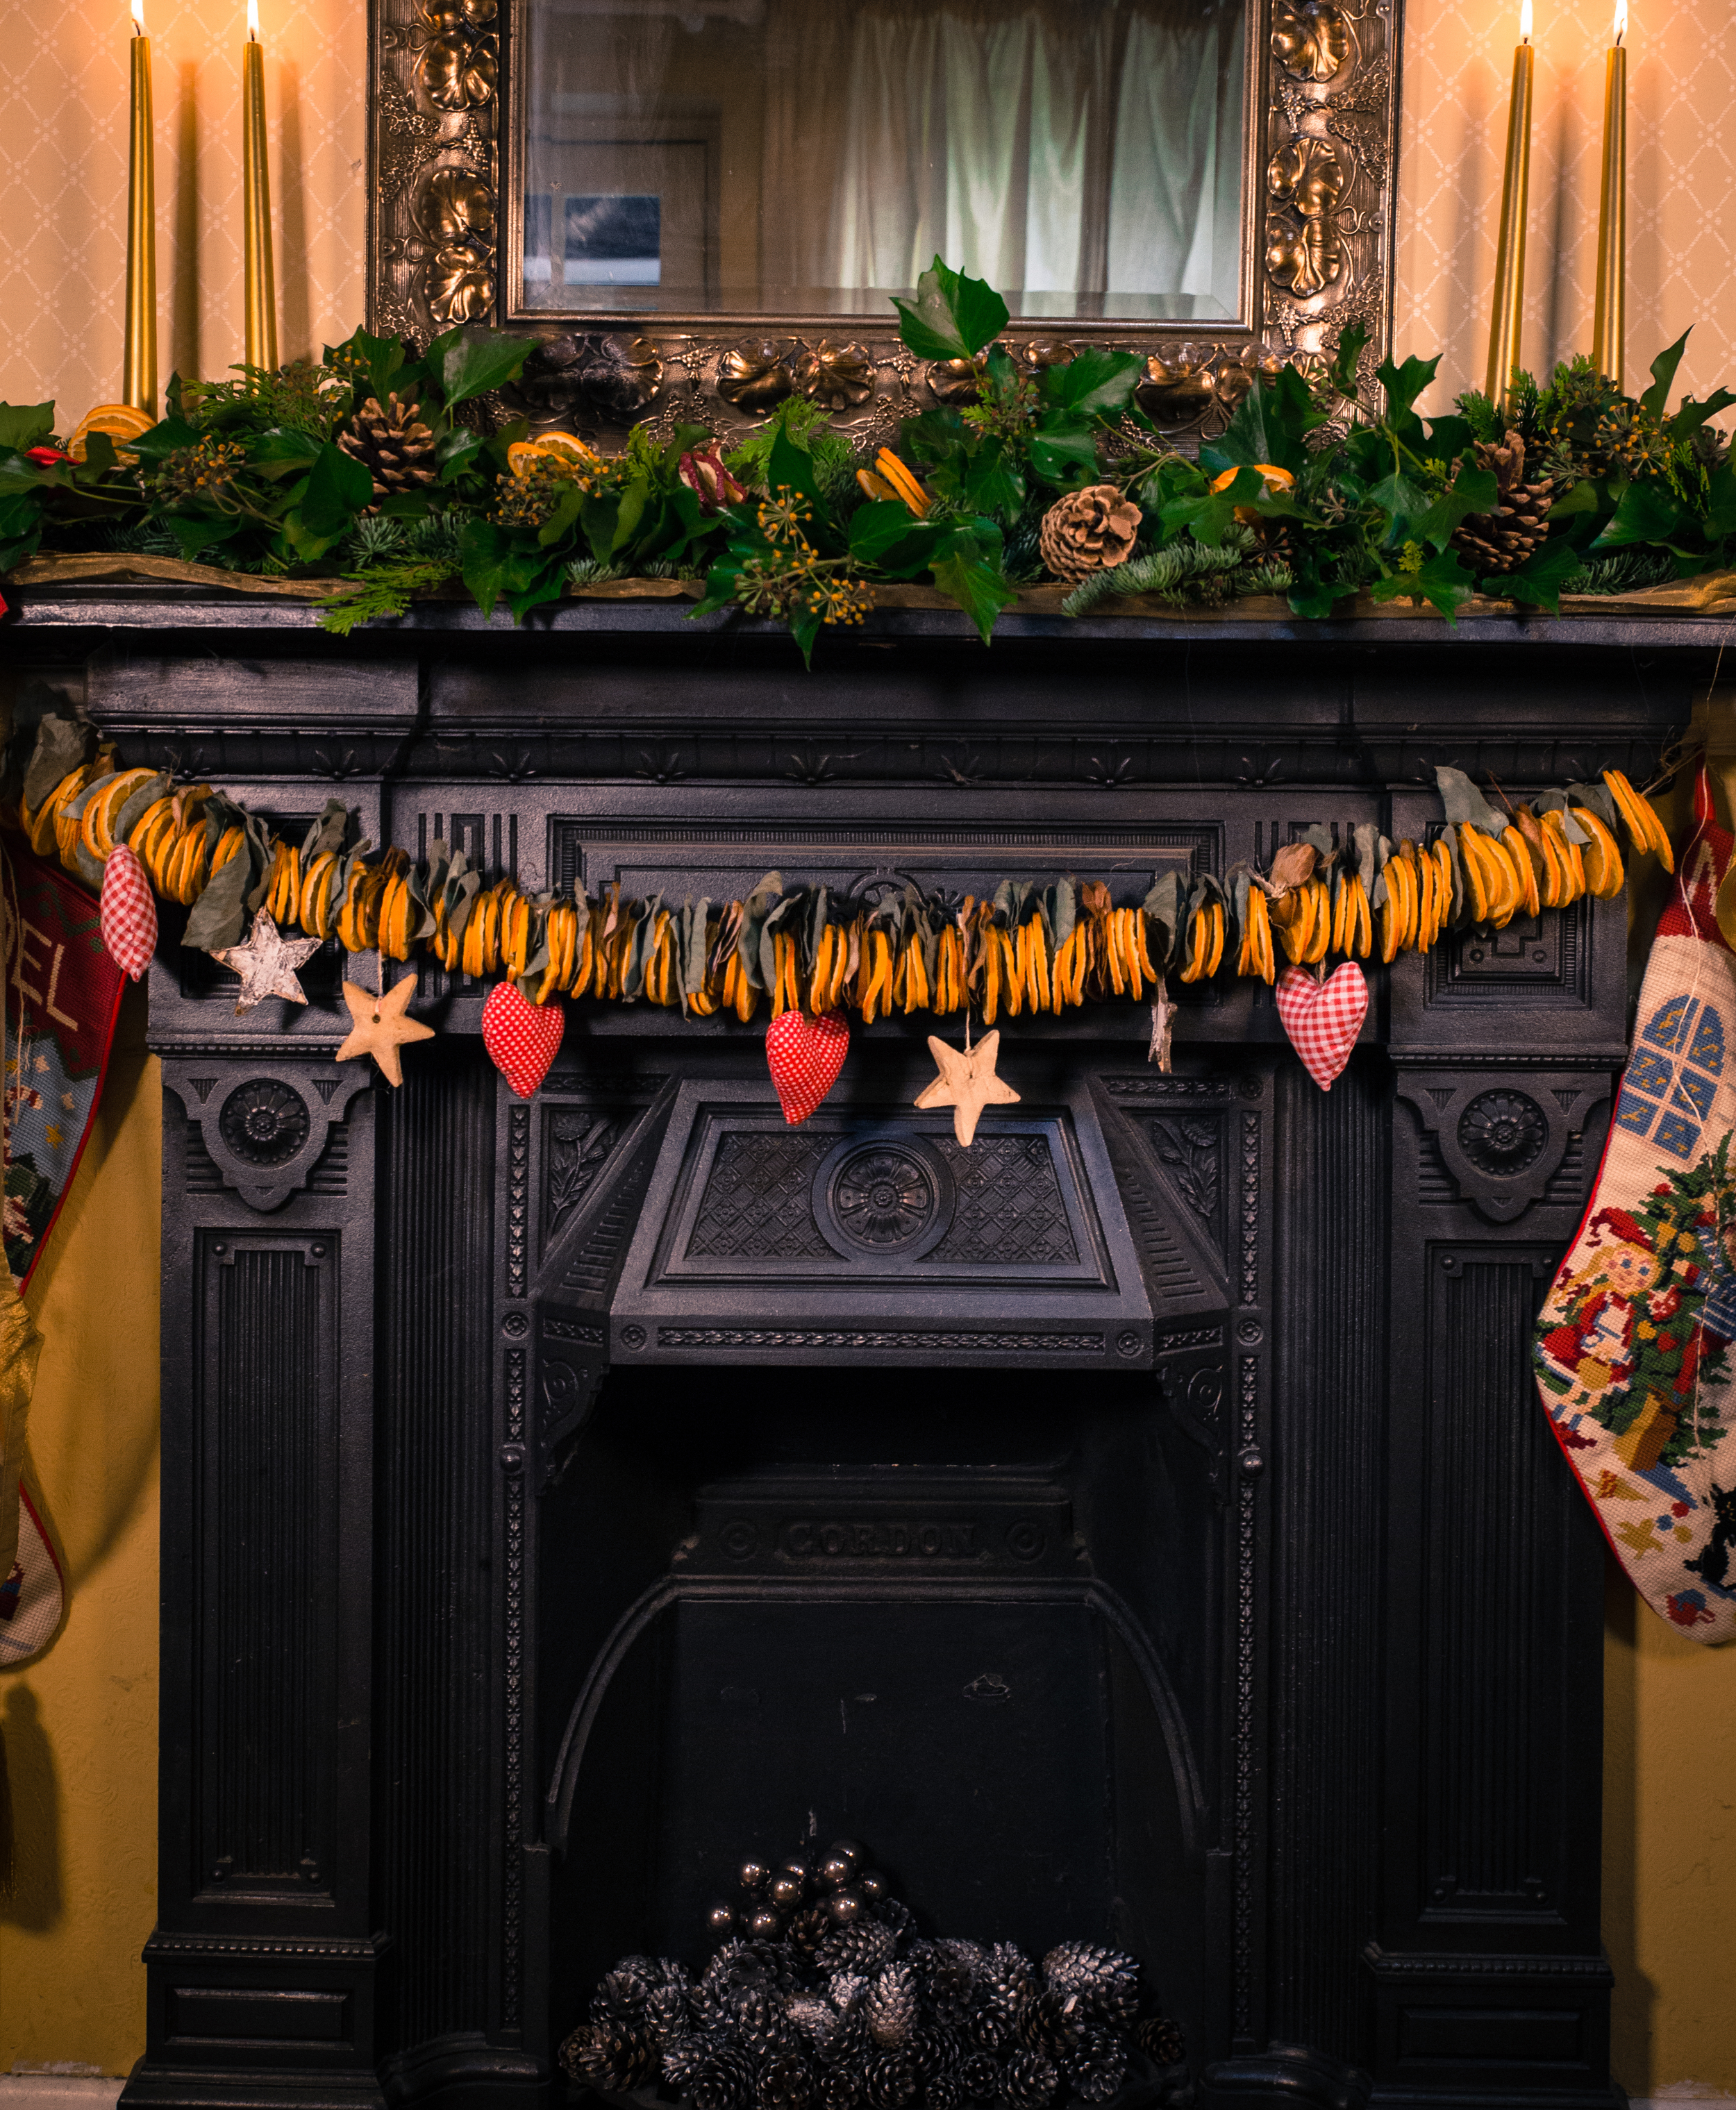
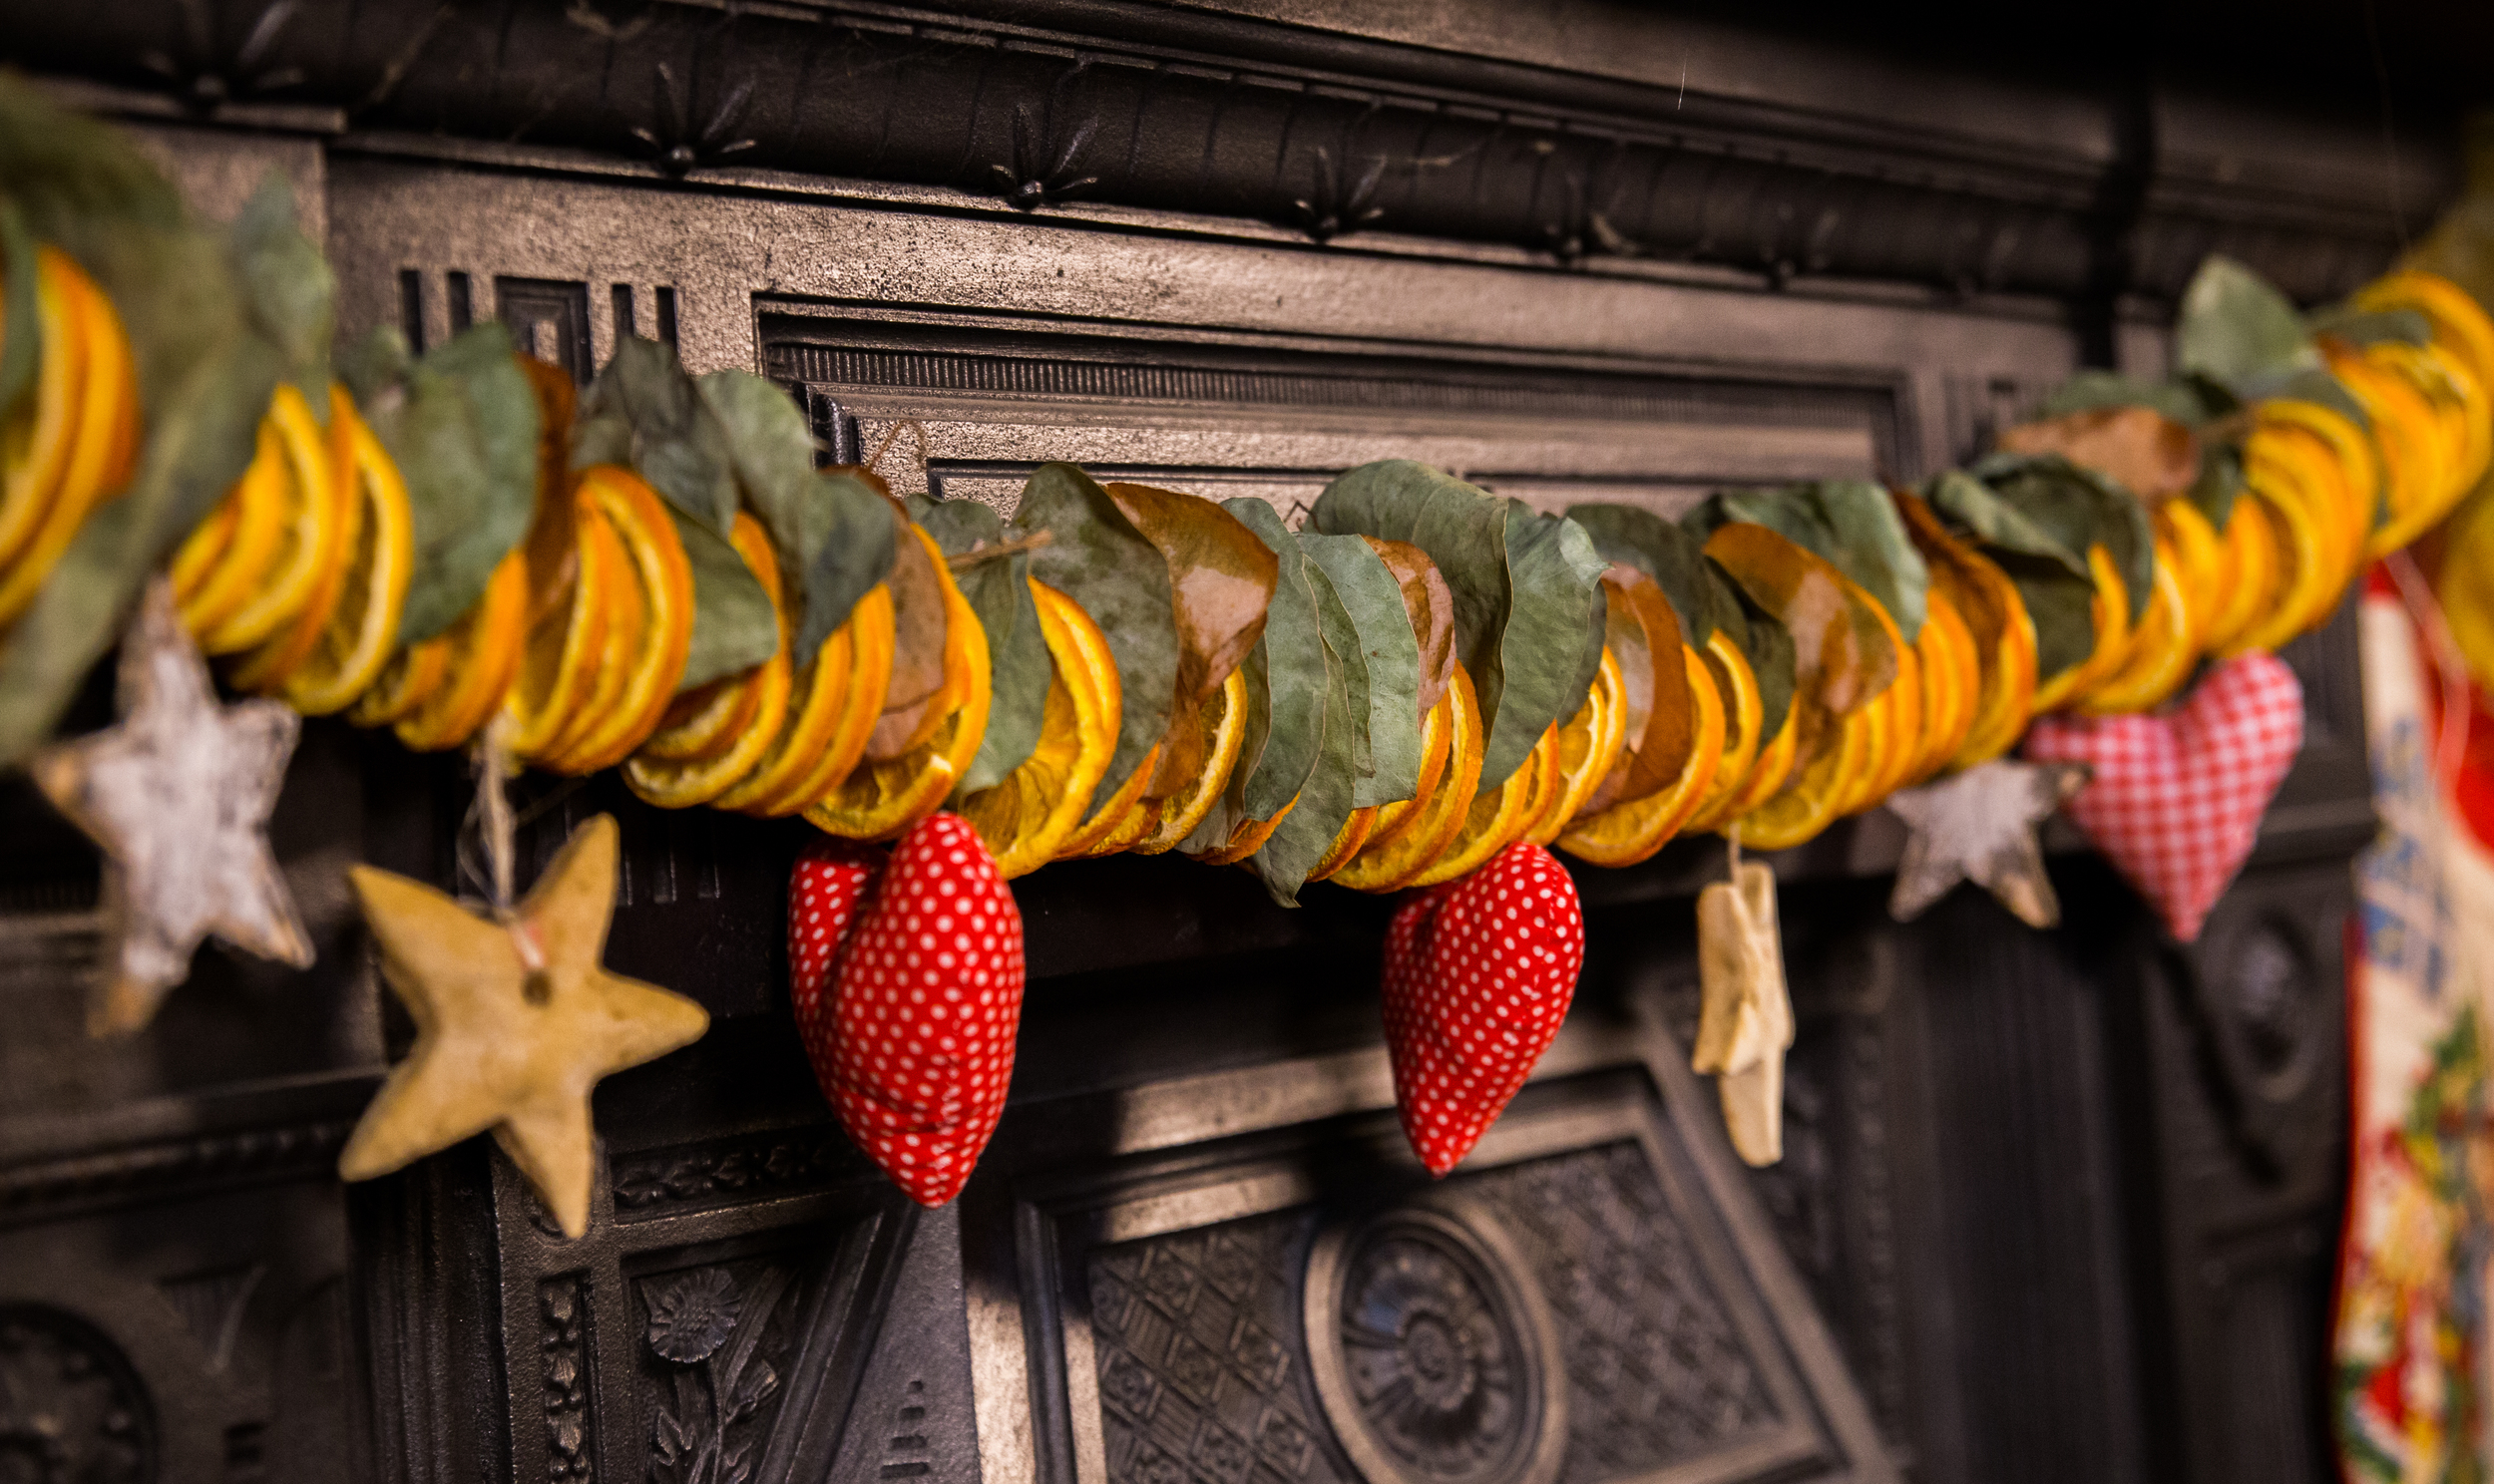
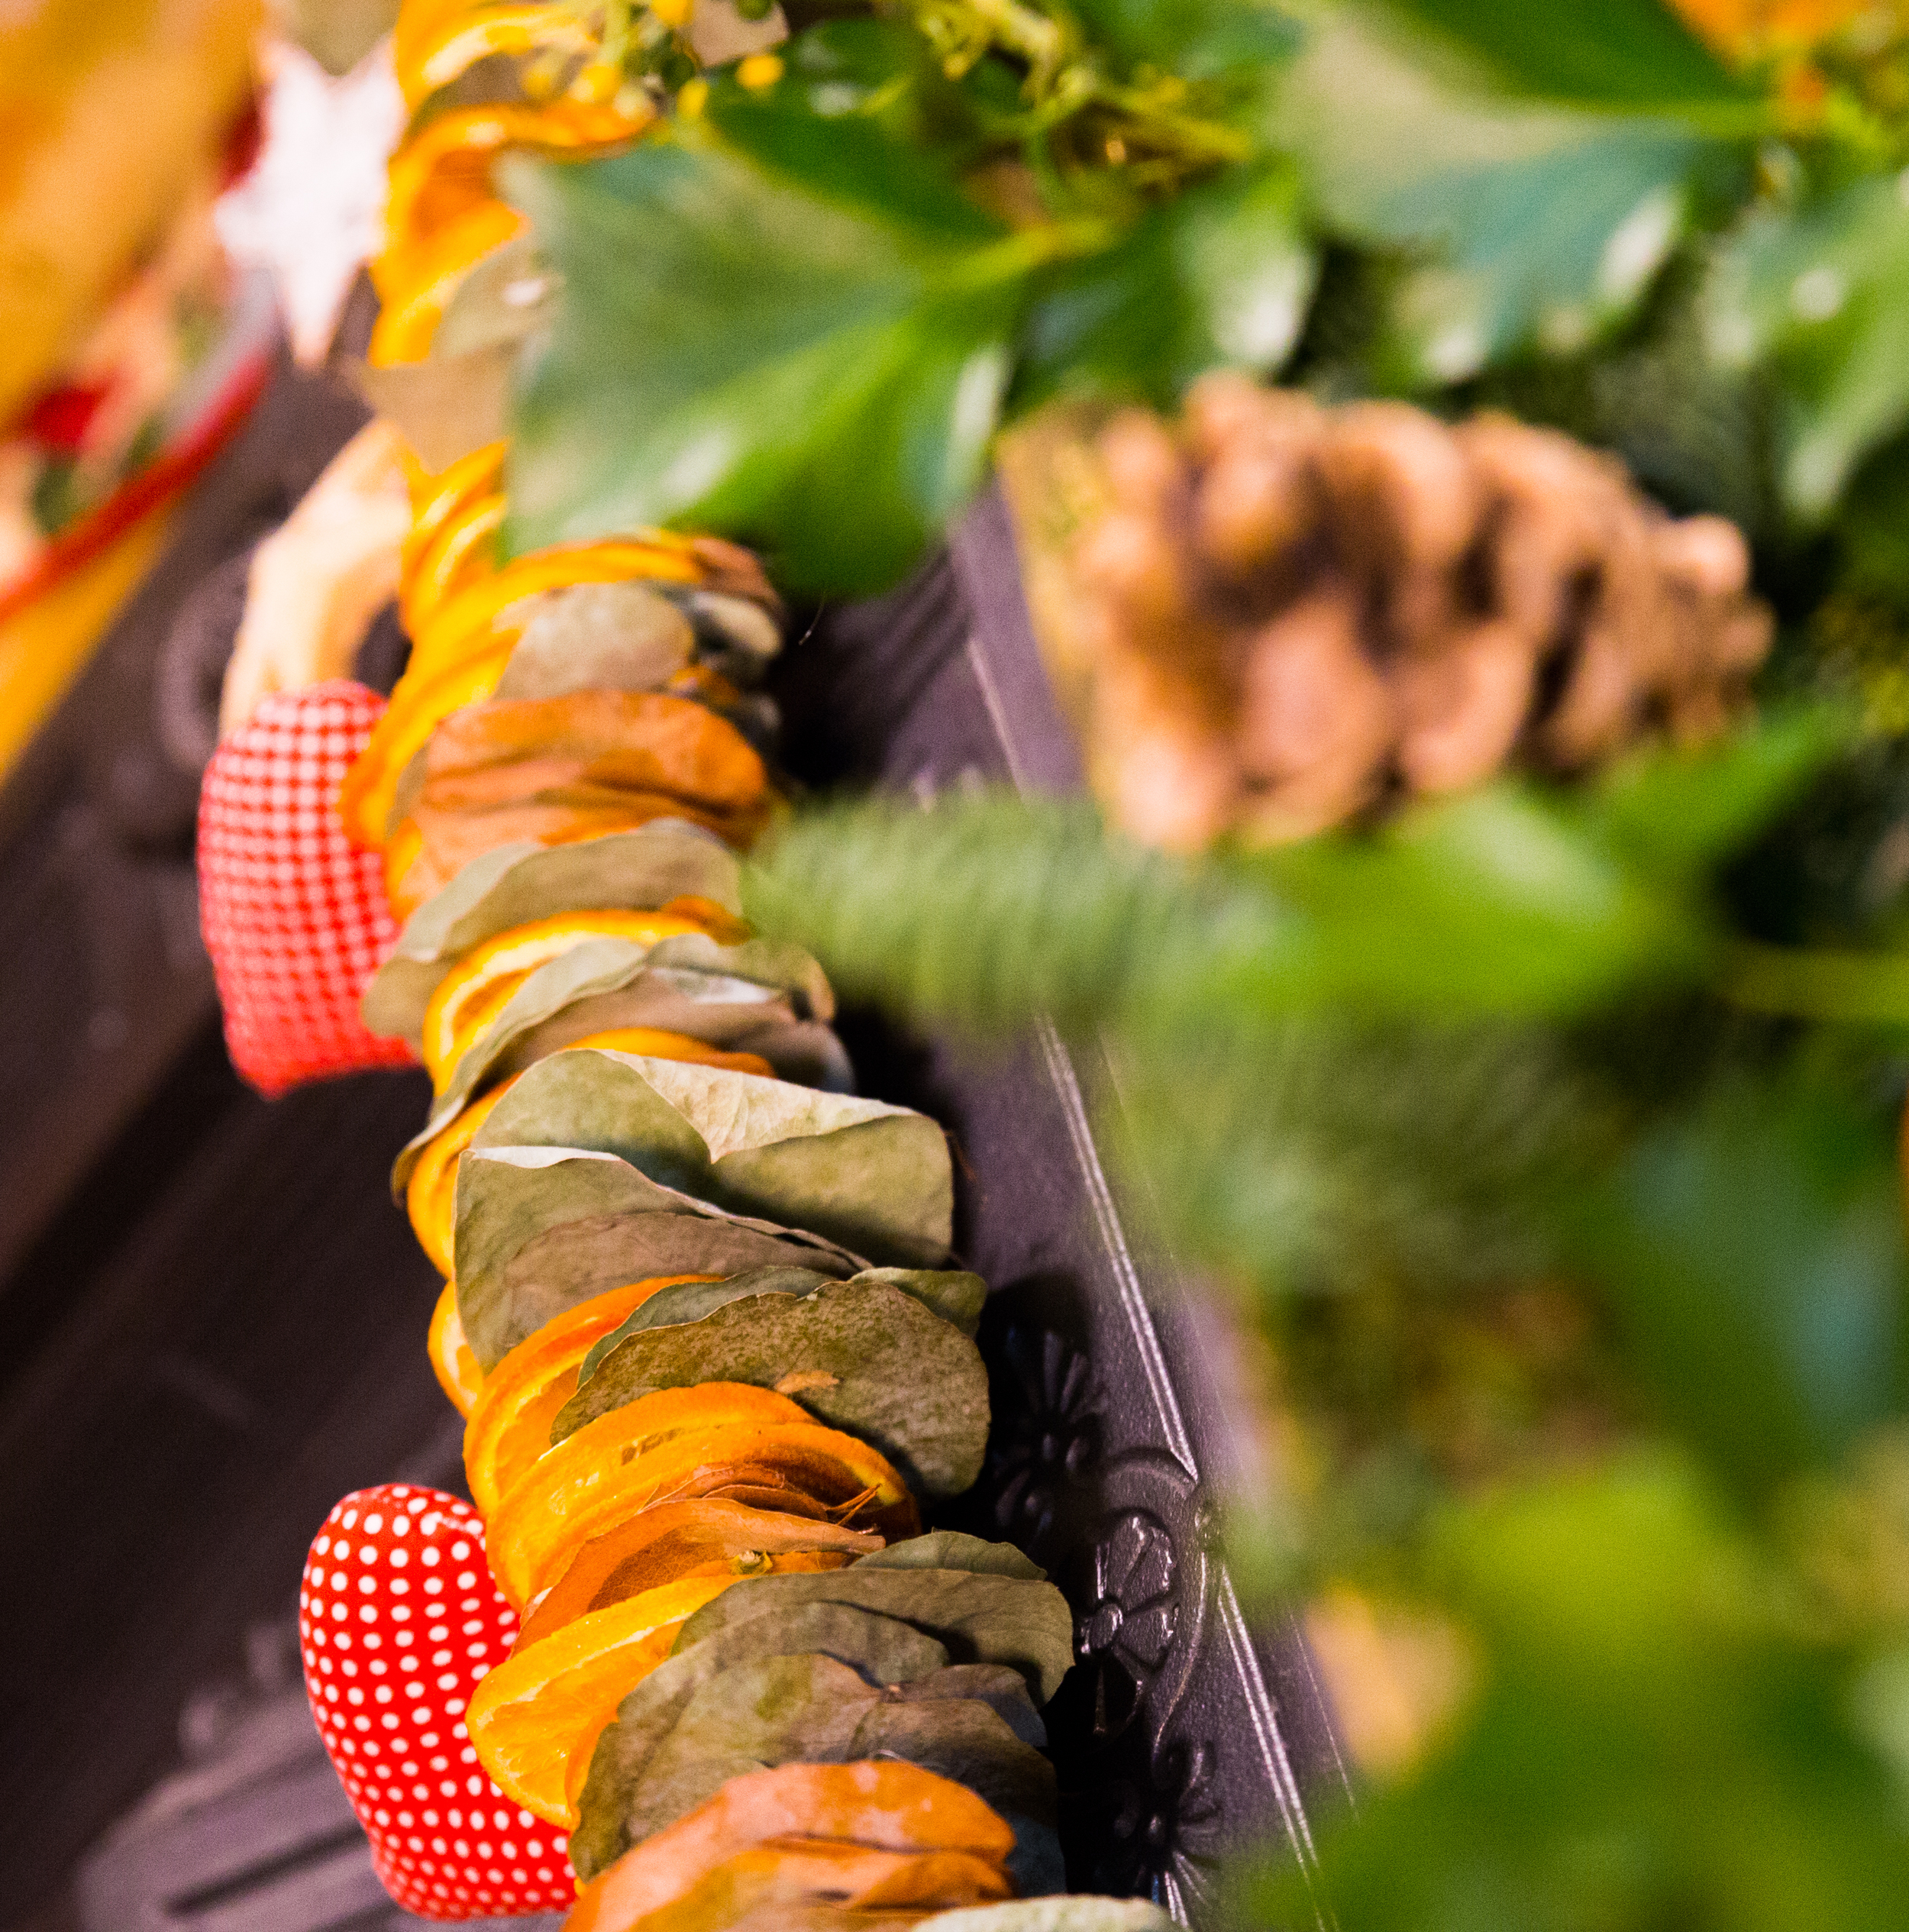
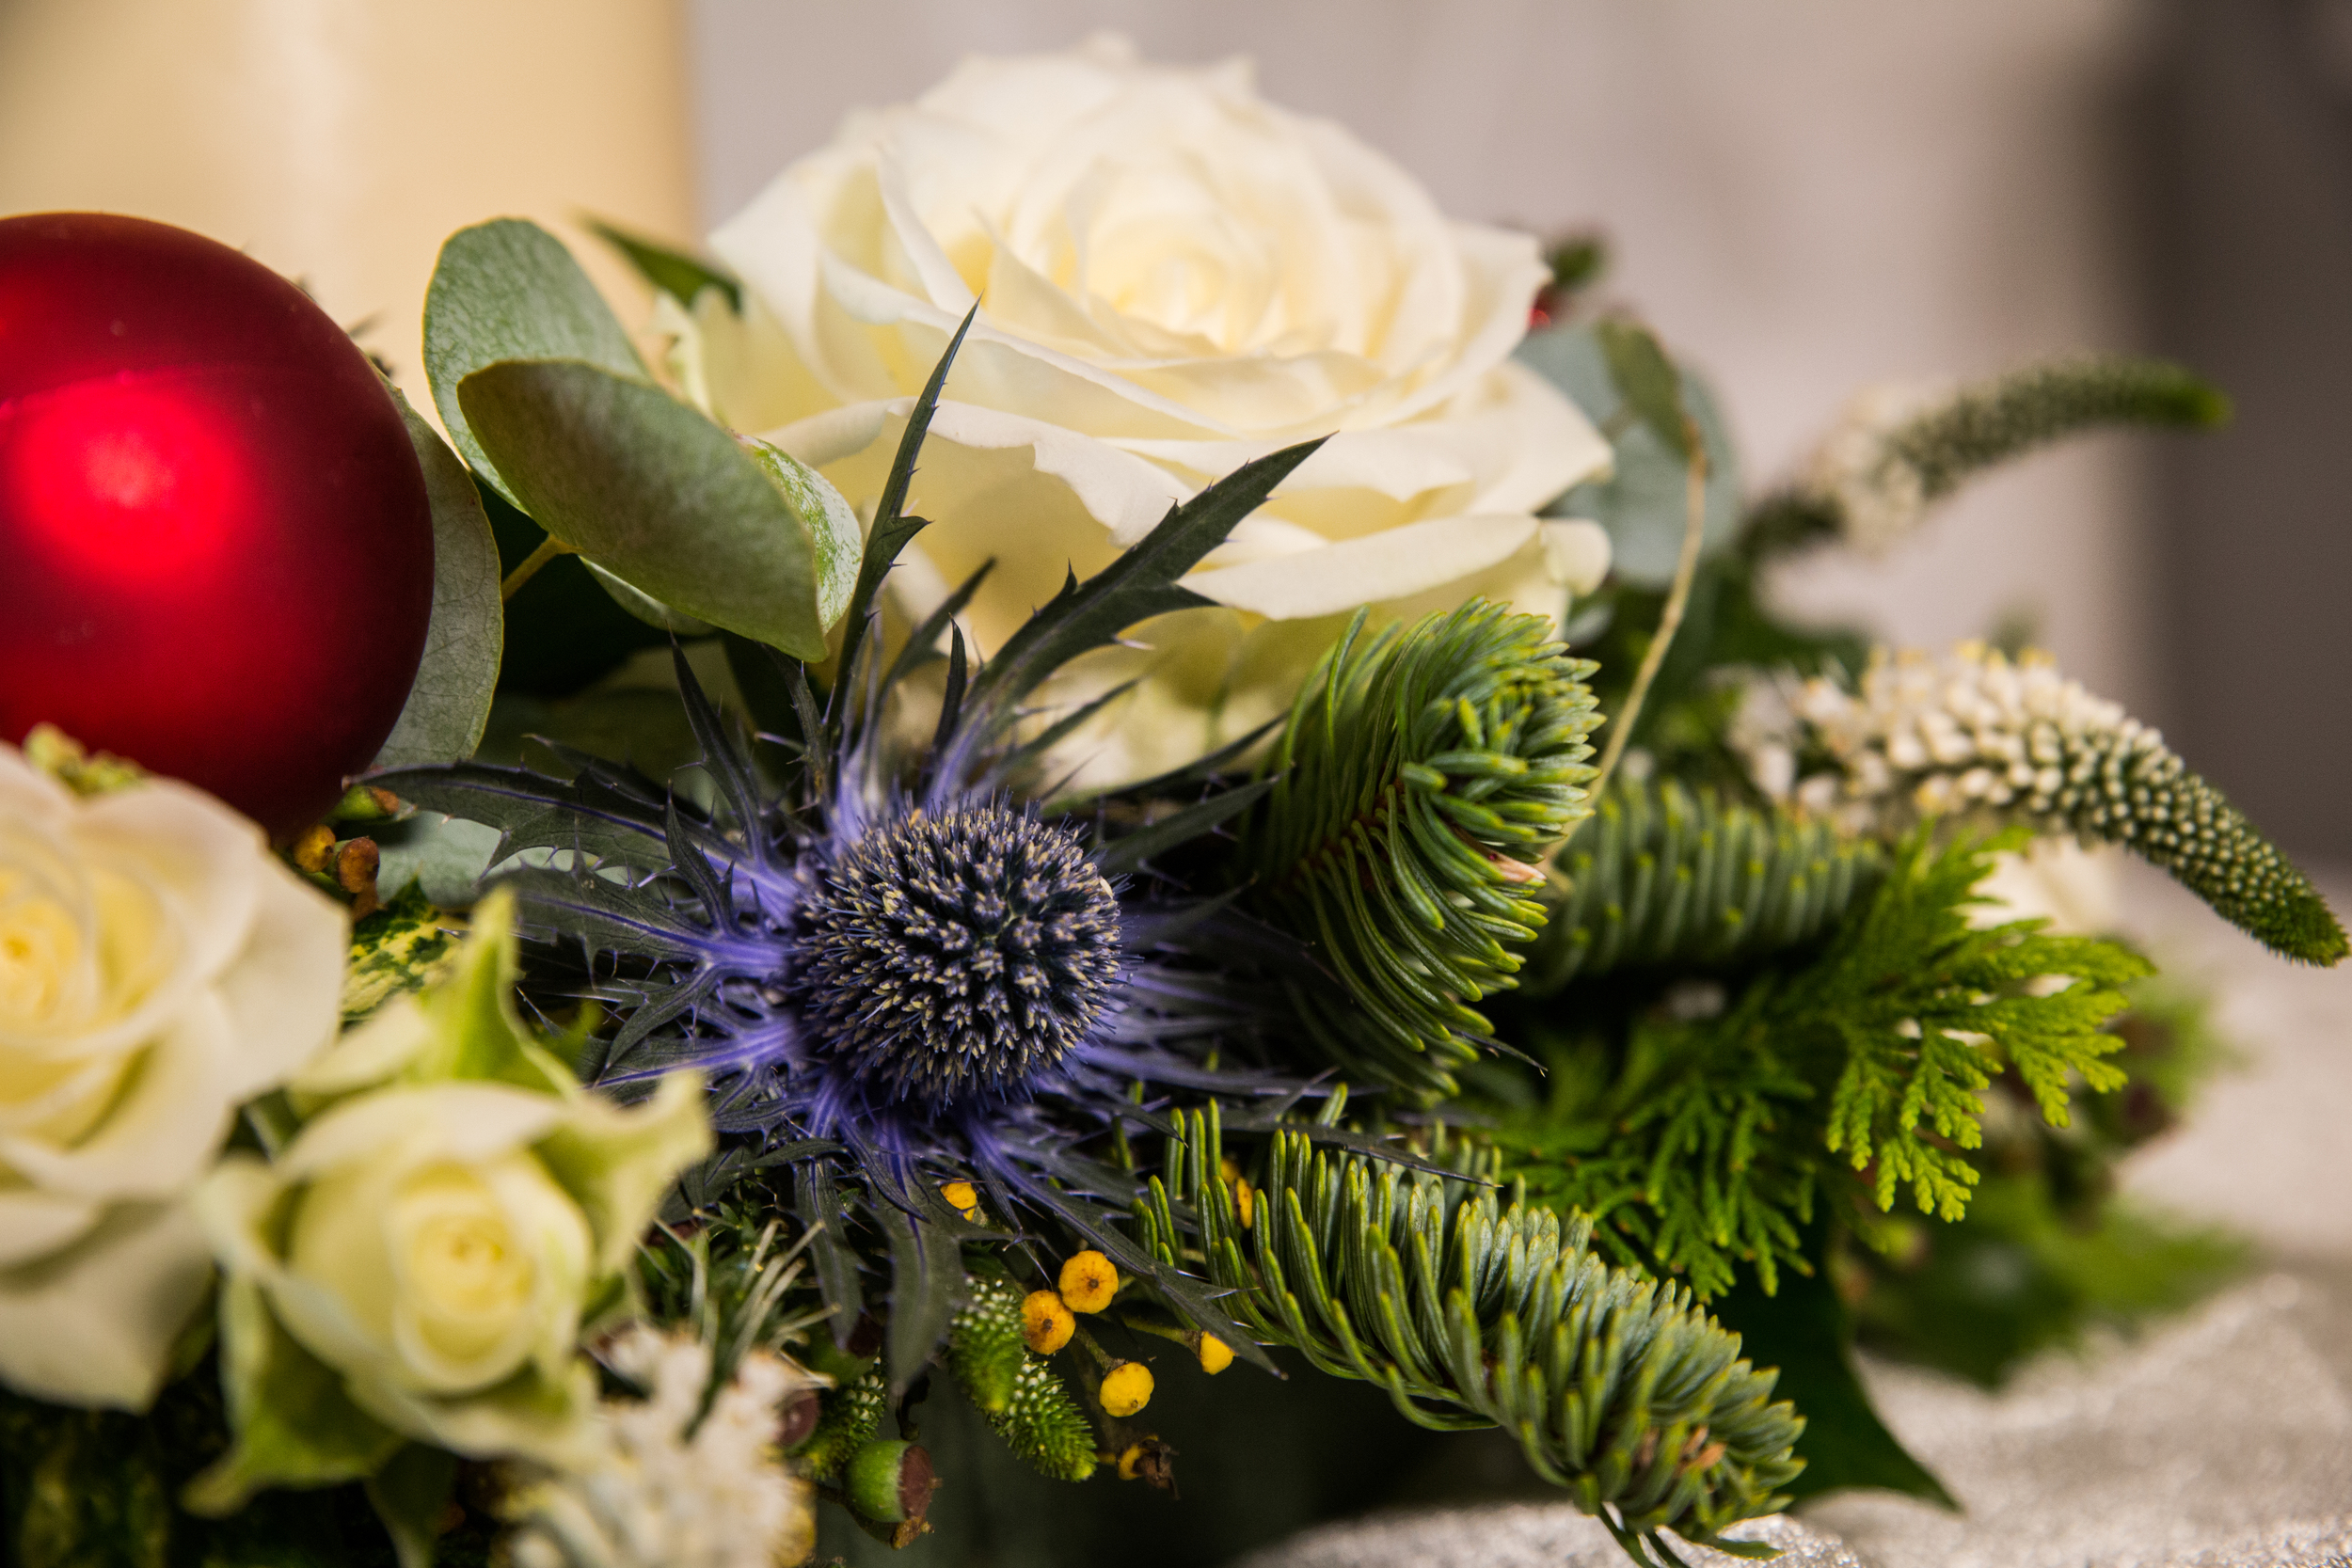
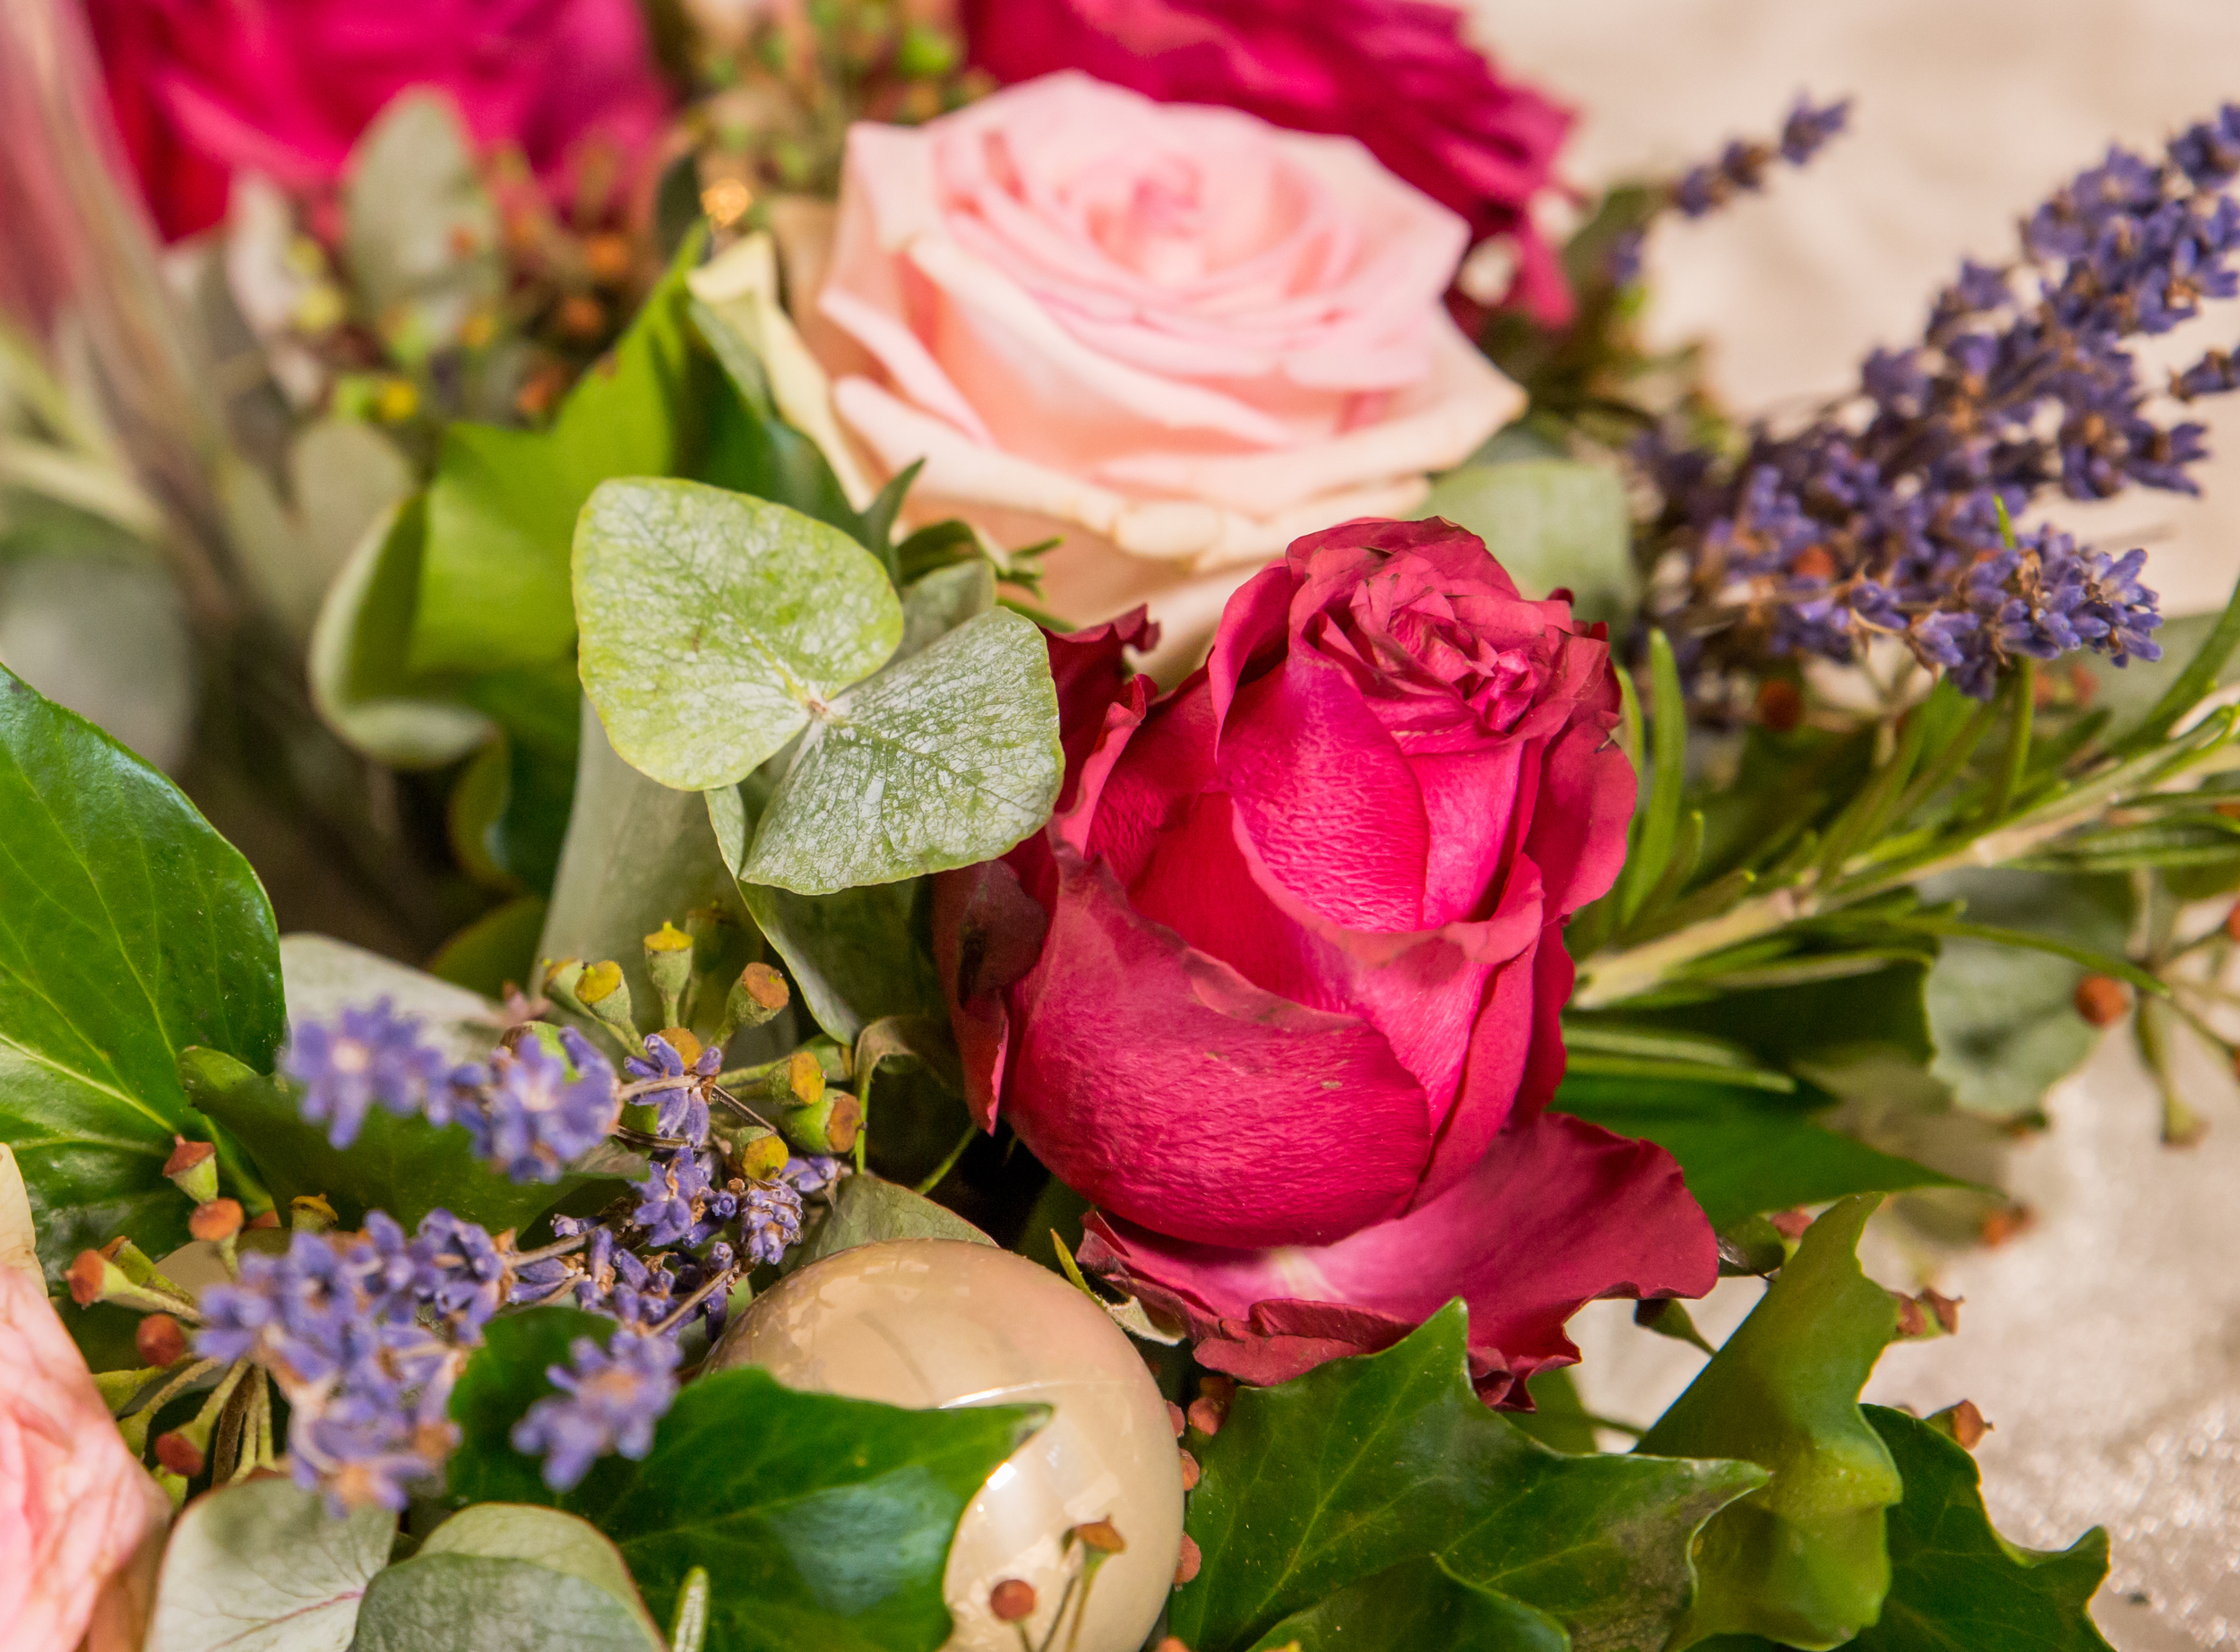
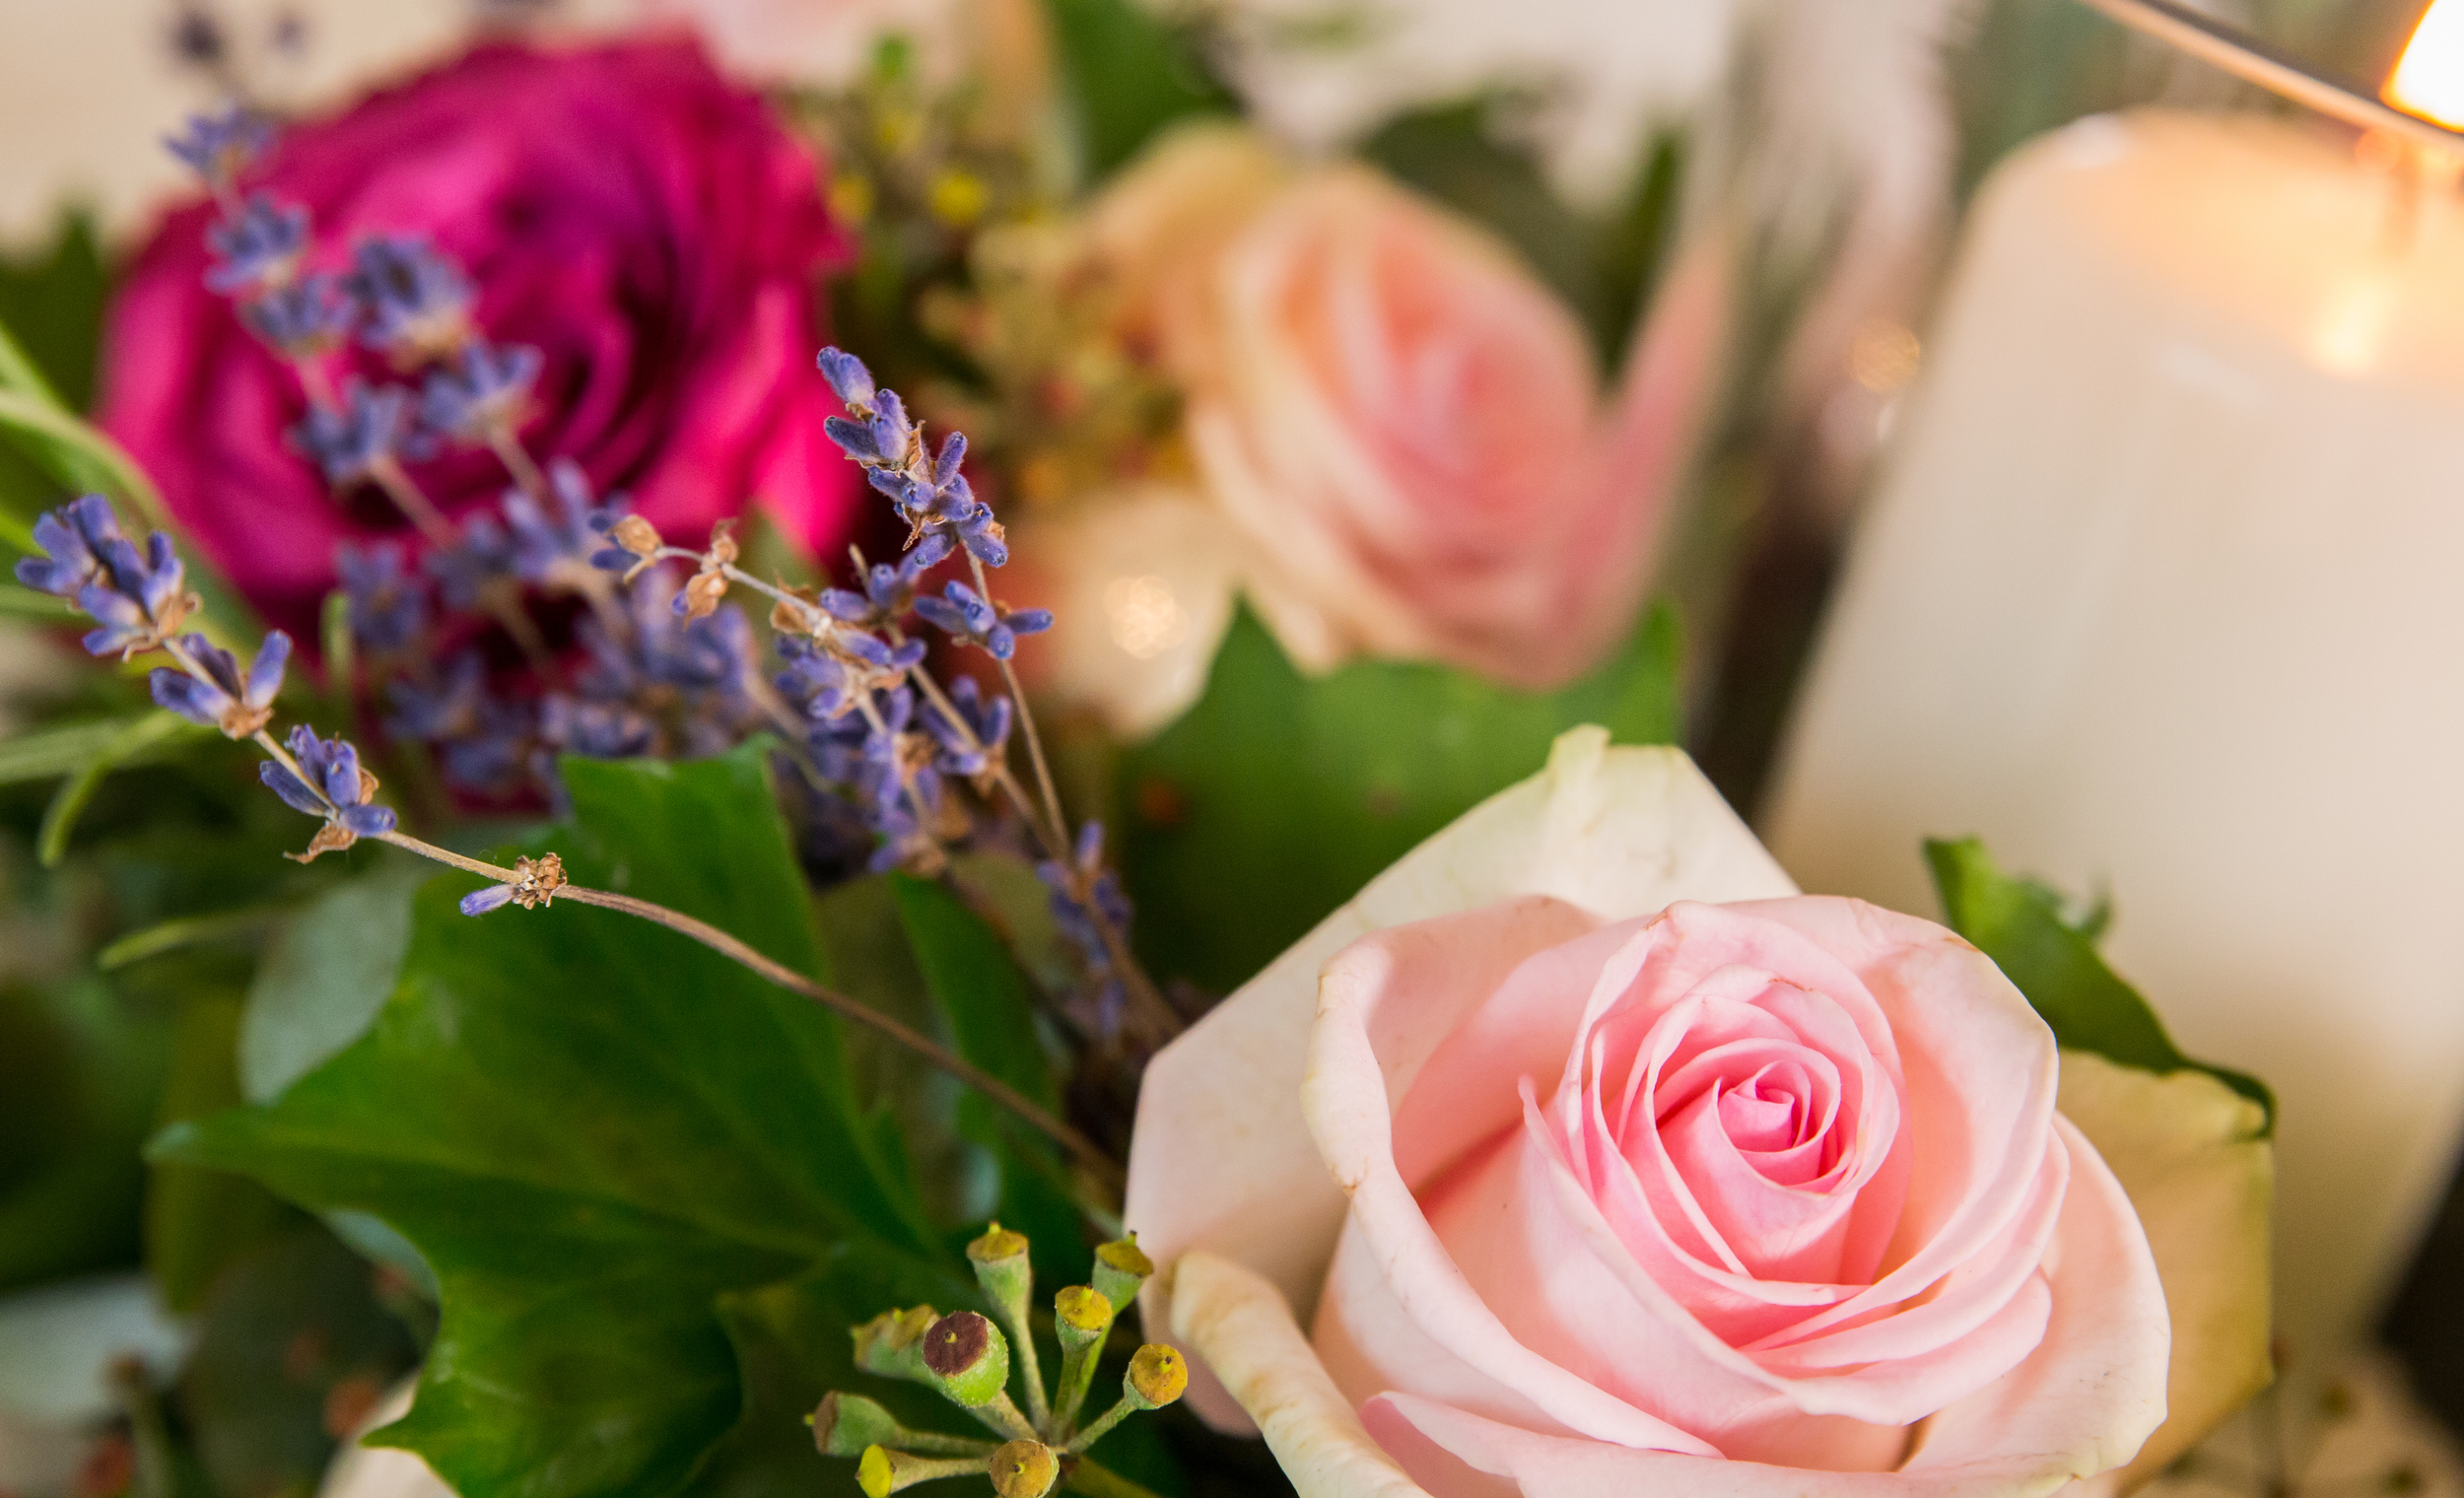
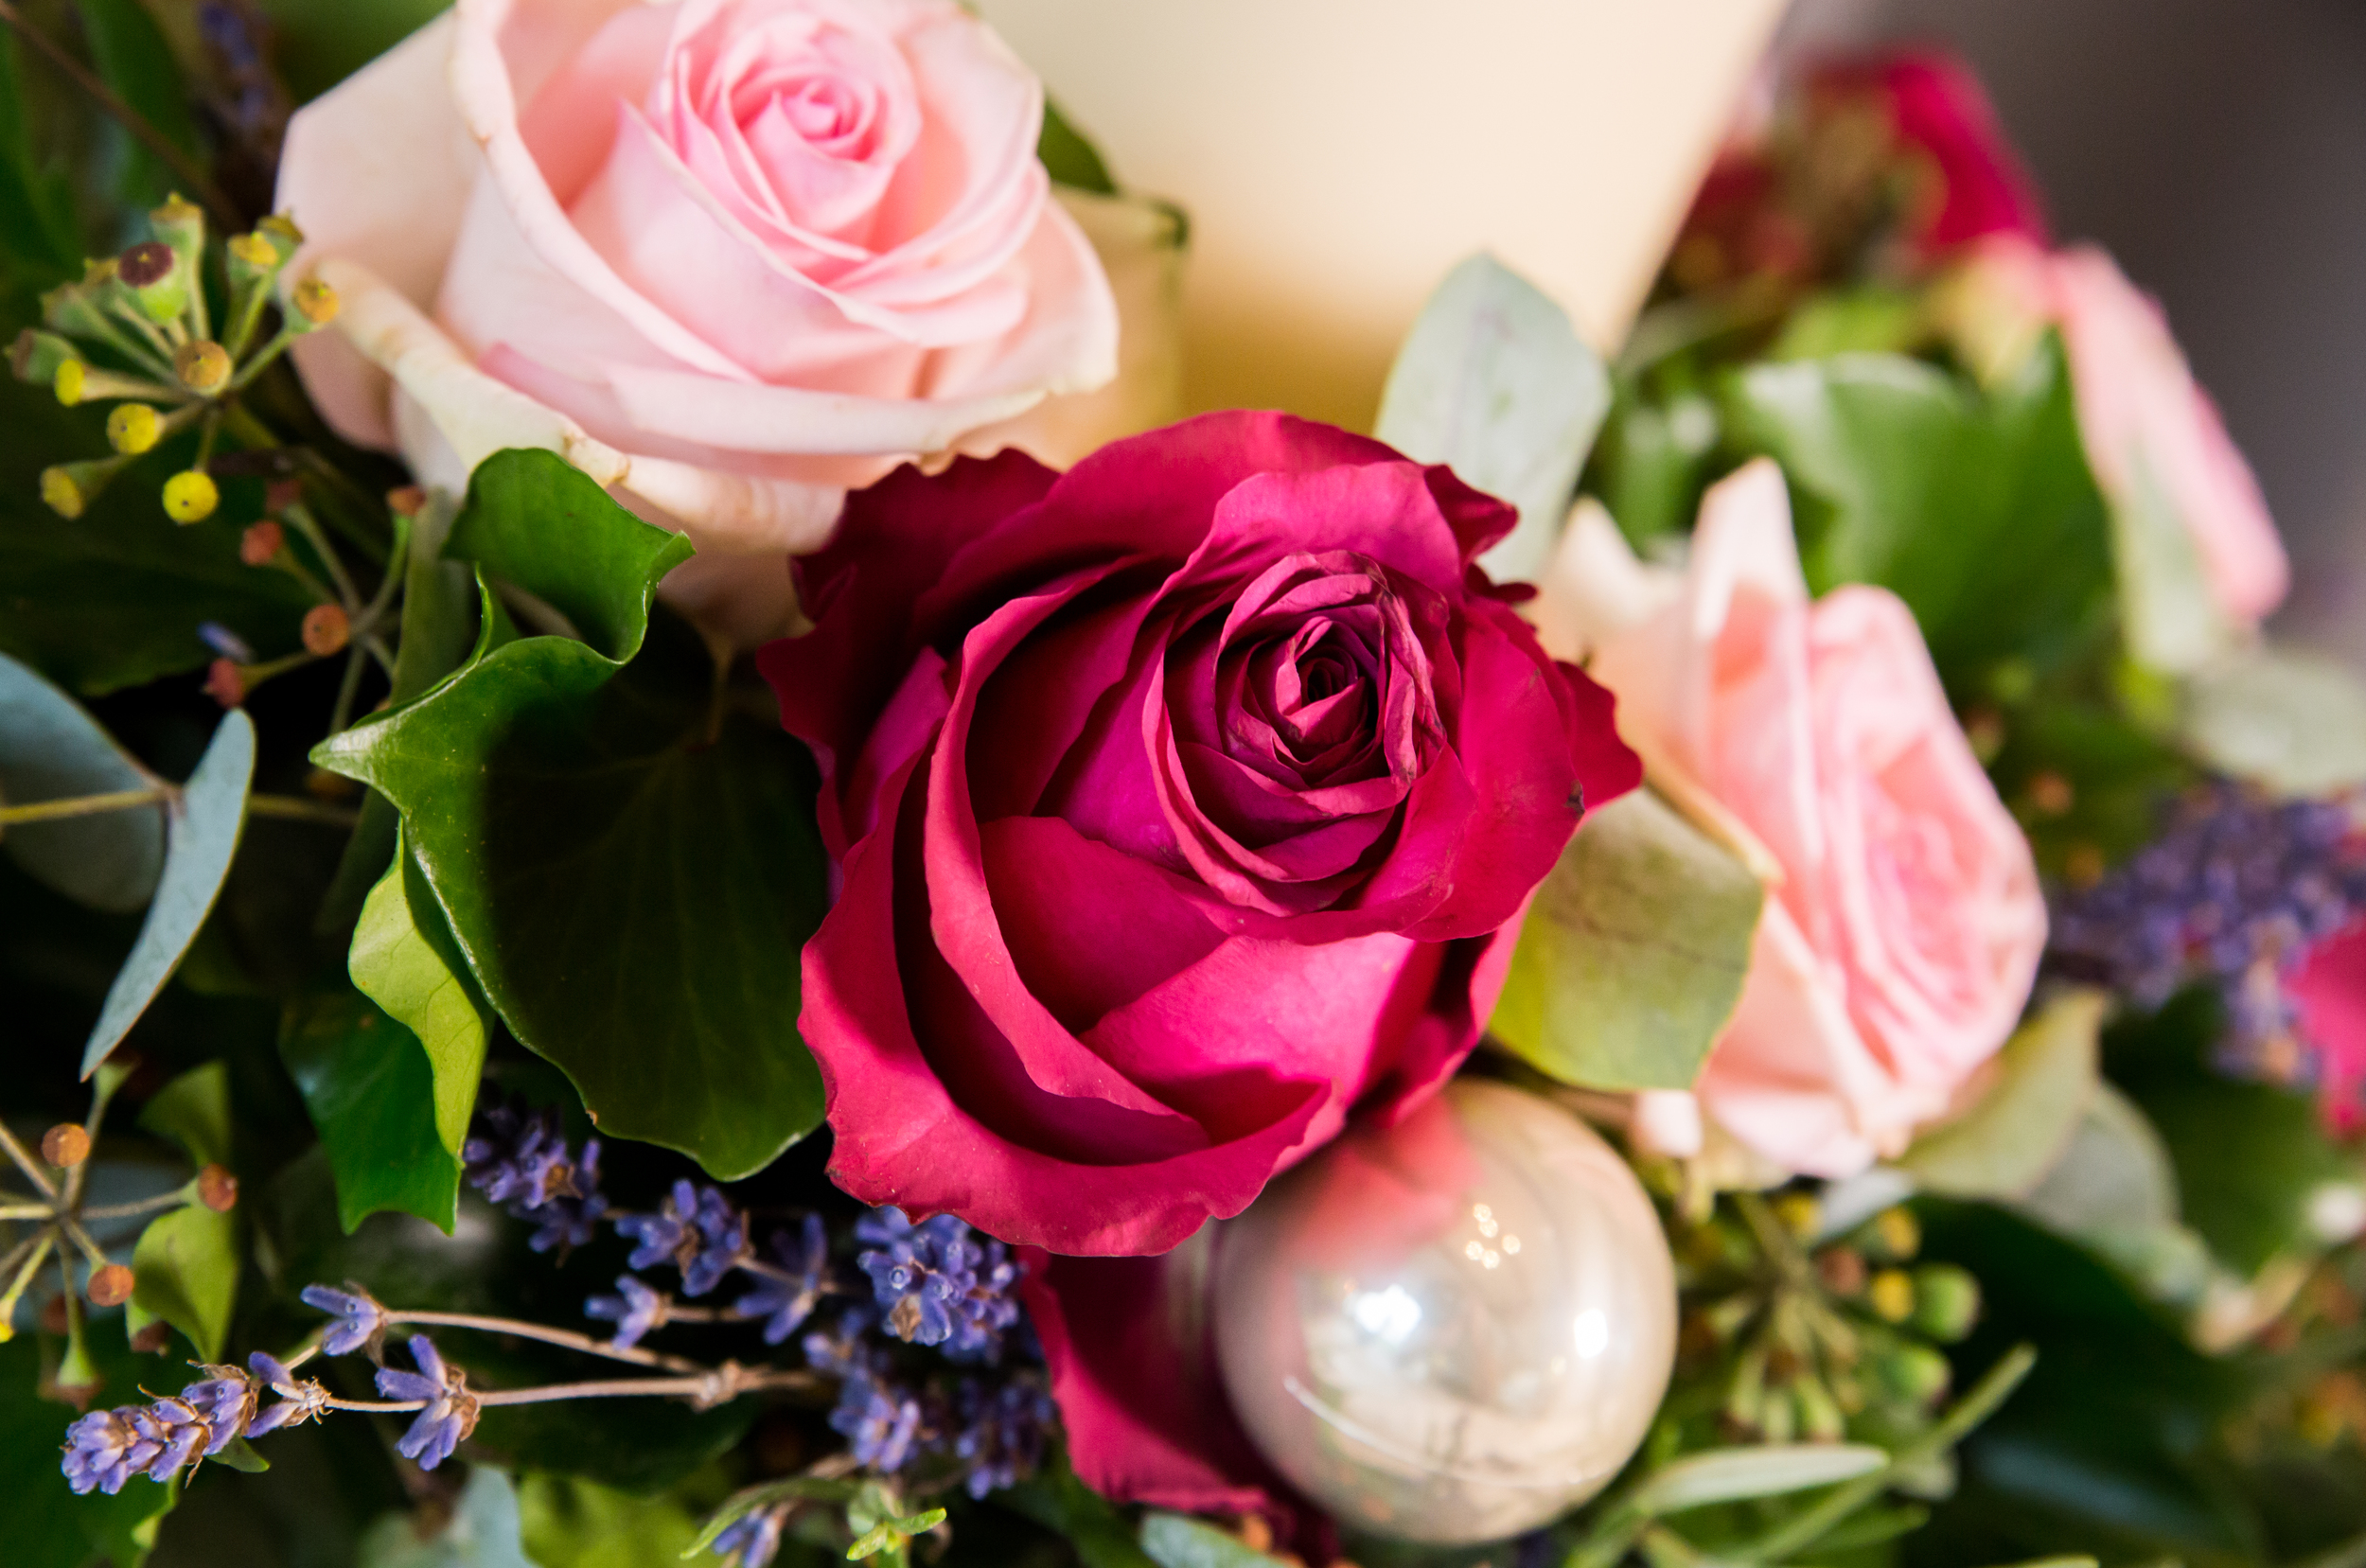
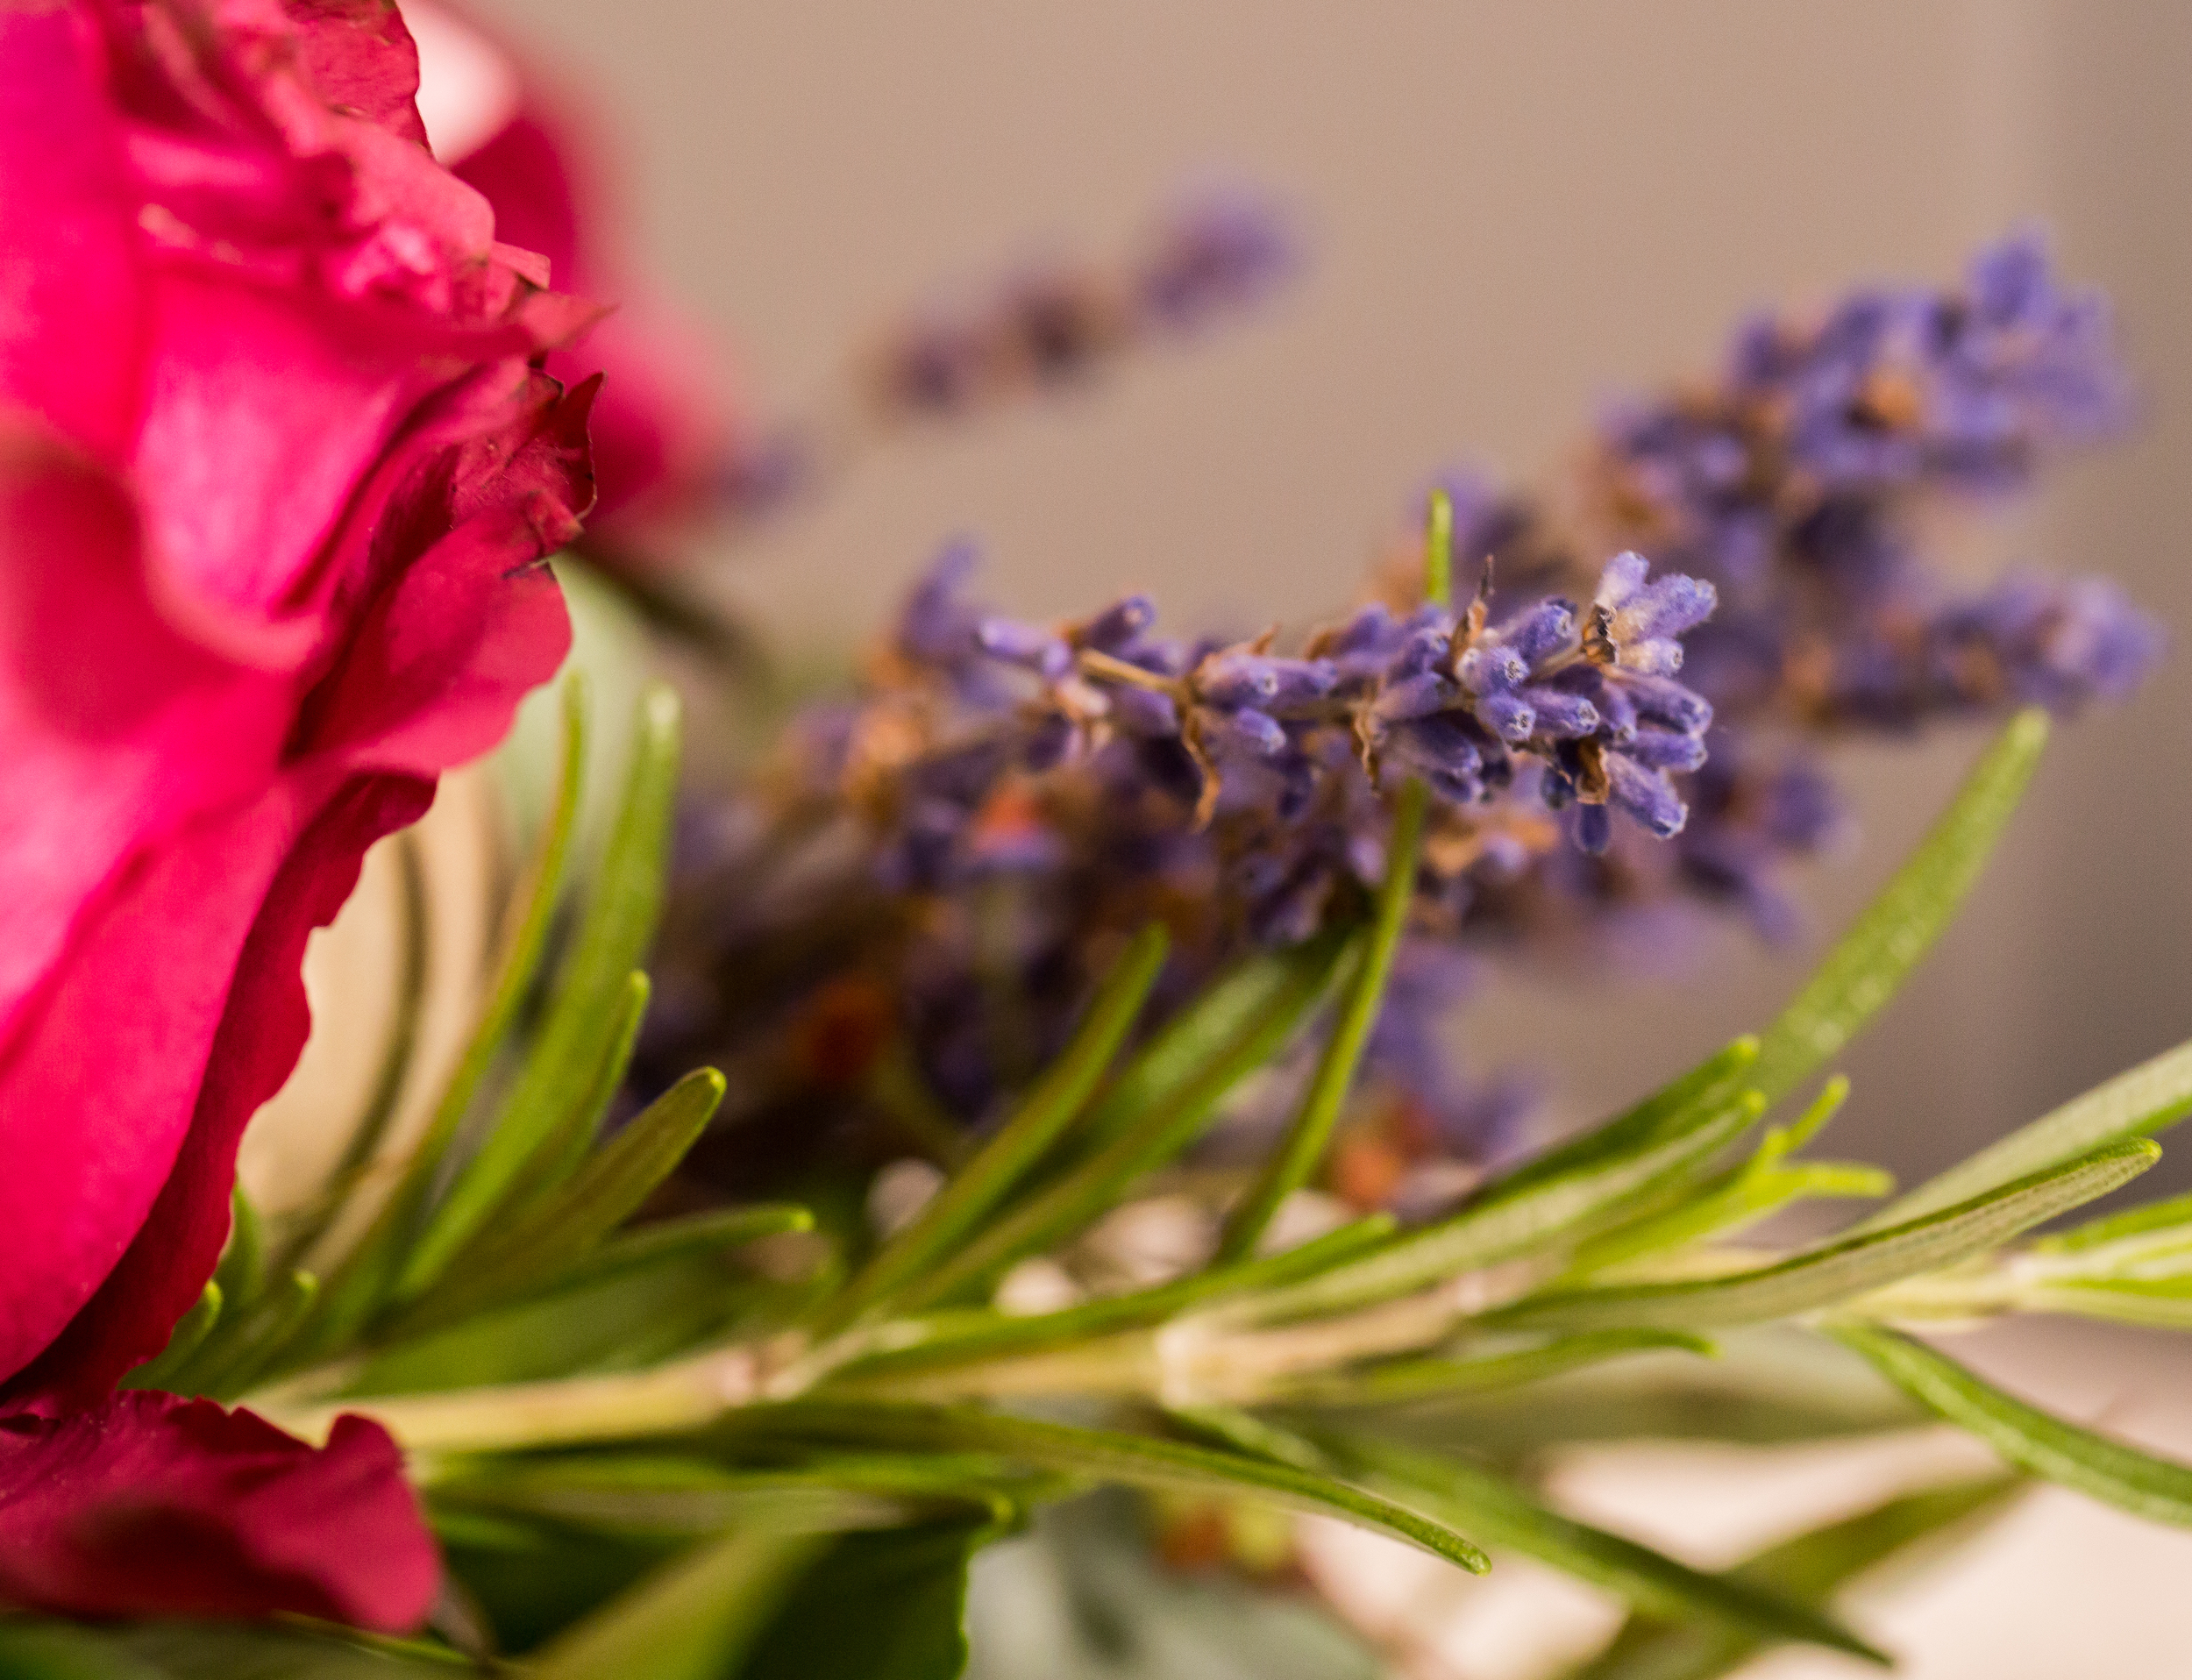
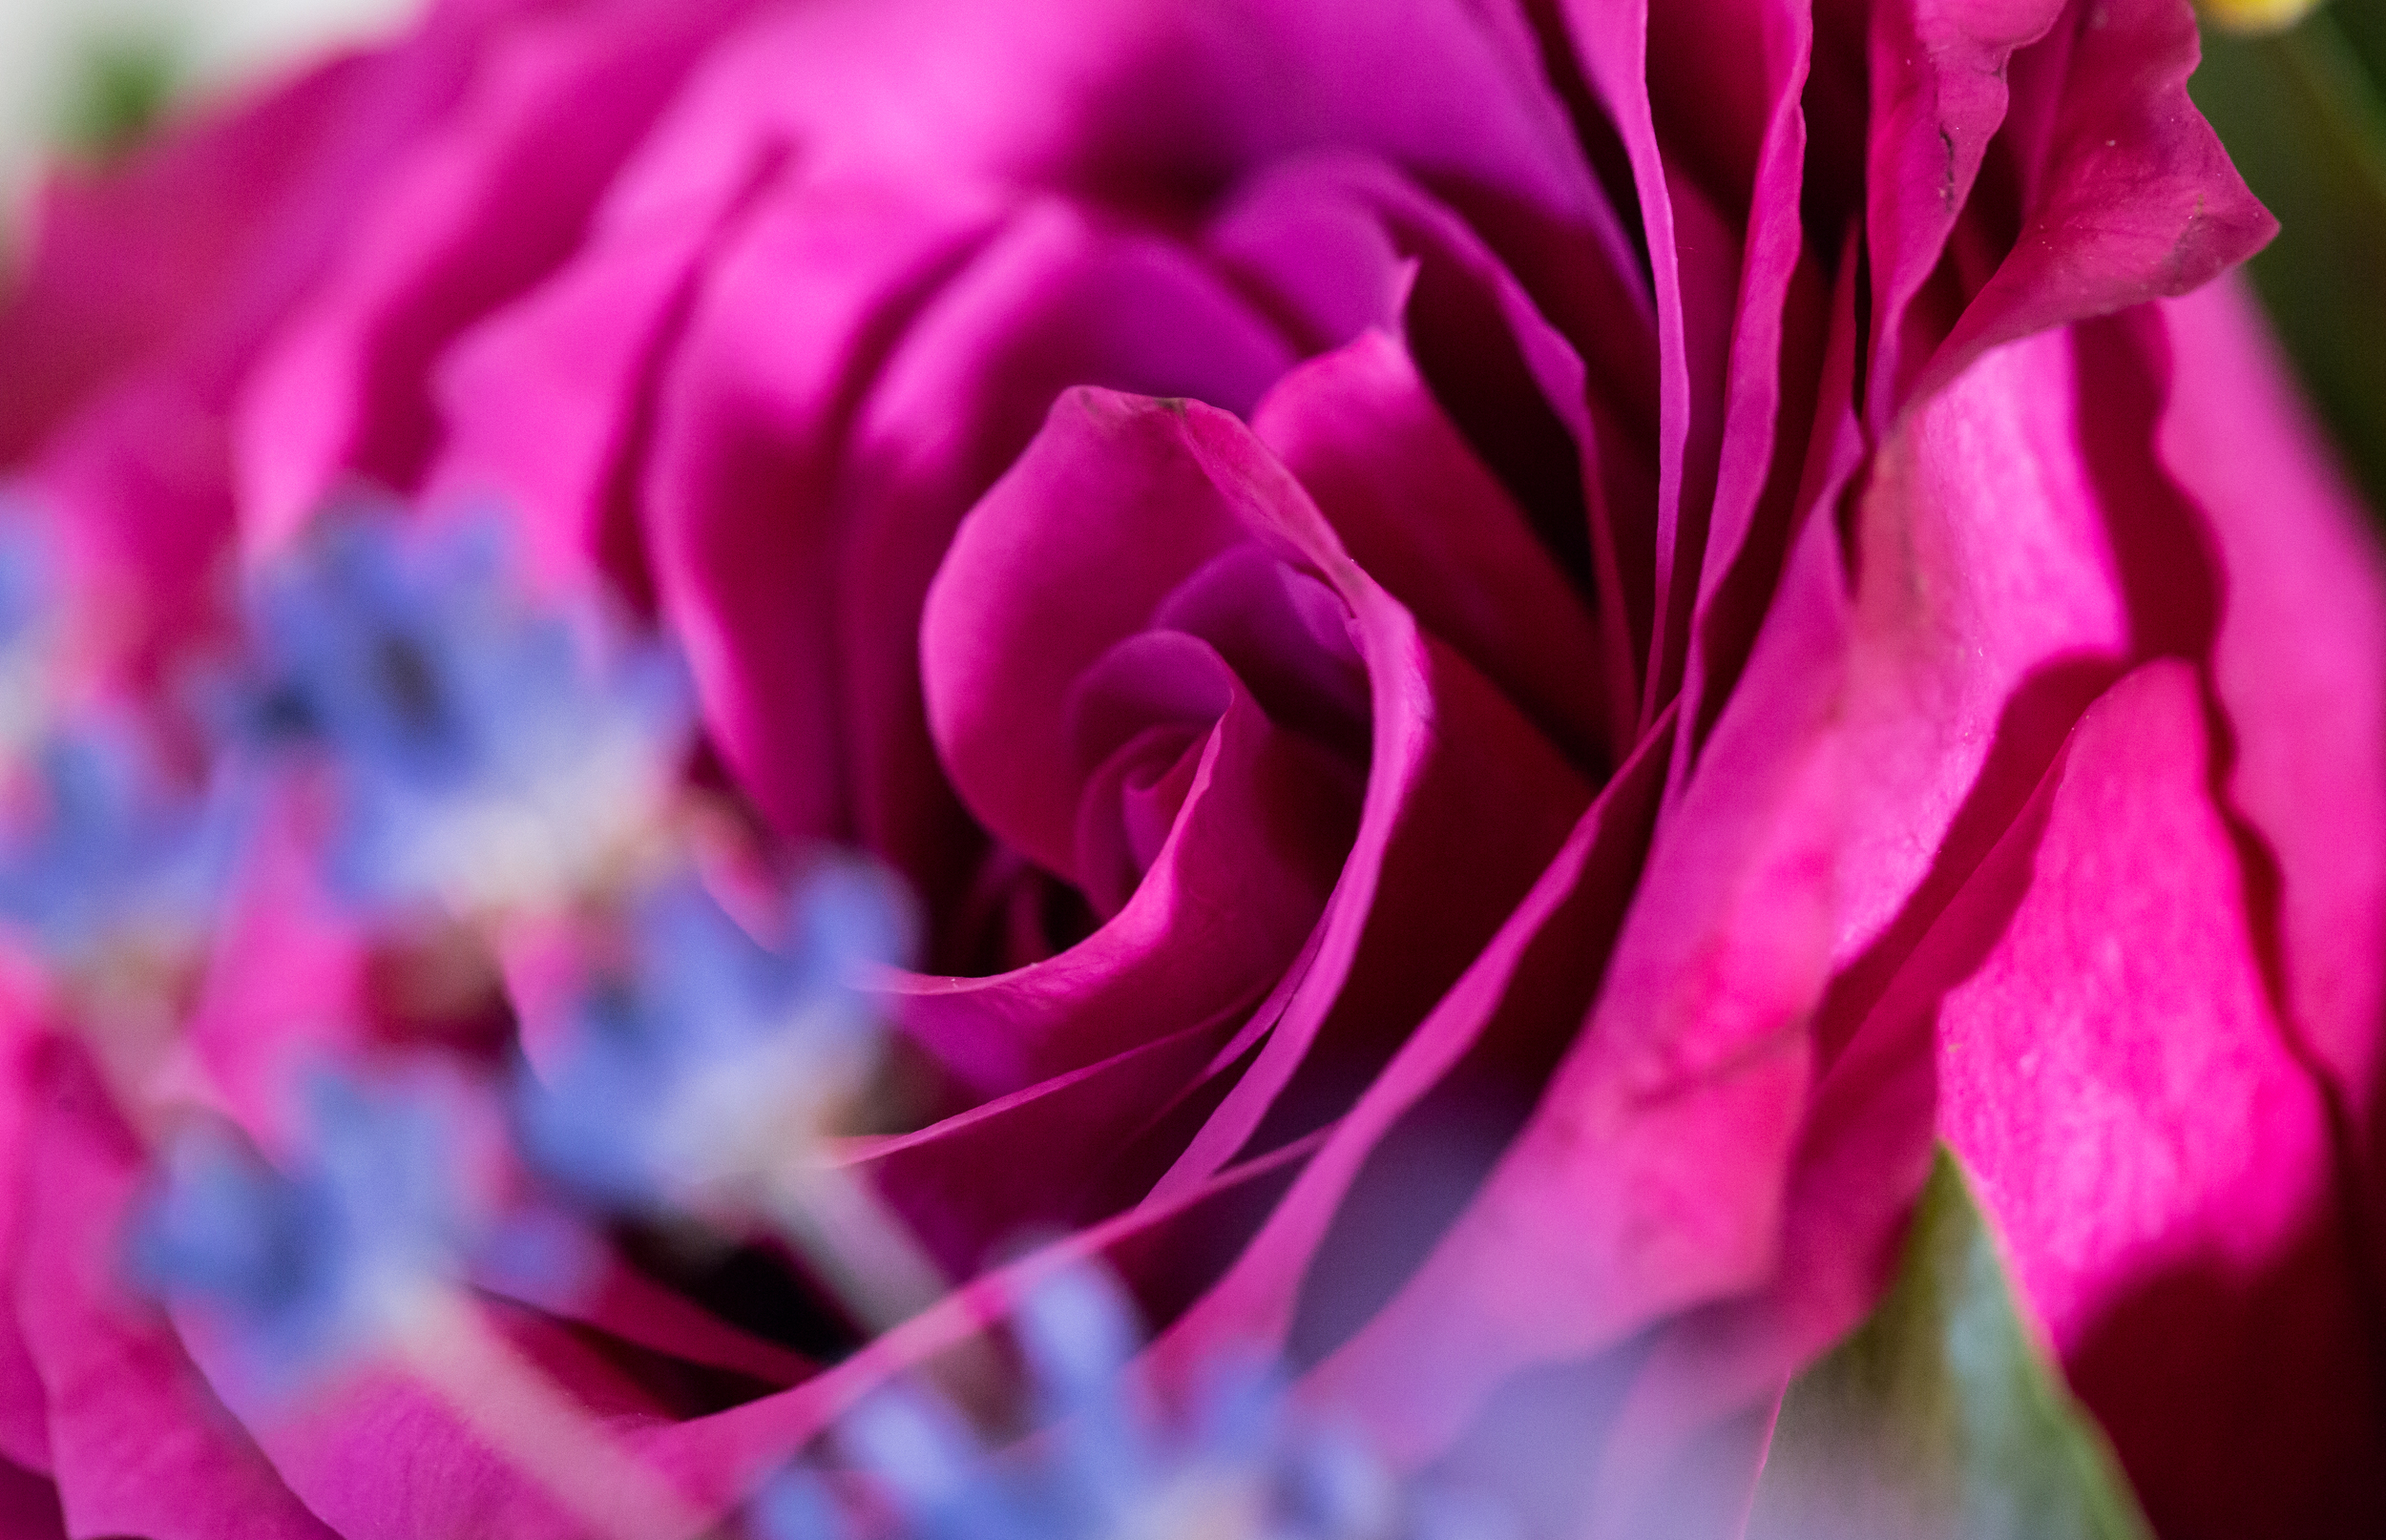
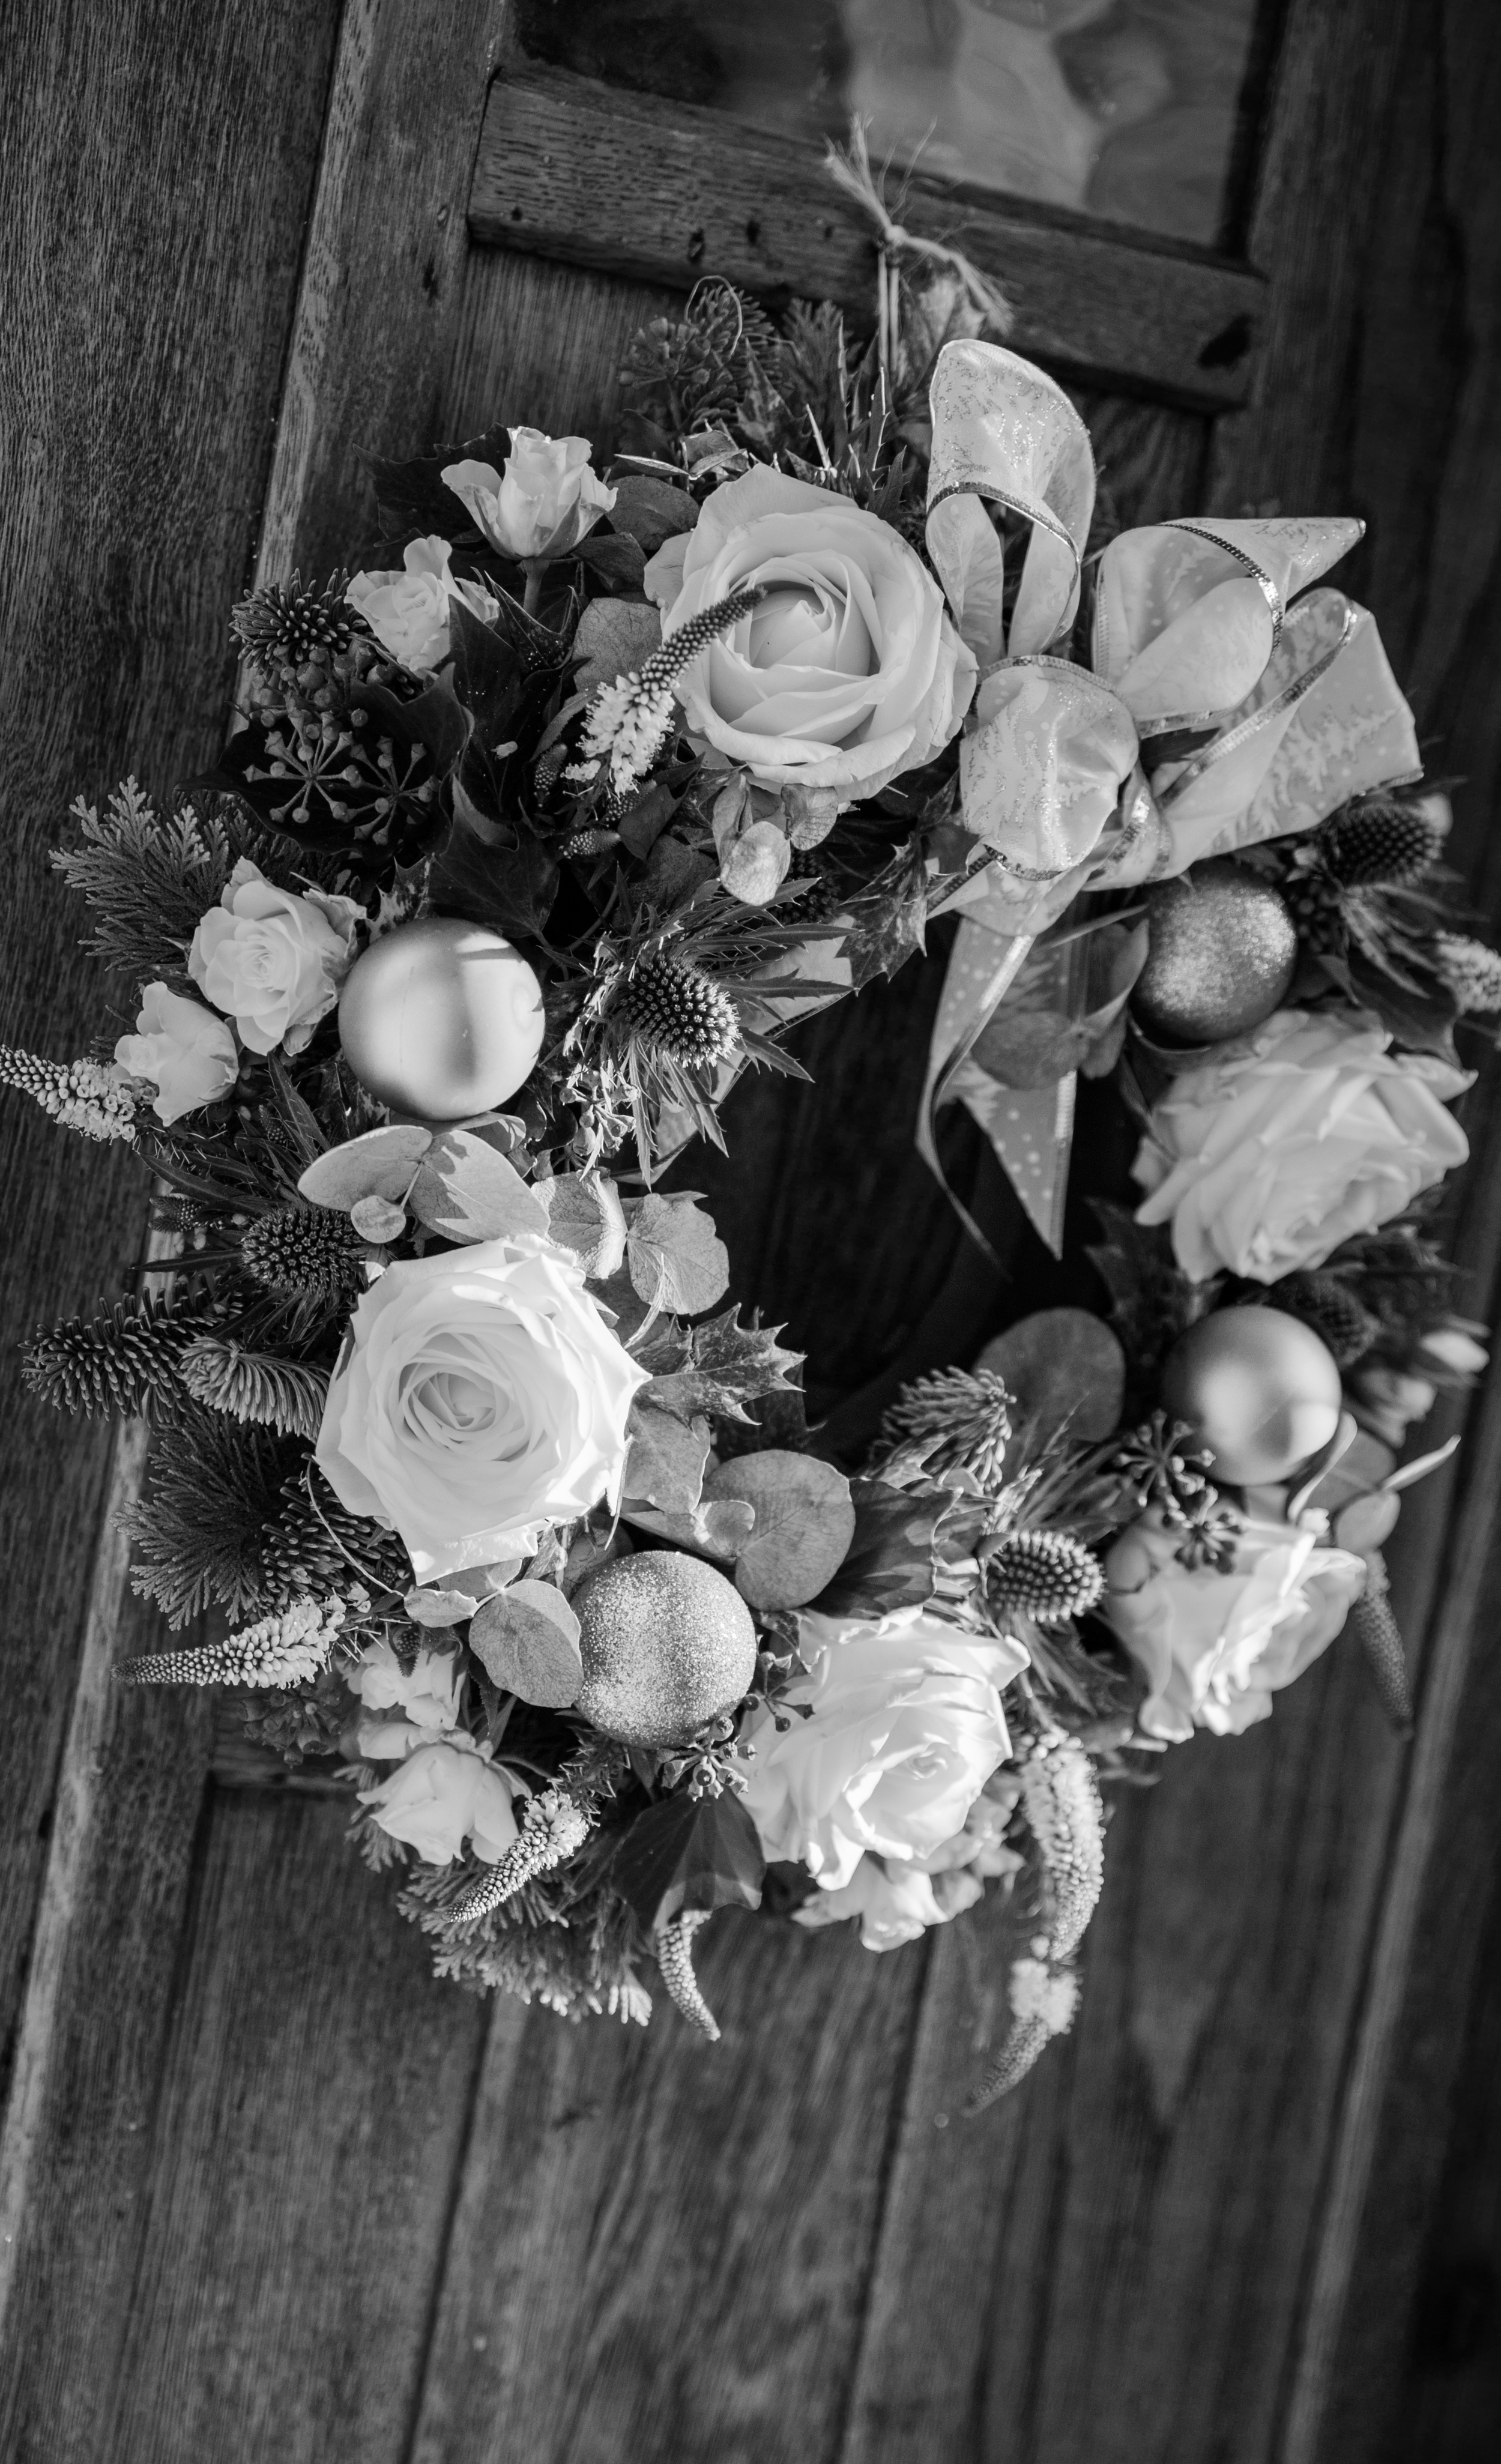
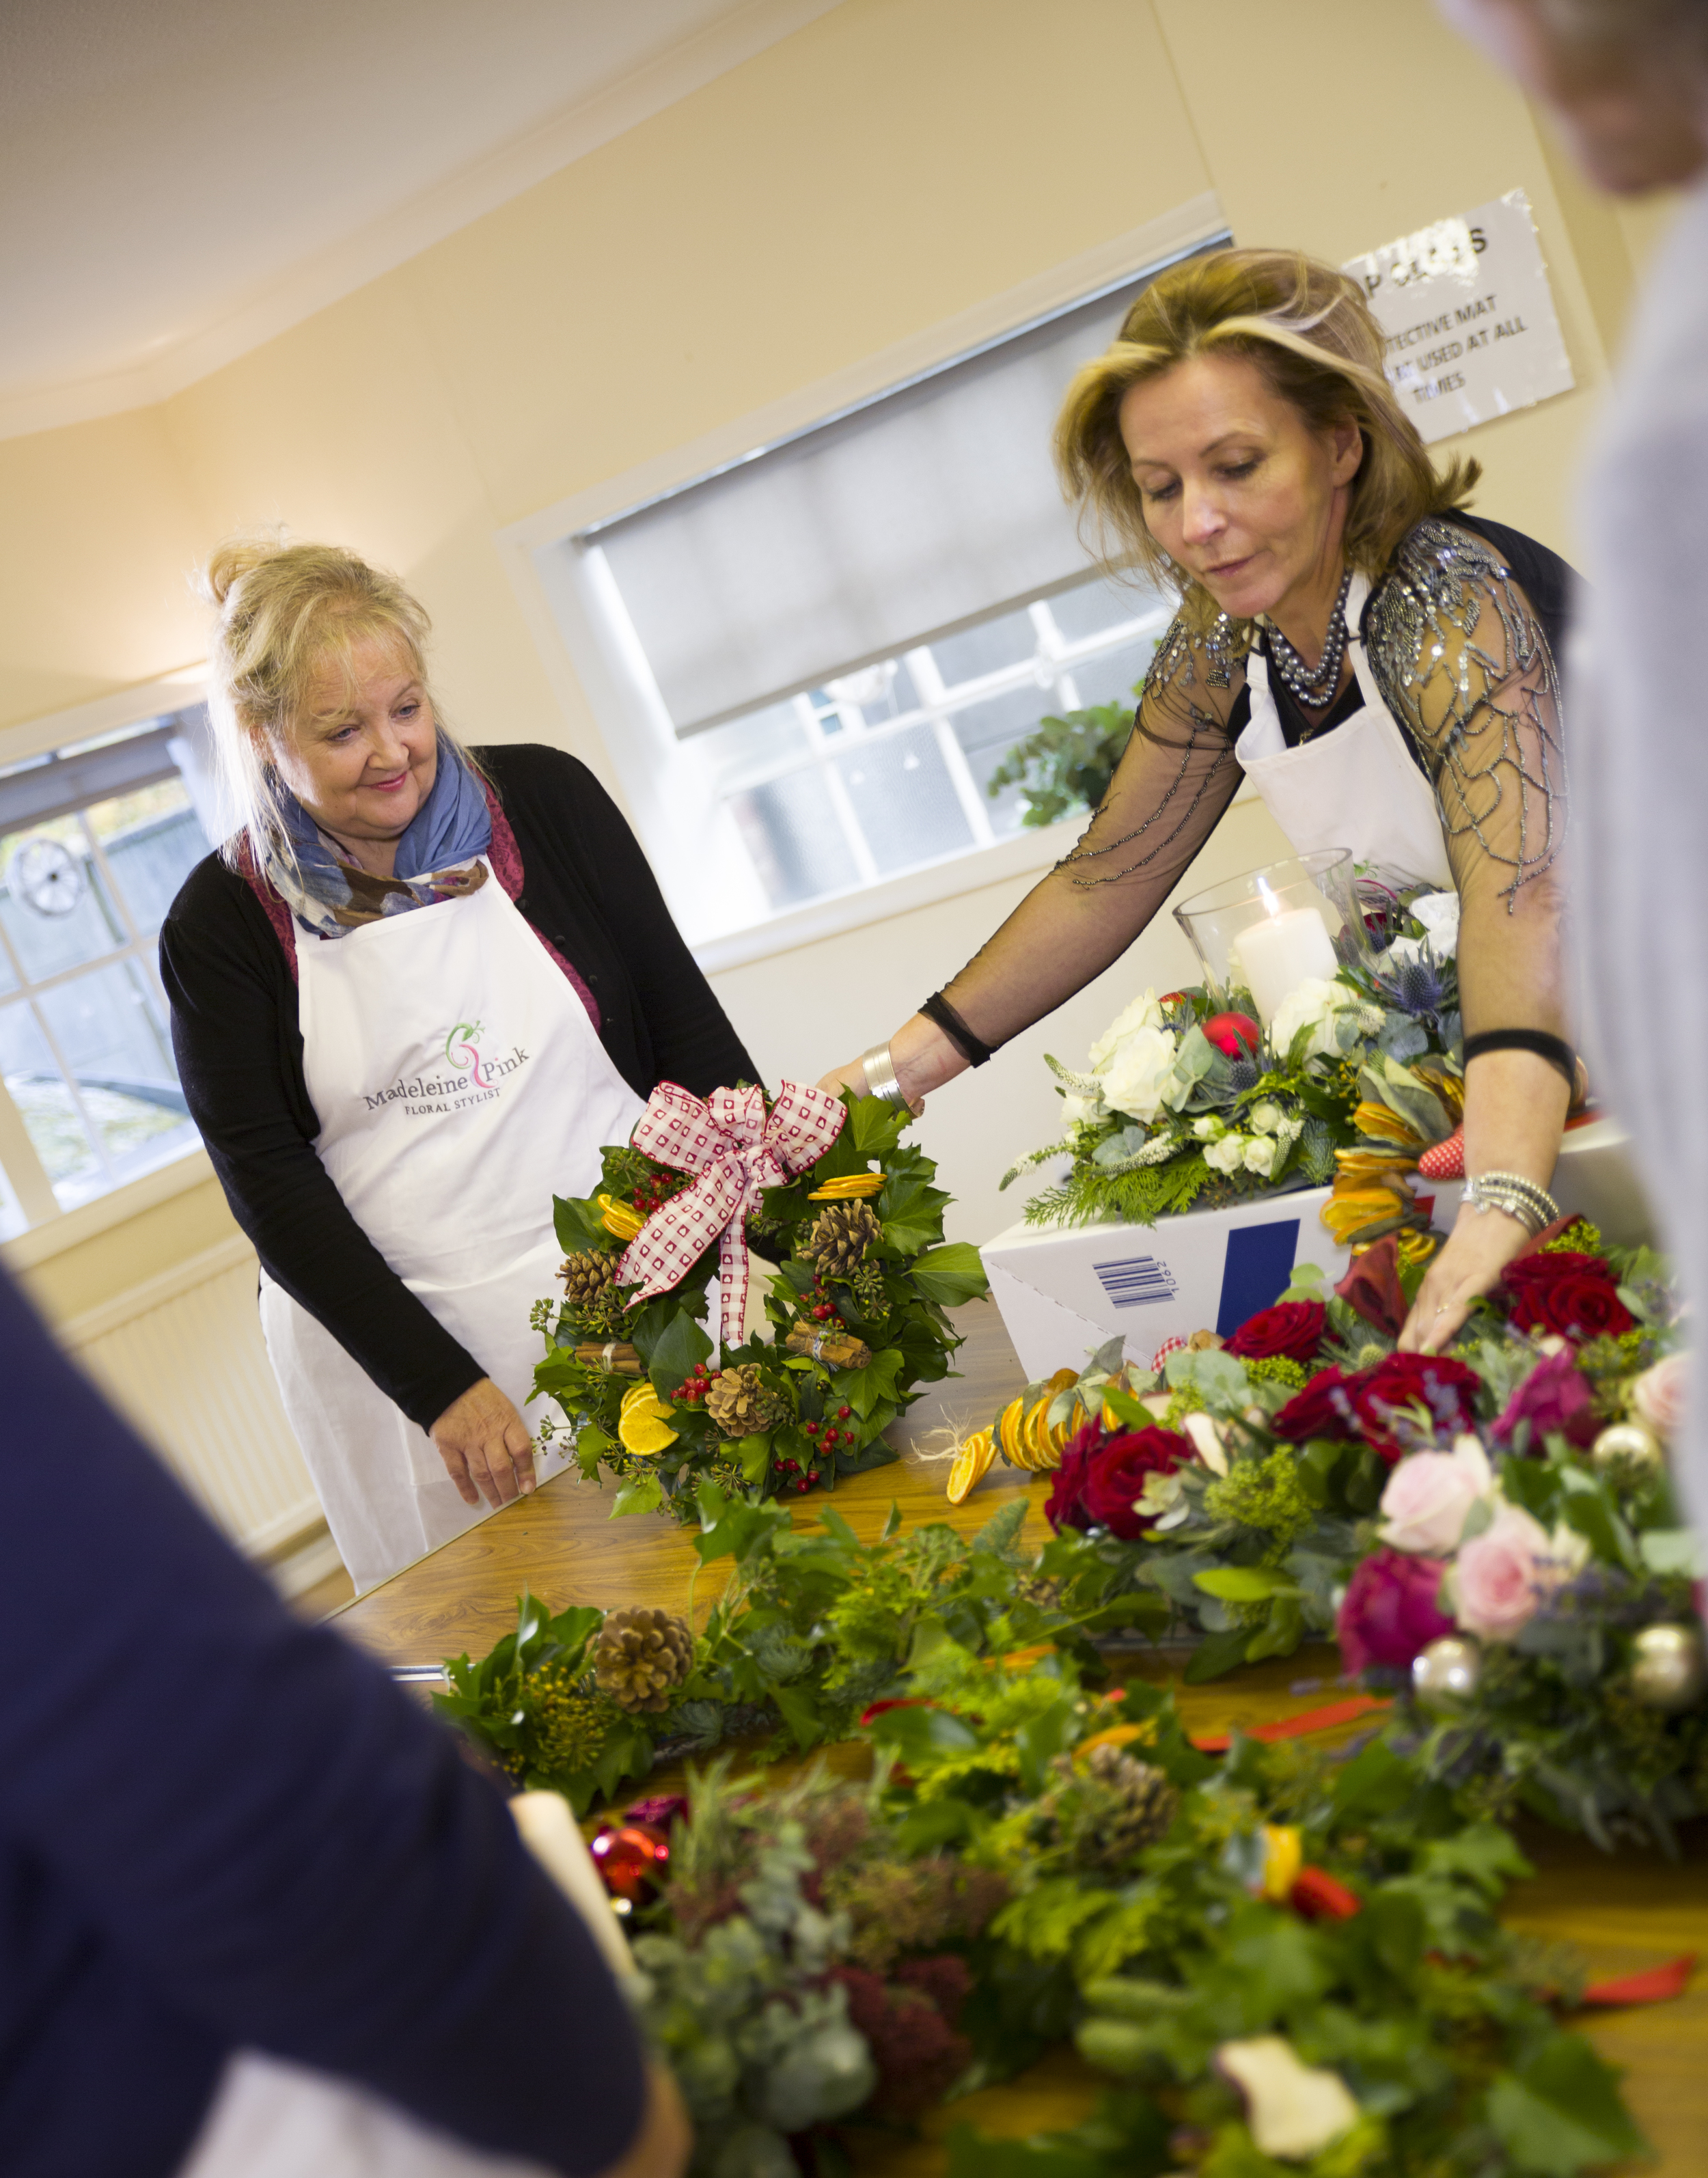
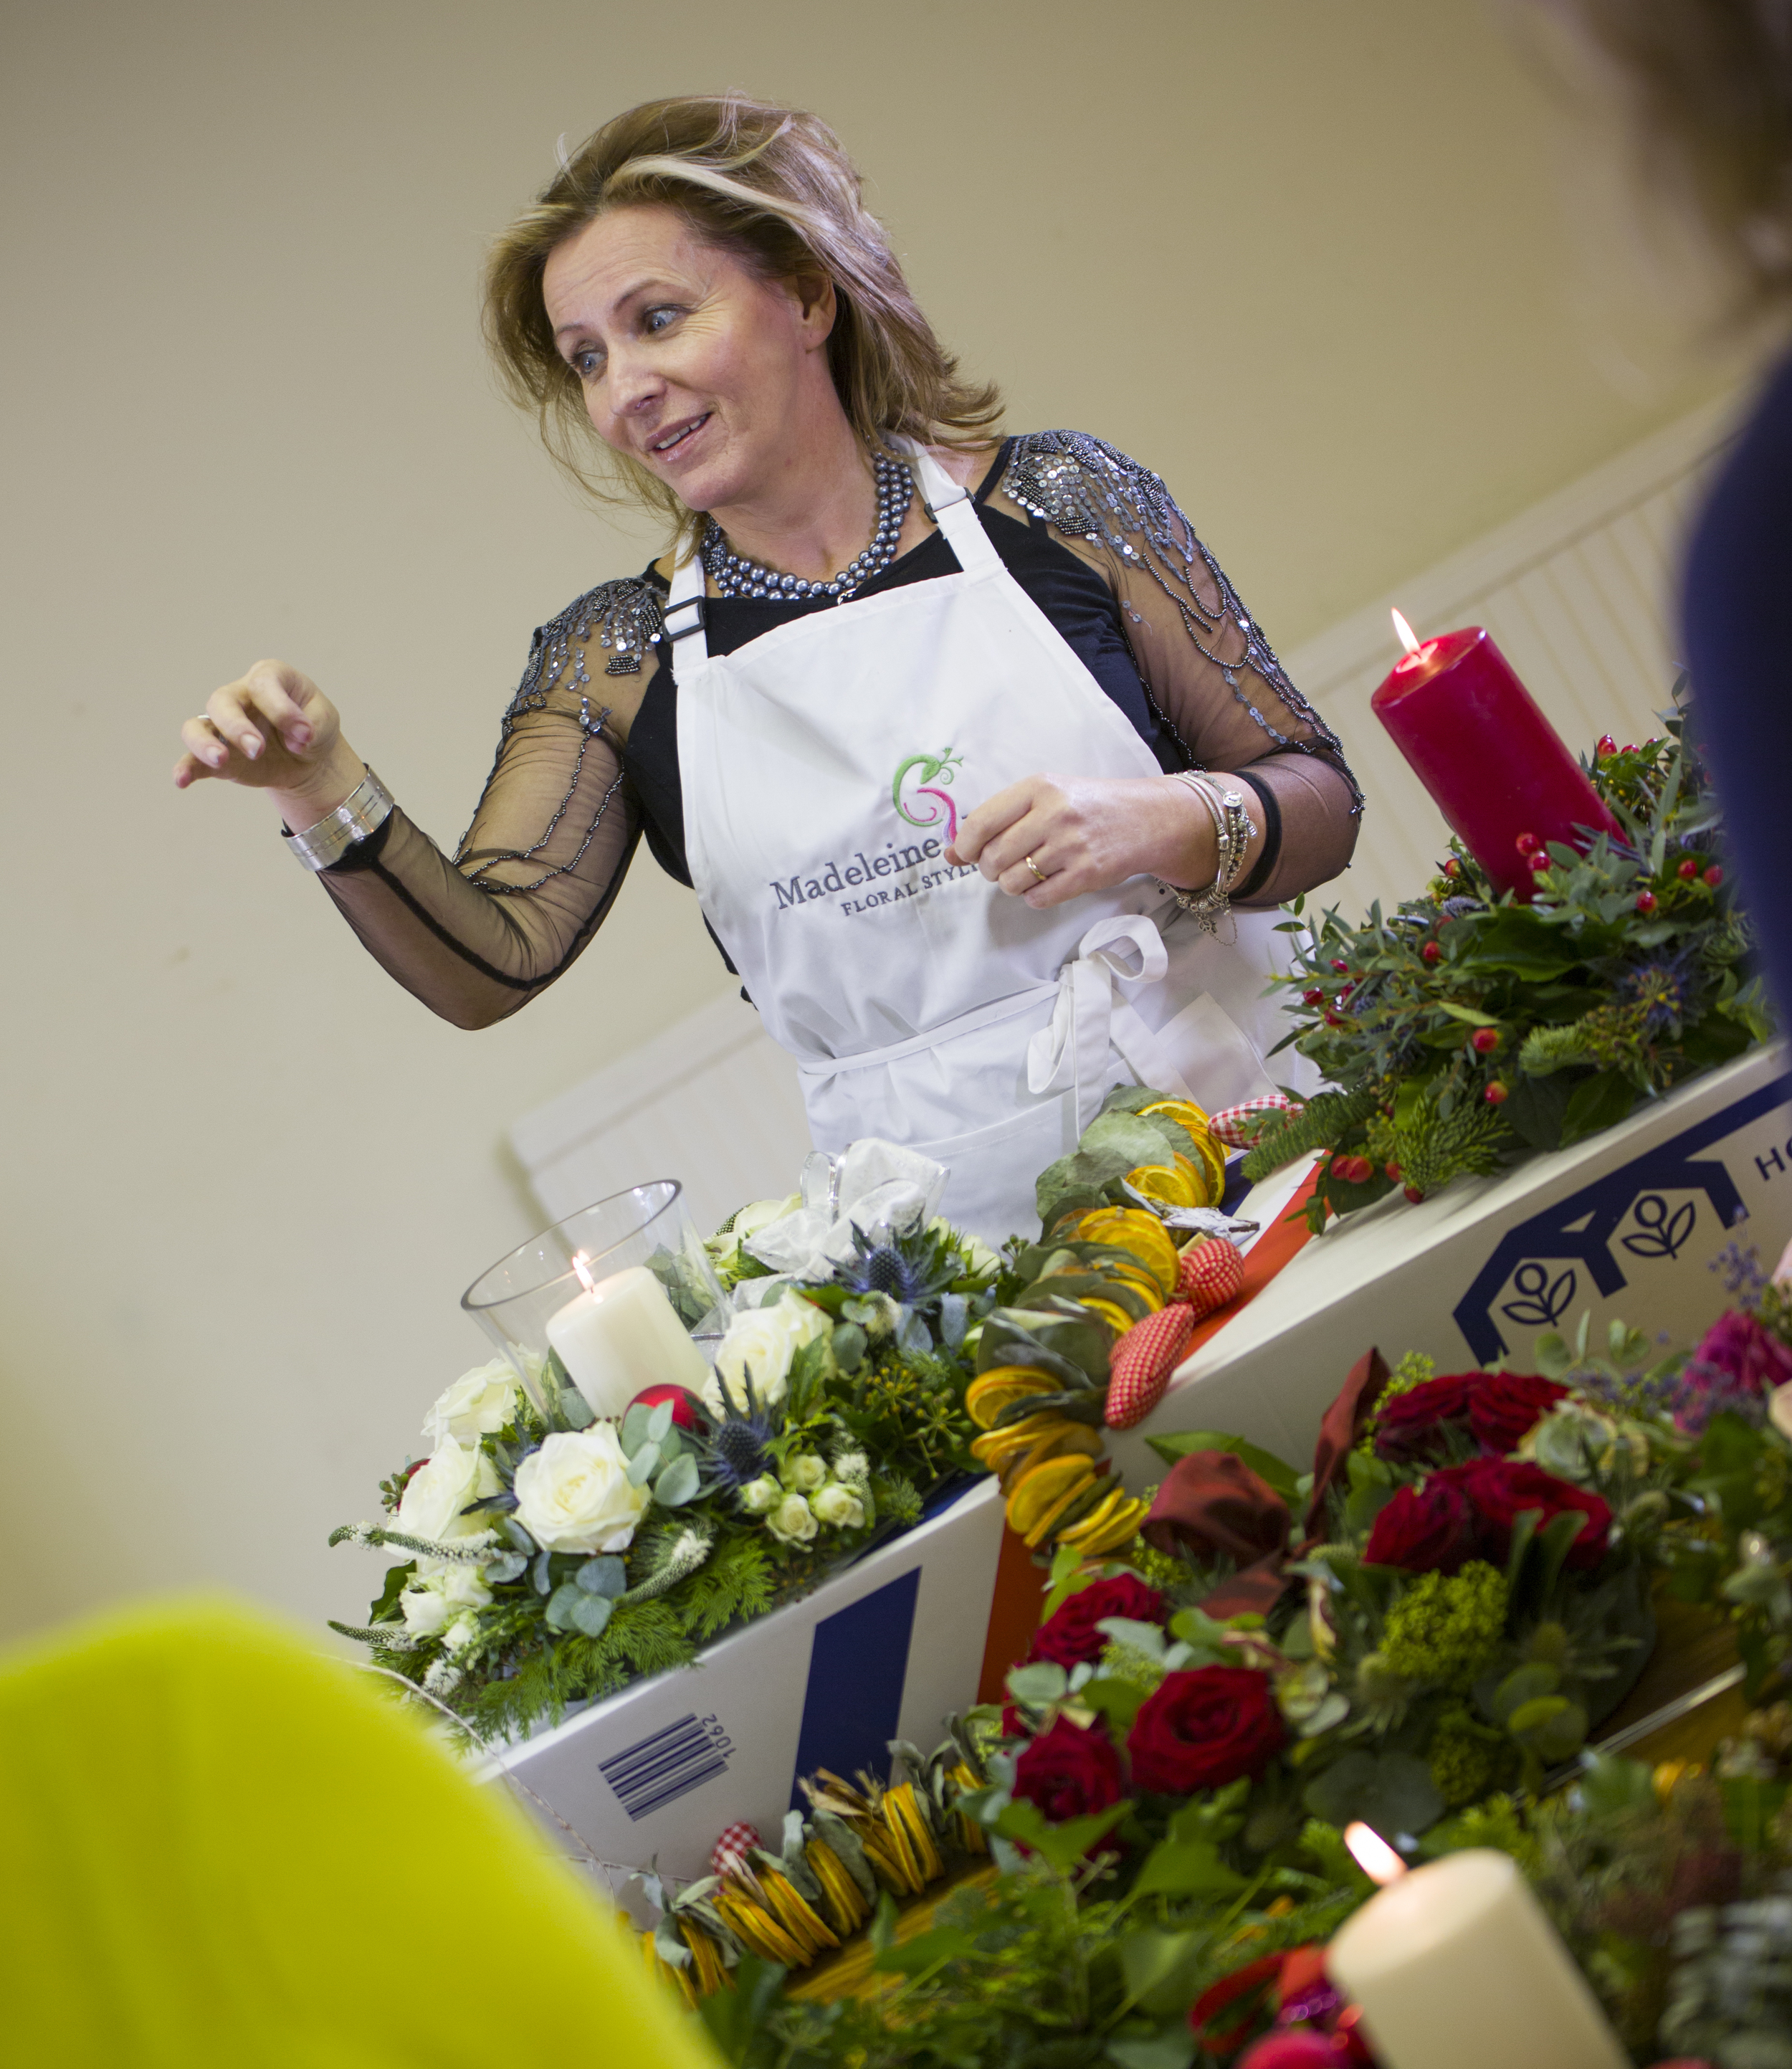
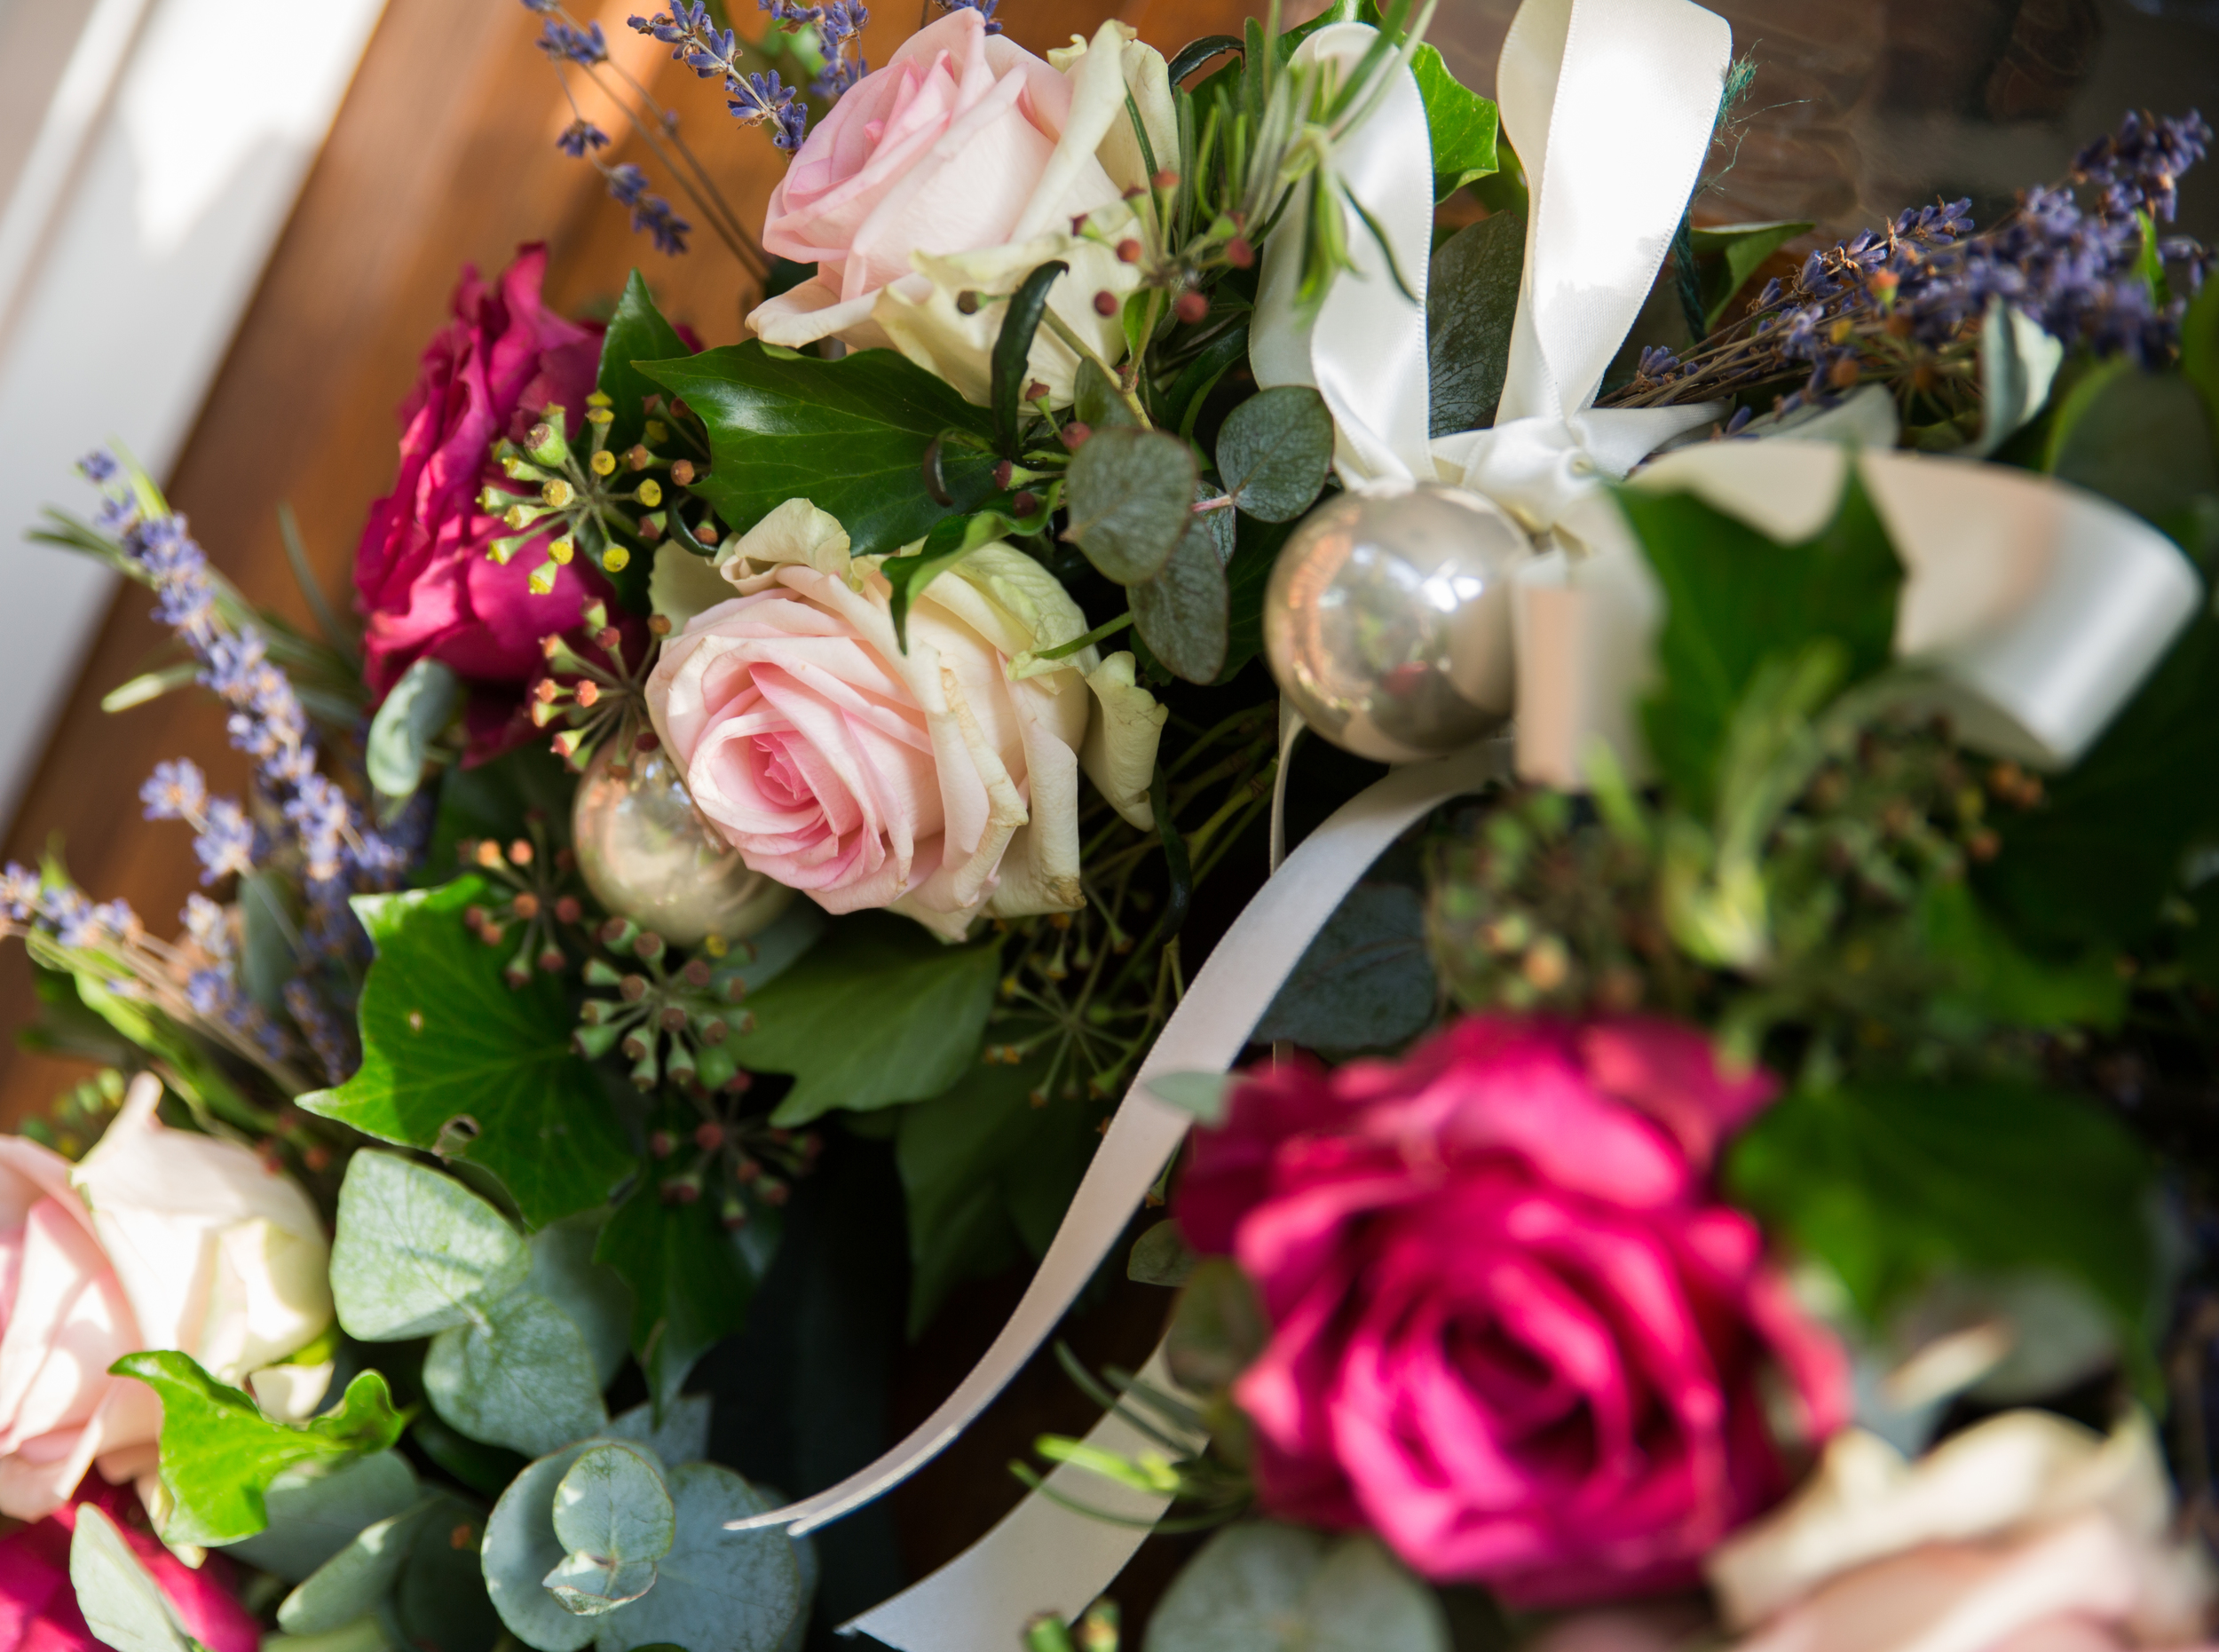
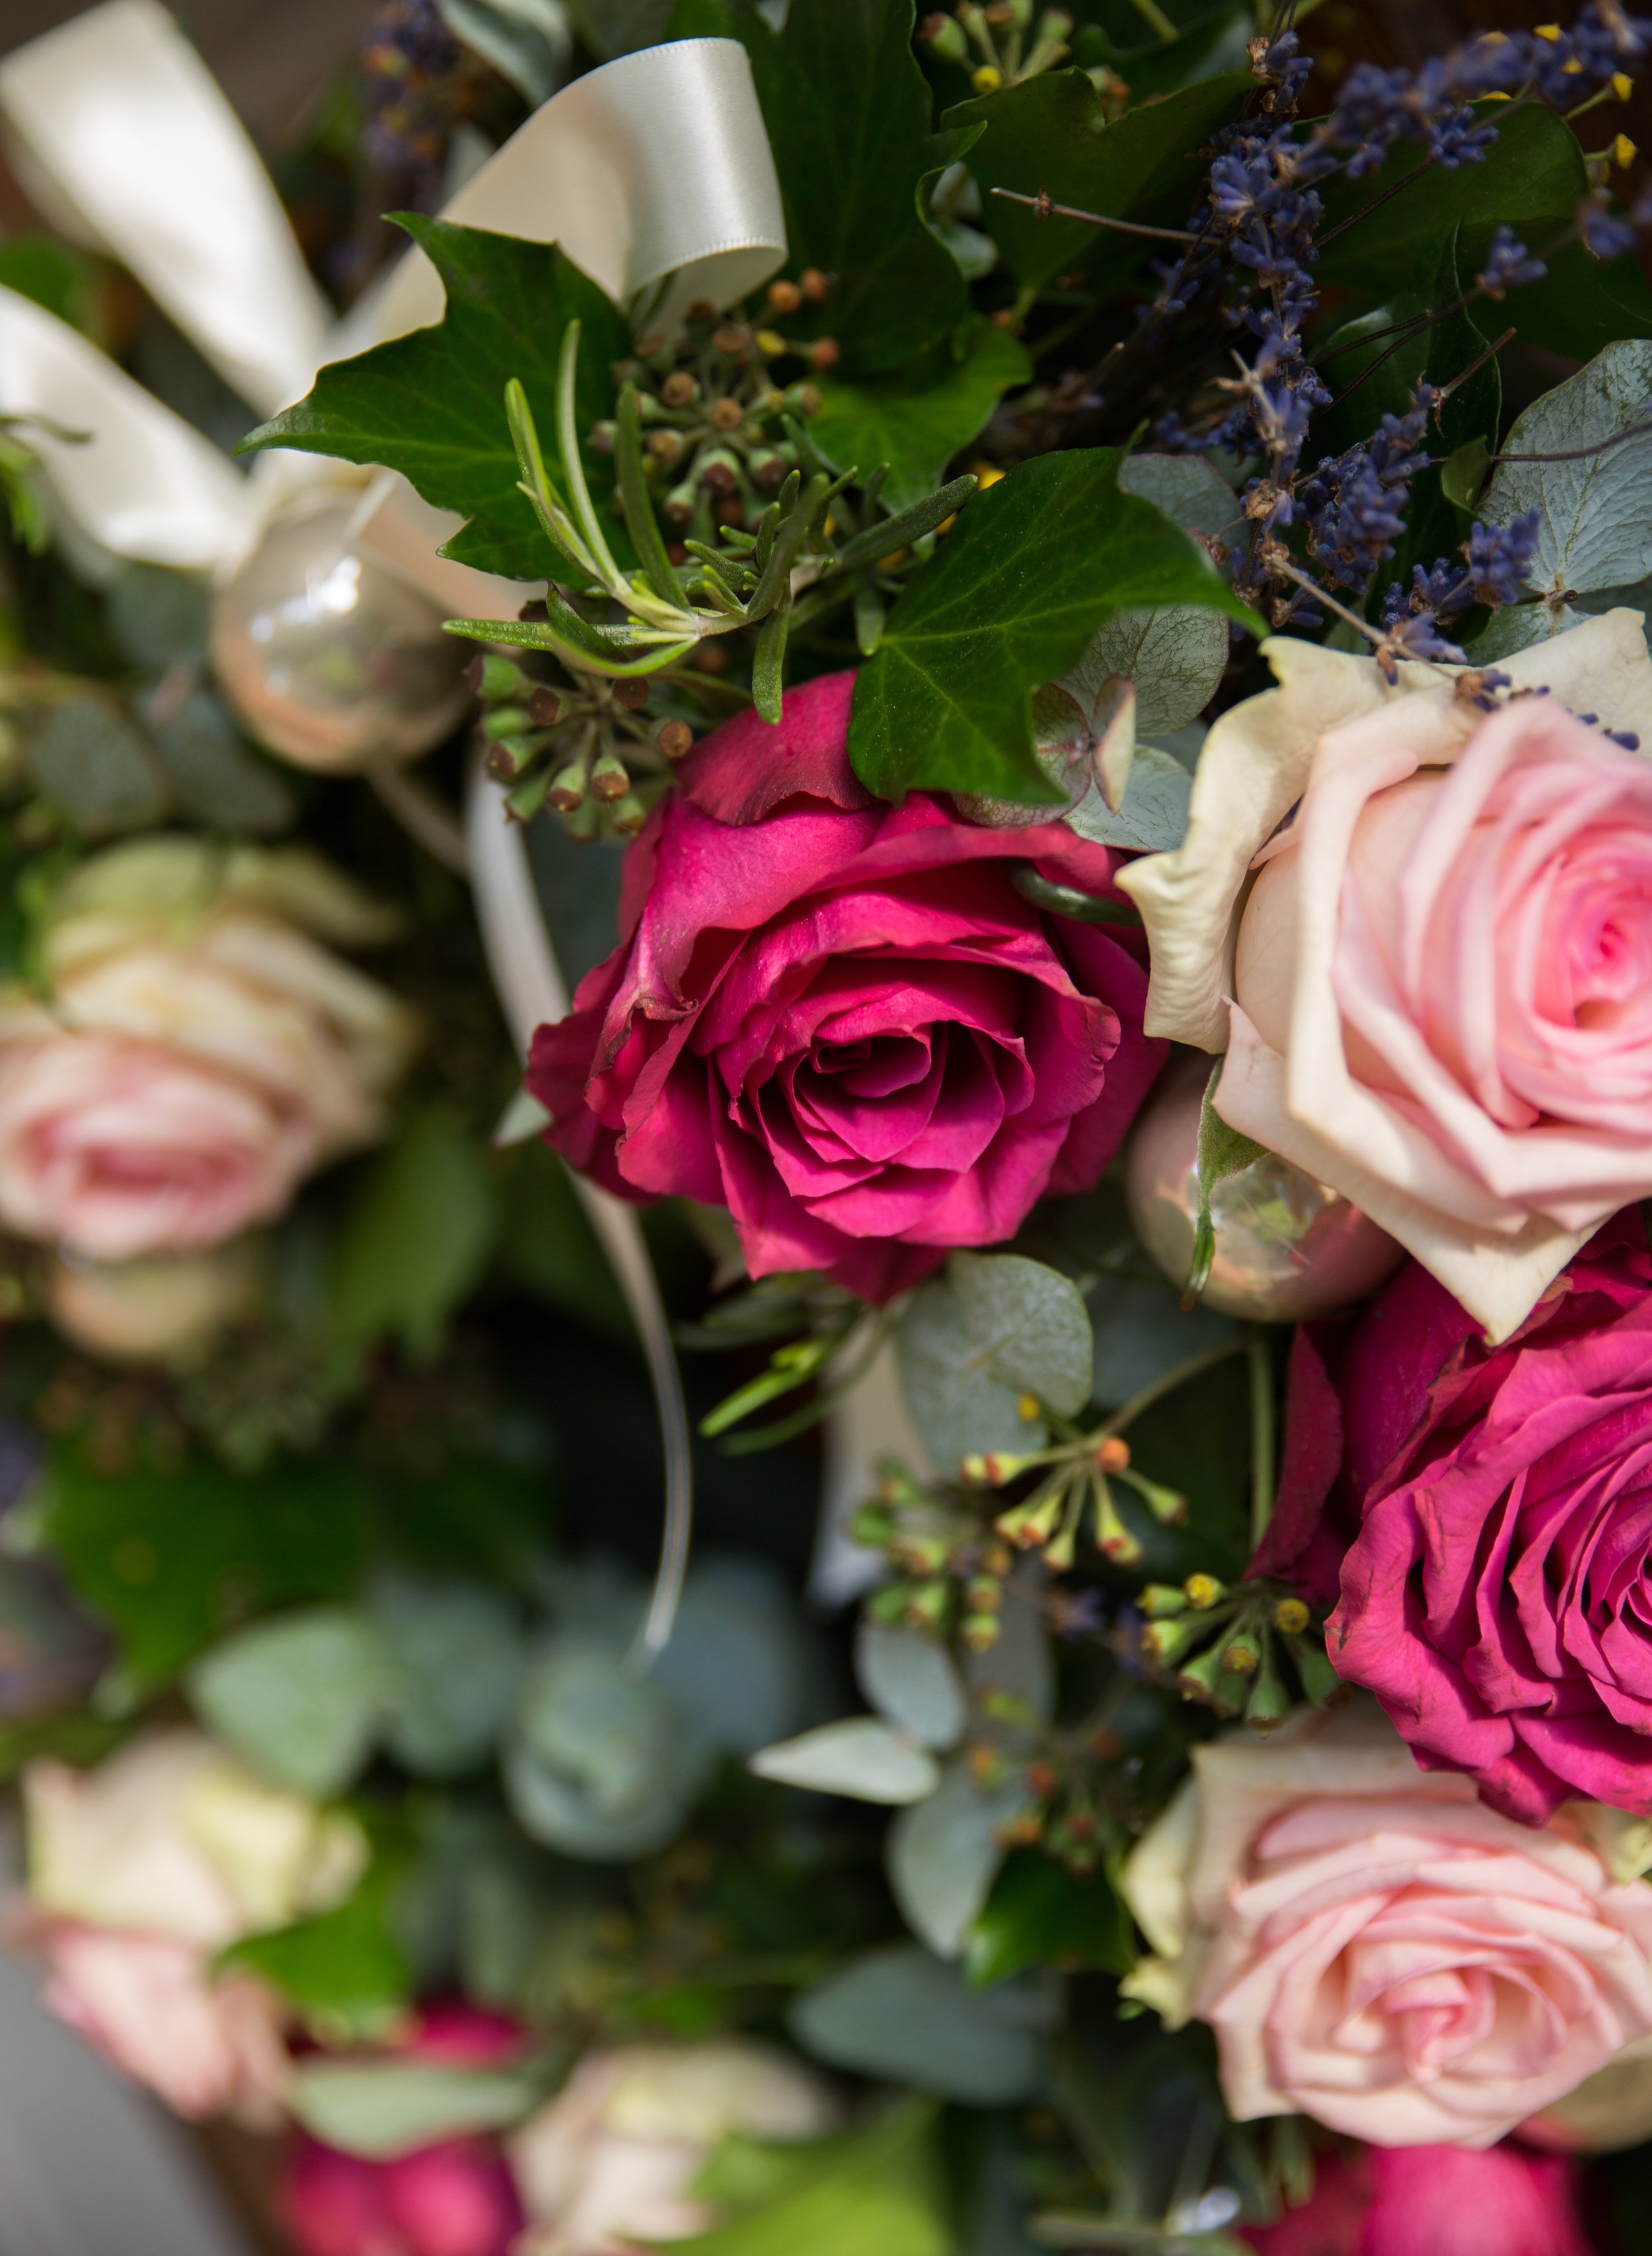
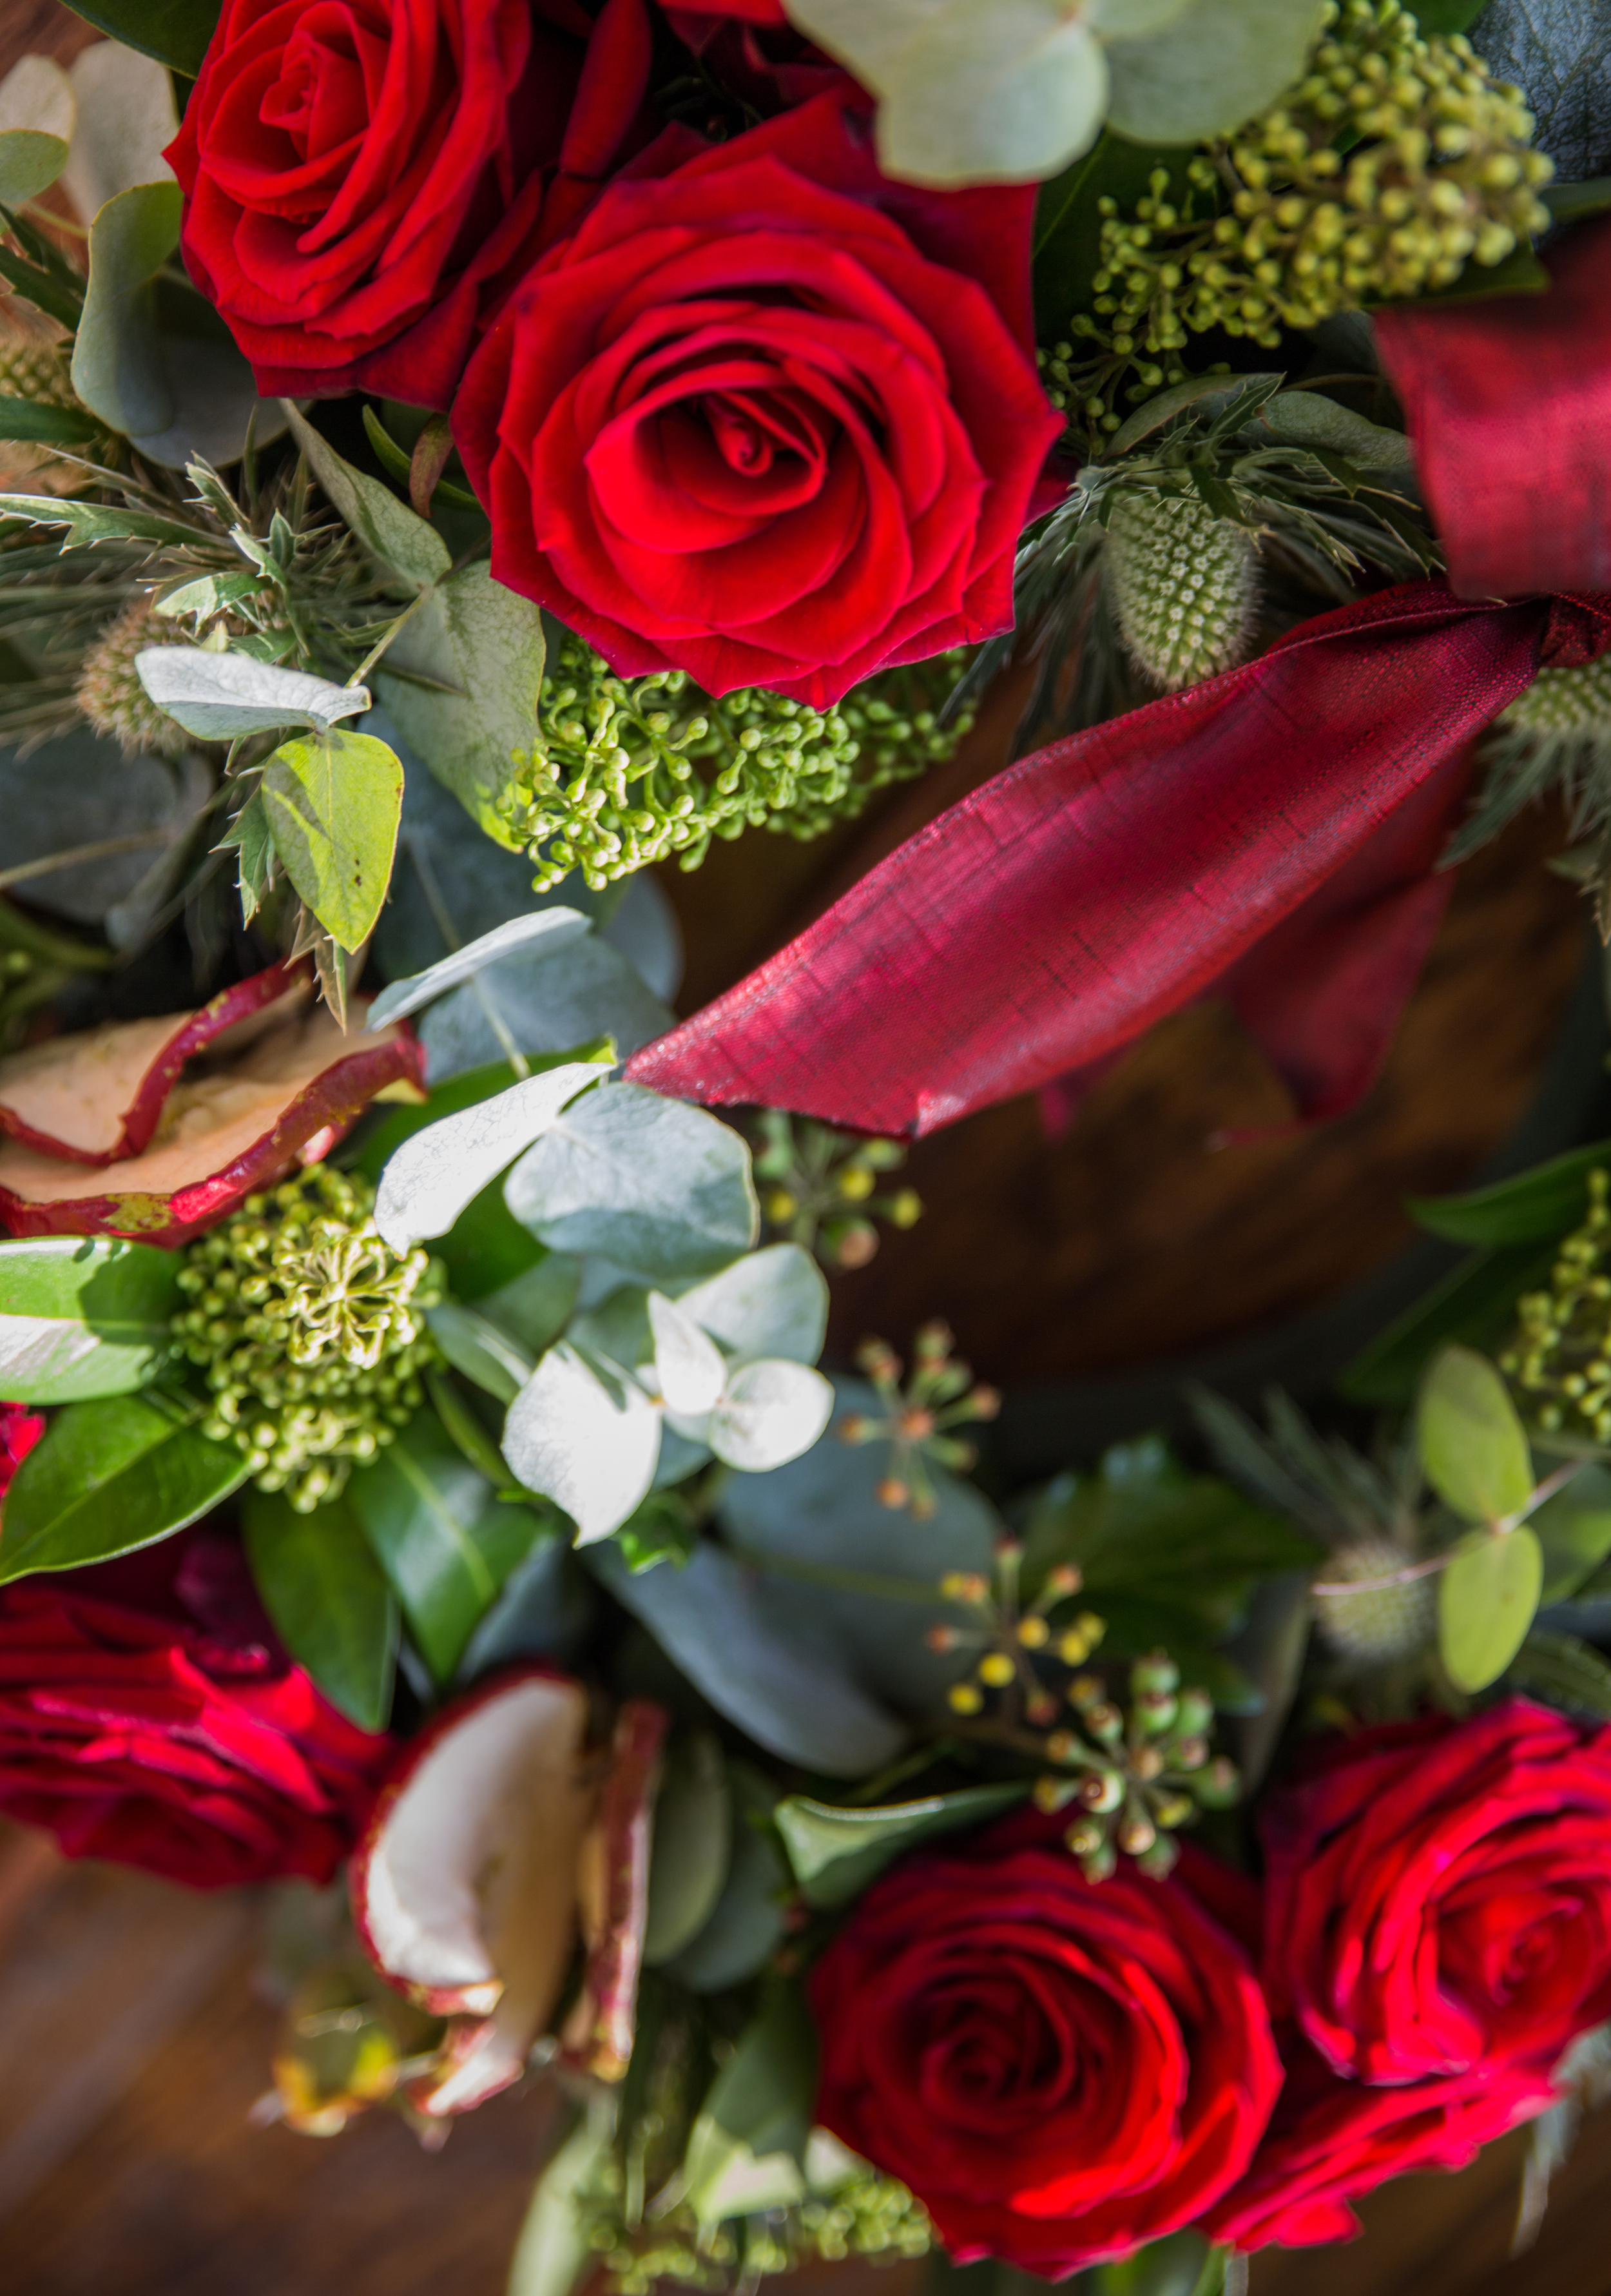
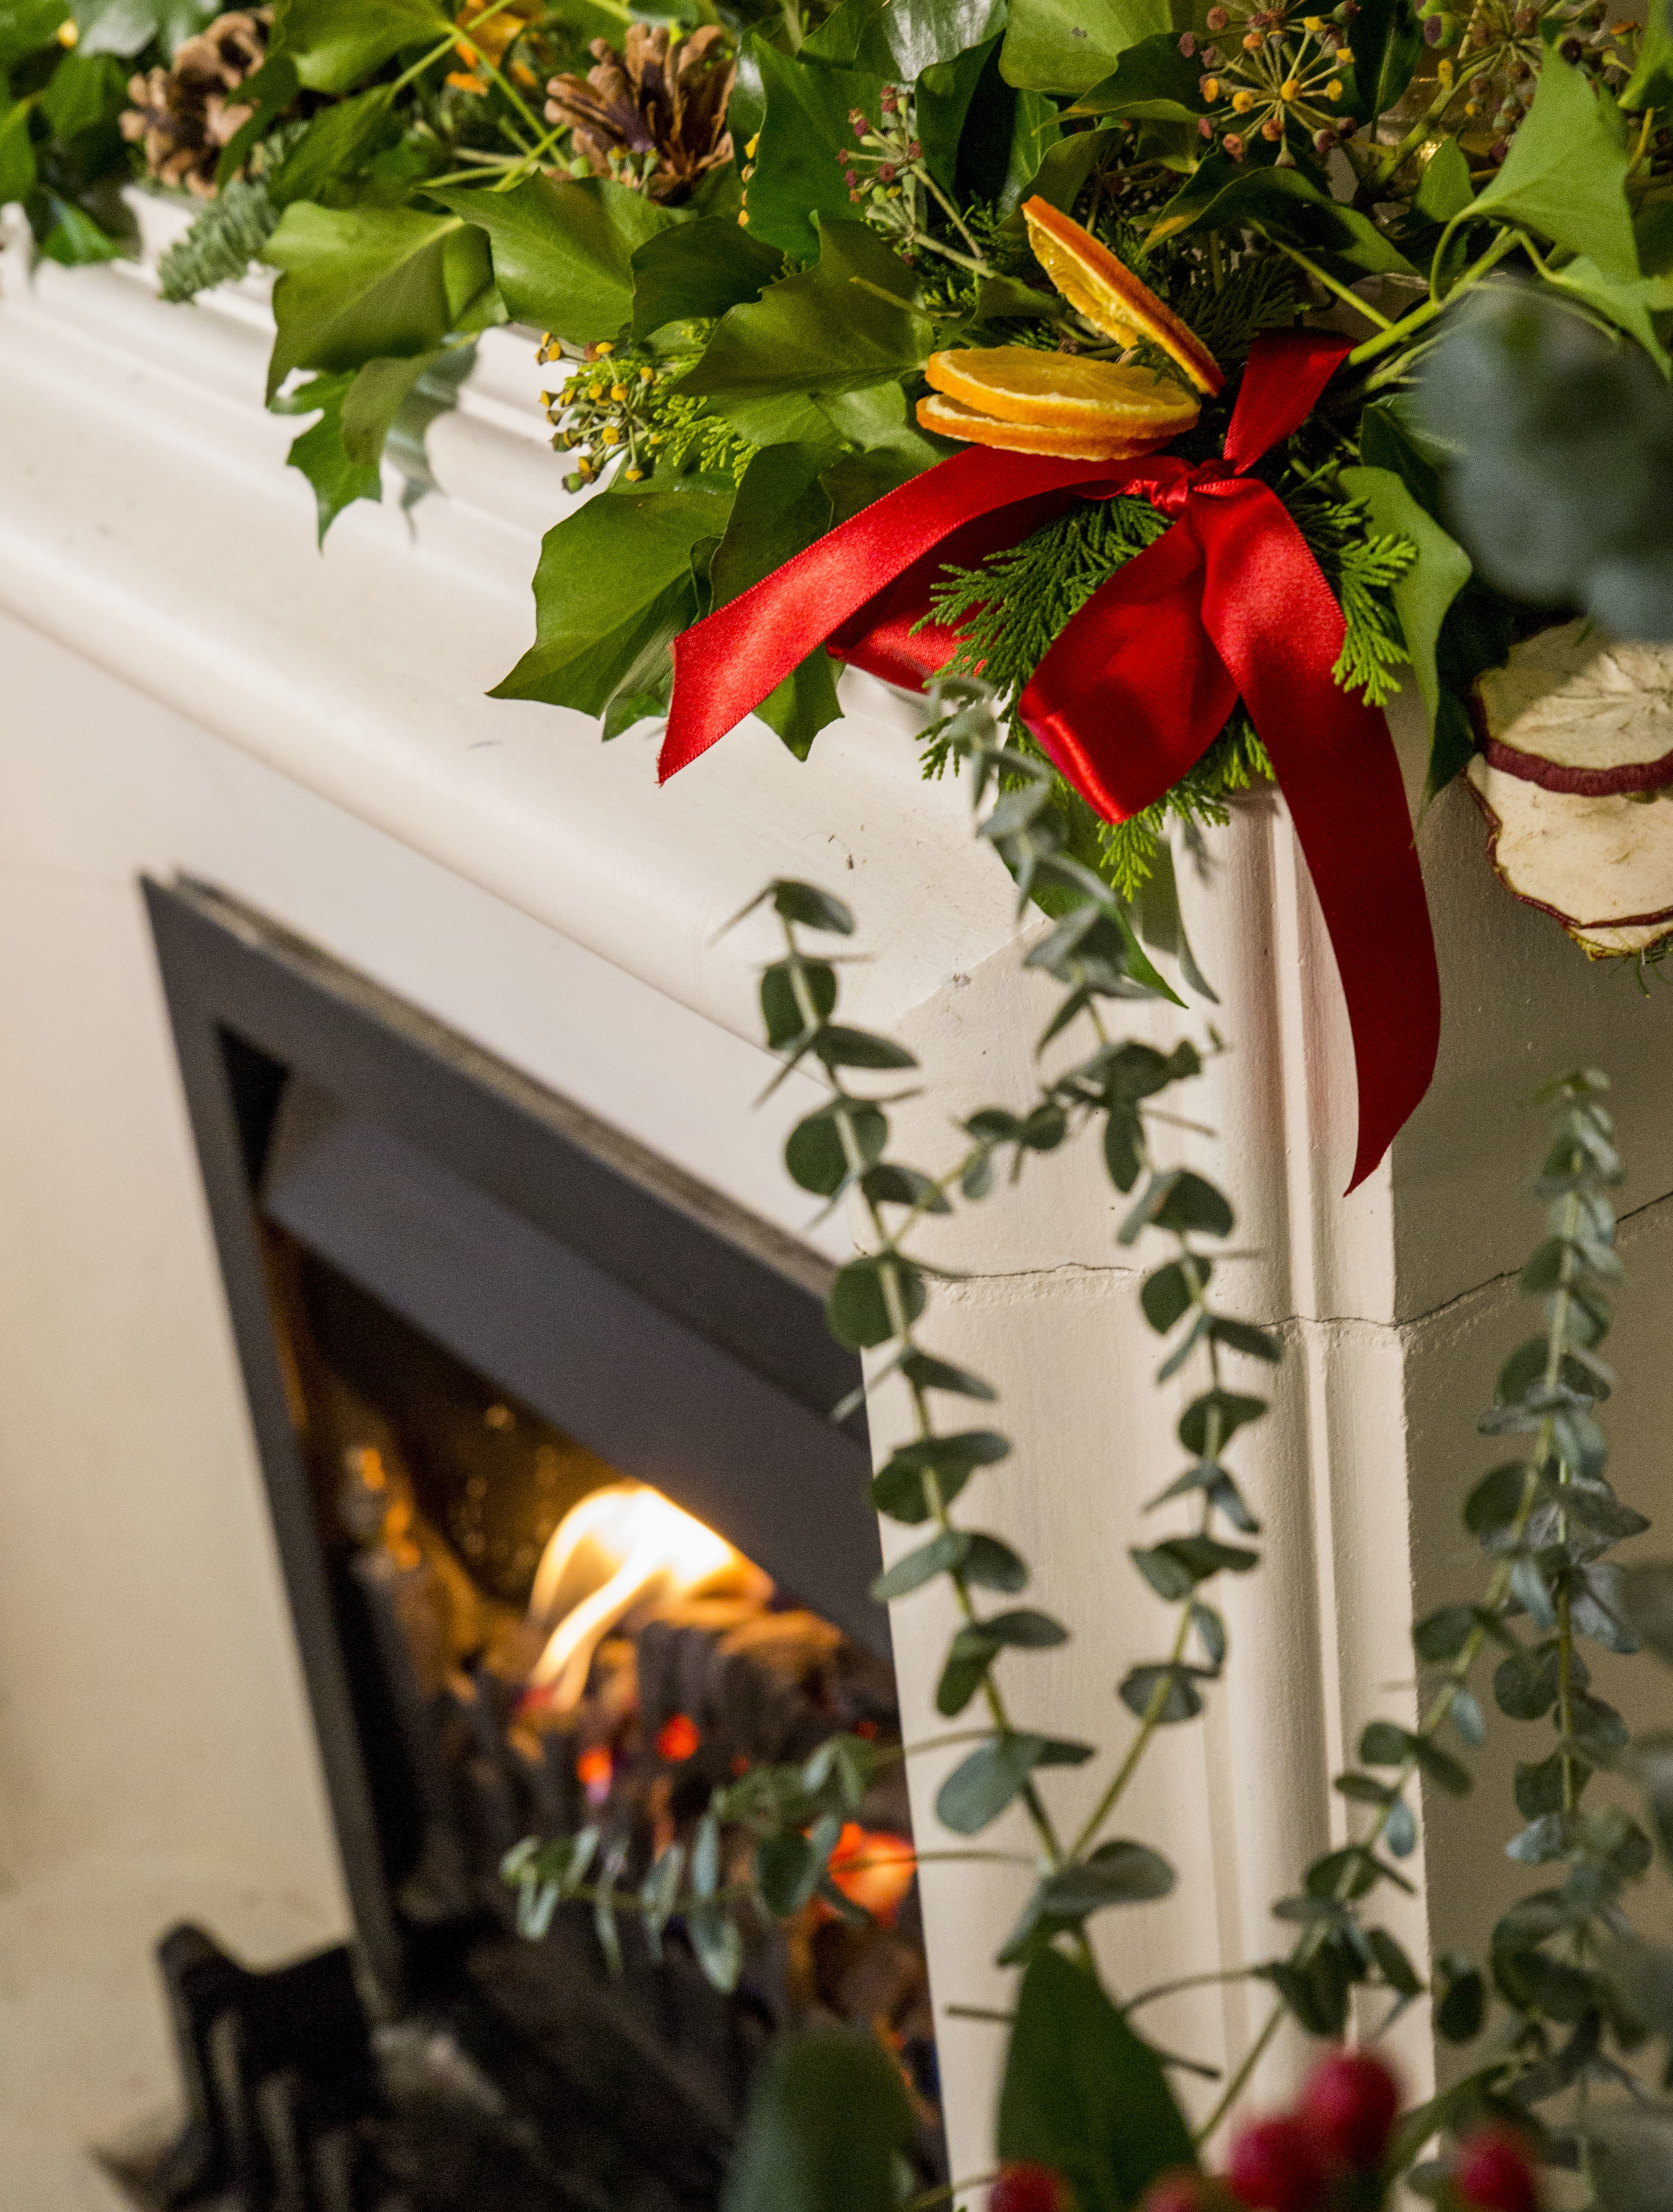
On Wednesday I was working with Margaret from Madeleine Pink Floral Design to capture her beautiful Christmas decorations.
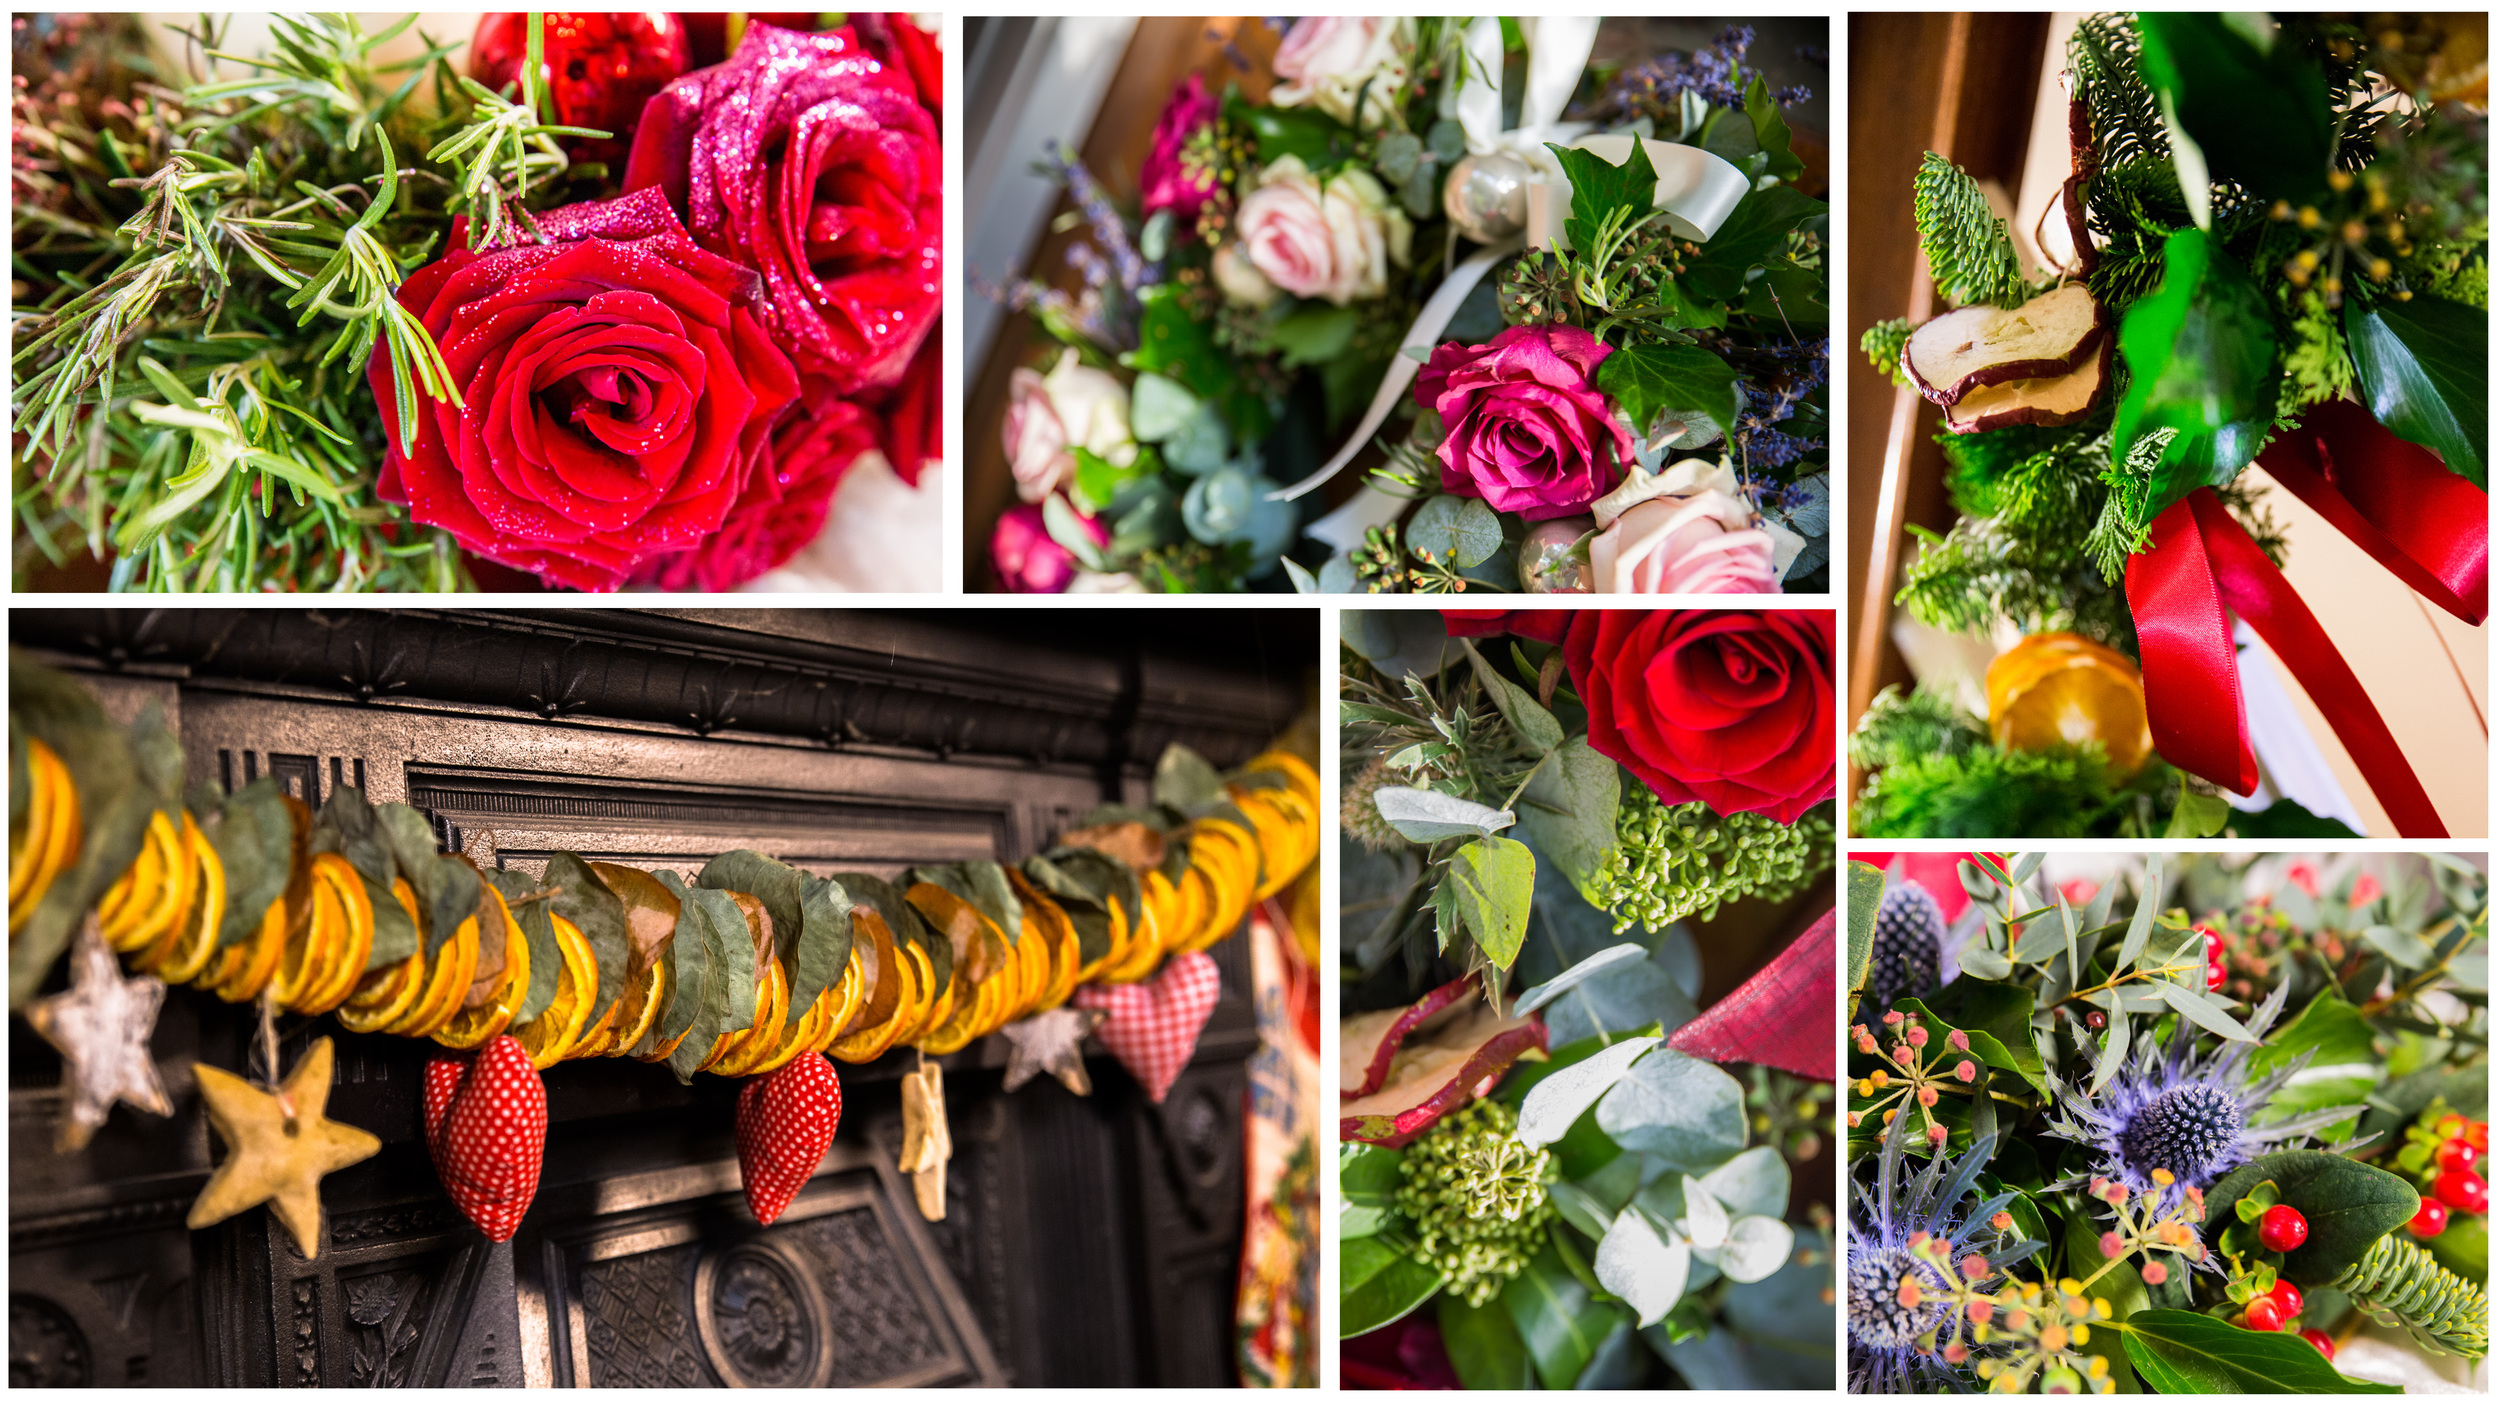
Using the Manfrotto 1x1FT LED light panels on the pro-light stands, I softly lit the decorations with the fine tuning bi-colour control; resulting in soft shadows!
Kit list: Canon 5D mkIII, Tamron 24-70, Sigma 70-200, Samyang 35mm, Canon 100mm L, Manfrotto Pro-Cx3 tripod and MHV500, Spectra 900FT LED light, Variable friction arm + super clamp.
"Chestnuts roasting on an open fire, Jack Frost nipping at your nose".
I'm doing a few productions for the IABM in the lead up to their annual conference in December, which included a video shoot in London at IBM; a panel discussion on the key topics of the conference, and the industry at the moment.
John Ive, the director of business and technology at the IABM chaired the discussion, with six of the top decision makers in the industry around the table, which included: Dominic Stone (Our host at IBM and multimedia executive), Rob Roberts (Avid), Marc Risby (Boxer), David Peto (Aframe), Chris Steele (Marquis), Paul Glasgow (Chyron Hego).
It was an early start for myself and Glen, to get a head start in the traffic heading up to the South Bank. Usually I would get the train, but as this was a full setup I required my little cars assistance to get the equipment there!

Glen at IBM

Me at IBM!
We arrived at the IBM office on the South Bank with plenty of time to spare, and after unloading the equipment in the loading bay we parked up in the National Theater and met our host for the day, Dominic. A wonderful chap with a wealth of experience as a television producer, many thanks for your hospitality throughout the day!

Trolley fulla gear!
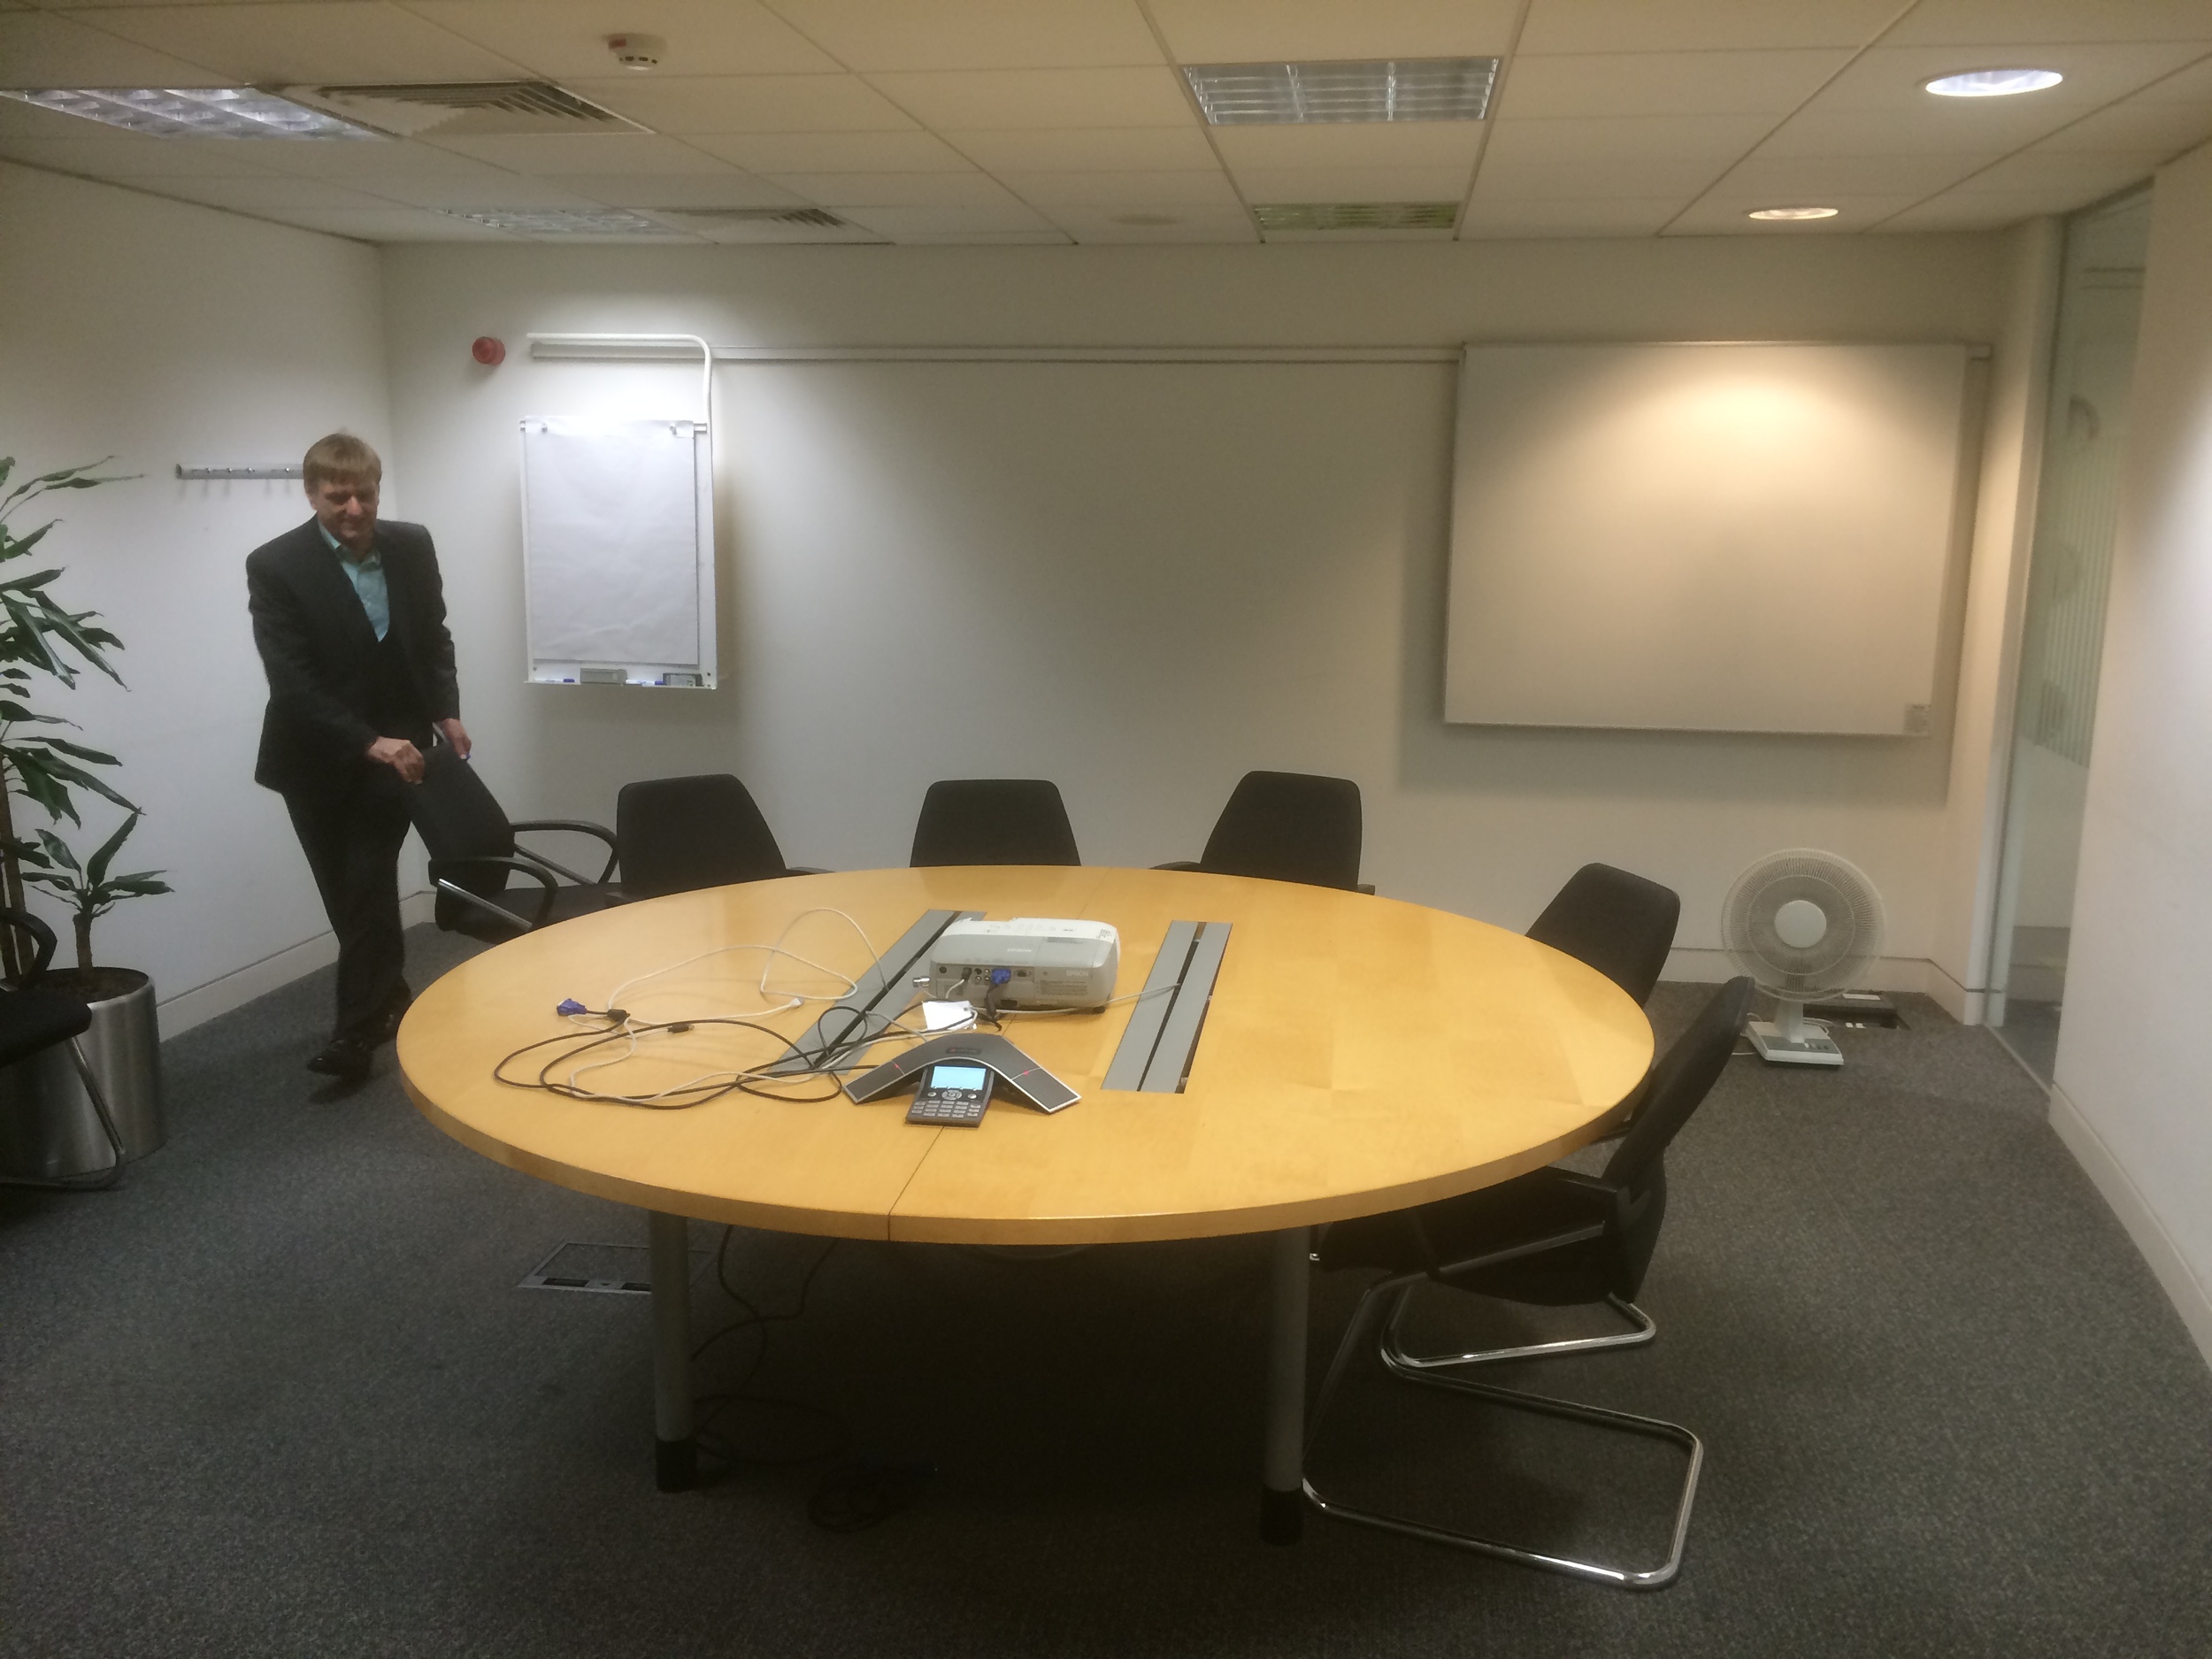
What the conference room at IBM looked like before we got our hands on it!
Once we had access to the conference room, we began the setup and moved any unnecessary furniture out of the way. Manfrotto has greatly helped me on this as much of the kit is new and definitely new to this kind of video environment too, and after IBC I was very keen to try out the new tripods; which now can be lowered to almost ground level with innovative locking joints. Also, although I'm using a 5D and telephoto lenses to shoot with (so the load is not very heavy), but having steady and smooth shots are imperative to keeping a good composition, both the tripod and video head allow me to achieve shake free pans and tilts, which can be counter balanced depending on your camera, lens and accessory setup.
The new light stands are awesome. I know it is something simple, but it makes a massive difference. Stands and poles can often get mislaid, damaged in transit or in use, or simply can't withhold a wide variety of lights and accessories. These on the other hand have a brilliant locking system to hold multiple stands together, meaning they can be carried and transported very easily. They are not heavy, and can take a heavy load (not that these SPECTRA 1X1 LED panels are that heavy)!

Panel video setup with Manfrotto 1x1 bi-colour LED light
After lunch, we checked the colour temperature on the four lights; the two front facing the panel, one giving a back light onto the speakers and background, and a smaller 900 panel to push a little extra light into the right panelists. All of the lights are bi-colour, which gives maximum flexibility when the video scenario changes so frequently.
The lights I used were: Manfrotto Spectra 1x1FT x 3, Spectra 900FT and the 1004BAC pro light stands.
To make sure all of the cameras were exposed and set correctly, we did a custom white balance and orientated around the cameras and lights to make sure we achieved the best out of the setup.
I transported the camera and audio equipment in the Manfrotto Pro Backpack50 as its large capacity was required for the amount of kit I needed which included:
I also had the Manfrotto 536 MPRO tripod and 504 HD video head in the large tripod bag, and the ProCX-3 and Pro-B for the other cameras.
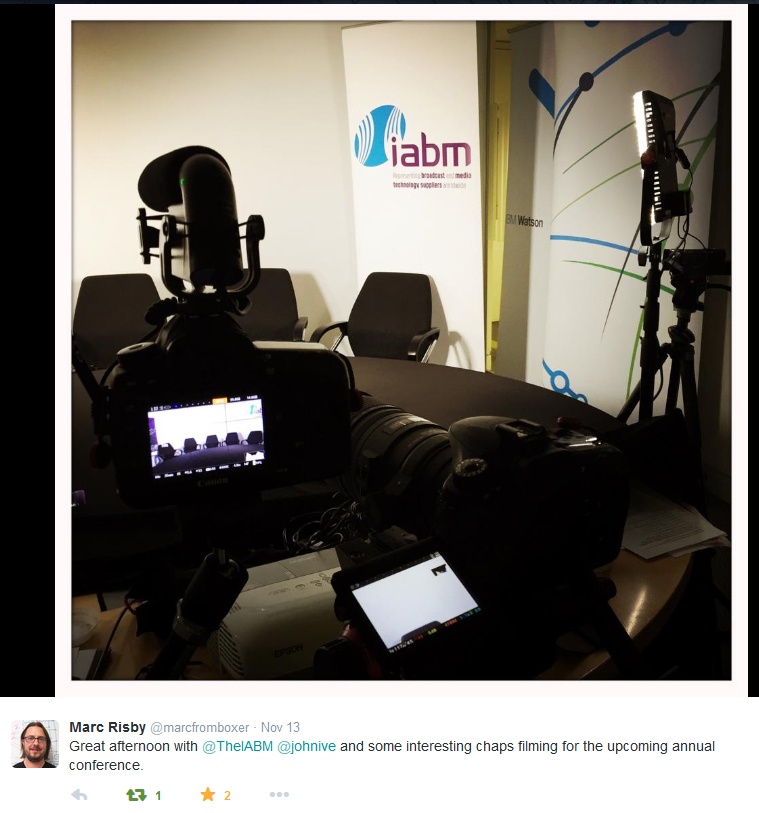
Marc Risby, one of the panelists tweets about his experience!
While we were setting up!

Shortly after our panelists arrived, and they were eager to get started in discussion; I put the lapel mics on and plugged them into the H6. John kindly allowed us to use a couple of cameras and microphones for the extensive number of panelists. The Sony ECM-77 are great lav mics with good audible response, as is the Rode Lavalier which I used with the MiCon-1 connector into the ENG-G3 wireless kit.
I got the panel talking for a practice run through while I checked the audio levels on the H6, which was placed under John's chair (due to the cable length I could not monitor the camera from my filming position).
If you've been following me on Twitter, you'll have seen I have been looking for a wide angle lens for both an APS-C and FF sensor (so far Canon's 16-35 F/2.8 is best), so I was without my Tamron 17-50mm (my standard lens on the 60D as a wide). To compensate for this, I alternated my usual video setup from 5D and Sigma 70-200mm for an MCU and 60D and 17-50mm for a wide to; 5D and Tamron 24-70mm for a wide and 60D and 70-200mm for an MCU which allowed me to capture a good wide angle of the whole panel, as well as a great MCU on the speaker.
The 504HD video head has integrated fluid drag and resistance which makes panning and tilting a dream for video; it is smooth, yet easily changed depending on the subject and timing of the camera moves. A large pan-handle makes the motion firm and steady throughout.
With a vast experience in broadcasting from all of the panelists, it was difficult not to get distracted into the conversation. After each discussion we shot some VoxPops for the conference with the other panelists that did not participate in that panel, which will be used throughout the presentations and panels at the IABM annual conference in December.
Unlike the Zoom H4N, the H6 has an incredible power consumption rate meaning on four AA batteries it can record multiple channels (four in this care) for a good 2 hours without needing to change! This meant I could rely on it recording stand-alone under Johns seat without monitoring, after each channel was correctly set (with a general limiter on).
In terms of the camera settings I was using:
- VisionTech2 Picture Profile
- F/4.5 on the MCU so focusing between panelists was minimum
- Because of light setting, as well as not much fast motion happening I reduced the electronic shutter to 1/33.
- ISO between 400 and 640 due to the good light produced from the 1x1's!
Once the filming was complete, we quickly de-rigged the setup so we could get out of London as quickly as possible; not to get held up with traffic queues etc.. Thankfully, all of the Manfrotto gear we had is fast to setup and tear down so we were ready to leave within half an hour or so!
Once I got back home, I begun the ingest and backup process; remembering to have 3 copies of the footage and audio on separate drives in case any fail. I also began re-naming the files so it is easier for me to locate specific panelists microphones when doing the audio mix-down.
Although the Zoom H6 is an awesome recorder, it for some reason records track 3 and 4 together (as a stereo channel) so I had to split the Tr3-4 into separate Track 3 and Track 4 files using Audition. This is a simple process, but I wonder if this can be changed in the device itself?

Here you can see the top track is different to the other, this is because the T3 and T4 inputs were from different speaker microphones, but recorded together. To resolve this, I simply solo'd the track I needed, selected ALL and copied, created a new audio stereo track and pasted the track there; this creates a Left or Right track for you in the new audio file.

Here, I've created a new stereo audio track and pasted the solo'd track into it. The new stereo audio file then replicated the audio on both tracks. I then saved this as a new audio track.
In Pluraleyes, I created the four camera sources and imported their respective video files, and then singularly imported each audio track into a new audio recorder as a new audio source (instead of importing the five tracks into the same audio recorder). This would allow me to control not only each track individually, but also when I separate the four sections into their own multi-camera sequences I have separate audio tracks rather than one reallyyy long one.


You can see here that the audio tracks from each microphone are separated in the sync.

I was amazed at the speed of the sync, only 1 minute 8 seconds to sync all of the video and audio from many different sources! I then exported the sync as both an XML and XML with replaced audio from Pluraleyes, and created a new Premiere Pro project for this production.
I imported the XML file into the new project, which imports and creates a new sequence with the synced footage in place. So easy! I then placed the footage into their respective sequences depending on the discussion topic, and prepared them for multi-camera editing!


The sequences are now ready to be cut using the Multi-camera interface! Unfortunately I can't show anymore as this is an IABM member exclusive video, but I hope you have enjoyed seeing how videos like this are produced on a small scale!
Blimey lots has been going on over the last week, I hope it has been as hectic for you as it has been for me! Monday started with continuing the design of the graphics for a recycling animation, a daunting task which put my drawing skills to the test. Bearing in mind I've spent the majority of the last year behind a camera, I took my time to learn the techniques I would need to use Illustrator properly. I would usually use Photoshop over Illustrator, but until I recently found out PS is not truly vector, and as I would be using a combination of the Pen tool and others to design the images this was very important, as I would need to transform the graphics later in After Effects.
My best mate Glen came down from Wycombe for a surprise week to, so I spent plenty of time catching up with him and chatting about work. He gave me so very important advice; "Everything is too complicated these days, you should keep it simple and your audience won't know the difference, especially if it is moving and animated anyway." True words, and I took Glens advice which not only sped up the process, but made me more confident with the work I was producing.
Here's a screenshot to show all of them! (I think I am working on a 10K canvas).

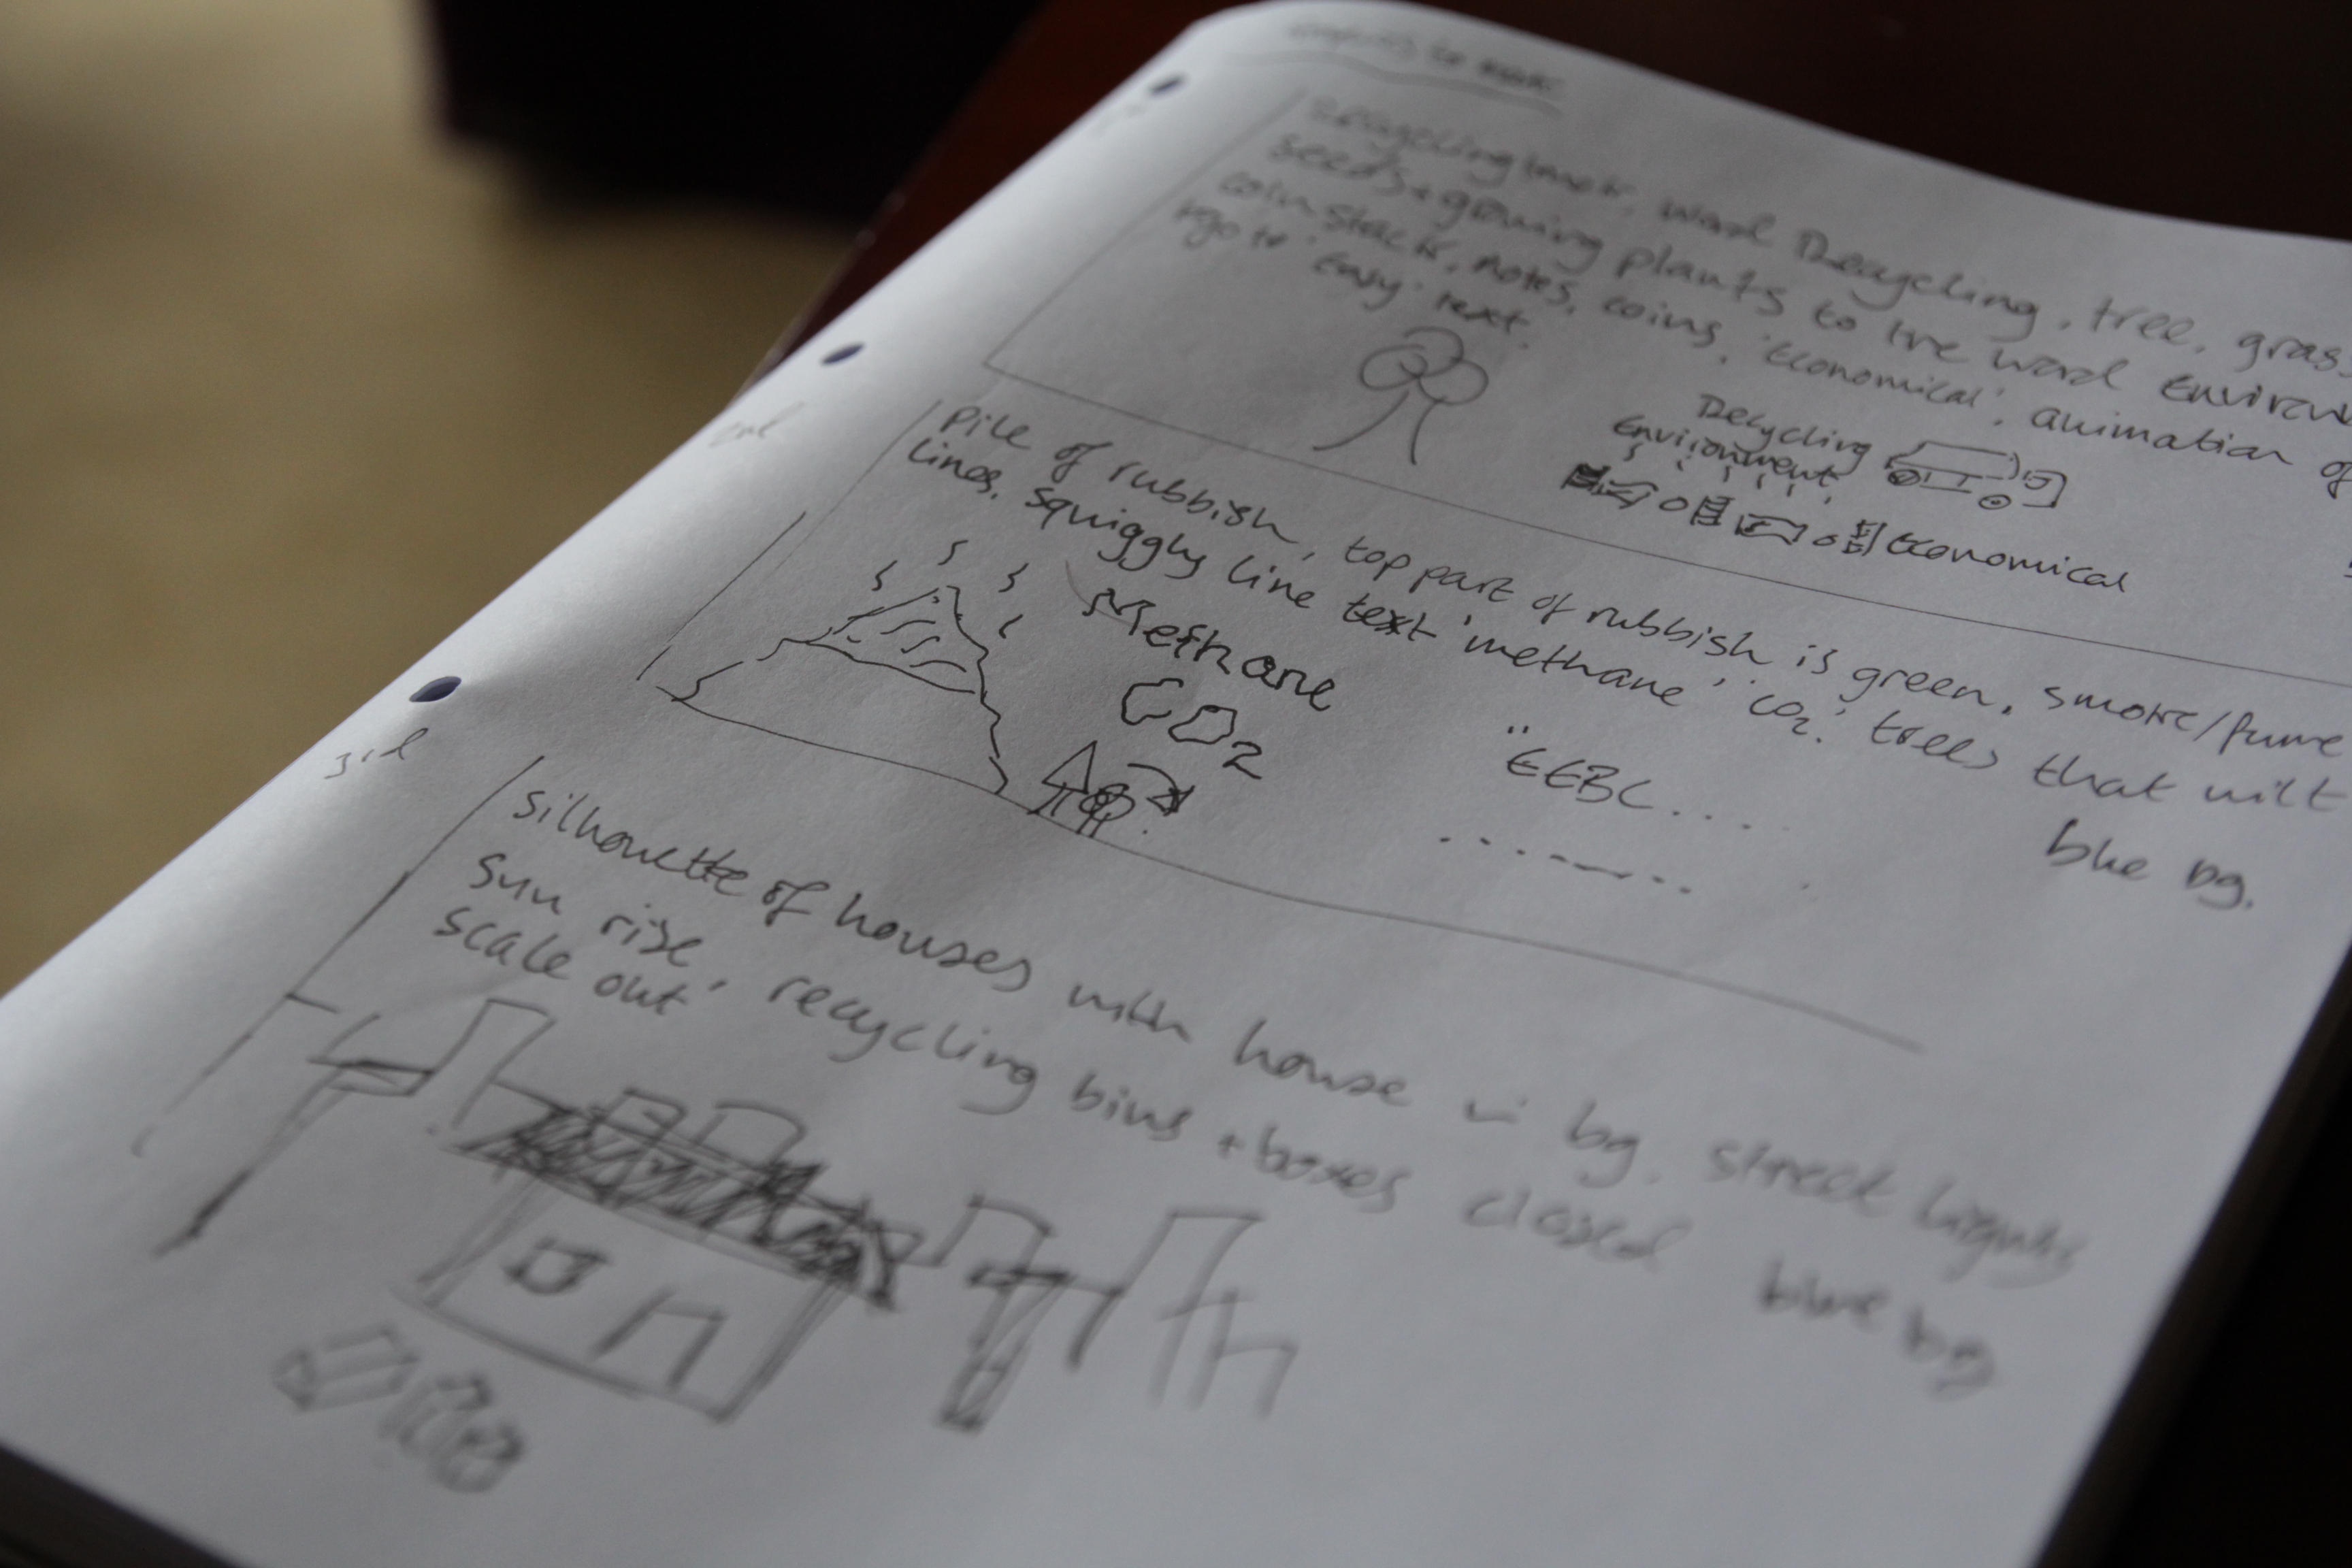
The graphics design has been on-going, I practiced when I was first commissioned, but it just shows how familiarizing yourself with the tools and applications can ease your work! A very very important part of this process was to intensively storyboard and plan each scene, so I know what graphics can be generated beforehand, so I spent a good couple of days story boarding and sketching the graphics I would need, followed by a long list of assets I would go on to to create.
Pre-vis sketches:

For the rest of the week I started importing the graphics into After Effects, and setting up the 15 scenes. I am finally starting to see progress! I am still working on this section, and it will take another week or so to complete all the animations. Again, I storyboarded this in the planning, so I know exactly what to produce for which scene which saves so much time. Also, the best thing about this planning part is that it does not have to be a work of art to depict your ideas, just a simple sketch to represent what you will need to create.
On Thursday I joined a crew of fashion designers, hair stylists and models to film a magazine photoshoot for Sherman Hawthorne (the hair stylist and creative director of the shoot) at The Lemonade Factory studios on Queenstown road. With eccentric styles and art direction, I set about to capture high contrast, dramatic footage which will compliment the photos. It was an early start, here I am waiting for my train at Clapham Junction;

I was a single shooter, I had the pleasure of transporting the equipment to the shoot which included a steadicam vest that I ended up not using. I've learned my lesson here not to take extra kit!
My kit list was as follows:
Canon 5DmkIII (A camera), Canon 60D (B camera)
Tamron 24-70 F/2.8 VC, Samyang 14mm T/3.1 cine, Samyang 35mm T/1.5 cine, Nikkor 50mm F/1.4 manual, Samyang 85mm T/1.5 cine, Sigma 70-200 F/2.8 OS
Manfrotto 755CX3, Manfrotto MVH700AH, Manfrotto Hydra arm and super clamp,
CamSmart camera rig + Lilliput field monitor, CamSmart Stabilizer vest, Flycam Nano
Zoom H6, Rotolight Roto-mic.
As with all of these shoots, time runs short so I was restricted to short burst of filming time with the models to capture the specific ethereal and industrial motif, but I also shot around the photographer to maximize my usable footage. I made use of the 50fps slow motion for the moving shots, so that the models movements are exaggerated, as well as stabilizing the shot.
As the props included wire fencing and chicken wire, aliasing was a problem when shooting shallow depth of field, or at an angle to the object. To remedy this I used a lower aperture (F/4-5.6) for some shots, but also I can add a Gaussian blur in Premiere Pro when editing to soften the lines, gently smoothing out unwanted aliasing.
A couple of frame grabs from the shoot!
 Here I'm using a moving shot to create a distorted perspective from outside of the set.
 Here I use a low angle shot, removing the identity of the model to create a 'trapped' and 'mysterious' feel to the model, and why she is in the box.
Weekends are always working weekend for creatives and freelancers. I spent yesterday working on the animation of the recycling project again, continuing to compose the scenes using simple 2D shapes and animation styles that have become very popular recently.
I also came across this post from Chase Jarvis about how to manage your time properly, its a great post with a detailed outline of 90-minute working slots that should improve your productivity, I urge you to read it if you're someone like me who can't stop working, then apply the plan to your working life. I know I will be!
Do Less = Do More by Chase Jarvis
I haven't had many #videoquestions come in recently, so please keep them coming so I can help with tips for the community of videographers and creatives! Send them over to me @Plowman91 on Twitter.
Finally, ending with a must watch video, check out Philip Bloom's video shot with the Blackmagic Production Camera, the 4K one at Miami Beach, what do you think of it? Is it worth investing now the Panasonic GH4 is on pre-order and it looks like Sony will have a 4K DSLR announcement coming at NAB2014 too..!!
Philip Blooms Four Corners Miami Beach (Blackmagic 4K camera)
That's all for now folks! Keep the creative juices flowing!
Now SWPP is over for me, I am free to release the 'Behind The Scenes' videos I shot down in Falmouth! Here is the second video; a model videoshoot using Canon, Manfrotto, Elinchrom equipment. Please like and share :) http://vimeo.com/84036470

I have the pleasure of working with the footage I shot down in Falmouth last weekend with Bjorn Thomassen we are both sponsored by Manfrotto so we took the opportunity to film new products and features, as well as how to shoot video on a DSLR! These videos will be available online, as well as on major suppliers websites. It will also be shown at The Society of Wedding and Portrait Photographers conference in Jan! I filmed the Behind The Scenes of the production, showing how photographic styles, techniques and equipment can be used to transist from photo into video with Canon cameras, Manfrotto grip gear and Elinchrom lights.
This is my view for the day, not bad aye :P I do love my job!

The results are incredible. After using my Canon 60D for the last two years, stepping up to the Canon 5DmkIII has dramatically improved the picture quality that I capture. Teamed up with Samyang (Rokinon) VDSLR cine lenses and you have an awesome camera setup for cinematic visuals. Yes, I captured the video in ALL-I compression (the lowest compression available), as Magic Lantern does not have a firmware upgrade for the new 5D 1.2.3 firmware :( I hope that comes out soon!
http://vimeo.com/81897582 Documentary title sequence.
I've been busy over the last couple of days, working on both John Sinclair videos, as well as the arrival of the professional camera rig I designed. It is still a prototype so some changes will be made, but so far it is a great fabrication of my design I proposed 18 months ago!!


I've since been working on the John Sinclair documentary, which I've titled 'Behind The Smoke' in Adobe Premiere, which has been going very smoothly. I've also finished the title sequence using footage from the Amsterdam gig rehearsal, as well as using outstanding quotes from John, it is accompanied by the track Mohawk of his new album with Steve Fly.
I used the layers blending modes to merge the layers together, as well as distorting the text (in a bold font like the 70's John Sinclair posters) and animating them in a style that conveys the subject.
I will post the video up later!
CHECK IT OUT! http://vimeo.com/74617352
Today I've been working on a video edit that I shot for Bremont Watches a couple of weeks ago; I had the pleasure of shooting a Behind The Scenes of the Bremont Watch Codebreaker launch, at Bletchley Park. In fluenced by the cracking the enigma code, the new watch includes pieces of the infamous 'hut 6' as well as original punch cards from the Enigma machine. one of the biggest challenge I have as a single shooter is that; the uncertainty of what a client may want in the final edit leads to the excessive capturing of footage! I've got so sift through a good 1.5 hours of material and cut it down to 4! It is a challenge, but its just another reason why I do this!
In the mean time, http://youtu.be/8hlocZhNc0M
DIT, Digital Imaging Technician, Camera Operator, Camera Assistant, TV Crew, TV Production, Film Production, Film Crew, UKTV, BBC Studios, Channel 4, Channel 5