review

ANDYCINE A6 4K Monitor Review - The Best Budget Camera Monitor?

4K Monitor With a Tiny Price Tag

Its always interesting when you come across new pieces of tech that surprise you. I’ve been on the look out for a camera monitor for quite a while, and have always had the smallHD Focus at the top of the list, while previously using the Atomos Shogun and Ninja Inferno.

That’s why I was pleasantly surprised when I came across the Andycine A6 4K monitor, a sub £200.00 HDMI monitor which would fit perfectly with my filming setup (in this case the Sony a7SII, SmallRig cage, Sennheiser AVX). Let’s take a look at the monitors performance and features.

Andycine A6 Design

Andycine A6 4K monitor with a Sony a7SII and SmallRig cage.

Andycine A6 4K monitor with a Sony a7SII and SmallRig cage.

Straight out of the box, I was impressed by the build quality of the monitor. I've used (lets call them) budget monitors in the past and this way surpassed the design and construction of those.

All of the menu and function buttons are accessed by the top of the monitor, and there are three mounting points for the bracket arm, or if you choose to use a ball head. The menu is simple to navigate using the left/right/up/down buttons, although this could be somewhat larger on screen. The image quality is sharp, and the brightness can be adjusted to suit indoor and outdoor filming.

Filming with Ellie Goulding in Switzerland

Filming with Ellie Goulding in Switzerland

Modular Filming Setup With The Sony a7SII and Andycine A6

Modular Filming Setup With The Sony a7SII and Andycine A6

The screen (5.7inch and 1920x1080) itself is brighter than expected, rated at 460nits and 1400:1 contrast ratio, again much brighter than other budget monitors, this is compared to the nearest popular competitor, the smallHD Focus monitor, that is rated at 800nits which has a display resolution of 1280x720 but higher pixel density. When filming in the snow and in bright sunlight, I was pleasantly surprised that I could still preview the image with ease.

Andycine A6 4K monitor interview setup with the Sennheiser AVX.

Andycine A6 4K monitor interview setup with the Sennheiser AVX.

Built-In Features

The A6 is feature-full, well, the tools that you would expect in a field monitor including;

  • Focus assist

  • False colour

  • Histogram

  • Over exposure (zebras)

  • Markers

  • Frame guides (2.35:1, 1.85:1, 16:9, 15:9, 14:9, 13:9, 4:3)

  • Anamorphic mode (letterboxes the image)

  • Audio levels display

There are four function buttons that can be preset to any of the features for quick access.

Usability

Andycine A6 4K monitor with the Sony NPF-750 battery and Sennheiser AVX.

Andycine A6 4K monitor with the Sony NPF-750 battery and Sennheiser AVX.

From initial use, I was pleasantly surprised at the battery life. I use the NPF-750 (Sony/SWIT) type batteries with the monitor brightness at 50%. After four hours, the battery life was at 40%, so I’m confident you could get a whole days shooting out of a couple, if not one large NPF battery.

The colour reproduction was accurate for use with the Sony a7SII on this setup, but I would certainly look for a higher quality monitor if shooting in HDR, HLG or with a 10-bit O/P camera.

I did notice two downsides; the position of the HMDI port on the left side isn't convenient if you would like to use additional hot shoe mountable accessories on a cage. Of course there is the option to mount the monitor on the left of a cage and use the built in cold shoe to mount additional accessories like a microphone.

The other downside is that there are no LUT overlays or previews, which would make shooting in Log profiles a bit tricky. For a 4K monitor that is under £200.00, there has to be a shortfall somewhere, but this would be an ideal feature to include in future models.

However, the colour rendition, brightness, build quality, features and of course the price make up for that.

Andycine A6 Accessories

In the box, the A6 monitor comes with a mini HDMI cable, sunshade and bracket arm. If you're hoping to power your camera via the DC output, remember to purchase this accessory separately as it doesn't come with the monitor.

Final Thoughts

Sony a7SII 4K camera rig setup.

Sony a7SII 4K camera rig setup.

If I needed a small monitor and was on a budget, the Andycine A6 4K monitor is a great choice. It is easily rigged into a camera setup and performs as you would hope and expect. The battery life is a winning feature for me, but if you’re looking for LUT overlays, head for the smallHD Focus or Swit S-1053F. The monitor is light, and with a small NPF battery would be a great combination with a gimbal like the Zhiyun Crane 2.

Want to get your hands on the Andycine A6 4K monitor, follow the link to Amazon here.


Movement For Video: Sliders, Gimbals and More!

Movement For Video: Sliders, Gimbals and More!

To move or not to move? There are many reasons to use both motivated and unmotivated movement while filming, but how can you achieve it? A slider? A Gimbal?

Exciting things to come at APVideo

October Update with lots of 4K

Evening all! It's been a long summer, made even longer by fantastic work with friends and brilliant clients. My last post 'Filming with the JVC GY-LS300..' has actually been in the works for months, but I didn't see fit to release it without a couple of the accompanying videos. As well as completing productions for Screen Systems, I also worked with NewsShooter.com to produce the coverage and blogs over IBC 2015. It was great to work with Dan, Elliot, Matt and the others from the NewsShooter team, more on IBC in another post.

On returning from IBC, I met up with Dan and we played around with some old 'budget' manual lenses with the LS300 and got some interesting results. Many of the lenses were purchased for £5 or at least under £10, giving it the budget aspect. The LS300 is also somewhat of a budget option for a video camera, but with the eagerly anticipated J-LOG gamma curve firmware update, much more visual quality and dynamic range can be captured. Together, that makes the 'budget lens challenge', in which you purchase a cheap lens, and make a short vid with it on a budget setup!

Can you do the 'Budget Lens Challenge'? Send over your results and #budgetlens on twitter to @plowman91 and @theNewsshooter!

Coming up, I am working on part 3 and 4 of the JVC GY-LS300 camera review which will include using J-LOG; filming and grading with it, as well as including the budget lenses I've acquired as part of the budget lens challenge!

Thanks to Manfrotto and WTS Broadcast for your support.

Filming with JVC GY-LS300. Is it the next underestimated camera? (Part 1 and 2)

Filming with the JVC GY-LS300 (PART 1)

I first met the LS300 at BVE 2015 in London where I went to the soft launch of JVC's 4K flagship video camera. There I met with Mike and John from JVC Pro UK who gave me of the walk through of the prototype they had on show.

Since then the camera has intrigued me as a production camera for filming and video. On paper it has similar specifications to the Canon C300 mk II and FS7, but only working with it would determine whether it weighs in as a contender. Time was rather tight for actually filming with the camera itself, so I timed it right for a music gig and extra time away from the desk to get out and shoot some material.

I got the GY-LS300 from WTS Broadcast

The wonderful guys at WTS Broadcast helped me out with the camera as I was looking to test it out and they had one in stock. I've got a great relationship with Alex at WTS and after a long conversation back and forth I was tempted to finally use the camera for filming, so I loaned one out for a gig and test shoot.

JVC LS300 4K video camera

Specs of the LS300

  • Internal 4K (UHD) 3840x2160 at 150Mbit/s in 24/25/30p.
  • HD in 24/25/30/50/60 interlaced and progressive.
  • Wireless video transmission capability.
  • Super 35 size sensor.
  • MFT mount.
  • Variable Scan Mapping (VSM).
  • Dual SD card slots.

Coincidentally, James from LogoLogo (Brighton) was up in London for an appointment, and keen to meet up after getting to know each other at Shadows and Light, this was the perfect opportunity to talk tech and film together at the Fleetmac Wood gig I had lined up for us at Birthdays in Dalston. We met up at WTS Media HQ in Fitzrovia where I introduced James to Duncan, and caught up over a drink overlooking the busyness of Oxford Street. It's awesome to meet up with a new friend, there are always so many stories to share.

We made our way to Dalston on the hot and sticky underground. Luckily I had no backpack as I'd packed all the kit (including the LS300) into the Manfrotto Roller Bag 70. It is a well padded case, and with varying foam dividers I simply constructed the bag sections before leaving home to accommodate the JVC camera, top handle, microphone, for example. It's an awesome bag for (definitely more than) two reasons - transportation and diversity. Transportation in which I can comfortably travel with the bag, and diversity in which I can securely store both photography lenses and pro production cameras.

The Manfrotto Roller Bag 70 also accompanied on my recent trip to Hollywood, and on both occasions it was perfect for the job. When I arrived at WTS Media I simply rearranged the dividers to accommodate the larger LS300 and its accessories. Flexibility is definitely at the heart of this bag.

In the restaurant across the road I got the camera set up and ready to film with, attaching the Metabones EF-MFT lens adapter and the Sigma 35mm T/1.5 lens. On arrival at the venue (Birthdays), I discovered that the settings are not easy to navigate; it takes a silly amount of time to locate the essential settings such as changing the video resolution, codec and format. Not very functional for run and gun or quick shooting work especially when you like switching between real-time and slow-mo, or using the VSM feature.

I went a bit retro with using a 17-50mm for APS-C on the A7S to give it the vignetting, and I like the outcome!

I went a bit retro with using a 17-50mm for APS-C on the A7S to give it the vignetting, and I like the outcome!

Because of the MFT mount and sensor size, it's possible to use EF-S or APS-C lenses with this camera, and also Micro Four Thirds (when you use VSM). I have the Tamron 17-50mm VC that I use on the 60D which is an ideal wide angle lens, however I chose to use the 24-70 (full frame) instead, which made the camera + lens combo extremely front heavy. However even with a smaller lens, the build of the camera itself seems somewhat plastic-like and unbalanced. I'd expect if the camera was rigged out with a shoulder pad, V-lock battery and recorder it would be much more balanced, but the camera isn't constructed for this, or at least it didn't feel like it.

Note: If you are using native MFT lenses directly to the camera mount, the combo is much smaller and lighter. Of course, you will have to use the VSM to crop in on the sensor to around 80% for the correct sensor coverage.

From JVC Pro with adapter and EF lens

From JVC Pro with adapter and EF lens

From HD Warrior with MFT lens

From HD Warrior with MFT lens

Honestly, I was rather disappointed with the quality of the flip out LCD screen and back eyepiece. I guess I've been spoiled with the A7S' viewfinder which is fantastic in quality and contrast. The LS300's didn't stack up, and I often found myself needing to use the eyepiece instead of the screen to judge the focus and exposure. What became difficult was finding the critical focus in contrasty situations. I could have used the digital zoom (expanded focus), but didn't know it existed.

The LS300 with Samyang 14mm T/3.1, which on this camera equates to around 20mm.

The LS300 with Samyang 14mm T/3.1, which on this camera equates to around 20mm.

Unfortunately I didn't have a lot of time in between eating and the gig to sus the camera out apart from checking the resolution, setting the white balance, setting pre-rec run etc. As we were filming a DJ gig I didn't want to have the camera (I was borrowing) out for long in case it got damaged or covered in booze.

Filming Fleetmac Wood was fantastic, Lisa and Alex are brilliant DJ's and their tambourines definitely lit up the dance floor. The added visuals from old music videos added to the eclectic experience, combined with mixes from many talented producers made the night one to remember.

As you would imagine, the venue was dark, only lit by a couple of LED lights and the projector. Almost immediately I ruled out using the LS300 after capturing a couple of shots of the venue and booth, in what the camera seemed to think was candle light. In these scenarios, I don't believe the camera would hold up unless you had the time, space and equipment for a lighting setup. Sure, you could shoot at T/1.5 but you'll get nothing in focus if you're filming crowds dancing, plus with the gain up to +12dB your picture becomes noisy.

James took some brilliant photos and videos of the night, some of which are below in the gallery and also included in the Fleetmac Wood @ Birthdays film.

While filming the Fleetmac Wood gig I did switch lenses a couple of times, firstly to the Samyang 35mm T/1.5 which although was heavy, had a wonderful bokeh and combined with the super 35 sensor made for great video. I also teamed it up with the Atomos Shogun (in HD) rather than 4K via SDI, which captured the video in ProRes HQ.

By my reckoning, you'll need to spec up this camera with additional extras to make it what you want to be. Out of the box it comes with all you would need to start (minus the SD cards and microphone and some spare batteries), but you'll need a tripod or monopod to keep it steady, especially if you're using primes of lenses without image stabilization/vibration control.

Saying that, if you weren't filming a music gig in low light you would have a lot more options and time to compose the frame... I come on to that in a moment.

I've cut all of the footage together for this edit which includes filming from the A7S, LS300, A7S with the Shogun in 25p and 50p, LS300 with the Shogun in 25p (HD), and footage from James Beer (LogoLogo) on the A7S in 50p and 100p.

Photography by James Beer @ LogoLogo

Filming with the GY-LS300 under normal circumstances (PART 2)

I had the LS300 loaned out for a week to put it through its paces, filming in a number of different scenarios. I shot quite a number of clips out in my garden just to get a feel for the camera and figure out it's settings. Of course, Alfie the cat was a willing subject!

From testing out the VSM feature, I can't see a big degredation in light or quality when you change the sensor scan mode from 100% down to 80% for MFT lenses, however I was using great quality lenses (Tamron and Samyang) rather than MFT lenses which have a smaller in-lens depth of field, so there is more light coming through the lens for the sensor to capture.

The built in ND filters are a god-send, and a very welcome adittion to a camera that would be used with large-aperture lenses. If you wish to shoot at T/1.5 for a very shallow look, using 1/64 ND in the bright daylight is probably your only option. Saying that, unlike using ND filters in front of the lens, there isn't a noticable colour cast of image degredation like with other filters. However, more ND stops please!! Going from 1/4 to 1/16 to 1/64 are big jumps, and in some cases, 1/64 was not enough!

While out and about filming in Ewell, I simply had the LS300 with the JVC50 battery, 1 SD card and the Tamron 24-70 on a Manfrotto 755CX-3 tripod. For run and gunning, despite the build of the camera it works extremely well for this kind of filming.

Unlike the FS7 and Canon Cinema cameras, the LS300 doesn't have any log capabilities for a wider dynamic range, which was expected as JVC marketed this camera for higher-end productions. It would be interesting to see how well the camera performs with a log curve and higher bitrate  recording for filming that needs it. From filming with the 'standard' colour setting and 'detail' knocked all the way down the image is rather pleasing, much better than I expected. I guess the viewfinder/eyepiece gave me lesser expectations of what the captured image would look like, so I was pleasnatly suprised to see the results.

However, like mentioned before, the viewfinder/eyepiece is not the best quality and without using the 'focus extender' function, it was difficult to achieve critical focus. Some of this is evident in one of the demo films I've produced with the camera. I also noticed that the form factor of the camera doesn't allow you to get a nice, steady shot like a shoulder mount camera would where you have numerous contact points on your body. With a top-mounted eyepiece it doesn't feel natural to hold the camera in front of your chest (for hand held or monopod filming), and is not steady, even with IS or vibration control.

Despite other things, the battery life is a winner, on one battery (JVC50) giving you over 200 minutes of filming time. I took the camera out to a local business networking night put on by What's On In My Town and Hobbledown, as I am joining forces with them to promote local business and talent it was a perfect opportunity to capture some of the event and talk to other companies about how films can help them.

It was a wonderful summer evening at Hobbledown children's farm, kindly the hosts for the networking, with attendees getting a full tour of the venue and a go on the new high ropes activity! David the manager and his team were fantastic and played great hosts with the BBQ.

With this beautiful golden hour of filming, the LS300 really shone as a camera. Yes, I probably shot at F/3.2 with ND 1/16 because I wanted a shallow depth of field, but ND 1/4 at F/8 was too bright. I was pulling focus all the time during the piece to camera from Whats On MD, Paul. I also found that as he walked from the shadows into highlights, he would become over exposed, so high contrast filming wouldn't be practical (unless you had some control over lighting) with this camera.

Revisiting this post about a week on from my last entry..

It was really rather easy to work with the footage from the LS300, and knowing there is a focus expander gives me more confidence in it. However, as you will have seen from the footage in the film above I do focus creep due to not being certain using the LCD screen or eyepiece. Premiere handled the 4K footage very well, without having to render until I added some colour correction, scaling and graphics.

You'll also probably notice the shots where I attempted to go handheld, this is where the form factor of the camera somewhat let it down, but hey ho that's what a rig or tripod is for.

In the longer piece to camera with Paul, the image captured was lovely and had a pleasing depth of field to work with (not too shallow like the A7S, but not too deep like the GH4). Of course you can use any wide aperture lens with the camera if you wanted it to be bokelicious!

Capturing my local countryside (the last test)

(Starring my thumb...)

I'm surrounded by greenery where I live, so making the most of the great weather I headed out with the camera to capture some local landmarks (for another archiving/history project I'm working on). This would be a real high-contrast/dynamic range test for the camera.

When thinking about purchasing this camera, it boils down to what I can get for the price, especially in comparison to other internal 4K cameras (Panasonic GH4, Sony A7R II). They are smaller, both will require a lens adapter (as will the LS300) and new batteries, SD cards, rig, and are cheaper than the LS300 (without a microphone).

APVideo JVC LS300 Final Thoughts...

Why I would by the LS300?

  • Long battery life (but need to purchase batteries) with JVC50 batteries.
  • Internal 4K on SD cards, U3 600x capable.
  • ND filters (1/4, 1/16, 1/64).
  • Super 35 sensor with lovely picture (but you would need to shoot at T/1.5 or F/1.4 for a cinematic look to it).
  • Microphone/audio inputs.
  • Compatible with current lenses, but would require EF-MFT adapter.
  • Wireless, 4K via HDMI and HD via HD-SDI outputs.
  • HD-SDI for HD output and HDMI for 4K UHD output.
  • Extended focus, to crop in digitally and acquire critical focus.
  • No obvious quality drop when using the VSM at smaller scan sizes (87% and 80% MFT).

Why I wouldn't buy the LS300?

  • The form factor is not ergonomic, like a large video camera rather than production camera. It would need to be rigged with a shoulder mount for use to be comfortable.
  • Camera build is plastic, doesn't feel sturdy and some parts (ND filter wheel) feel delicate.
  • Not enough ND filter stops, needs at least 2-3 more, with improved digital filter wheel instead of mechanical, which feels very plastic like.
  • No variable 4K bit rates (up to 150Mb/s) or slow mo.
  • Low light is definitely not the cameras forte unless shooting very wide.
  • Terrible LCD screen and EVF quality.
  • Does not include a microphone.
  • The placement of the video output connectors is near the lens, which is odd considering other ports are at the back of the camera.
  • The dynamic range doesn't hold up to that of the GH4 or A7S.
  • The picture/colour settings are extremely limited, with no gamma curve or log option. This means the image is considerably burnt in with limited grading or colour correction options.

NEW Mid-August Update!

I've been away for a little while, so the review was put on hold until my return. On which I found out some interesting news from JVC, who have decided to upgrade the firmware of the LS-300 with new features..

  • JVC-Log - supposedly increased dynamic range, for colour grading.
  • Full DCI 4K and 2K resolutions - currently only UHD 4K is available, and no 2K option.
  • Prime Lens Zoom - ability to use the zoom rocker to extend the focal length of prime lenses using the VSM feature.

READ THE FULL PRESS RELEASE from JVC PRO HERE

Considering these new updates, the camera is now more capable of competing against higher level players, rather than the DSLR/mirrorless market. I'm due to test the camera out again in September, hopefully with the new firmware 2.0 to compare!

Finally, big thanks to WTS Broadcast for lending me the camera for a week to test it out. To Manfrotto for their Roller Bag 70 and 755Cx-3 tripod, and to Fleetmac Wood & Whats On In My Town for letting me film their events.

MORE COMING FROM MY SEPTEMBER TESTS SOON!

Camera Conundrums

As you'll know, we've seen a big influx of cameras focused on upping the picture resolution and others battling with dynamic range. This week, AJA announced their 4K CION camera is now shipping, so I checked out some of the specs and test videos that they produced to see how it weighs up against the competition!

To see that these pictures are ungraded is pretty stunning. The colours are very natural, as well as the dynamic range, quite noticable in the first couple of shots of a lady with light skin on a textured background, and a lady with dark skin on a muted background. The detail usually lost in hair keeps its definition without fringing, and the shot of the eye shows how 'clean' the image is.. Watching the video, I get more and more amazed at the quality of the light captured 'straight out of camera', without grading or corrections.

Copyright AJA.

Copyright AJA.

The release of the CION comes shortly after the delayed release of the Atomos Shogun, a 4K recorder and full HD monitor, which allows images to be captured 'straight from the sensor' in a higher codec and format than recorded in camera. Atomos teamed with Sony to ensure the A7S and FS7 are compatible for 4K recording, which opens the floodgates for video producers to capture high quality video content for a considerably lower price than a high end camera. The recording media is standard 2.5" SSD's, via HDMI or other connections, meaning the Shogun can be teamed with many DSLR's and video cameras to be used as a primary recording device (many RED cinematographers use the Shogun for secondary proxy recording), and enhance the video functions to analyze the quality of both the image and sound.

The other end of the spectrum with internal 4K recording, of course is the Panasonic GH4 which I have worked with before. Ergonomically, for run and gun shooting it has a great form; small camera body and micro four thirds lenses dramatically reduce the kit you need to carry, as well as having a great power consumption rate. The GH4 captures 4K at a crop factor of 2.2x, which inherently means you are double the focal distance closer to your subject, but it does so at a high bit-rate of up to 100Mbps. Although in low light the camera does not stand up to larger sensor cameras, with a £1000 price tag and options to add gamma adjustments, it seems like a no brainer, right?

2015 is going to hold some very exciting developments in the world of cameras, and the way the picture and sound is recorded, I believe. We have yet to see any competition from Canon, apart from the C100 mark II (I don't believe this is a competing camera), so it will be interesting to see how they market their high end Cinema EOS cameras now that there are many 'just-as-good-if-not-better' solutions out there from other manufacturers. By NAB I expect there to be announcements from Canon, which I look forward to seeing because it will determine whether I remain a Canon videographer or move over to another camera system like many have done so before me.

On that note, it's time for me to put the feet up in front of the telly and munch on a mince pie before I head out later on this afternoon for a wintery walk around the countryside!

christmas tree presents

Wishing you a very Merry Christmas and a prosperous New Year, and remember, capture moments that matter :)

What a few months it has been!

Blimey, my last post was a while ago.. Honestly, since then work has got heavy and much of my time is either spent behind the camera or the screen. One exception was the Manfrotto Pro Backpack50 review, shot by Glen Symes for me where I actually appear in a video! Manfrotto pro backpack50 review video adam plowden and glen symes videography

Some of the things I've been up to range from filming quite a few weddings [embed]https://vimeo.com/98328657[/embed] to filming and editing for a series of videos on health and wellbeing.

eebc health and wellbeing video edit adam plowden videography

On the side, I've talked at EEHS about going through uni and starting a business, am preparing for my Manfrotto Tour videography seminar and other bits and bobs.. I'm sure if you follow me on twitter or facebook you'll have an idea of the things!

Going back a few weeks, my main projects have been the EEBC Health and Wellbeing video series, and an animation on Telecare. This is a predominantly piece to camera series, with additional b-roll shots to add to the videos messages which range from stopping smoking, to eating a healthy and balanced diet. The standard production of information videos ensued, editing down from around 45-50 minutes to a concise 2 minutes providing the relevant facts and summaries on prevention. Editing in Premiere Pro, I used the very good Luma Corrector tool for exposure changes and a simple RGB curves adjustment for the colour temperature.

I find the Luma Corrector better to work with, as by adjusting the Gamma control slightly, it removes the washed grey look to push out the prominent shadows and highlights meaning that it is very simple to correct/match shots; especially as I filmed using daylight as my key.

adobe premiere pro screenshot luma corrector effect adjust exposure

As per the clients request I have also added subtitles, which I created using the dynamic link into After Effects (noting at this point that if you're doing several stages of an edit, to duplicate the sequence you are working on before you start the next stage as Premiere and AE require you to save your work for updates to take place, meaning no Ctrl-Z/Command-Z to get back to a timeline with the clips rather than your 'replace in AE linked composition').

premiere pro dynamic link sequence editing

I was also out photographing flowers for a wedding, for the florist Madeleine Pink a few weeks ago too! Taken on a range of lenses with the Canon 5D mkIII (Tamron 24-70mm, Sigma 70-200mm, Samyang 14, 35, 85mm cine, and Nikkor 50mm).

Madeleine pink floral wedding flower photography adam plowden videography Madeleine pink floral wedding flower photography adam plowden videography button hole Madeleine pink floral wedding flower photography adam plowden videography button hole 2 Madeleine pink floral wedding flower photography adam plowden videography brides bouquet Madeleine pink floral wedding flower photography adam plowden videography table bouquet Madeleine pink floral wedding flower photography adam plowden videography table bouquet silhouette Madeleine pink floral wedding flower photography adam plowden videography table bouquet 2 Madeleine pink floral wedding flower photography adam plowden videography table bouquet 3 Madeleine pink floral wedding flower photography adam plowden videography table bouquet 4

Since then, I ventured into using Lightroom to edit the photos as well, still learning bits and bobs but found a range of fantastic presets here that create some great looks. I'd appreciate your thoughts on the photos and the looks as well, as it's mostly stab in the dark/emotive based :P

[gallery ids="4278,4279,4280,4281,4282,4283,4284,4285,4286,4287"]

A couple of weeks ago I had the pleasure of filming Dan and Kelly's wedding in Ashford + Foxhills where I met the awesome Ash; a unique wedding photographer! Check out the wedding film here [embed]https://vimeo.com/97953644[/embed], and definitely check out Ash's work over at Ash Darling Photography! Highly recommended by me :D and I believe I'll be working with Ash soon on an up coming wedding, really looking forward to it!


Believe it or not, I have been doing some videography too! In between editing the health and wellbeing videos, and on the pre-production sketches of the telecare animation I spent a couple of afternoons in The Woodland Garden in Bushy Park; one of my favorite places to go to switch off work mode, relax and shoot some video for personal projects. I've named this one 'Waterhouse', it's the name of the part of the garden where a balcony looks over a pond with a waterhouse to the left. It poses interesting thoughts to its original function, the bricks and foundations holding strong throughout years of use and bad weather. Virginia Creepers pursue to edge up its sides, gripping on to reach the sunlight through the tree canopy.

beautiful blooming purple Allium flower photography adam plowden video waterhouse

The edit is complete, but I am now working on a quirky hipster logo/title animation for the beginning of the video so as soon as it has been animated and comped into the footage I will upload!

The kit I used for the 'Waterhouse' video include; Manfrotto 755Cx-3 tripod, Edelkrone Slider+ v2, Canon 5D mkIII, Canon 100mm F/2.8 macro (hence why the shake on the slider is slightly more visible than without IS/OS, but I have used Warp Stabilizer where I can). Tamron 24-70mm, Sigma 70-200mm, Samyang 14, 35, 85mm cine, Nikkor 50mm. After using the Canon macro lens, I have totally decided to purchase the Sigma 105mm F/2.8 OS macro lens; firstly because of future video productions where a small minimum focus distance is necessary (product, people, detail shots), also it has optical stabilization which I found was needed when moving the camera and lens on the slider, and lastly its around £400.. Bargain!


Things I've learned so far from doing this kind of work;

  • Shoot with a widespread histogram (unless I wish to isolate the subject from shadows behind).
  • Lightroom is awesome, try playing with the presets I linked to work on the developer tools.
  • Regardless if it has been a long day filming, if you want to talk to someone, always, always, always do it!
  • I want a macro lens for intricate detailed shots, as my current range does not let me get close enough to the subject.
  • Take some hand held lights for kicks and fills; the venue room where the table decorations were photographed was very dark. With a tripod and a couple of lights I would have had much more control over the lighting composition.
  • Dabble in a variety of work types, to keep it interesting and different!
  • I need a slider for cinematic moving shots; I have made my choice; not the Edelkrone! There will be a whole blog post on this coming soon.

Rotolight Sound and Light Kit Review!

I have had the Rotolight Sound and Light kit for a little while now, and I like it. I like it even more so because Rotolight has been the only manufacturer to really think about what consumers moving into the industry, and already established creatives would need from the outset. Without light you have no picture, and without sound you only have 50% of that video.Videos with bad or unprepared sound are noticeable, just if the subject of the video was not lit correctly. Unfortunately we are now used to watching and seeing very high quality, glossy pictures with filmic motifs, and excellent sound including orchestral scores. We aspire to work on these 'big budget' productions, or to make videos that look like them, but without thinking about your lighting and sound, you are very far off. I produced this review and the music video using the Canon 5D mark III, and a range of Samyang Cine lenses. To keep the light source and sound as pure as possible, I only used the Rotolight RL-48 B ring light and Roto-Mic. I also used my custom camera rig, which is manufactured by CamSmart, as well as a 5" Lilliput field monitor. I used Adobe Premiere Pro, After Effects and Speedgrade to edit and post-produce the videos.

rotolight sound and light videography video kit review led ring light

RL-48 B LED Ring Light

Out of the box, you get everything you need (apart from batteries) to start shooting straight away. The inclusion of a Rotolight belt-bag is fantastic for getting the light out quickly if you are shooting on the run, and for storage while traveling and keeping the batteries, light and accessories safe. One pain I always have, as I am a single shooter is that to change parts of my equipment setup; which means opening my big bag, routing through to find the bit I need and then carrying on. With Rotolights ingenious solutions they have removed that need entirely!

Inside the LED light is a set of ND, skin, colour and minus green filters that can be applied directly inside the housing of the unit itself; no need to carry around filters, gels and pegs to achieve your desired brightness and tone. This is great as no longer do you rely on a bag of old gels to adjust the temperature and brightness of the light source, and all filters are supplied by LEE, so you know you can trust them. The LED's being naturally daylight at 5600K, you are set to use the light in most conditions! For photography and video with people and models, Rod from Rotolight recommended using a softening ND and the skin filter which gently soft lights the subject, with a peachy, wrapping beam. There are no shadows, and the result is a beautiful glimmer of light in the subjects eyes giving them emotion and life.

rotolight sound and light videography video kit review music video filmmaking shoot videography model light

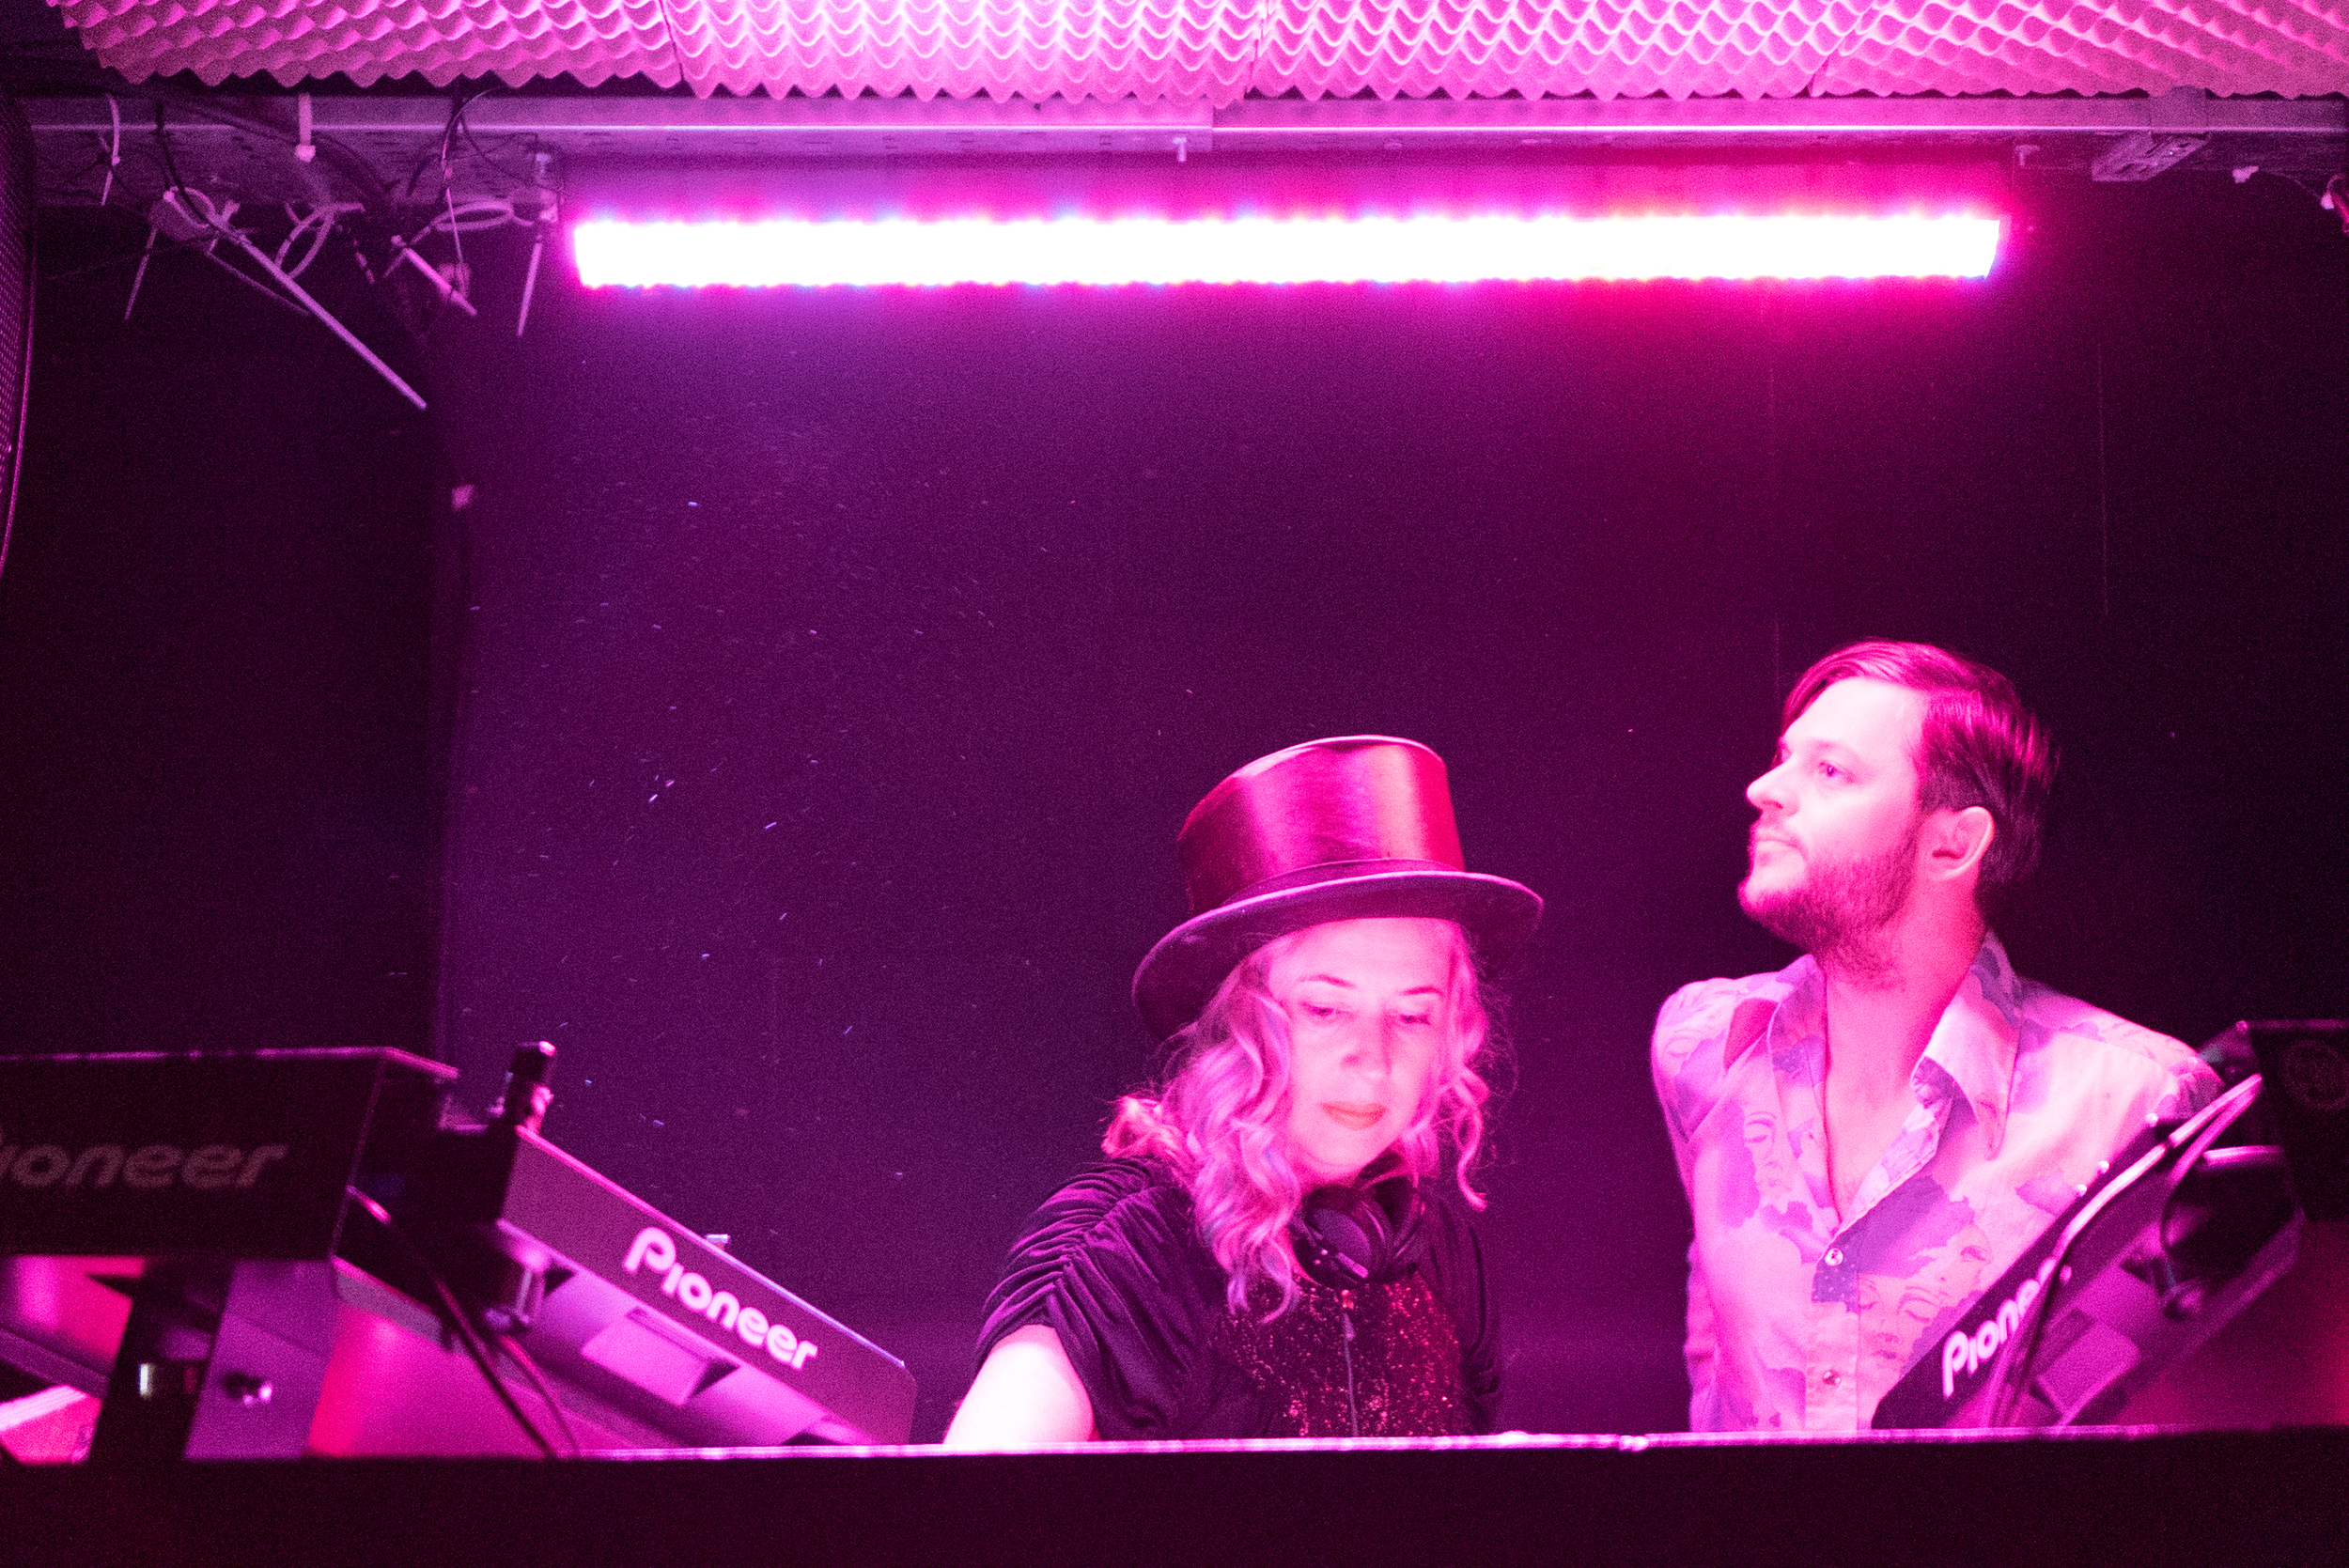
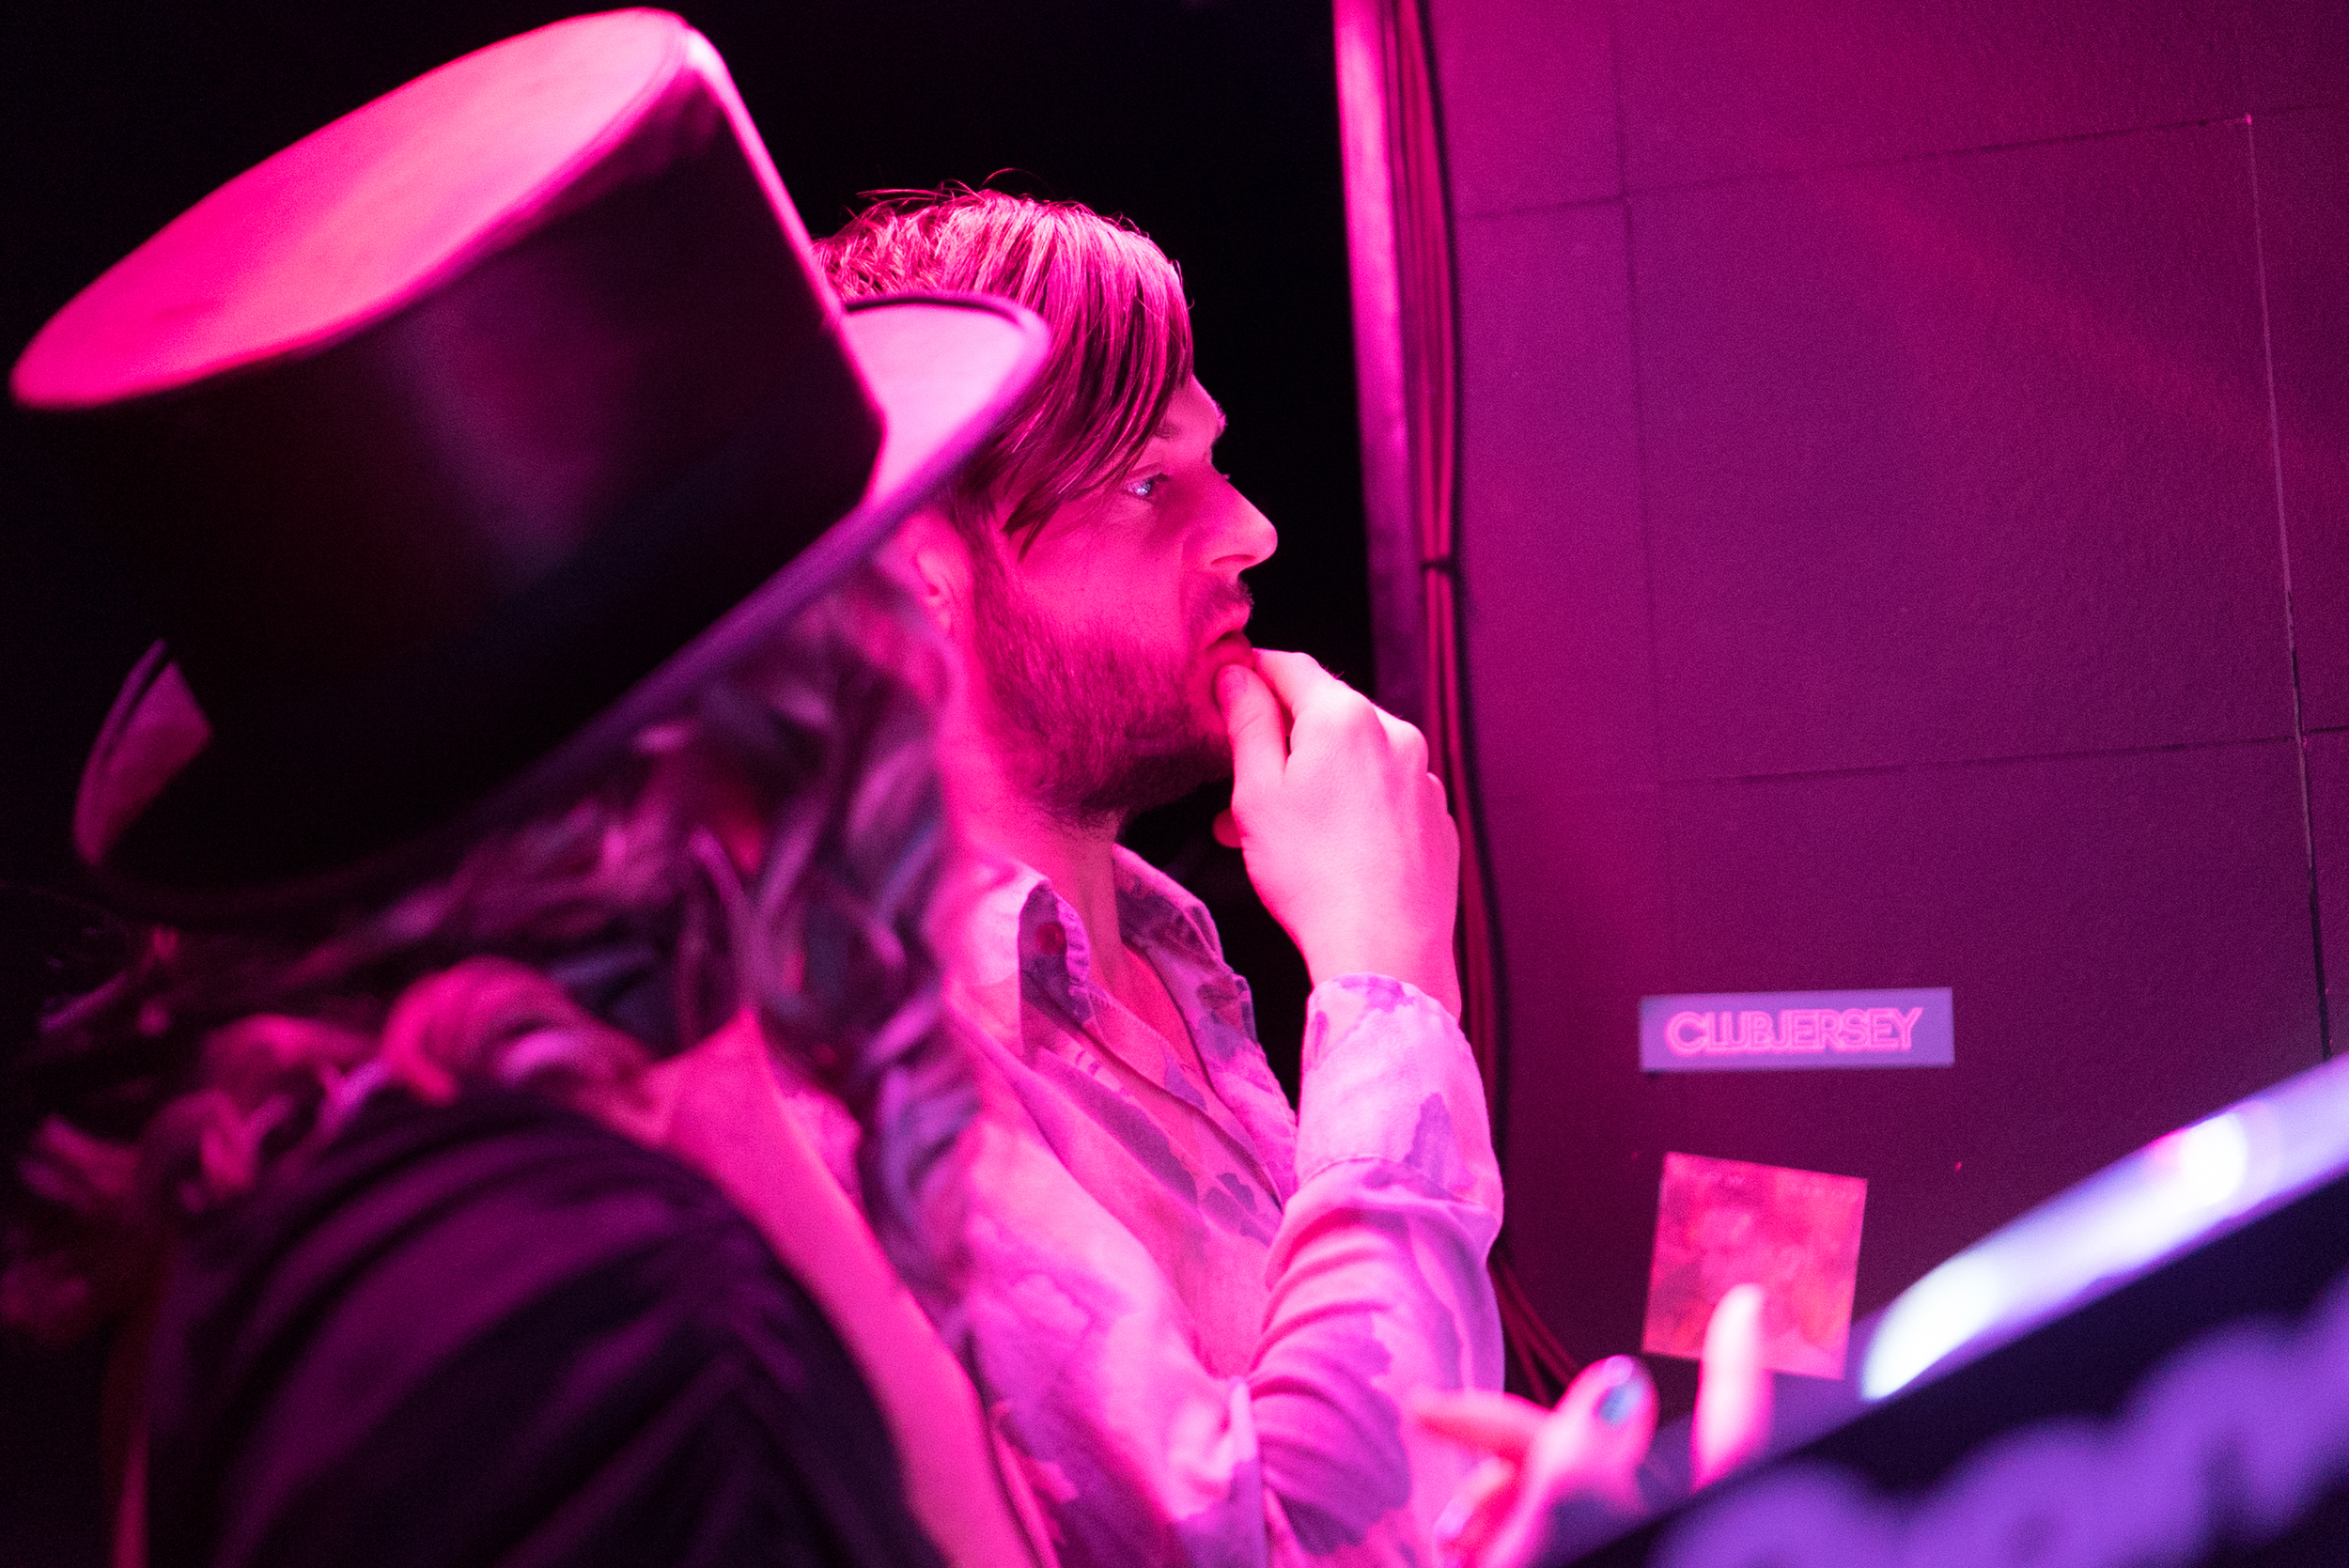
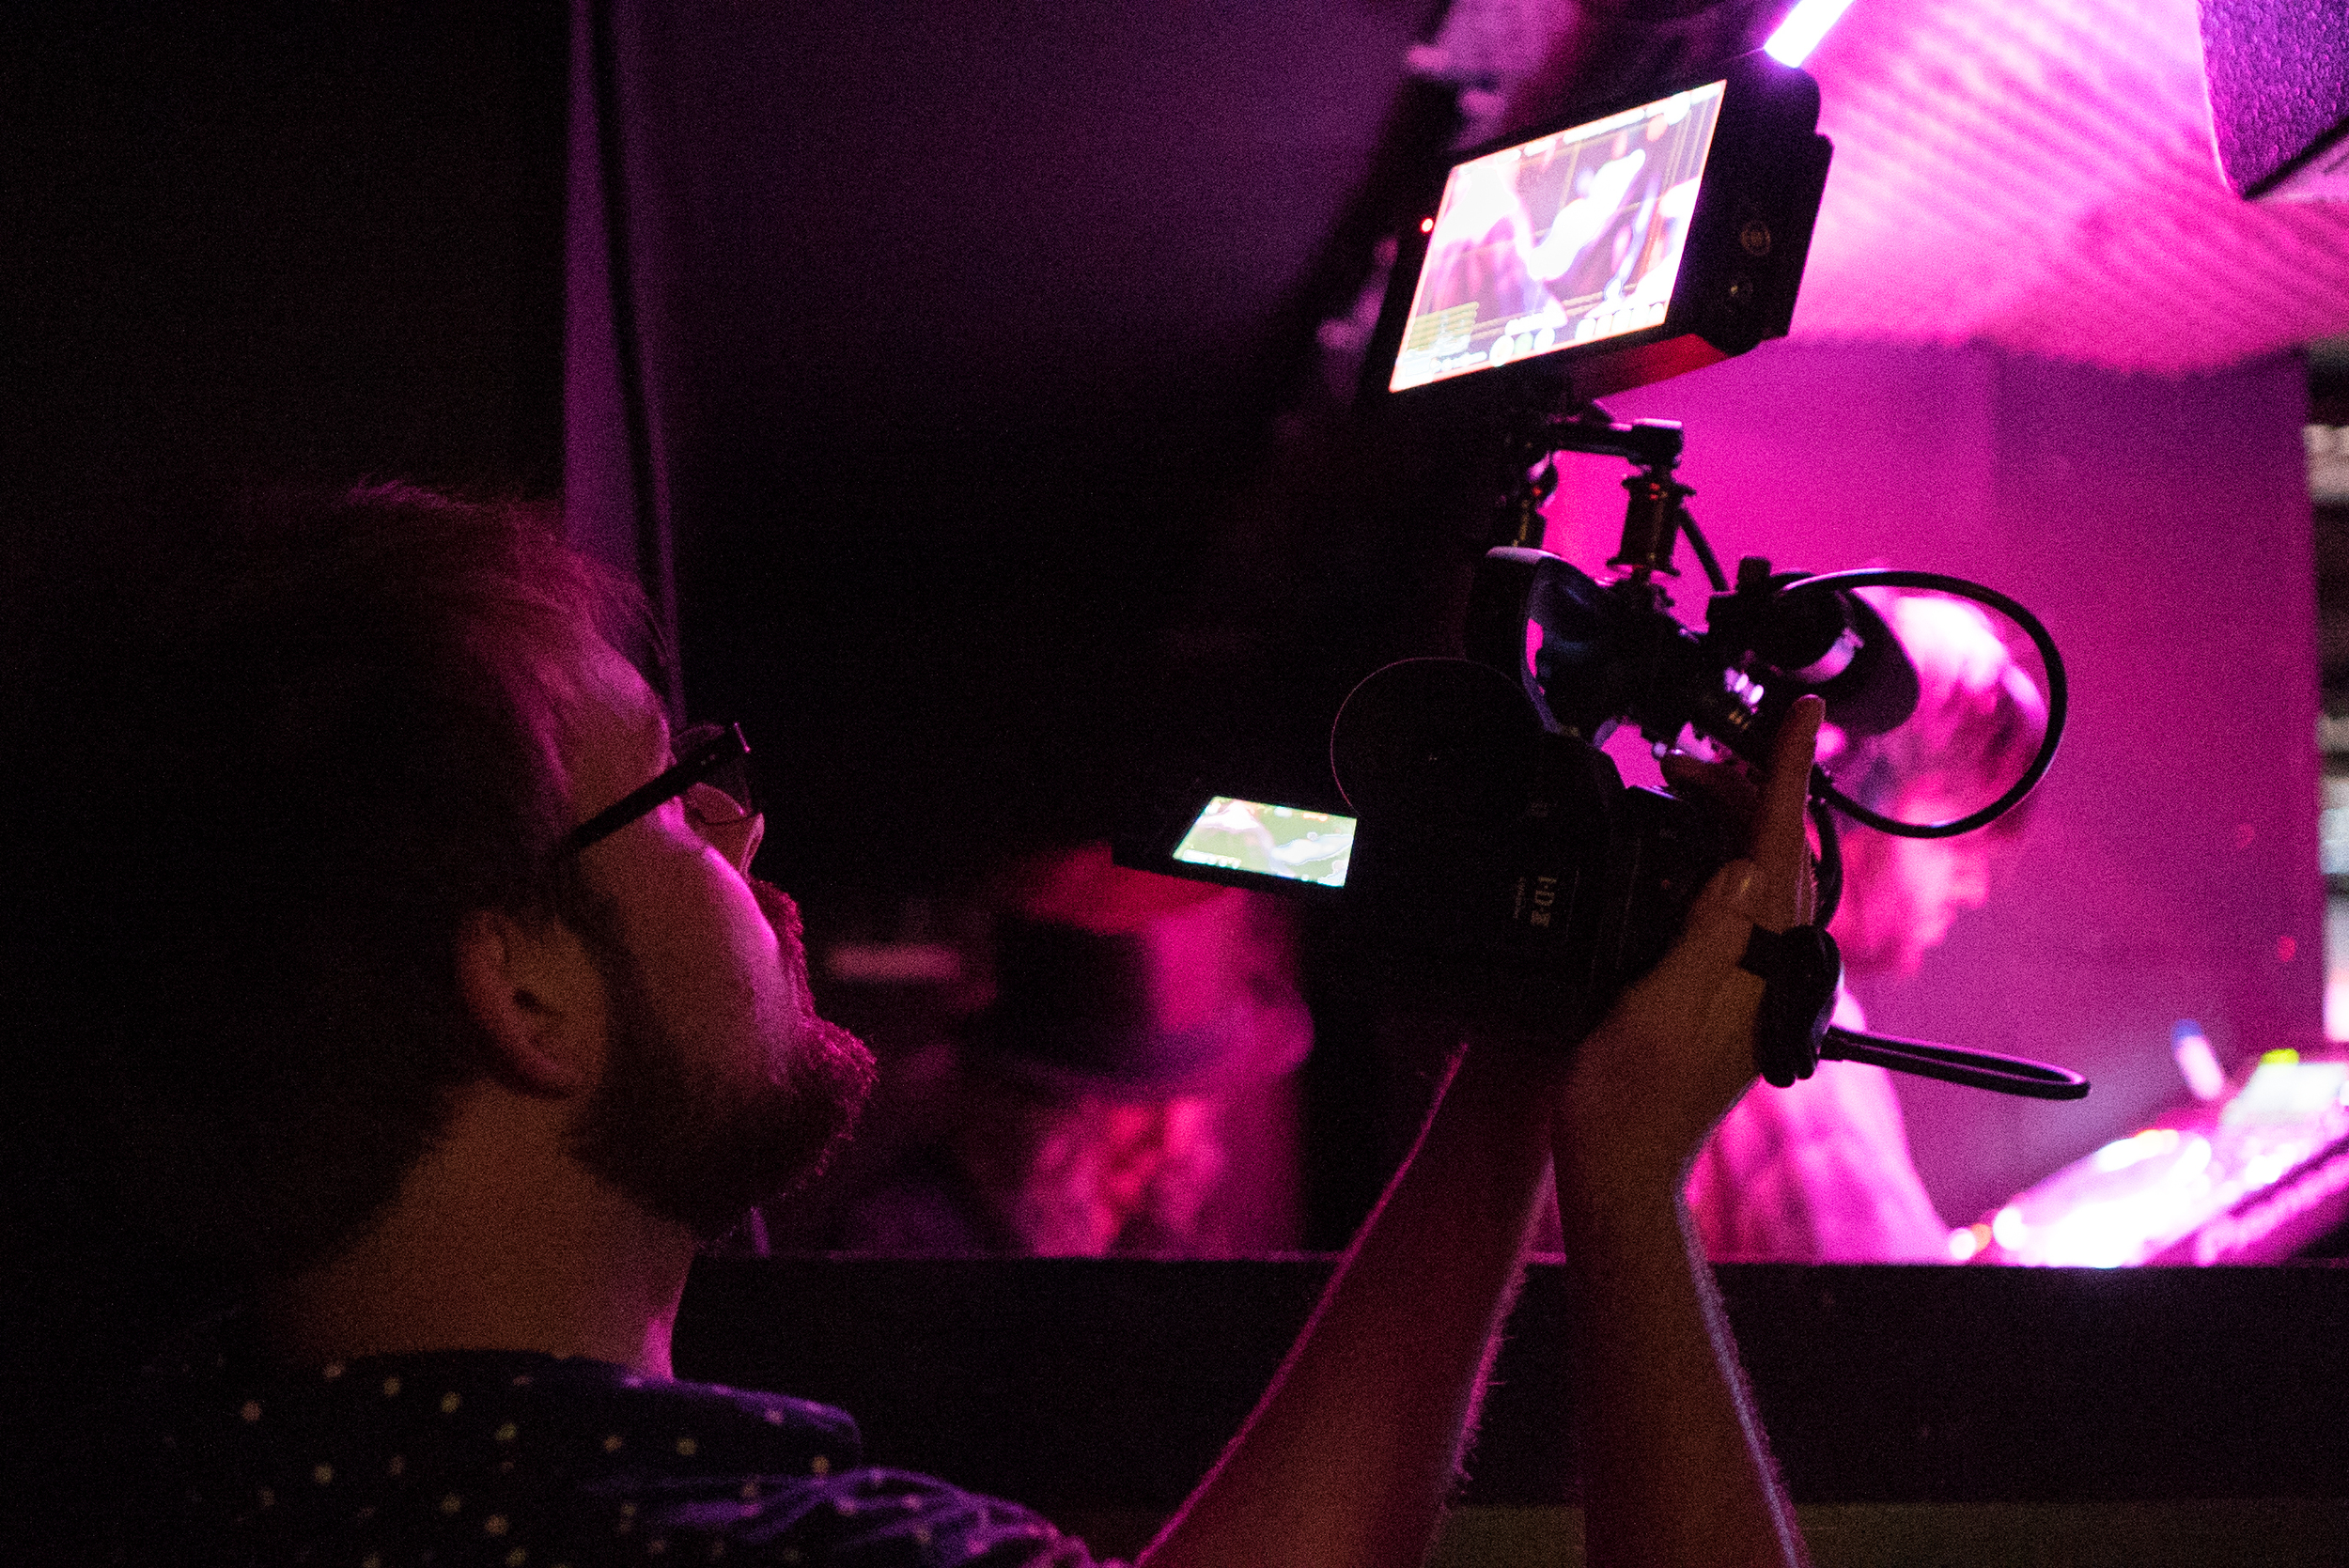
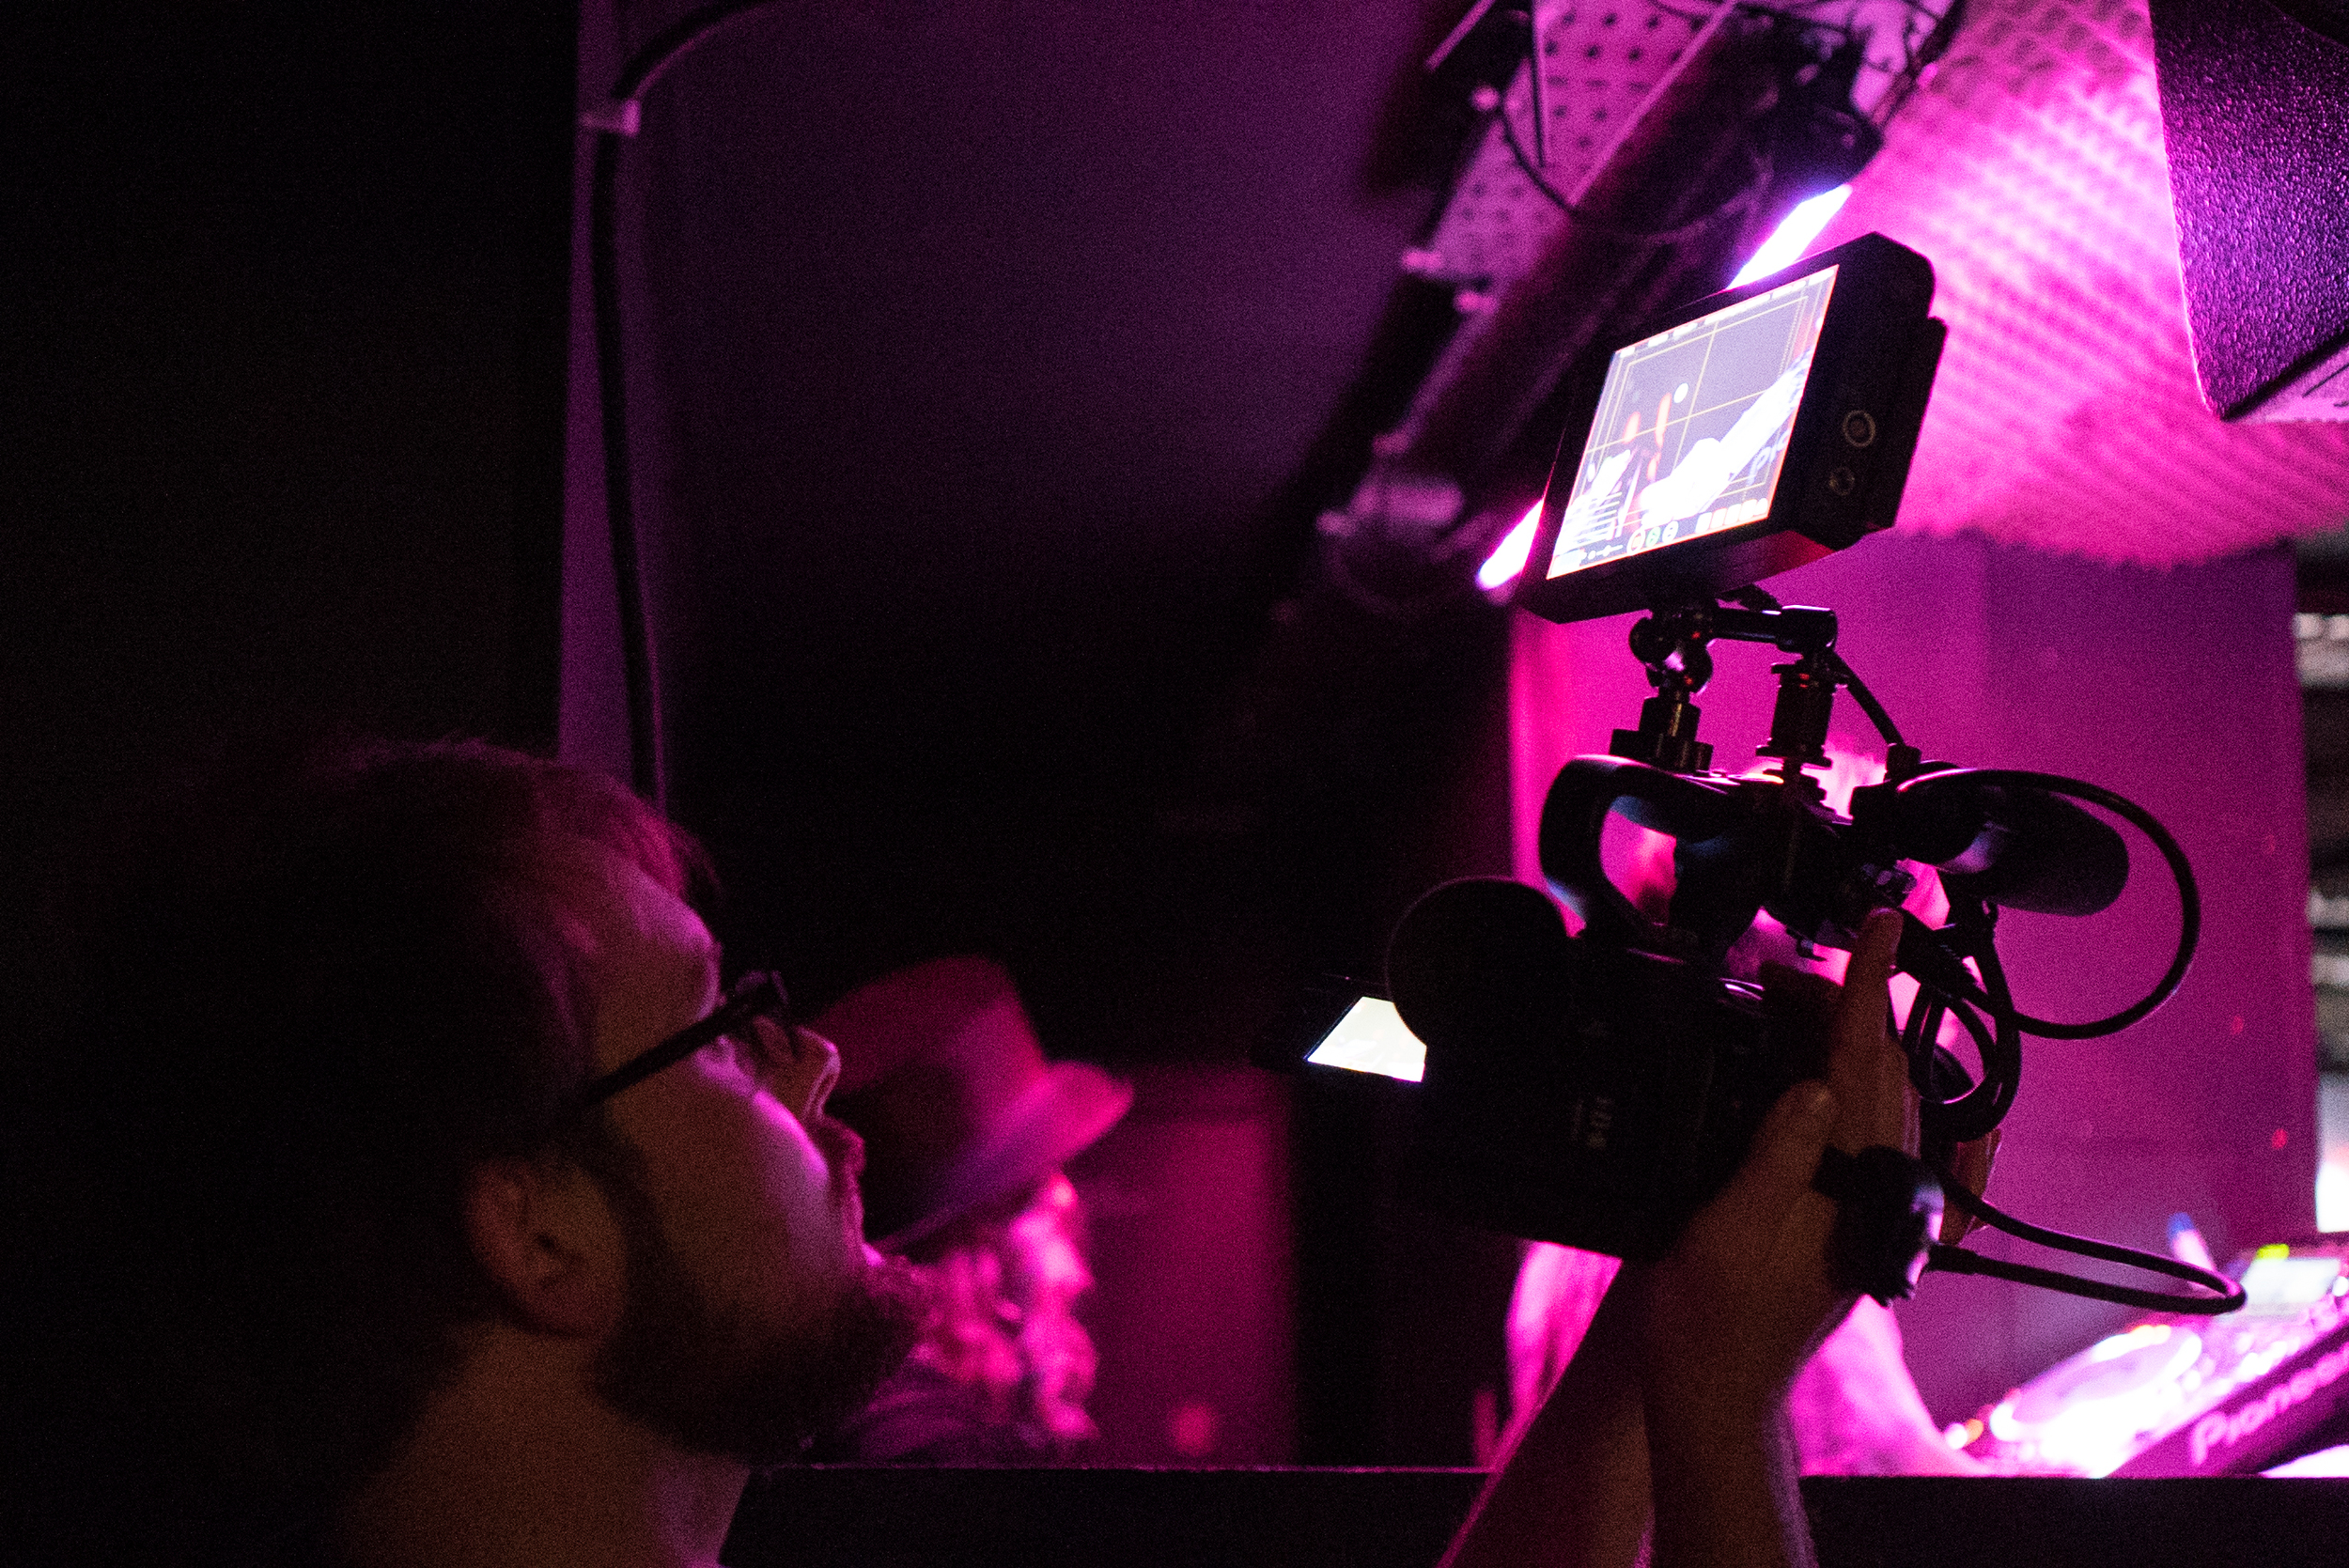
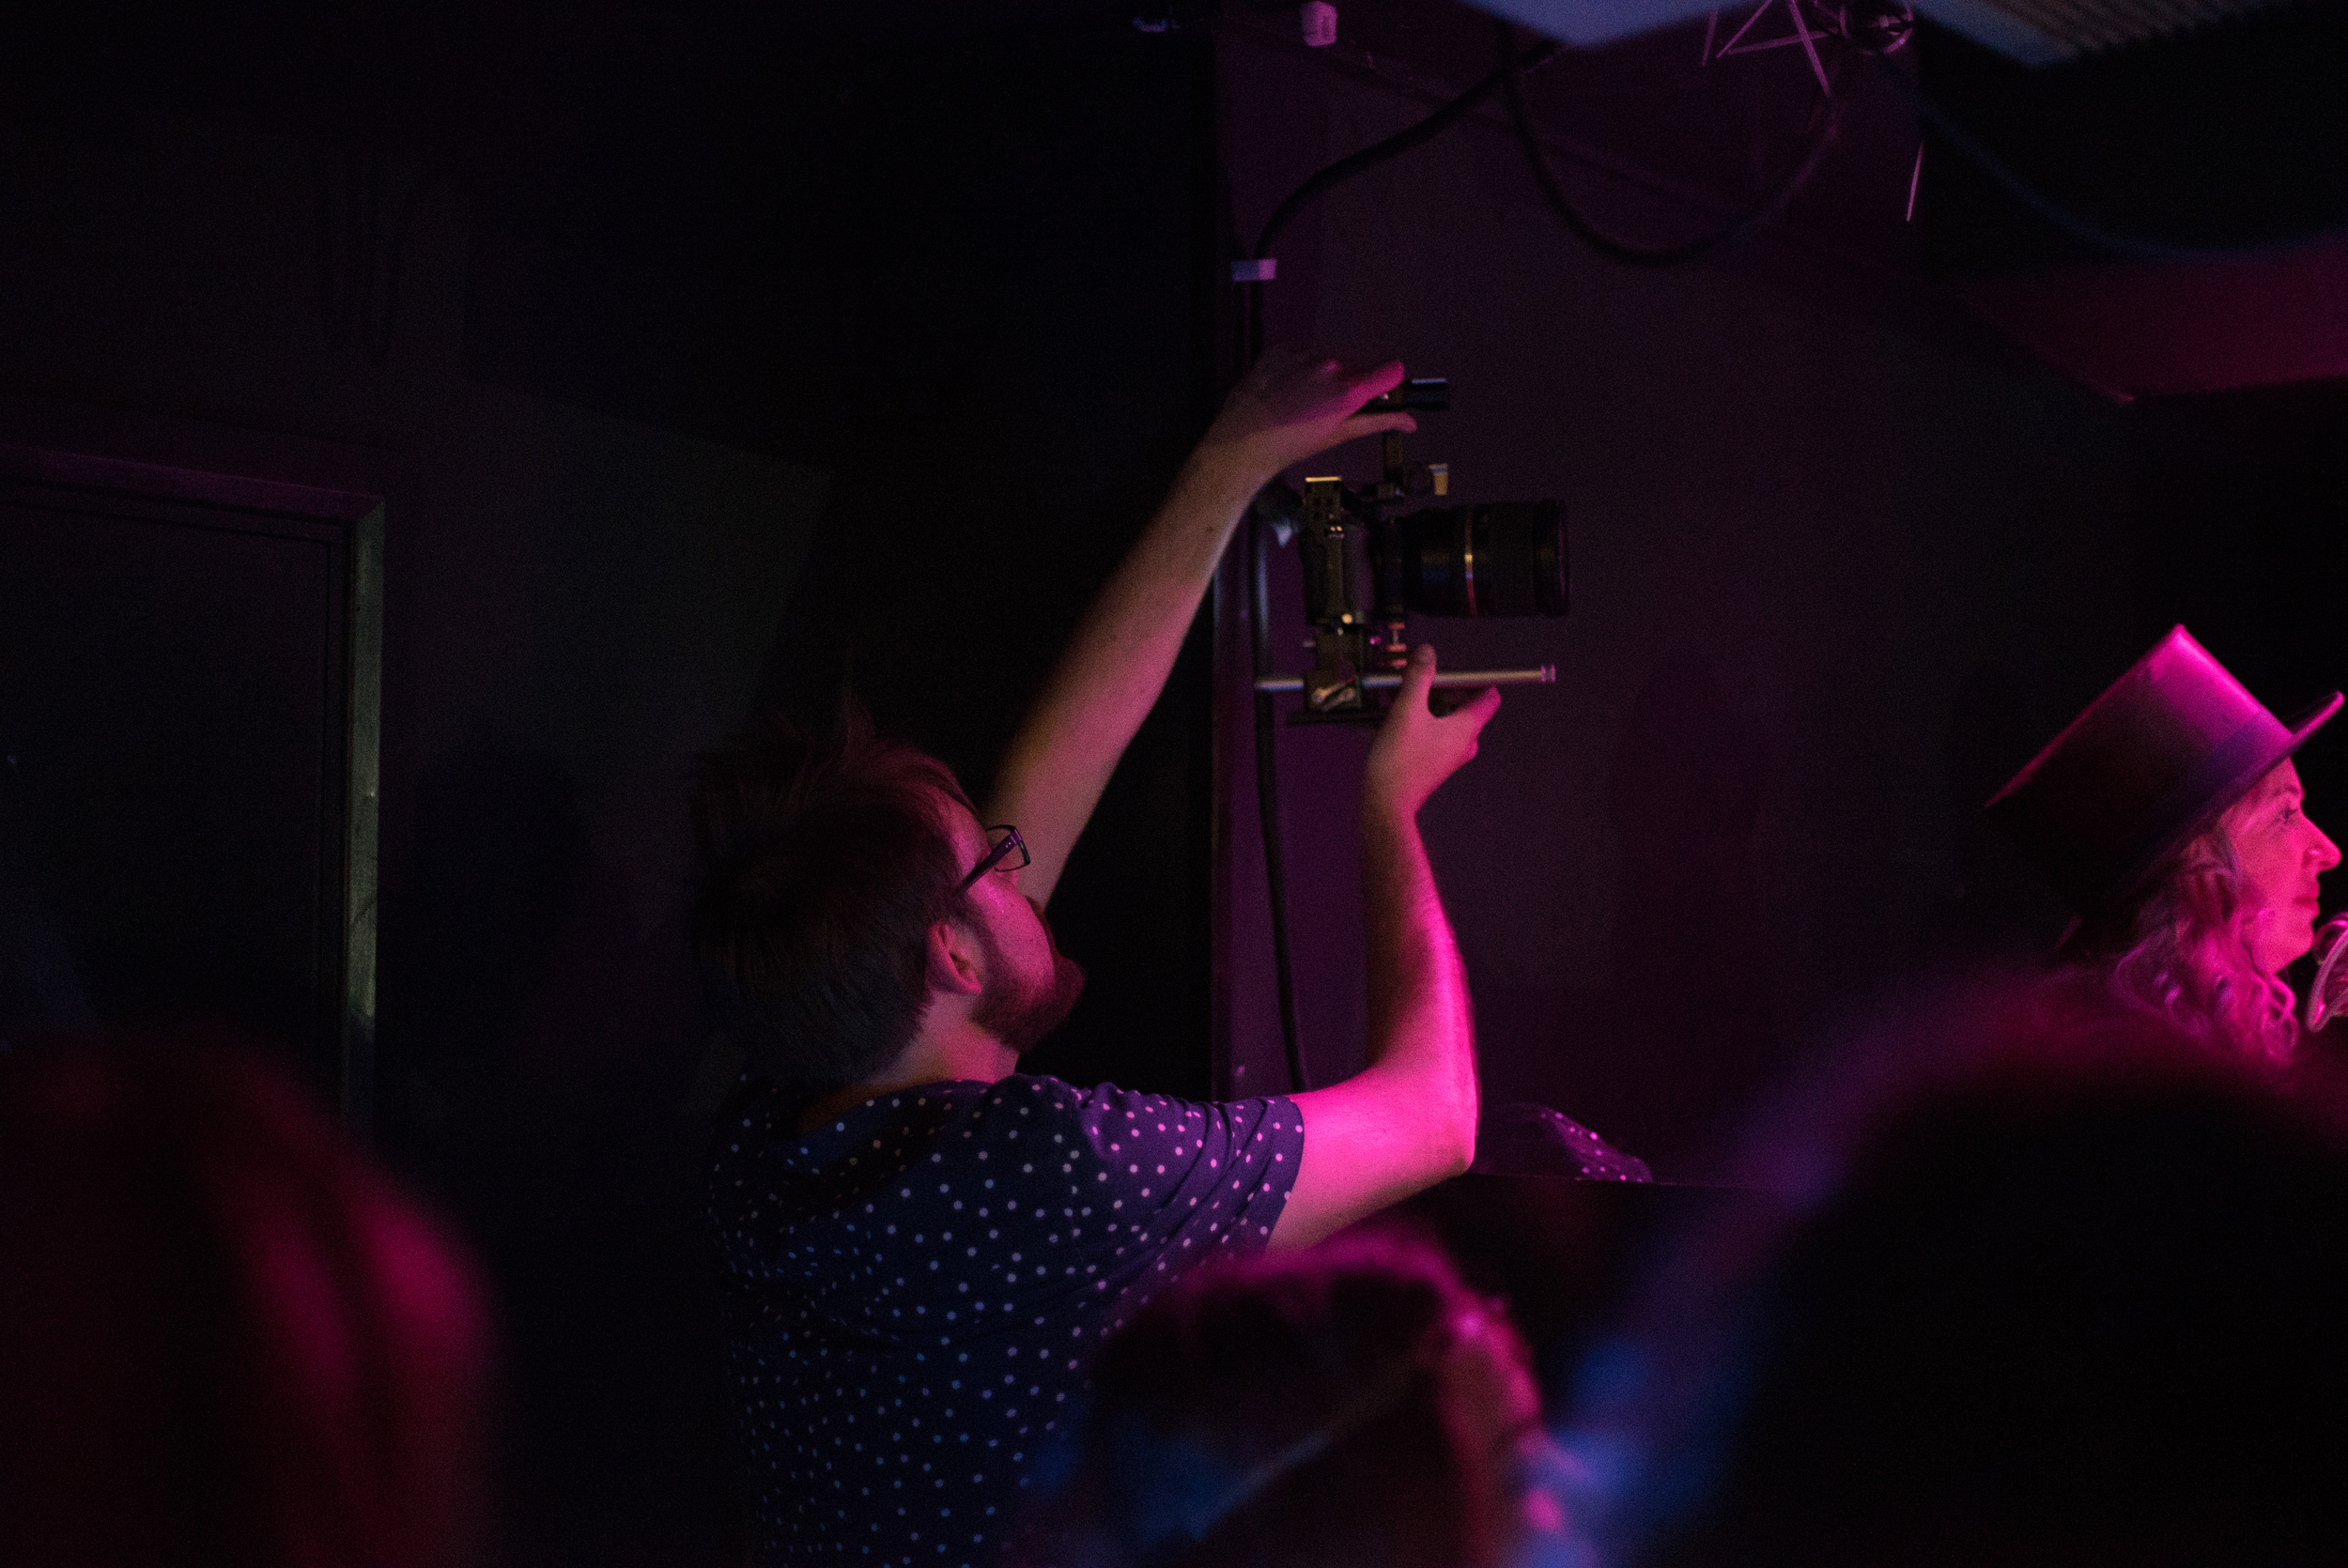
During my time with the Sound and Light kit, I tested out its practicality when out filming indoors and out on location. Above is a still grab from the indoor shots of Josh performing his lines to the camera; you can see a hint of light in his eyes, and a soft-neutral coverage of his face. This was the look I wanted to achieve; an intimate piece-to-camera. I used the ring light and mic mounted on the hot shoe of my camera setup, this gave a direct beam onto the subject, and would work for any subjects in front of the camera. Indoors the RL-48 ring light gives out a beautiful 140 degree beam of light that wraps around your subject, without any hot spots (usually on the forehead). I was filming a music video, but would work exceptionally well in model and fashion work, where beauty is exaggerated through the images.

rotolight sound and light videography video kit review music video filmmaking shoot videography

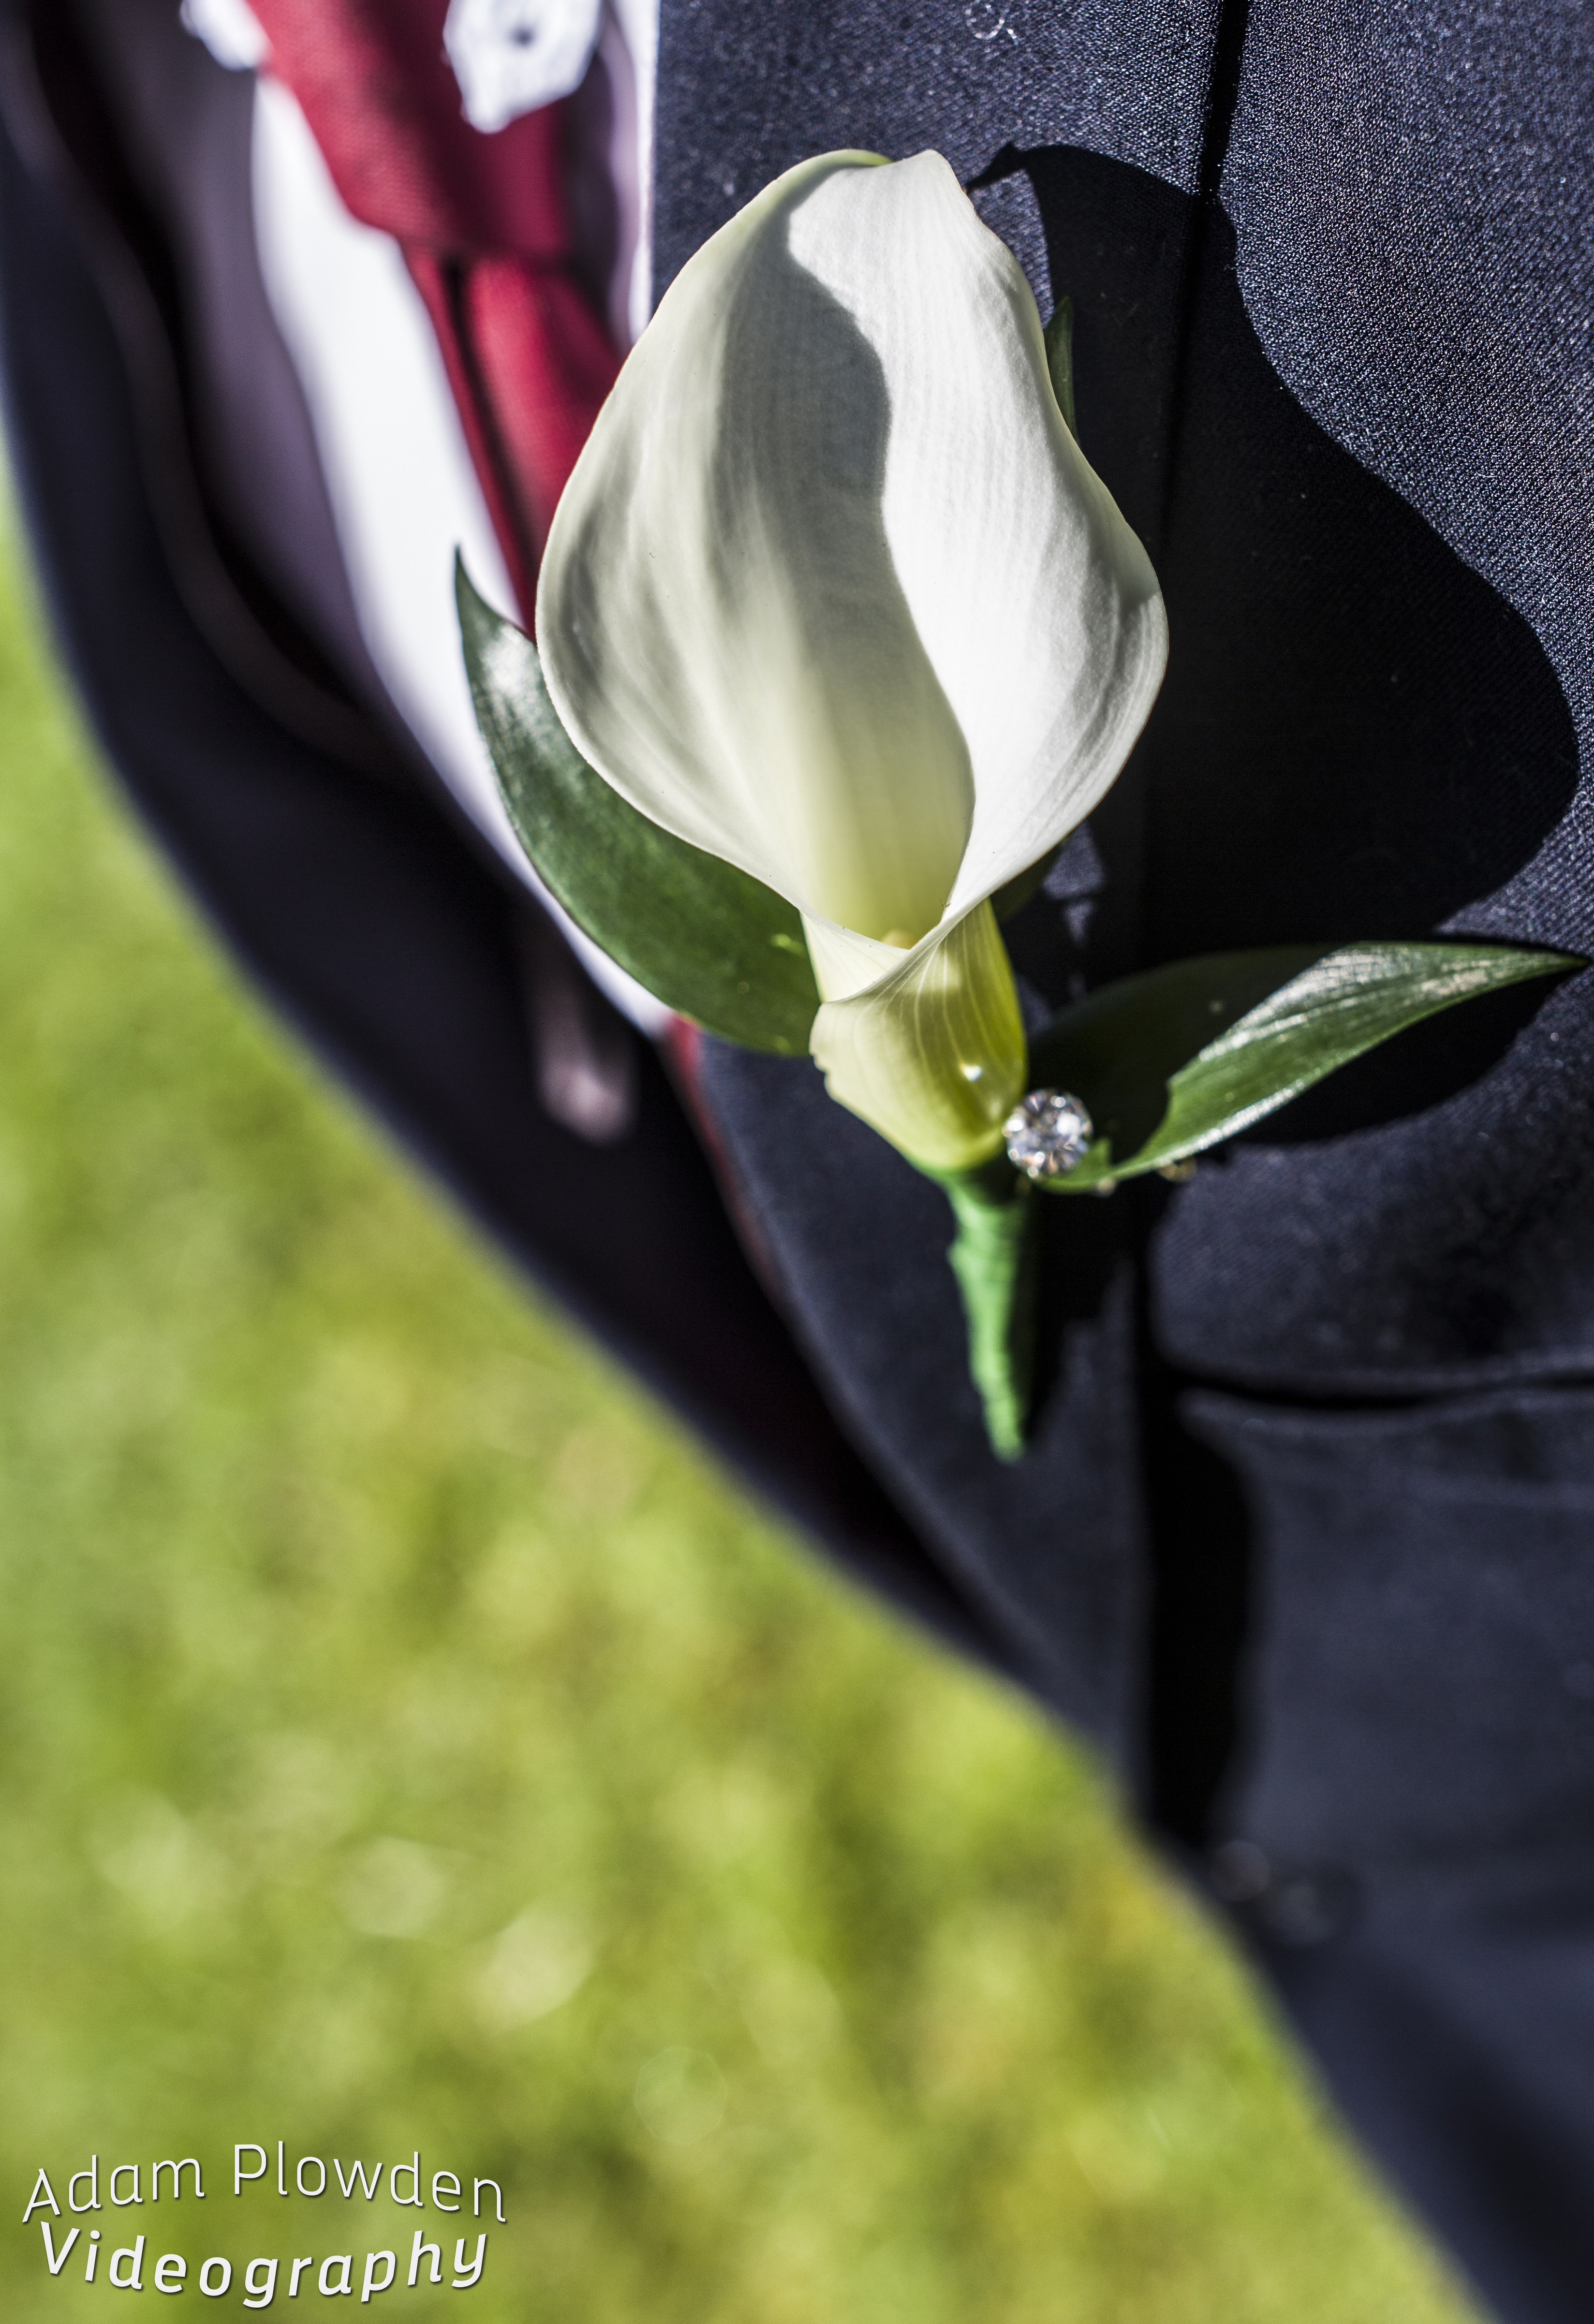
It took some innovative thinking to get the lighting right for this continuous tracking shot. Although I was shooting in the afternoon sun, I still needed a key light to keep Josh's face illuminated throughout. The night before we were at the location shooting the same scene, but had the ring light mounted on the camera. This time I needed the source to be much closer, so I whipped out the Manfrotto Magic Arm and Superclamp and clamped the light to the boot of my car. In the still grab above, the light is only a foot away from the left of Josh!

What I found here was the need for a brighter light. The 48-LED ring light provided great overall coverage of my subject, but I required a brighter beam to achieve the desired soft-skin and glimmer in the eye look. Although Rotolight produce large LED lights (Anova) for videography and cinematography, I didn't need that much more power. I think for video it would be great to see this model brighter, or have different brightness levels, as usually you require more light than less - especially when adhering to the 180 degree shutter rule. Once your shutter and aperture are set, the only exposure controlling parameters you have is the ISO/ASA or your light sources brightness, and where you're unable to move the light closer or further away from the subject; having a brighter light from the outset is more beneficial.  This is a small niggle from myself, but can be shown with examples in these still grabs -

rotolight sound and light videography video kit review music video filmmaking shoot videography night videoshoot filming car tracking model dark 
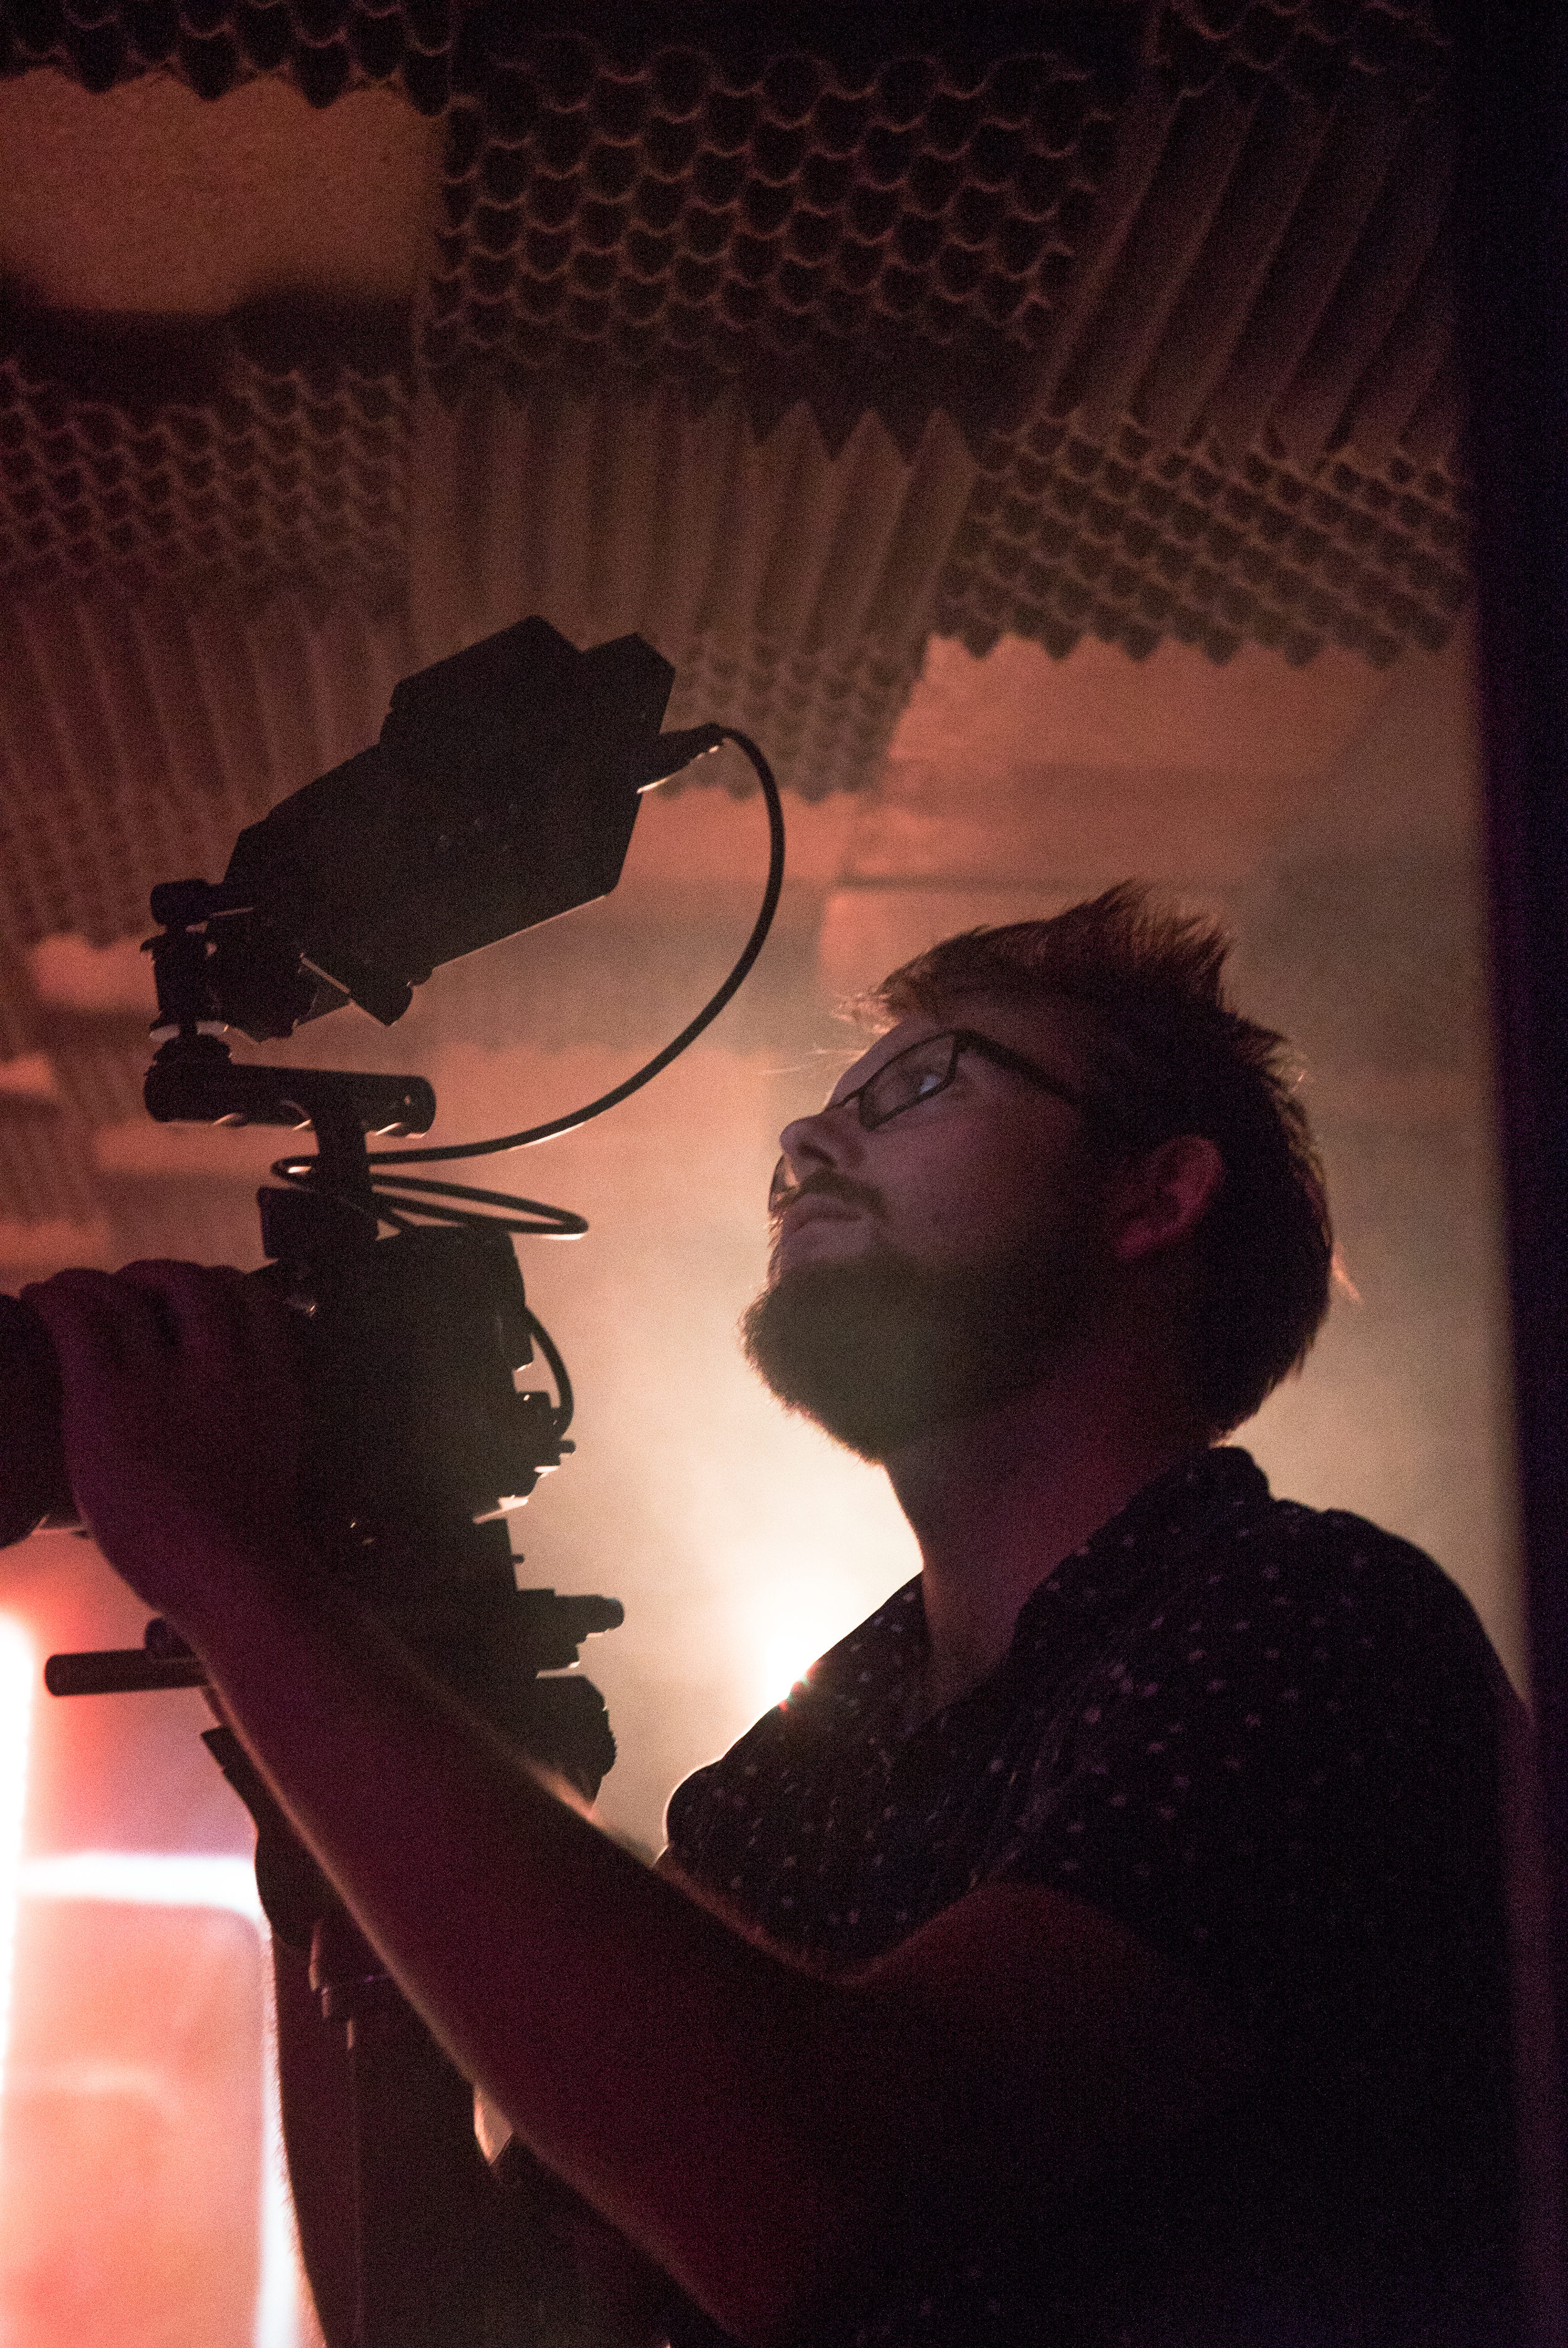
(Here the light from a street lamp came in very handy.)

rotolight sound and light videography video kit review music video filmmaking shoot videography night videoshoot test greet tint

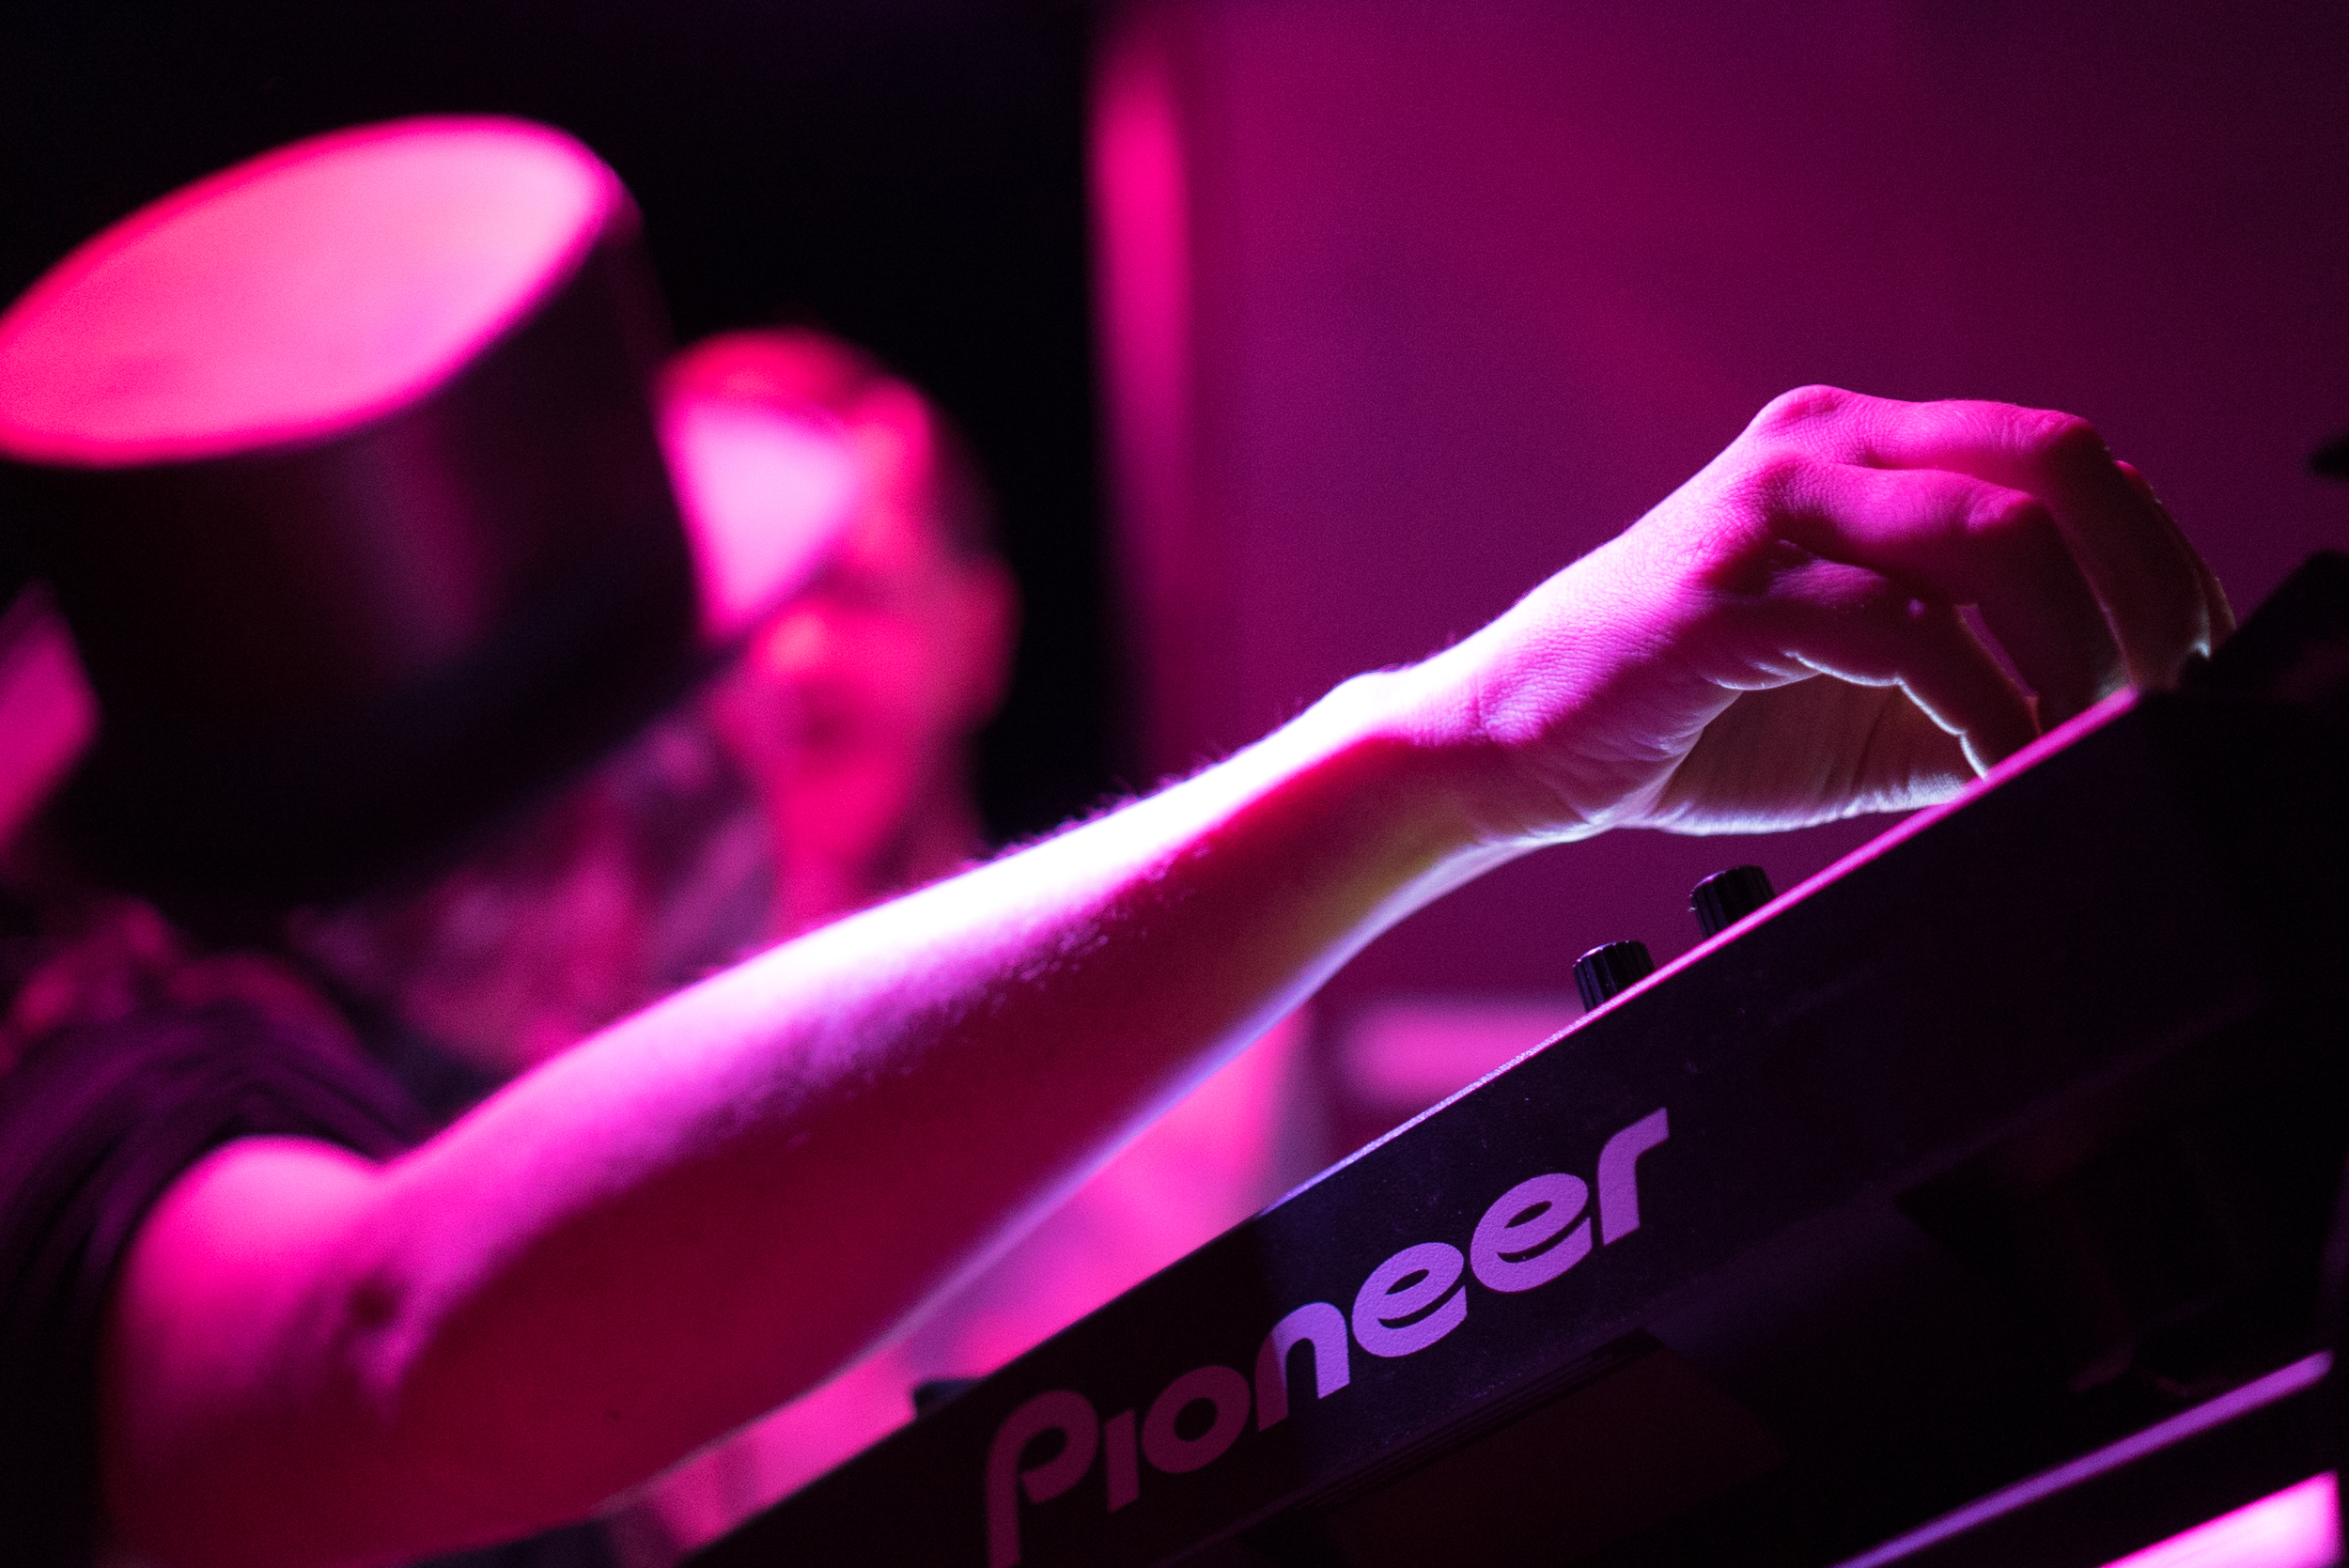
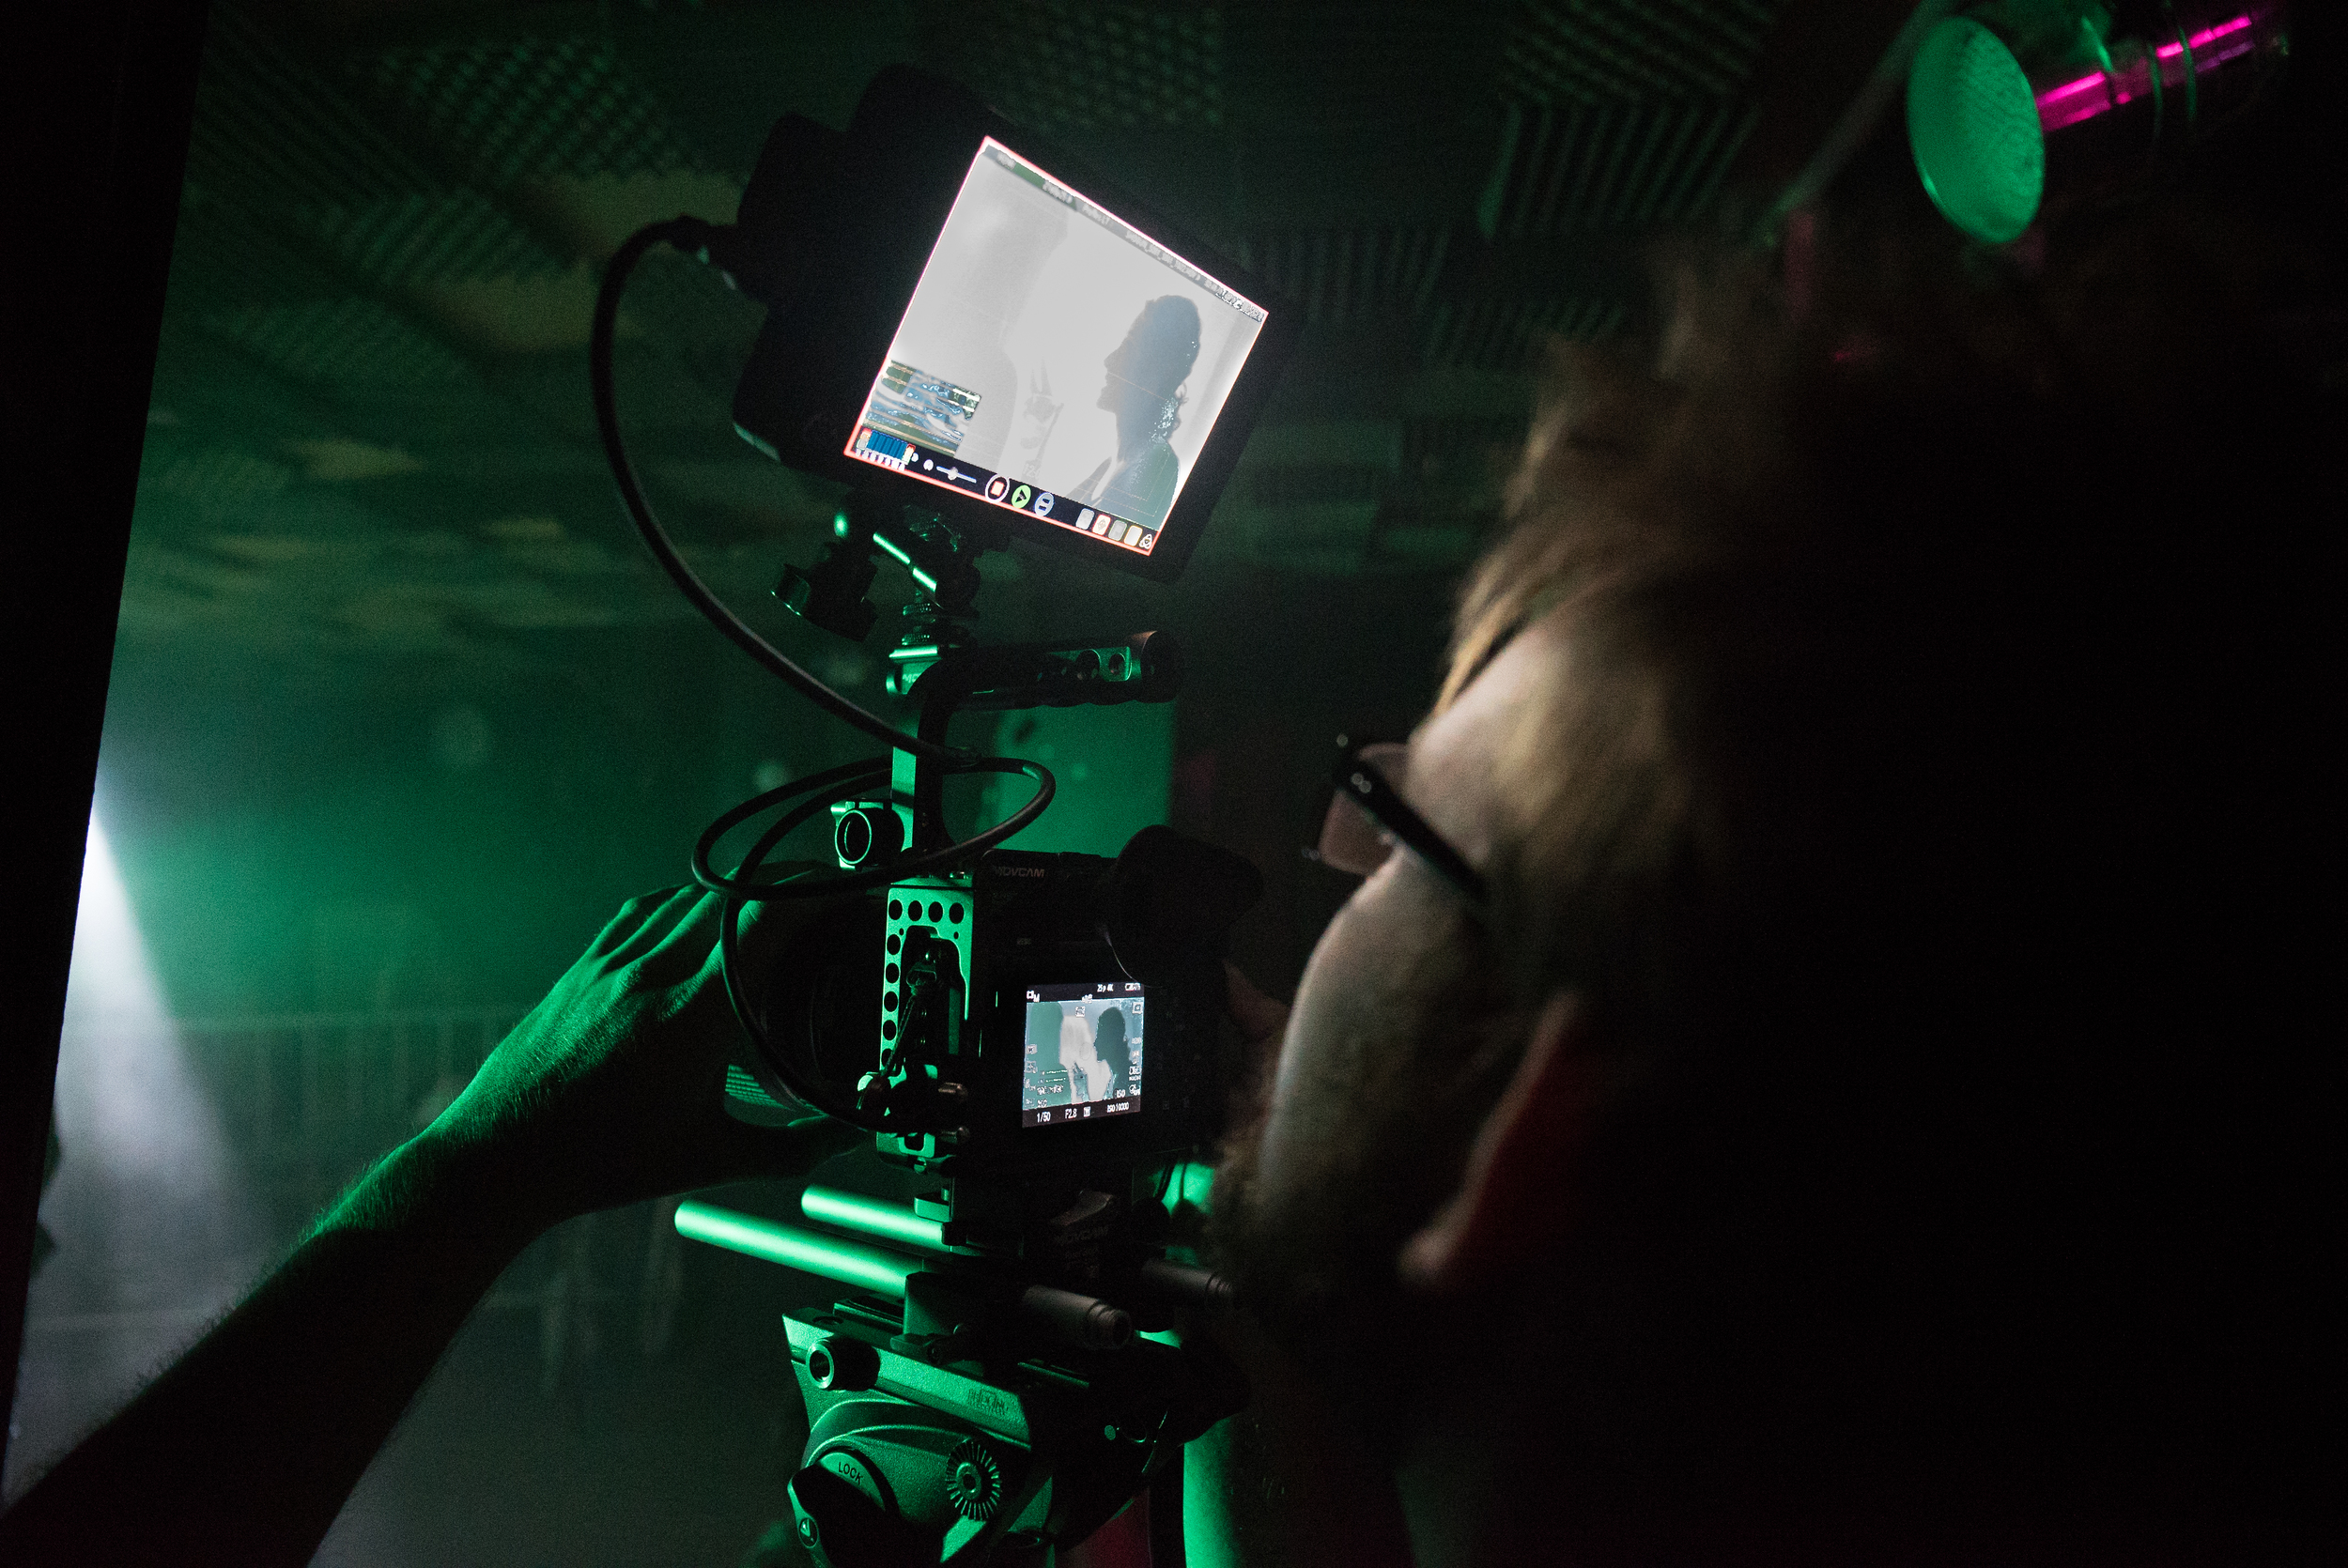
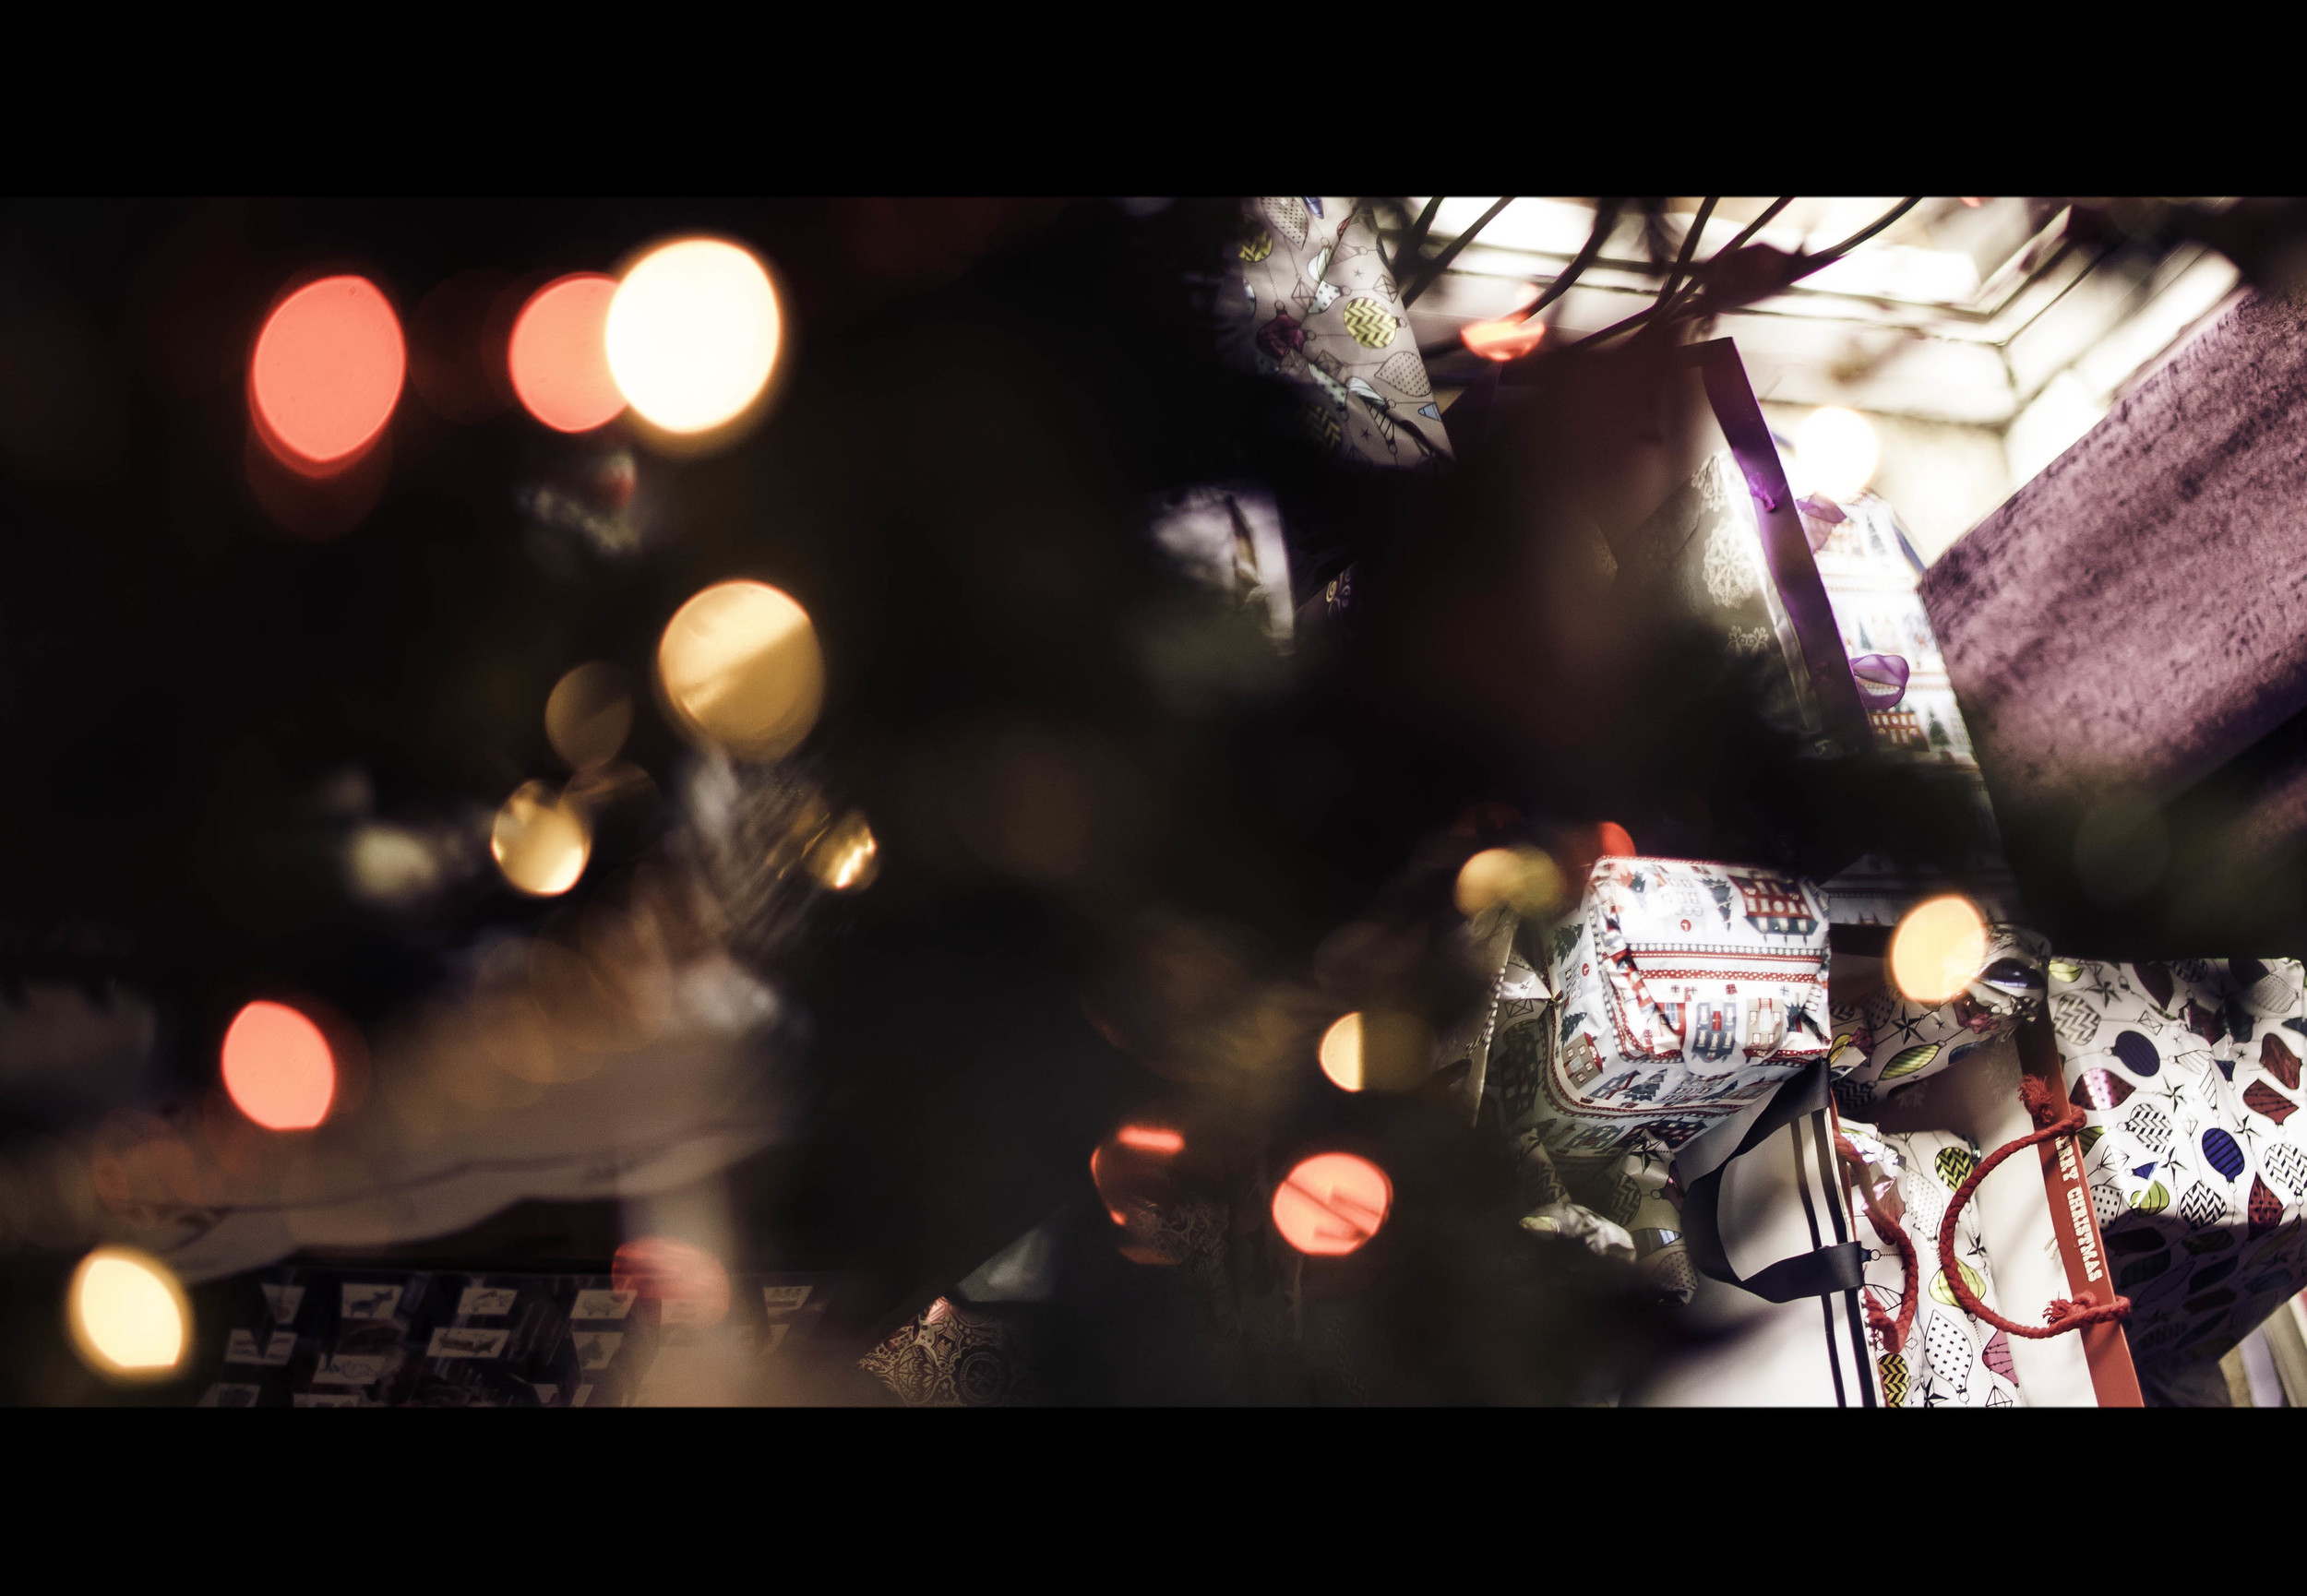
This shot was taken on a 14mm T/3.1 lens at ISO 1250. Although I have remedied the low light in Adobe Speedgrade, a green tint is visible across the frame. A minus green filter is included in the kit which can be used where the green spike (due to LED technology) is prominent, but as I was filming in near darkness I chose not to use the filter to get maximum light output, which by the way is 100w! During the shoot I also used the light hand-held to get intimate with my subject, but not blasting them in the face with an offensive flash gun or LED panel light.

Roto-Mic

Like I mentioned earlier, video is (in most cases) useless without good quality sound. Imagine watching a film or TV program and the sound is noisy and fades in and out as the presenter moves around the frame. It is distracting and essentially draws the audience away from the video, it is suddenly and mostly subconsciously hard to watch and enjoy. With current trends in pro-sumers moving to DSLR to make films and video, there is more pressure on achieving good quality sound when acquiring your footage; the built-in mic does not do your pictures justice.

rotolight sound and light videography video kit review on camera dslr microphone

Here, Rotolight have entered the sound game by producing an on camera directional shotgun mic, with excellent pickup response and sound to noise ratio. When I first started out in freelance videography 3 years ago, I got myself the original Rode VideoMic; it was the best I could afford at the time, and it did the job I needed - to capture good quality audio that will enhance my video. Since then, Sennheizer, Audio-Technica, Hama and many more brands have seen the need for on camera mics for DSLR videographers, and a competitive market has emerged. One that the Roto-Mic will compete very well in due to its superb signal processing and price - an attractive offer to anyone seeking to invest in a cost-effective solution. You will need a 9V battery to power the Roto-mic, but it will last you a good 100 hours.

One very annoying problem with on camera microphones is noise added by the mic's shock mount. The Rode VideoMic I have is notorious for that, creating a squeaking noise as you move or walk with the camera that was audible and therefore recorded into the sound of the video - very unwanted! The Roto-Mic shock mount has been specially designed to minimize any movement the mic may be affected by, holding the capsule stiff, without wobbling on the mount; keeping unwanted noise out.

Rotolight considered many filming scenarios when designing the new mic; it includes a gain adjustment of -10dB to +10dB which is very handy when you are far away from the subject or action, or are filming in a loud and noisy environment. A two step high pass filter is also built into the body of the mic which removes any wind noise and rumbles from the captured sound; perfect when filming outdoors. These small but important features show that Rotolight have done their research into where DSLR videographers are working, and how they need to use their kit.

I was really pleased with the results of the sound recorded with the Roto-Mic, I was expecting another Rode VideoMic moment but it never came. The mic surprised me with its quality recording, and with a little noise reduction in post production the final sound recording is clean and crisp.

rotolight sound and light videography video kit review music video filmmaking shoot videography night led light mic kit

Rotolight has also been innovative in their mounting options, considering many different setups with the light and mic together. This makes a lovely change from complex accessories hanging off the camera to use two hot shoe mounts. The option to use the light mount, or to mount the light on the microphone gives you many different setup options that doesn't restrict your shooting, and is not fiddly or complicated to change! I was using the mic and light together; here the mic mounts onto the camera hot shoe, and then the light can be pushed onto the barrel of the microphone. Although I was dubious of this at first, as it would add extra weight to the shock mount and possibly interfere with the sound recording; it has proved me wrong with being fully functional no matter how the light and mic is set up.

rotolight sound and light videography video kit review music video filmmaking shoot videography night videoshoot filming car tracking

My verdict

  • Fantastic kit if you are starting out in DSLR videography - a must have kit to get you started.
  • Ring light provides excellent soft light for work with models, people, macro and prominent subjects.
  • Filters included is really handy, although as I am heavy handed they are sometimes difficult to apply.
  • Battery life is second to none - 4 hours with recommended lithium AA batteries (x3) or regular lithium AA (x3) for 3 hours.
  • Various mounting options means shooting is not restricted.
  • Mic is broadcast quality - remember sound is just as important as video.
  • Gain adjustment is handy in quiet and noisy locations.
  • The Rotolight bag keeps your hands free!

Of course with every review there are some constructive criticism comments, but not many for me as my experience working with the Rotolight Sound and Light kit has been very pleasant. Firstly, a higher power portable light would be ideal for video, with intensity control. Secondly, now Rotolight has entered the sound game it would be great to see other microphones like hand held bi-directional or even lav mics, and a boost in the recording quality (maybe a Zoom competitor??!). Thirdly, and this isn't criticism, more a request for a flexible light stand or arm so the light can be positioned in extreme and unusual angles.

I am recommending you to go out and get this kit if you're into your DSLR video and photography and need a light source and microphone that you can take to every shoot you go to! It will definitely be coming with me in the future, and I can imagine the RL-48 LED light working fantastically for wedding films and interviews, teamed up with the Roto-Mic and you have a perfect, all in one, on camera 'run and gun' solution to your filmmaking and photography.

You can check out the video I produced for Rotolight demo'ing the new Sound and Light Kit here, and the music video will be released very soon!

[vimeo http://vimeo.com/87515700]

Fantastic Rotolight Video News - Coming To A Screen Near You!!!

The Rotolight Sound and Light kit video I produced for Rotolight featuring Josh McDonough is being taken on tour to America, where it will be shown to a live audience of 30,000 film students! If you haven't already, you can check out the video here!

[vimeo http://vimeo.com/87515700]

Check out Josh's new studio too, and get recording there - Just Jam Studios!

Got a meeting about the recycling project today, then will be getting my new iPhone (about time I know)!

rotolight rotomic ring light tiele motion graphic video

Happy creating you awesome bunch of people, and thanks for all your support so far!

And no I haven't forgotten about new videos!

It hasn't slipped my mind that a number of new videos are on the horizon showing you guys my videography setup, going through the equipment and techniques to set up for a reliable interview scene using the new Rotolight LED ring light and the Rotolight microphone. The weather has been terrible here over the last week so I haven't had a chance to get out and do much filming and testing out of the new Rotolight products, but this is the job for today and next week!

Watch this space for plenty of 'Video Questions' videos and samples using the Rotolight kit!

canon 5dmkIII with samyang 85mm moda camera rig Canon 5DmkIII with Samyang 85mm cine lens

Fantastic Sony PMW-300 Review

Following on my post about camcorders yesterday, here is a great review of the Sony PMW-300 camcorder from Shooting Image Ltd - http://www.shootingimage.co.uk/MoreInformation/SonyPMW300/SonyPMW300.html Sony-PMW300-Large-e1371403796121-616x486[1]Photo from NoFilmSchool.

Video on the Canon 5DmkIII and Samyang Cine Lenses

Many of you intrepid videographers may have come across a unique range of VDSLR Cine lenses from Samyang (Rokinon/Walimex) depending on your region. Have you had thoughts to invest in one, or a whole range of them? Focusing on video, having electronic focusing and aperture is not essential for me, and in fact gives more control over the light entering the lens due to the de-clicked aperture. You can create smooth transitions between light and dark situations with ease by pulling the aperture.

As I've only just got the 5DmkIII and cine lenses, I thought it would be a good idea to test the kit out individually; producing a short video of the results.

I began on the Samyang 14mm T/3.1, an ultra-wide lens that does have barrel distortion if subjects or distinct lines move towards the sides of the frame. Operating the camera handheld on the MODA rig, I was not left much choice but to capture the video in 720p 50 frames per second, to eliminate obvious camera shake. This did work in my favor come later in the day when I was hanging out of a car boot filming!

adam plowden video filming canon 5dmkiii samyang 14mm

To exaggerate the ultra-wide effect, getting close to the ground, walls or your subject will show how wide the image actually is, while offering exquisite sharpness throughout the depth of the image. Moving while operating an ultra-wide also gives a unique changing perspective to the viewer; one that is appealing due to it looking unnatural to our eyes - a great effect for establishing locations in film.

What I did notice was a very strong contrast, even when shooting in Neutral picture style (for a flatter image). This is causing issues in post due to burnt in detail in the highlights and shadows.. So I have adjusted the picture style to my needs by reducing all of the parameters to the lowest level.

Overall, I am ecstatic to finally get my hands on an ultra-wide as I had no way of achieving that perspective with my old kit.

My tips would be to keep the camera stable - use a tripod, shoulder rig or steadicam to operate the camera. This gives you better control and steady visuals that won't distract the viewer from the awesome visuals.

Judge your highlights and shadows correctly - this is a manual lens, so remember it is easy to stop down to F/6.5 or F/8.3 (uncommon electronic F stops) to expose the image perfectly. With this, always check your focus (use digital zoom!!). The worst thing ever would be to find an awesome flowing shot but it being slightly out of focus.

Experiment using the manual aperture, it will take some time to get used to!

Here is a draft edit that I chucked together from the test day -

http://www.youtube.com/watch?v=JN4tb8MJpEc

On to the Samyang 35mm T/1.5

london filming canon dslr video camsmart moda camera rig

This is a beautiful lens. I've only worked with a 35mm F/1.8 for my little Nikon D5000, so as far as experience with 35mm that goes out the window.

What can I say... The 35mm focal distance works so well with the 5D's full frame sensor, and even at T/5.6 the image was sharp and had a beautiful bokeh. To the other end of the spectrum; I also shot at T/22 to achieve a silhouette effect of Glen and the Houses of Parliament in the background. At this small aperture you would expect loss of detail and softness, but the Samyang 35mm excelled.

Another fantastic benefit of this lens is its minimum focus distance (the minimum distance from the lens to the subject for it to be in focus). It is very small at only 30cm allowing you to get very close to the subject and still achieve pinpoint sharpness and shallow depth of field.

I was filming up in London with my friend Glen, the light was hard when we arrived with strong sunlight beaming through the rain clouds, so to retain good exposure throughout the frame I found myself shooting between T/4 and T/8, varying the ISO depending on the location. For demo purpoes, I also filmed Glen constructing and using the new CamSmart MODA Rig, in innovative new video and photography product aimed at all level of users to achieve exceptional visuals in a cost effective solution.

For this close up, intricate video the 35mm lens was perfect for both wide and close up shots, I get more and more impressed as time passes!

My tips for using the Samyang 35mm T/1.5 cine lens - get yourself some ND filters, or even better variable ND filters as this will reduce the light entering the lens without changing the aperture, shutter or ISO. If you have a lens that is very fast, like this model at T/1.5, to retain a shallow depth of field in a multitude of locations and light levels ND filters are crucial and should be in your kit bag.

Here is the rough edit of the 35mm film! -

http://www.youtube.com/watch?v=g66CTm38SsA

Big shout out to Manfrotto for the 055CF tripod, video head and pro backpack, makes a world of difference to my old 055 aluminium model!

Good luck with your shooting, drop us a comment if you have any questions about using the lenses or kit, and be sure to like, follow and share!!

Review: Manfrotto Backpack50

Hello all! Here is the anticipated review of the new Manfrotto Backpack50, the flagship range of professional photography and videography bags for cameras and equipment. edt1

The new range comes in a variety of sizes depending on the equipment and lenses you use. If you are going to be shooting for ENG, or know you will need fast access to your camera and lens kit then the Holster range may be for you, or if you're looking for a perma-home for a vast range of bodies, lenses and accessories then a Roller Bag or Backpack will be for you.

screen1

I got a great surprise through the post a couple of weeks ago, it was the Backpack50, which I have been using out on photo and video shoots, testing it to the extreme in a wide range of shooting situations such as weddings, on location video and corporate events.

First things first, as you can see the bag is BIG! Not too big that it is laborious to carry around, as the support straps provide great comfort for a fully packed bag. Having a bigger bag eliminates the need to bring extra sling bags if you take laptops and tablets on shoots, as there two separate zip pockets for both, and also allows me (predominantly shooting video) to keep all of my essentials in one place. For example, the bag is currently full with my kit needed for a shoot for Tesco on Friday, so a 7" HD field monitor, clamps, Rode VideoMic, 2x DSLR bodies and 6 lenses sit snugly in the protective separators. I have all I need in one convenient place, a perfect solution especially as I am a SINGLE shooter.

IMG_1918_1

Overview of the Backpack50's features:

DSC_0173_1

Unlike other camera bags which open from the side or the back, the Backpack50 opens from the top, which allowed me to quickly grab my camera (with lens attached) almost immediately with ease. If you've got the waist support done up then this is even quicker as you can swing the bag from your back to front and grab the camera that way. The other handy feature of this is that you can have a telephoto lens attached to the camera and still take it out with ease, as the support pads can be customized to fit your individual kit needs.

DSC_0179_1

Here you can see the bag open, the top flap unzips all the way down revealing many side pockets, 3 zip pockets on the flap (which I use for little bits that I can grab quickly such as batteries, SD cards, hot shoe adapters etc). There is even a protected zip pocket for a tablet if you have one too!

The capacity of the Backpack50 is fantastic! As I mentioned before I filled it up with various accessories for shooting video, but it will comfortably hold a large DSLR body and telephoto lens attached in the middle section, up to 8 standard lenses in the side sections, as well as two ideally large and deep side pockets. These would be great for clamps and arms, but I use mine for my microphone and a little tool box for emergencies!

IMG_1861_1

A small but memorable Manfrotto logo on the main flap of the bag, the branding is not in your face which keeps the bag discrete.

IMG_1892_1

With a fully packed bag (including a laptop, EVF) it is heavy as you would expect, however the inclusion of a very comfortable, padded waist strap distributes the weight evenly through the body, rather than putting the pressure on your shoulders, reducing fatigue, and it was a welcome relief for me to see too! All the straps are padded, and are very heavy duty for a camera bag which is fantastic when shooting in rugged and fast paced environments, or for a very long time.

The Backpack50 also includes a waterproof cover, essential for protecting your beloved kit in times of heavy downpour, however it would have been better to see this built into the bag rather than a separate part, as this reduces the risk of forgetting it!! It also has a side strap for tripods which is a welcoming sight. Previously I used a Lowepro bag and simply strapped my Manfrotto 055B tripod and 701 head to the main straps, which is heavy and also puts lots of strain on the bags fastenings (i don't recommend this). The external strap loops through a heavy duty fabricated patch on the side of the bag, and the strap can be secured around the head of the tripod. It is quick release too, so you can get the tripod off the bag and set up quickly. A great improvement.

IMG_1903_1

Overall, I am delighted with Manfrotto's new Backpack50 as it caters for the pro photographer AND videographer, protecting our livelihood (equipment) with fantastically engineered bag sections, as well as providing flexibility when out shooting which many backpacks restrict due to their bulky and un-ergonomic design. Manfrotto have overcome this by designing a bag with the pro in mind, and have produced a very successful and ergonomic addition to the growing kit list of photographers and videographers alike.

Check out the new range on Manfrotto's website here - http://www.manfrotto.co.uk/collection/8615.1065.17520.0.0/Professional

Want creative and cinematic promotional video, and need to keep costs down?

Get 10% off all productions until the 15th November '13!

Are you in need of innovative, cinematic and artistic promotional video's and media, that makes your business, product, event or service stand out, attract a wide audience and immerse them in the visuals and sound?

My portfolio includes video/media work with - Moet Hennessy, Broadcast Magazine, The BBC, AstraZeneca, Manfrotto & more.

I'm offering 10% off on all productions until the 15th of November 2013! Check out my work at

www.adamplowden.co.uk

and get in contact!