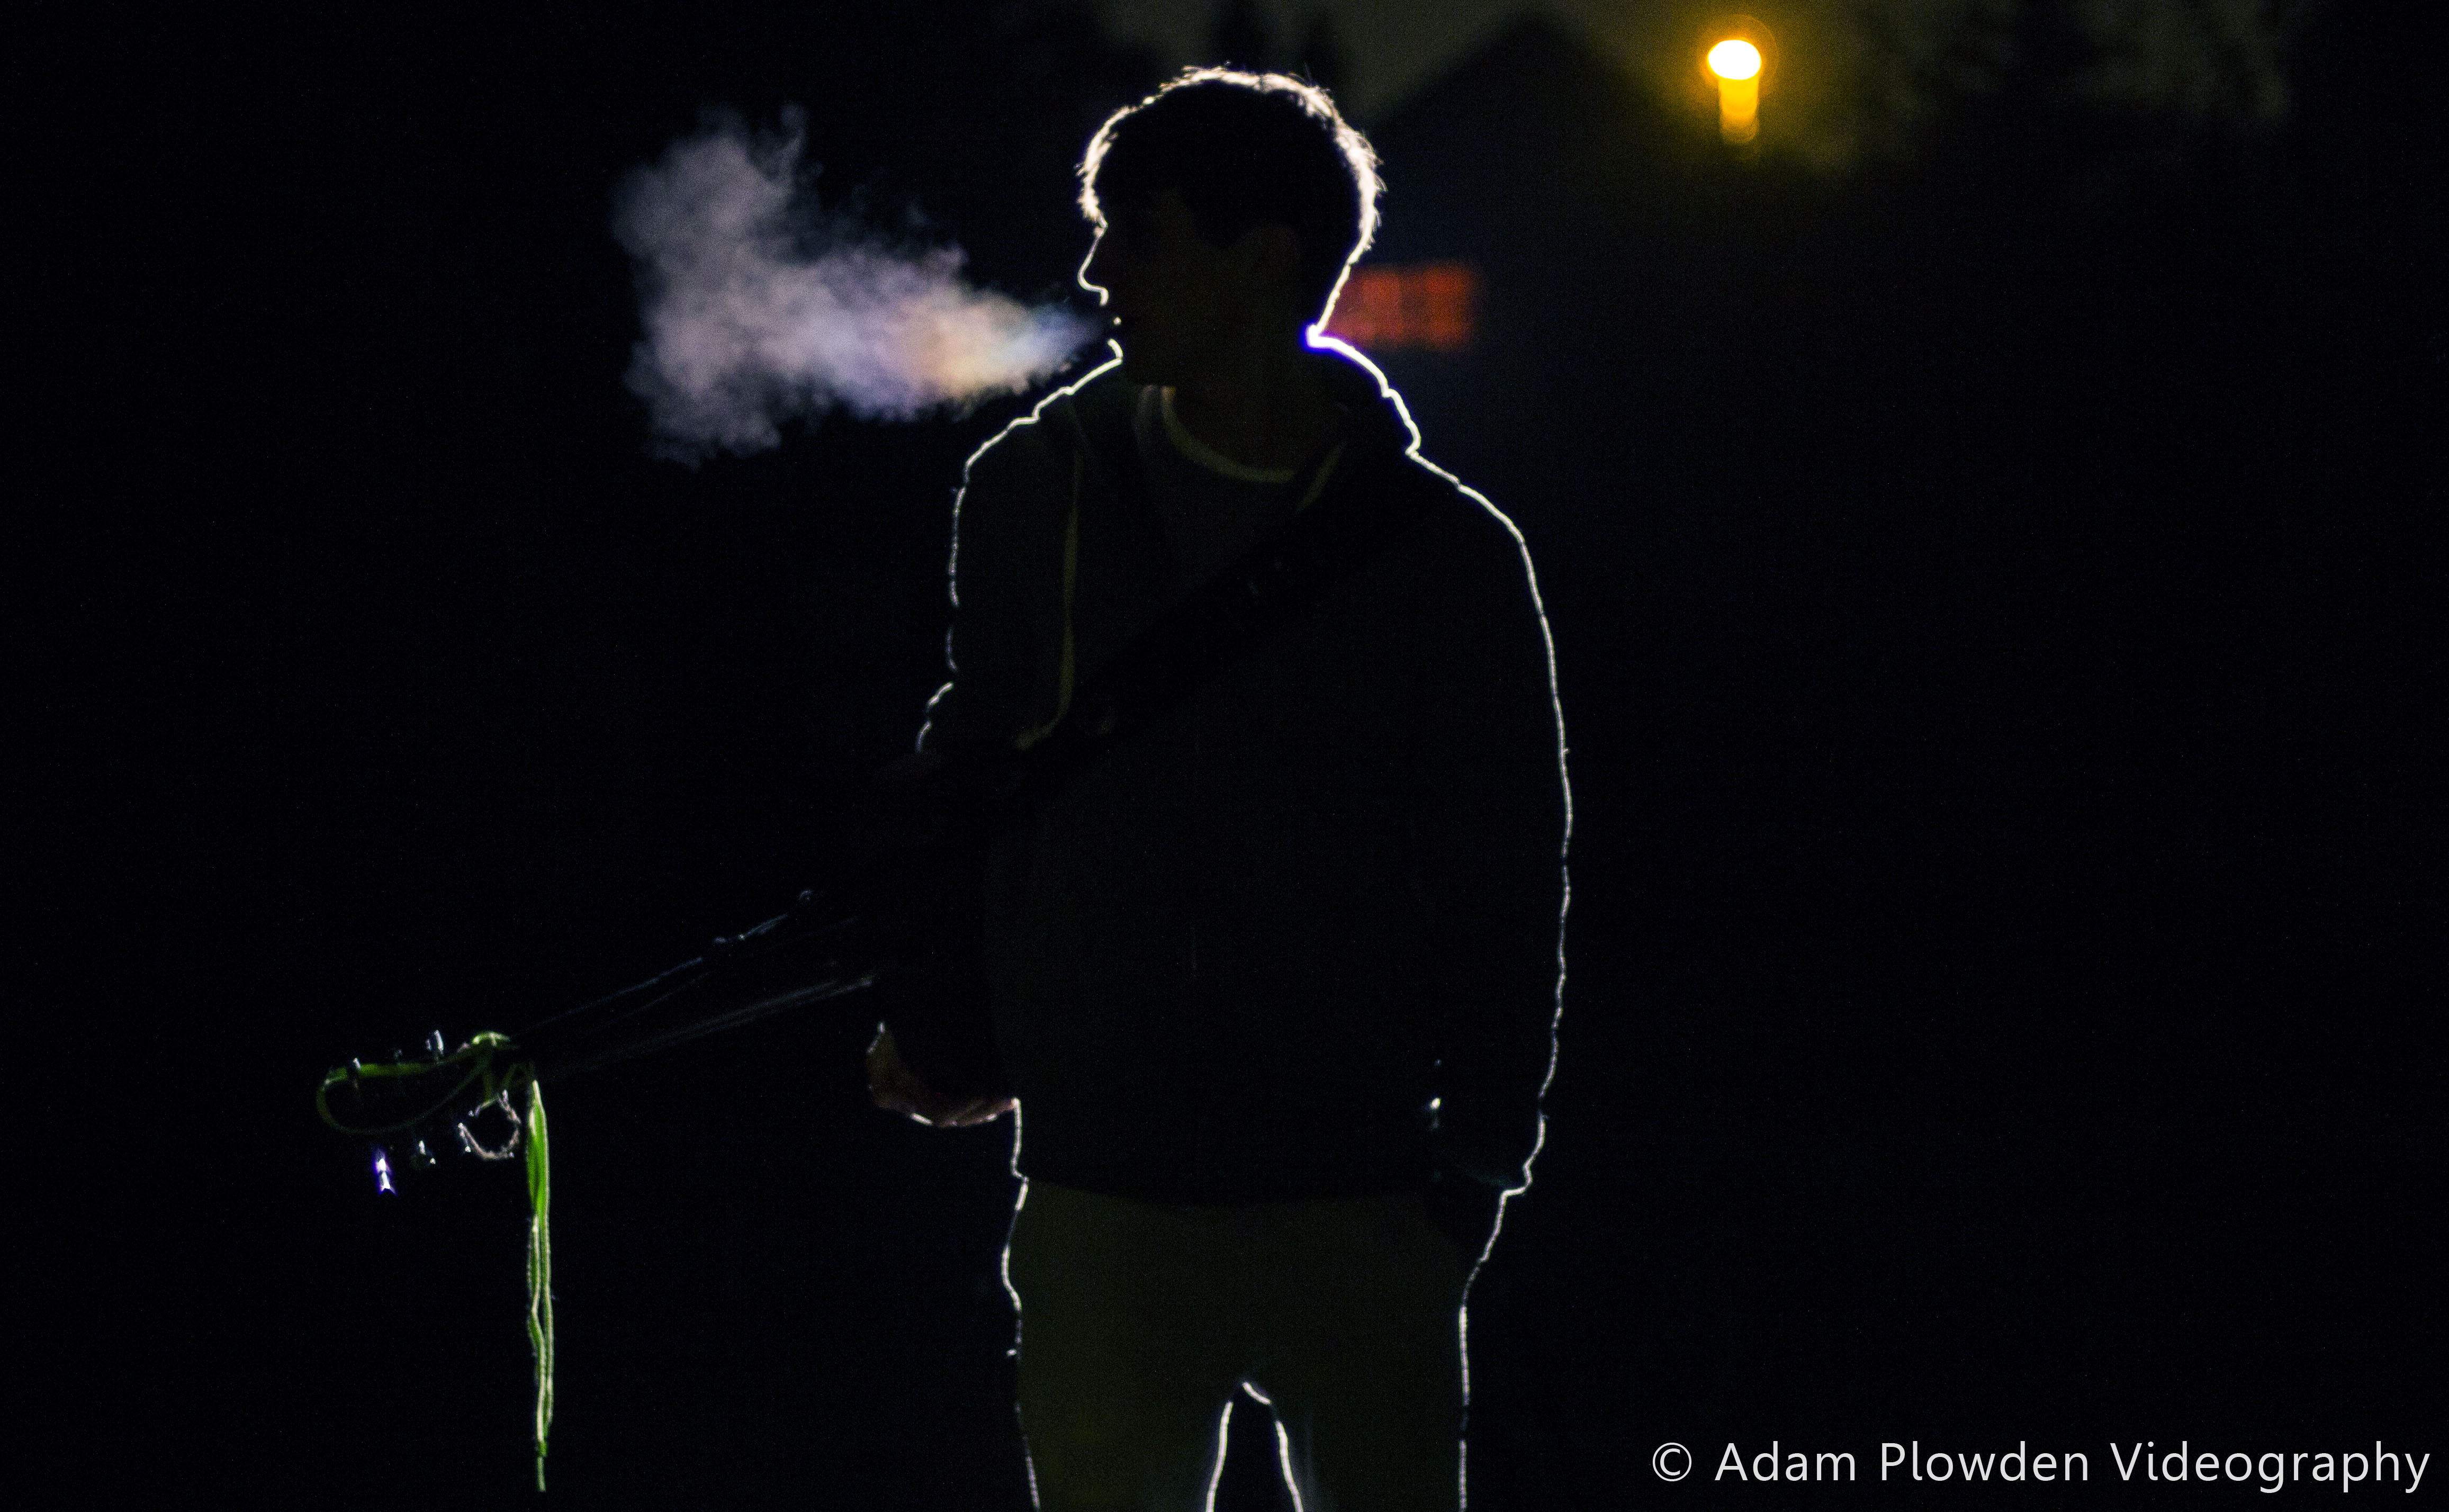
light

Shadows and Light was INCREDIBLE!

I arrived for the brand new 'Shadows and Light' two day filmmaking workshop on Sunday evening, excited to hone in on skills and meet new friends. The drive was smooth, only an hour from Surrey down to Brighton where I was greeted by lovely staff and great room at the Umi (on the seafront).

I dumped my stuff and met my good friend and VFX/Director mastermind HaZ before heading to the pre-drinks to meet everyone. Informal drinks like this are perfect for networking, so remember business cards!!

I met Olly, the 'behind the scenes' filmmaker for the night and the first day and got chatting as he was using a 5D mkIII like me. I also caught up with Nino, and met the wonderful organizer of the event, Fraser, who did a great job of running the event, keeping everything in check.

HaZ and I also chatted to Ollie Kenchington about production for grading and many other things, another great person to meet!!

I also met Yusuf at the pre-drinks when talking about shooting on the A7S, and on returning to the hotel I met Giordano Borghi, an Italian wedding filmmaker who I really enjoyed chatting to over a whisky on the rocks.

Day one was hosted at 'Dukes at Komedia' theatre in Brighton town, great venue with comfortable seats for recovery from the late night.. I was enthralled by Vincent Laforets presentation about motion, in which I got grilled by Vincent in front of the professionals and attendees over my 'Seasons Are Changing' video. He commented it was beautifully shot, but the long takes with unmotivated movement would make the audience somewhat bored. It was fantastic feedback from him, despite the public screening!!

Technical Difficulties?

After a break, HaZ presented his talk about VFX in low budget film making, and also considering and directing it in your films. As always HaZ is just a fantastic chap and screened the whole SYNC film, which I was the 1st AC on (shot in Southend), and features one of my shots on the jib!

It was then I met James, who is incorporating film into his company. He's a fantastic dude, and it was great to meet him and chat more throughout the day. I look forward to collaborating in the future :)

Another talk that got me thinking was 'Colour Grading' by Olly Kenchington, who got in deep with shadows and light, and colour theory, and how to produce such grades in Resolve with ease, as well as enhancing the shots/scenes from OK to GREAT!

Day 1 ended with Philip Bloom's talk, followed by the party! Well done to the raffle winners, great prizes donated from the events sponsors; Miller, Rode, Adobe and more.

Day 2 comprised of intense group workshops covering many areas of filmmaking. We were divided into groups which was great for networking with new people attending, and headed to Philip Bloom's workshop on using gimbals (like the MoVI) for filming motion. We got hands on with a range of equipment to see what it's like to operate/walk around using an M5 with a Sony A7S.

I was impressed by this little Defy G2X gimball.

Next on to James Miller's 'Lens Whacking' workshop, very hands on with old manual lenses out in the street. I met one of the models, Ruby, and had a great time filming her while trying to get the hang of 'whacking' the lens for 'ethereal' looking light leaks and almost 'tilt-shift' esque focusing.

Luckilly for us, the sun was beaming through the clouds which was perfect for trying to get some leaks in the frame. We stopped for lunch, then continued on to Vincent's workshop.. The BEST of the day!

Vincent talked through a number of movies with a moving camera, breaking down the scene to show how the narrative flows and is complemented by moving the camera, and the characters in frame. We then got hands on blocking out a small scene, which was fantastic to see to get to grips with working as a director when moving the camera.

Lastly was my good mate, Nino, who was talking about filming interviews and using motion control to add interest to otherwise uninspiring corporates. Using a bright window, we set up an interview scene with LED lights and the Kessler second shooter device to move the camera on the pocket dolly. This added much needed life to an otherwise 'standard' two camera shoot.

It was how big, Nino?!

I had an awesome time, and was happy to give a piece to camera about my thoughts on the workshop. Over the two days I learned an incredible amount that I can directly apply to my work to make films that are more engaging and that have motivated movement! I made loads of new friends too, both from the UK and internationally. For networking and collaboration, there was no better place to be.

Adam's at Shadows and Light until Wednesday!

Taking up the chance to learn more about filmmaking from industry pro's, I'm attending the first 'Shadows and Light' event with Philip Bloom, Nino Leitner, Vincent Laforet and my friend HaZ Dulull who I worked with on SYNC.

It's a two day event full of learning and hands on workshops, I'm really looking forward to it!

Keep updated on my twitter @Plowman91!

Shadows and Light

Five things I wish I knew when I started as a videographer....

Five things I wish I knew when I first jumped into the creative videograpy adventure that is my life:

1. It does not matter what camera you use, invest wisely in reliable glass.

Entitled 'F**k with nature and nature f**ks with you', after previewing it appears it loads as a playlist, so please skip down to the bottom! Shot on my first DSLR; Nikon D5000 and 17-50mm F/3.5 -5.6, a uni project.

2. Work for free (yes, it's the only way you'll generate enough video content, but you'll make friends, have a good laugh, experience terrible mistakes and awesome times).

Produced by Adam Plowden Videography, edited by Joe Bannister. Shot on Canon 60D, Tamron 17-50, Canon 50mm F/1.8, Canon 18-135mm

3. Fix it in post doesn't exist, in fact, trying to fix it in post can do more harm than good (at least with low budget DSLR productions like mine still are.. For now..).

I had to return to Sian Williams' house because I had over exposed a shot, and didn't get good enough sound during her interview.. Produced by Adam Plowden Videography, 'Behind The Scenes' uni project and mini web series.

4. Think of the sound and the light, our primary senses for absorbing content.

A quick example video shot for my Manfrotto Takeover seminar showing the use of sound and light in short video drama to add emotion. 5DmkIII, Samyang 35mm, Tamron 24-70

5. Be yourself and create things that inspire you.. IE: Put you in your work. Copying other artists doesn't make you stand out, you can learn from them and implement your flair and style into whatever you do. That way, when you begin to get clients you know they are interested in not just what you make, but the person behind it.

A personal favorite is filming plants and nature, a good excuse to get away from the computer! 'Waterhouse' produced by Adam Plowden Videography.

Bonus tip. It is kind of included as part of No.2: Collaborate and work with others from different mediums; actors, musicians, vfx artists etc. It is how new ideas are generated!

SYNC is HaZ Dulull's new short film, I worked with him as well as DP Adam Batchelor on the production! It is backed by Blackmagic Design, Adobe, HP and more so give some support!!!

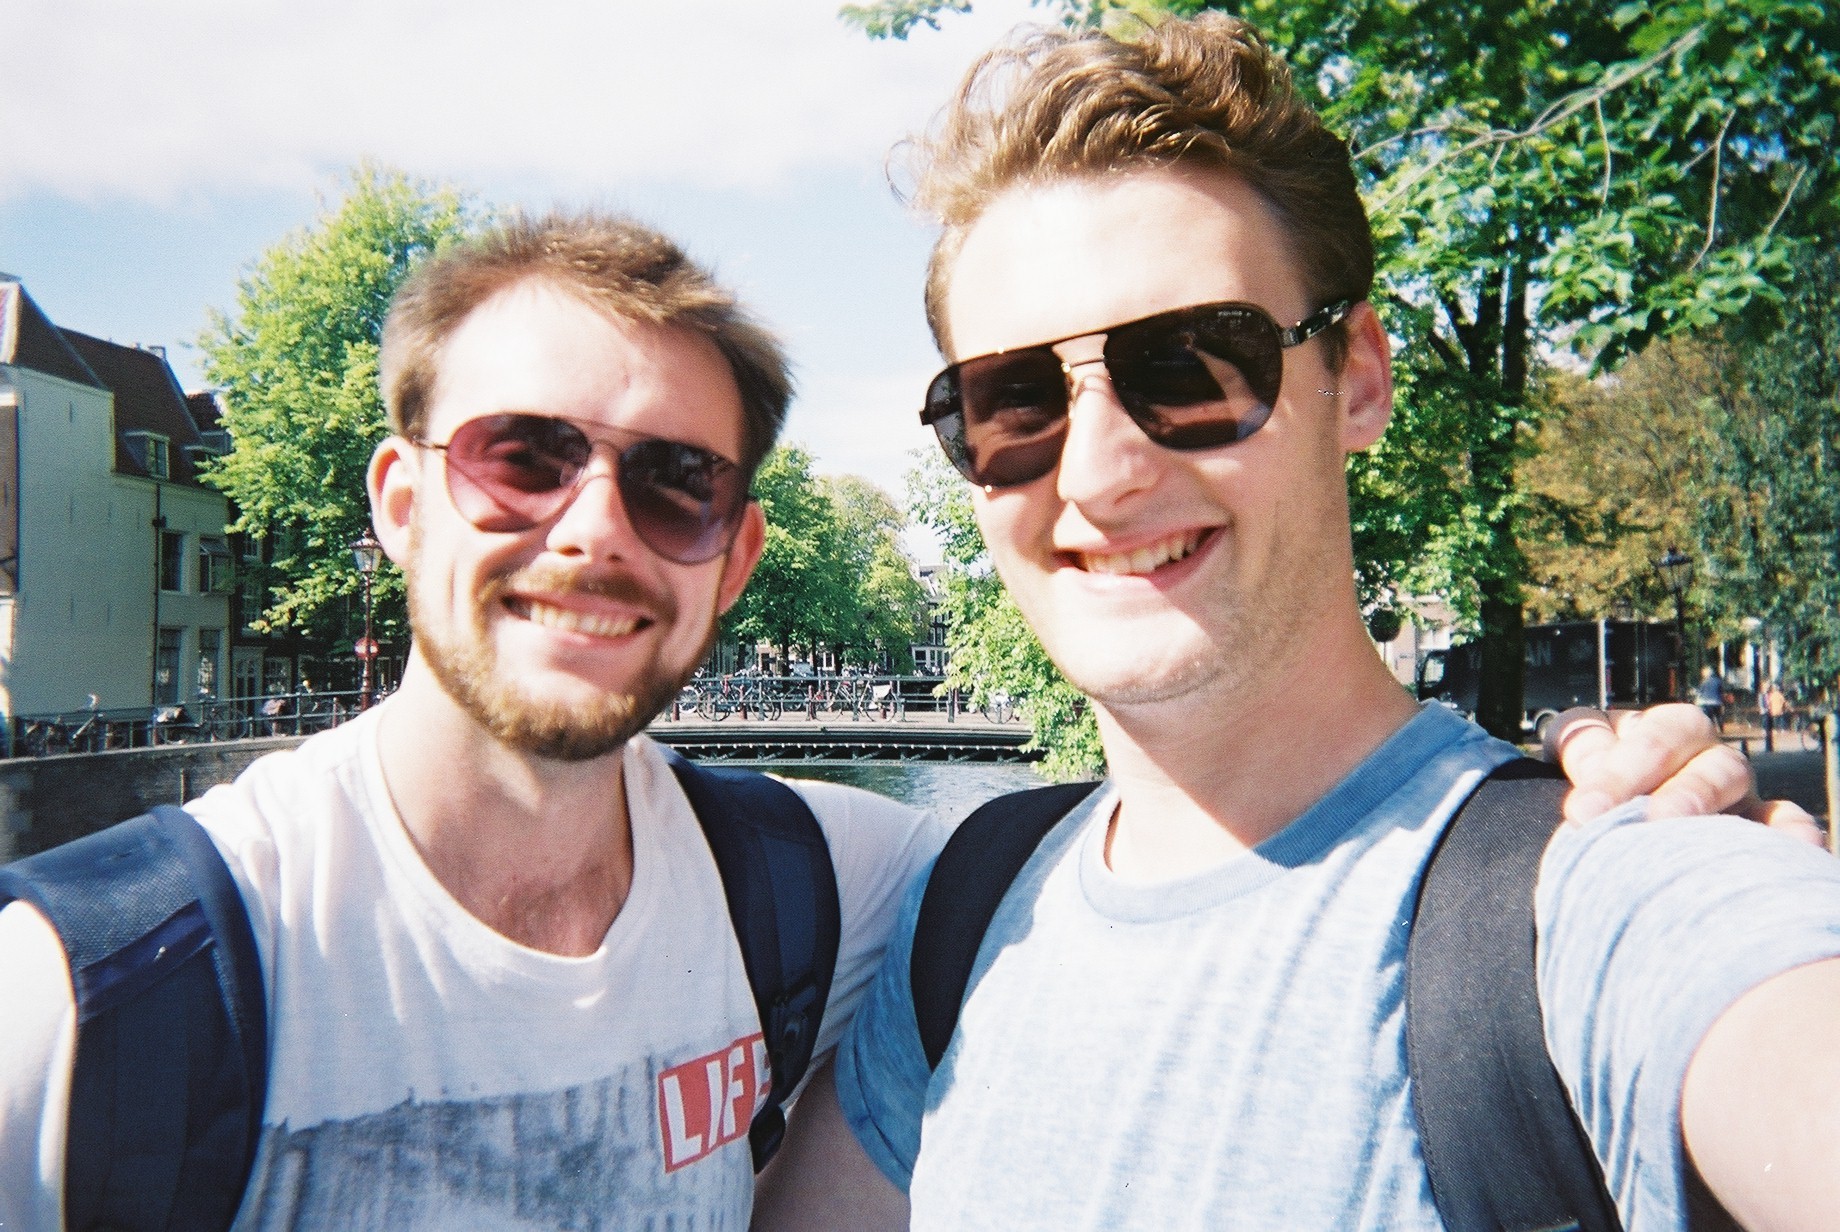
Adam and Glen 1st day in Amsterdam for IBC 2014! Taken on a disposable camera by Glen Symes.

I hope these little tips will serve you well, a shout out to Dave Beck at Avenger and John Harris at John Harris Media too I couldn't have done it without you! And Glen and Sam. Much love.

Behind the scenes of yesterdays Wellbeing videoshoot!

06:30 Kit bag, check.

Audio kit, check.

Lighting, check.

Brain, just about.

bts early morning sky

Yesterday I was out filming talking heads and some b-roll for a Wellbeing project on behalf of EEBC. Wellbeing is our general mental and physical health, but there are many factors in the way that we live that can affect our chances of developing serious health problems in the future. These include some sensitive subjects, that I was capturing to provide an information base for those in the community that may be suffering, or have friends and relatives of those diagnosed with; Cancer, Coronary Heart Disease, Dementia and Diabetes.

I was featuring nutritional expert Yvonne McMeel throughout the videos, so I began by planning my main piece to camera with her in the Wellbeing Centre.

This was a standard video shoot, so I packed my kit bag to be prepared with whatever the day would bring! This included;

Video - Canon 5D mkIII, Tamron 24-70 F/2.8 VC, Sigma 70-200 F/2.8 OS, Canon 60D.

Audio - Zoom H6, Roto-Mic, Sennheiser ENG-G3 100 wireless.

Grip - Manfrotto 755CX3 tripod + MVH500AH, Manfrotto 190Pro-B (old version) tripod, Super clamp and magic arm.

Lighting - Daylight balanced 85W studio light with soft umbrella.

Extras - Lilliput 1018 (I am currently testing out and reviewing this product).

behind the scenes videography equipment

I took along the Lilliput 1018; the new flagship 10 inch touch screen field monitor, which produced crisp pictures and well represented colours. I ran this on a F-970 battery with HDMI through from the 5D, so I could monitor both. This did however cause the camera to heat up quite quickly. However, the monitor has awesome features usually found on high end products which include; exposure and focus peaking, on screen waveform monitors, levels and much more, which came in very handy for assessing the quality of the picture. (More coming later regarding this product).

behind the scenes make up artist Char1 behind the scenes make up artist Char2 Char doing her make up thang!

I began setup at 9am, shortly followed by Char the make up artist who set up her bits. The location for filming was the Wellbeing Centre, which as a wonderfully bright open facade with big doors and windows. Luckily enough, blaring heat and sunshine poured through the windows, so that was my key light at slightly cooler than daylight colour balance at 5200k. This also matched the daylight light fixture I was using to add a fill and kick to the subject.


Why did I use a 2-point light setup?

I could have rocked up with the intention of using just the daylight and the incandescent lights in the centre with the mentality that it will illuminate my subject well, but there are risks you have to be willing to take if you approach lighting in a casual way. Some points to remember when thinking about lighting your subjects;

  • Are they defined from the background?
  • Do they have harsh shadows on their face?
  • Moving sunlight will change throughout the day, in brightness, direction and colour.
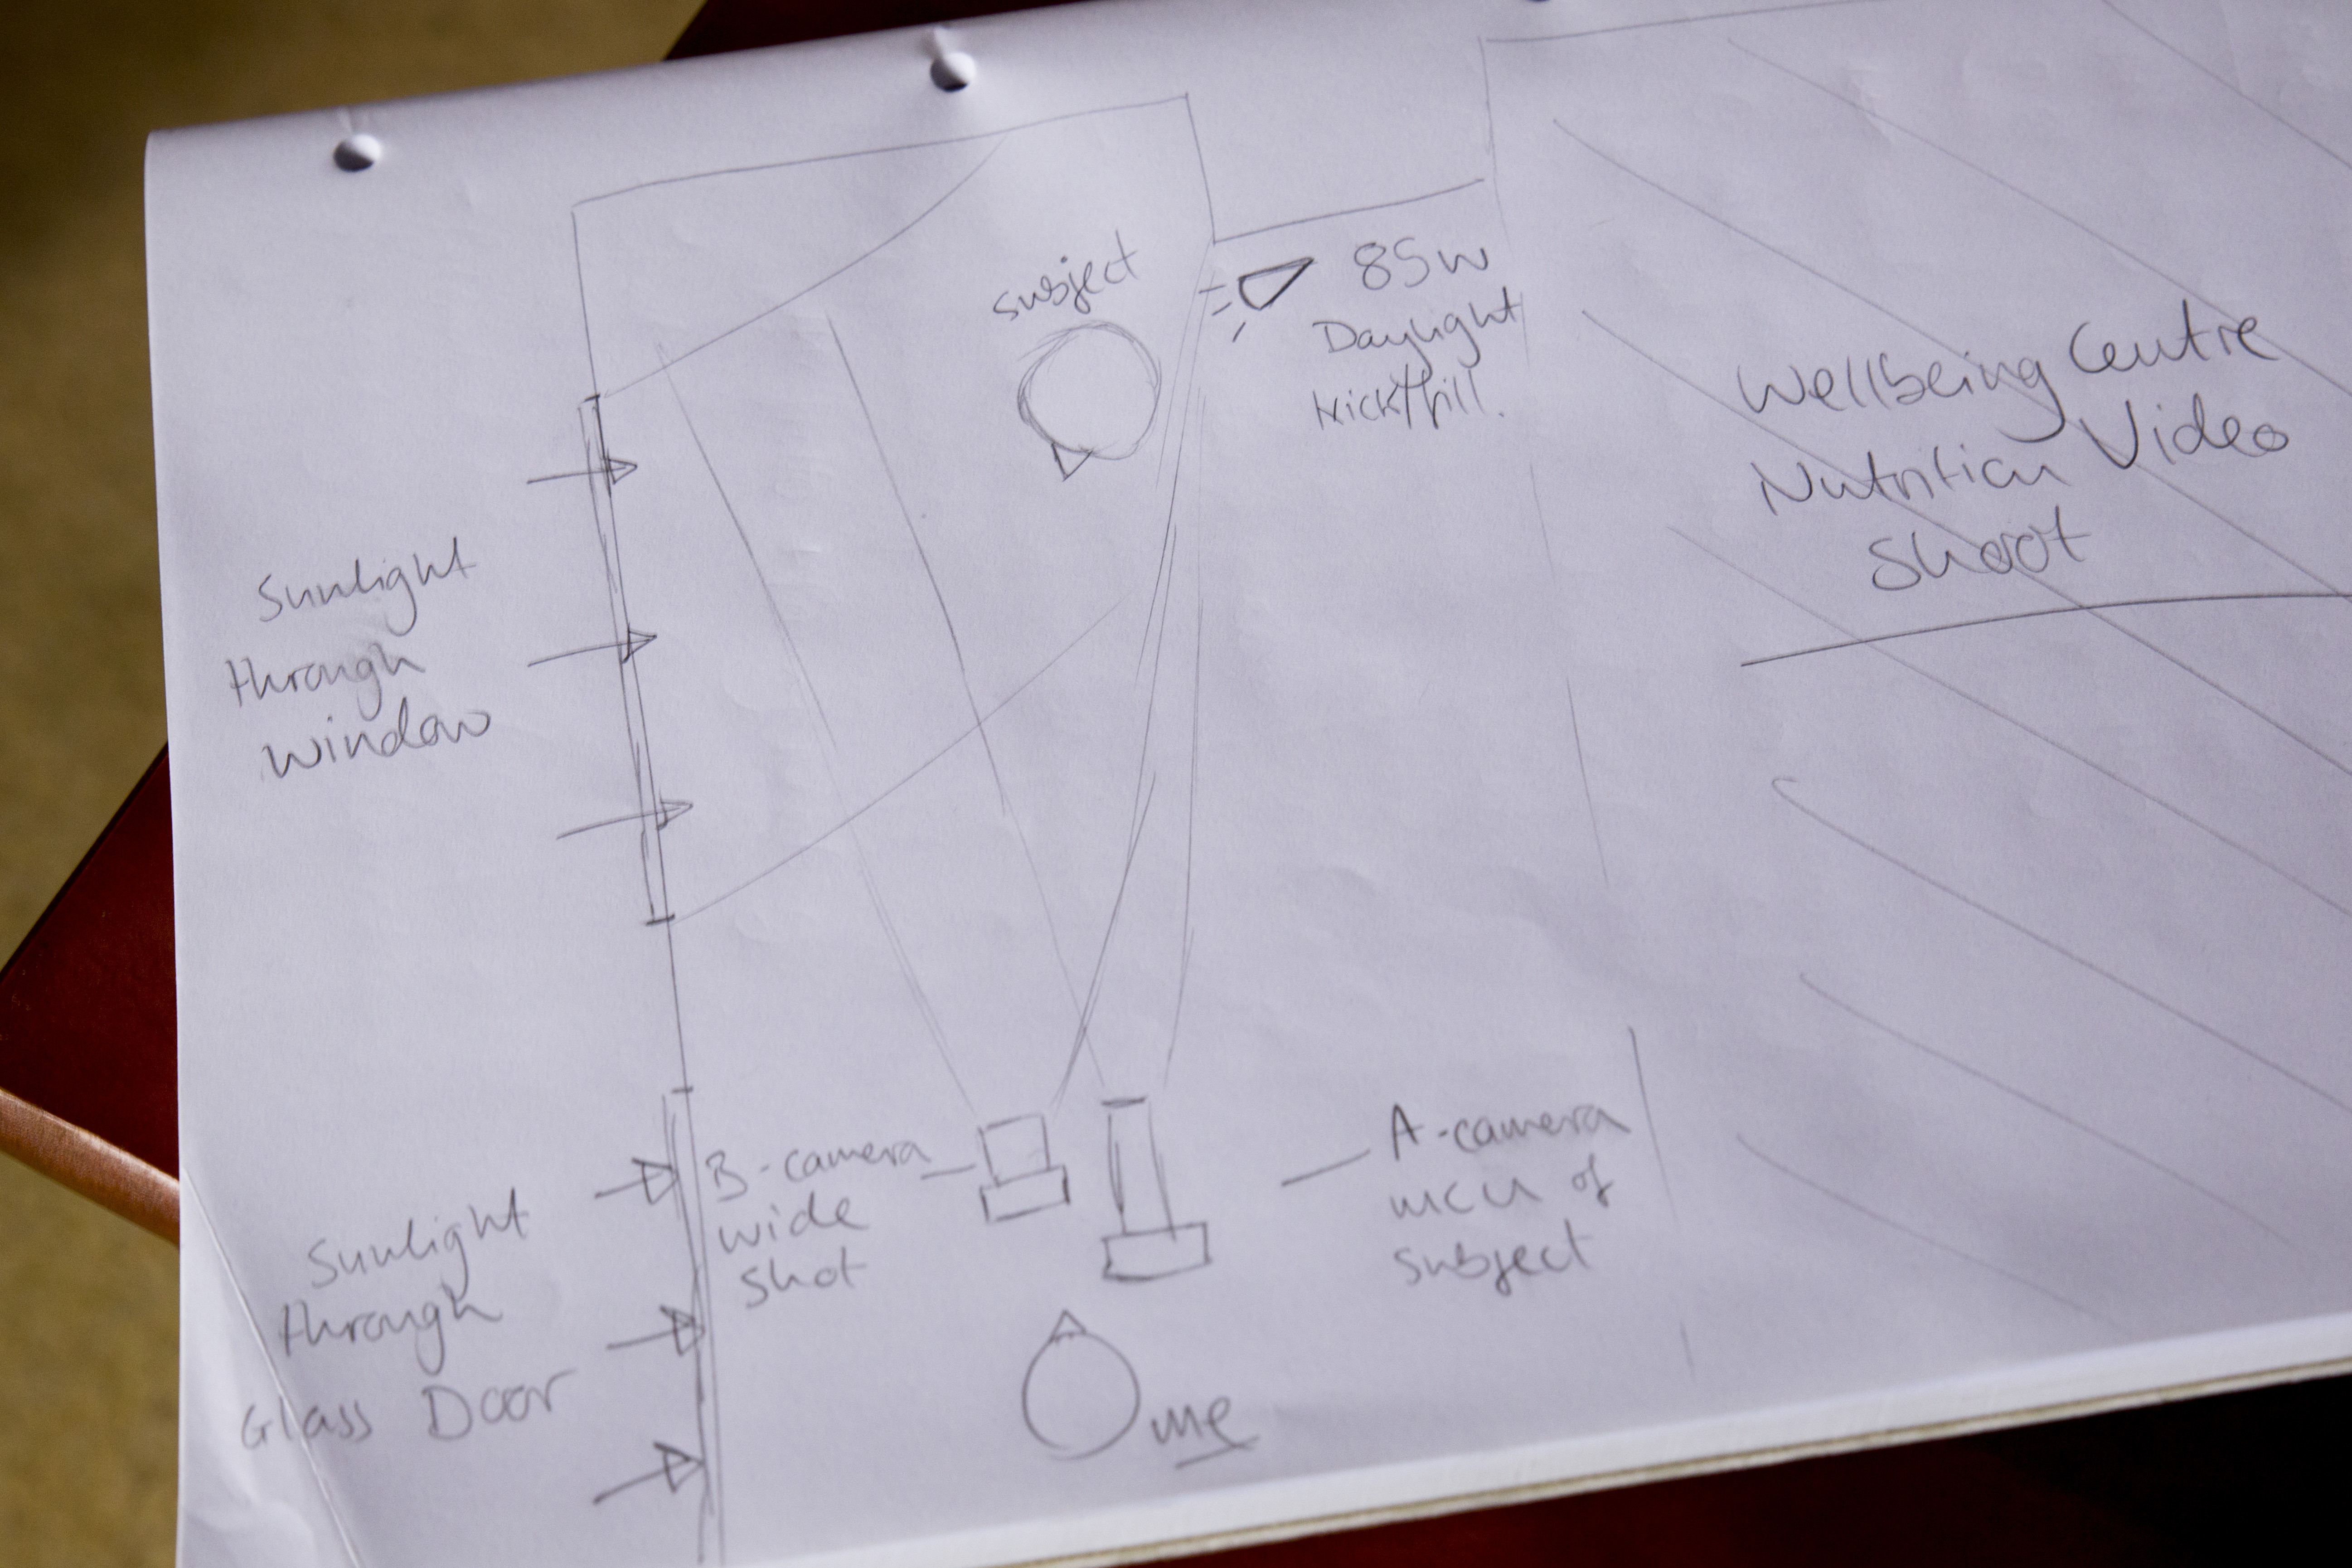
  • bts wellbeing light setup

Now, when you haven't been to the location before it is difficult to judge the lighting conditions, so firstly if you can have a RECCE of the location. It is very beneficial as you can begin to compose the scene, judging the internal and external lighting, now noisy the environment is, whether you will need a backdrop instead of a plain background.. All points to consider before you turn up with the camera kit and begin filming.

Defining the subject from the background is what makes them look 3-dimensional and not flat, this is the same for the shadows too as it shows that features are visible on the face. With DSLR's it is possible to use depth of field to define your subject from the background, but lighting can also be used to 'pop' the subject out of the BG.

Harsh shadows are caused by strong direct light, and are unwanted as they mask features and don't represent the subject properly, unless this is the effect you are looking for. For piece to cameras and interviews having soft shadows around the nose show the features of the subject, again making them look real.

The sunlight is your best friend and worst enemy at the same time... As the Earth rotates, we move further away or closer to the sun which changes the lights direction; if you start filming in the morning with your subject lit from the front, by 12 noon the sun is over head and by the late afternoon the light will be behind you. To combat this, keep continuity by filming at the same times each day, or even simpler be aware of the suns direction and gradually rotate the subject and other lights to keep a constant illumination. For me, I was filming from 11am through to 15:00 with the sunlight to my left for the whole day which was very beneficial, but not every time will I be that lucky!

Watch out for clouds that can block the sunlight, and be aware of how the colour temperature of daylight changes throughout the day; cool in the morning and warm in the evening. For me, shooting in midday sun meant a constant temperature of 5200K for both cameras, matching the other light.

The use of a kicker or fill light, pushes out the shadows caused by the key light (the sun), and gives a halo effect to the hair of the subject making them stand out. The difference is subtle but effective.


Camera Setup and Composition

Once I had my lighting up and running, it was time to set up the cameras and audio equipment. I was going to shoot using the Samyang 35mm T/1.5 cine lens, but this would result in being intimately close to Yvonne, the subject, which would be quite off putting and may add shadows/interference such as me rustling papers to the recording. Instead, I used a telephoto lens as I can be a good distance away from the subject, and create a narrow field of view that frames up as an MCU (medium close up).

My main A camera was the 5D mkIII, and although the Sigma lens can open up its aperture to F/2.8 for shallow depth of field, this was not required for today. Instead, the camera was set to F/4.5 for a still shallow depth of field, but deep enough for the subject to move forward and backwards in the frame a little, and to de-focus the background. The ISO was set to 200, although when the Sun disappeared behind clouds I would ride the ISO to 250 or 320 depending. To stick to the 180 degree shutter rule, the electronic shutter remained locked at 1/50th.

The B camera was the Canon 60D, I paired this with the sharp Tamron 24-70 F/2.8 and shot wide open, again riding the ISO when required. I did this because this camera was capturing a wide shot of the subject, so depth of field was not noticeable. To keep continuity, both cameras were set to a white balance/colour temperature of 5200K, but it appears that the 60D picture is slightly yellow/green than the 5D picture.

behind the scenes camera dslr audio setup light

Audio

The often forgotten partner to the pretty pictures you see, having top quality audio is just as important as having your subject in focus and exposed. I used the Zoom H6 as my recorder, with the XY mic attached to capture one stereo recording. I also used the Sennheiser ENG-G3 wireless mic kit, attaching a lav/lapel mic to the subject which would be my main audio source. As a back up I also used the Rotolight Roto-Mic plugged into the 5D just in case. Remember to take headphones so you can monitor the sound recording, just like you would use the cameras screen to compose the picture.

Behind the scenes wellbeing video shoot adam plowden videography canon 5D lilliput

The filming went brilliantly. As a precaution I decided to use the 'record to multiple card' function in the 5D so I had a back up of the footage in case the cards got corrupted from such long recording times. As mentioned earlier with the lighting, as the light slowly changed, I also adjusted the position of the kick/fill to push back the shadows.

I was very impressed with the Lilliput 1018 field monitor too, and although it is larger than monitors I would usually use the touch screen control and diverse functions suited the shoot well, so I could keep a close eye on the changing light levels.

After the principal piece to camera filming was complete, I ventured out into Epsom and Ewell with Yvonne to film some b-roll pieces that would add to the information and dialogue about wellbeing and health. So, we visited Shadbolt Park outdoor gym, Ewell Court Library, Epsom's Derby Square, we were going to hit the market but by that time it was 17:30 and no chance of finding fresh fruit and veg to film.. We returned to the car to go to the last location, Epsom Downs, when this happened...

adams broken down car

My car broke down. The filming day abruptly ended with a call to my insurers for recovery, while I also arranged a taxi for Yvonne to take her to the train station. That didn't put a dampener on the day though, I had captured great video and dialogue that I hope will help many people in the borough and wider community who may be suffering with cancer, heart disease, diabetes or dementia.

I then ingested the footage, and backed up a whopping 80Gb of footage and audio.. Lots to edit through, but thankfully those wonderful geniuses at Red Giant have a tool called Pluraleyes which can sync video with externally recorded video, so suddenly the issue to matching up the audio to the video disappeared, saving me potentially hours of work!

pluraleyes un-synced A bunch of un-synced video and audio clips gets transformed into this -  behind the scenes pluraleyes sync video

Pluraleyes then allows you to export the sequence as an XML that I then imported into Adobe Premiere Pro to edit! It's ready to go!


Overall, very happy with the footage and the outcome of the first day! I need to get out and shoot some more cutaways/b-roll of healthy food, socializing and some more bits and bobs to add.

Rotolight Sound and Light Kit Review!

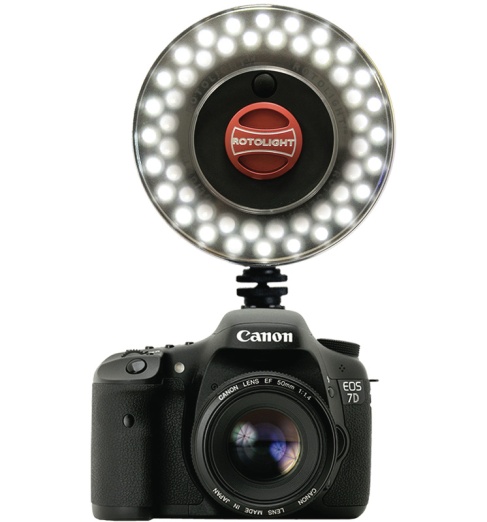
I have had the Rotolight Sound and Light kit for a little while now, and I like it. I like it even more so because Rotolight has been the only manufacturer to really think about what consumers moving into the industry, and already established creatives would need from the outset. Without light you have no picture, and without sound you only have 50% of that video.Videos with bad or unprepared sound are noticeable, just if the subject of the video was not lit correctly. Unfortunately we are now used to watching and seeing very high quality, glossy pictures with filmic motifs, and excellent sound including orchestral scores. We aspire to work on these 'big budget' productions, or to make videos that look like them, but without thinking about your lighting and sound, you are very far off. I produced this review and the music video using the Canon 5D mark III, and a range of Samyang Cine lenses. To keep the light source and sound as pure as possible, I only used the Rotolight RL-48 B ring light and Roto-Mic. I also used my custom camera rig, which is manufactured by CamSmart, as well as a 5" Lilliput field monitor. I used Adobe Premiere Pro, After Effects and Speedgrade to edit and post-produce the videos.

rotolight sound and light videography video kit review led ring light

RL-48 B LED Ring Light

Out of the box, you get everything you need (apart from batteries) to start shooting straight away. The inclusion of a Rotolight belt-bag is fantastic for getting the light out quickly if you are shooting on the run, and for storage while traveling and keeping the batteries, light and accessories safe. One pain I always have, as I am a single shooter is that to change parts of my equipment setup; which means opening my big bag, routing through to find the bit I need and then carrying on. With Rotolights ingenious solutions they have removed that need entirely!

Inside the LED light is a set of ND, skin, colour and minus green filters that can be applied directly inside the housing of the unit itself; no need to carry around filters, gels and pegs to achieve your desired brightness and tone. This is great as no longer do you rely on a bag of old gels to adjust the temperature and brightness of the light source, and all filters are supplied by LEE, so you know you can trust them. The LED's being naturally daylight at 5600K, you are set to use the light in most conditions! For photography and video with people and models, Rod from Rotolight recommended using a softening ND and the skin filter which gently soft lights the subject, with a peachy, wrapping beam. There are no shadows, and the result is a beautiful glimmer of light in the subjects eyes giving them emotion and life.

rotolight sound and light videography video kit review music video filmmaking shoot videography model light

During my time with the Sound and Light kit, I tested out its practicality when out filming indoors and out on location. Above is a still grab from the indoor shots of Josh performing his lines to the camera; you can see a hint of light in his eyes, and a soft-neutral coverage of his face. This was the look I wanted to achieve; an intimate piece-to-camera. I used the ring light and mic mounted on the hot shoe of my camera setup, this gave a direct beam onto the subject, and would work for any subjects in front of the camera. Indoors the RL-48 ring light gives out a beautiful 140 degree beam of light that wraps around your subject, without any hot spots (usually on the forehead). I was filming a music video, but would work exceptionally well in model and fashion work, where beauty is exaggerated through the images.

rotolight sound and light videography video kit review music video filmmaking shoot videography

It took some innovative thinking to get the lighting right for this continuous tracking shot. Although I was shooting in the afternoon sun, I still needed a key light to keep Josh's face illuminated throughout. The night before we were at the location shooting the same scene, but had the ring light mounted on the camera. This time I needed the source to be much closer, so I whipped out the Manfrotto Magic Arm and Superclamp and clamped the light to the boot of my car. In the still grab above, the light is only a foot away from the left of Josh!

What I found here was the need for a brighter light. The 48-LED ring light provided great overall coverage of my subject, but I required a brighter beam to achieve the desired soft-skin and glimmer in the eye look. Although Rotolight produce large LED lights (Anova) for videography and cinematography, I didn't need that much more power. I think for video it would be great to see this model brighter, or have different brightness levels, as usually you require more light than less - especially when adhering to the 180 degree shutter rule. Once your shutter and aperture are set, the only exposure controlling parameters you have is the ISO/ASA or your light sources brightness, and where you're unable to move the light closer or further away from the subject; having a brighter light from the outset is more beneficial.  This is a small niggle from myself, but can be shown with examples in these still grabs -

rotolight sound and light videography video kit review music video filmmaking shoot videography night videoshoot filming car tracking model dark (Here the light from a street lamp came in very handy.)

rotolight sound and light videography video kit review music video filmmaking shoot videography night videoshoot test greet tint

This shot was taken on a 14mm T/3.1 lens at ISO 1250. Although I have remedied the low light in Adobe Speedgrade, a green tint is visible across the frame. A minus green filter is included in the kit which can be used where the green spike (due to LED technology) is prominent, but as I was filming in near darkness I chose not to use the filter to get maximum light output, which by the way is 100w! During the shoot I also used the light hand-held to get intimate with my subject, but not blasting them in the face with an offensive flash gun or LED panel light.

Roto-Mic

Like I mentioned earlier, video is (in most cases) useless without good quality sound. Imagine watching a film or TV program and the sound is noisy and fades in and out as the presenter moves around the frame. It is distracting and essentially draws the audience away from the video, it is suddenly and mostly subconsciously hard to watch and enjoy. With current trends in pro-sumers moving to DSLR to make films and video, there is more pressure on achieving good quality sound when acquiring your footage; the built-in mic does not do your pictures justice.

rotolight sound and light videography video kit review on camera dslr microphone

Here, Rotolight have entered the sound game by producing an on camera directional shotgun mic, with excellent pickup response and sound to noise ratio. When I first started out in freelance videography 3 years ago, I got myself the original Rode VideoMic; it was the best I could afford at the time, and it did the job I needed - to capture good quality audio that will enhance my video. Since then, Sennheizer, Audio-Technica, Hama and many more brands have seen the need for on camera mics for DSLR videographers, and a competitive market has emerged. One that the Roto-Mic will compete very well in due to its superb signal processing and price - an attractive offer to anyone seeking to invest in a cost-effective solution. You will need a 9V battery to power the Roto-mic, but it will last you a good 100 hours.

One very annoying problem with on camera microphones is noise added by the mic's shock mount. The Rode VideoMic I have is notorious for that, creating a squeaking noise as you move or walk with the camera that was audible and therefore recorded into the sound of the video - very unwanted! The Roto-Mic shock mount has been specially designed to minimize any movement the mic may be affected by, holding the capsule stiff, without wobbling on the mount; keeping unwanted noise out.

Rotolight considered many filming scenarios when designing the new mic; it includes a gain adjustment of -10dB to +10dB which is very handy when you are far away from the subject or action, or are filming in a loud and noisy environment. A two step high pass filter is also built into the body of the mic which removes any wind noise and rumbles from the captured sound; perfect when filming outdoors. These small but important features show that Rotolight have done their research into where DSLR videographers are working, and how they need to use their kit.

I was really pleased with the results of the sound recorded with the Roto-Mic, I was expecting another Rode VideoMic moment but it never came. The mic surprised me with its quality recording, and with a little noise reduction in post production the final sound recording is clean and crisp.

rotolight sound and light videography video kit review music video filmmaking shoot videography night led light mic kit

Rotolight has also been innovative in their mounting options, considering many different setups with the light and mic together. This makes a lovely change from complex accessories hanging off the camera to use two hot shoe mounts. The option to use the light mount, or to mount the light on the microphone gives you many different setup options that doesn't restrict your shooting, and is not fiddly or complicated to change! I was using the mic and light together; here the mic mounts onto the camera hot shoe, and then the light can be pushed onto the barrel of the microphone. Although I was dubious of this at first, as it would add extra weight to the shock mount and possibly interfere with the sound recording; it has proved me wrong with being fully functional no matter how the light and mic is set up.

rotolight sound and light videography video kit review music video filmmaking shoot videography night videoshoot filming car tracking

My verdict

  • Fantastic kit if you are starting out in DSLR videography - a must have kit to get you started.
  • Ring light provides excellent soft light for work with models, people, macro and prominent subjects.
  • Filters included is really handy, although as I am heavy handed they are sometimes difficult to apply.
  • Battery life is second to none - 4 hours with recommended lithium AA batteries (x3) or regular lithium AA (x3) for 3 hours.
  • Various mounting options means shooting is not restricted.
  • Mic is broadcast quality - remember sound is just as important as video.
  • Gain adjustment is handy in quiet and noisy locations.
  • The Rotolight bag keeps your hands free!

Of course with every review there are some constructive criticism comments, but not many for me as my experience working with the Rotolight Sound and Light kit has been very pleasant. Firstly, a higher power portable light would be ideal for video, with intensity control. Secondly, now Rotolight has entered the sound game it would be great to see other microphones like hand held bi-directional or even lav mics, and a boost in the recording quality (maybe a Zoom competitor??!). Thirdly, and this isn't criticism, more a request for a flexible light stand or arm so the light can be positioned in extreme and unusual angles.

I am recommending you to go out and get this kit if you're into your DSLR video and photography and need a light source and microphone that you can take to every shoot you go to! It will definitely be coming with me in the future, and I can imagine the RL-48 LED light working fantastically for wedding films and interviews, teamed up with the Roto-Mic and you have a perfect, all in one, on camera 'run and gun' solution to your filmmaking and photography.

You can check out the video I produced for Rotolight demo'ing the new Sound and Light Kit here, and the music video will be released very soon!

[vimeo http://vimeo.com/87515700]

Fantastic Rotolight Video News - Coming To A Screen Near You!!!

The Rotolight Sound and Light kit video I produced for Rotolight featuring Josh McDonough is being taken on tour to America, where it will be shown to a live audience of 30,000 film students! If you haven't already, you can check out the video here!

[vimeo http://vimeo.com/87515700]

Check out Josh's new studio too, and get recording there - Just Jam Studios!

Got a meeting about the recycling project today, then will be getting my new iPhone (about time I know)!

rotolight rotomic ring light tiele motion graphic video

Happy creating you awesome bunch of people, and thanks for all your support so far!

Update from Adam!

It has been a very busy couple of weeks since BVE, which by the way was great this year. I was over the moon to see the new finalized range of Manfrotto LED Spectra light panels which I got to test out a couple of years ago. Seeing products develop over a long period of time is interesting, even more so when your opinion is considered in how the final product should perform. Manfrotto also had their re-designed SIMPLA rig to demo, a much lighter and more ergonomic model I must say which is compatible with 15mm rig accessories like their matte box and electronic remote control.

schneider kreuznach optics lens for cinematography bve 1

As well as that, Manfrotto have also joined forces with Schneider Kreuznach optics (page in German), who have a new range of cinema lenses, specifically designed with ease of use in mind. All of the lenses from 24mm to 135mm have the same filter size, length and focus rotation to make filming with a range of the lenses effortless, simply change the lens and your peripherals stay in position. The optics of the lenses blew me away. Even in the well lit Excel, the background bokeh was stunning, soft yet so crisp. I cannot wait to get my hands on them. I think the combination of the new Manfrotto 055 tripod, the SIMPLA rig and Schneider glass will be a killer cine kit, delivering incredible visuals, making your shoot run smoothly, and at a low cost. Give it a year and this will be the go to package for production rentals, and part of every kit bag.

schneider kreuznach optics lens for cinematography bve 2

In other news, I've been working with EEBC on a couple of projects; a short video on recycling and another about a Wellbeing centre for those suffering with dementia and their carers. Both projects have messages that are close to me, so I've been working hard to blow my clients expectations out of the water. For the recycling video, I'm combining video with animation to show why recycling food and material waste is ever more important today; generating renewable electricity and resources. The Wellbeing centre video will be live action video, featuring the range of activities available to those in the community as well as the vast benefits to carers and visitors to the centre.

So, busy busy at the moment. I'm also meeting some designers from the fashion label ACF (Art Comes First) next week about another video featuring the design process here in London. Very exciting, I've been patiently waiting for an art-collaboration project to come along, it's what I started the business for!

I've had no #videoquestions for a while, so remember to keep them coming to @Plowman91!

Remember, inspiration is everywhere so take your camera with you!

excel centre bve london photo camera dslr inspiration

EDIT!!!! Just remembered to include this, I spoke to an un-named informant about the new Samyang/Rokinon VDSLR cine lenses and whether any new models are going to be released. Our brief chat resulted in confirming rumours of a 50mm and 135mm cine lenses coming very soon! I think it's exactly what the lens range needs, and I will certainly be investing in the 135mm if it is at T/2.2, or pushing it at T/1.8 would be a dream come true. So hear my thoughts Samyang/Rokinon!

New Rotolight video released for BVE, produced and directed by Adam Plowden Videography!

http://vimeo.com/87515700

Creating ambience in motion graphics

I've been working on the title graphic for the Rotolight BVE video, sometimes I can get going straight away with designing and animating however (and I presume this is due to getting up early to start working) I was stuck for ideas.. VideoHive is a great resource for re-made graphics sequences for After Effects, but they are also great for getting inspiration on how to create the atmosphere and effects for your own work. I spend a good half hour looking through the pre-made effects and gathered some ideas.

One key point I've found to make the graphics seem realistic, and to give it an ambience there are a couple of things you can do to make it more life like. Number one is to use a particle generator to create dust to naturally drift around the environment. The particles can be given physical attributes like gravity and wind, which makes the animation more realistic.

after effects particles atmosphere ambience rotolight

Number two, using light and lens flares; this leak of light appears to give the environment in which your text, graphics etc seem to be in a 3D space shot through a camera - these are naturally occurring when out filming and in our eyes, so it can be used too.

Number three; textures and patterns; for a graphic based (not so much vfx based) title, tiling textures and patterns to create a wallpaper background is visually appealing, as is only using a number of tones from a simple colour pallet.

Number four; interpolation and motion blur. Again just like in real life, our brains process the images we see at around 16 frames per second, and fills in the spaces in between. In graphics this motion blur needs to be added, to correctly interpolate the animation and blur of a subject or object. The local and global motion blur (bouncing ball) icons are easily found on the timeline so be sure to click!

Number five; depth of field. In cinematography the director uses the depth of field to move the audiences attention through the frame to reveal new parts, to uncover secrets and ideas. This can be done in motion graphics too, by using a Camera. When you have a camera in your composition, be sure to check 'enable depth of field' and to set your aperture to a low F stop (F/1.8 for example) and increase the blur amount. After Effects then generates depth of field using the camera settings; making objects close and far away from the camera blurred.

rotolight title graphic after effects camera blur

Here's a snap of the working-graphic for the title, for a cinematic look to the video I have also applied an anamorphic aspect ratio overlay. I might make some changes later, but for now it is off for comments and feedback. If you have any questions about the graphics or videography then give me a shout!

rotolight rotomic ring light tiele motion graphic video


Manic at Adam Plowden Video HQ!

Its been incredibly busy over the last few weeks, so apologies for not posting for a while! Lets fill you in. February has been a tough month. Work as been here and there, it is always difficult at this time of year and made even more difficult by starting a new business. I expected a lull at the beginning, so not to lose hope I kept myself busy. Although I haven't been posting, I have been out filming all the time, especially these last couple of days.

rotolight video shoot videography dslr mic

Rotolight sent down their awesome ring light and roto-mic, which I have been testing out and reviewing in what feels like all weather conditions! One minute it is sunny, the next it is bucketing it down. A couple of times I got stranded in the downpours with my kit, a prolific moment was this, up in a quiet and forgotten playground near Epsom Downs. I only got 3 shots that day, then the rain came and we retreated.

the rainy conditions i work in rotolight video review filmmaking shoot

Since then, the weather has picked up, and so has the tempo of production! I got an email from Rotolight asking if its possible to put a short video together for BVE with the footage I got when using the roto-mic and ring light. Feeling up for a challenge I accepted, and have been busy producing a music video to coincide with the video for BVE! I reeled in one of my good mates Josh McDonough is an awesome musician and producer, currently working on a new studio build to perform in the video, and in return he can have the music video to kick start his recording-producing business.

rotolight video shoot videography dslr mic camera rig music

To show how you can maximize the creativity and convey the flexibility of the Rotolight Sound and Light kit, I used various techniques including mounting on a camera, hand held, and playing with the light to create unique blooming and light effects. I had a few ideas of what the visuals would look like, an intimate piece to camera in the soon to be studio, as well as getting out and using the light in low light situations to add an urban feel.

There will be much more later, but right now I need to continue with the editing and graphics for the Rotolight video!

Andrew Kramer (VideoCopilot) does it again!

I'm a big fan on Andrew Kramers work and contribution to the industry, running the After Effects tutorial and blog website, creating the title sequence for Star Trek Into Darkness film, it has had a big impact on my learning. tron_1[1] videocopilot

I first started using VideoCopilot when I was 16, designing a title sequence for a series of webisodes I had written and was planning to film, direct and produce. It never got made, and I'm sure I've got the original work somewhere. My point being is that to this day I still use this amazing resource for my work now, learning new techniques for effects creation. If you haven't checked it out before, I urge you to do so immediately!

Here's the latest tutorial, creating '3D' volumetric light rays which will look great in mysterious, dark trailers or titles!

http://www.youtube.com/watch?v=frXQxwMKh6c

Planning a product promo + review shoot!

I've been working on the plans for a number of videoshoots to test out the awesome Rotolight mic and LED ring light. As the kit works especially well with people and subject focused shots, I am orchestrating a model/fashion/lifestyle shoot to show off the equipment to its full potential. rotolight training LED ring light microphone property of Rotolight and Jason Lanier (Photo from Rotolight website - Rotolight and Jason Lanier)

I spent the morning trawling through various fashion sites, blogs and Pinterest for inspiration on make up, clothing and models. I've never used it before, and from my experience it is a great resource for mass data collection. (The reason I'm not signed up to Pinterest is due to its Terms and Conditions). Building up a mood board, I've narrowed down some ideas and will spend tomorrow wandering around my town to find unexpected gem locations!

If you know any models; male and female, make up artists, fashion designers that would be interested in collaborating then please get them to contact me!!

rotolight led ring light video shoot pinterest womens indie fashion

I've had this idea in my mind, of a young woman running toward the camera as it tracks backwards, she holds her shirt together around her chest, hanging on to lace summer sandals. Cuts to her feet as she skips to slip her sandals on, slow motion playing a big part here.

Close up of her glorious smiling face as she races forward, her hair like silk in the wind flowing as she exits the frame. Tracking behind, as the young woman continues her path, into the horizon and out of focus as the camera slows and tracks high in the air.

8-forest-road-landscape-photography[1]

(Ideas Intellectual Property of Adam Plowden 2014) muah!

That is all your getting for now, a teaser while I magic up the rest!

I'll be posting later about the questions I got via Twitter and Facebook; choosing your camera - is a camcorder an option for you? As well as analyzing picture profiles and how using filters can help your video! Much more to come, so share!

Wonderful SWPP email, Rotolight + more!

I just got a fantastic email from a photographer I got chatting to at SWPP about video! It's great to offer help and tips in such a vast industry - so if you're looking for any info about video on DSLR, equipment, conferences, cinematography, audio, graphics.. Just check out previous posts!

Another positive; Rotolight (design and manufacture of the awesome circular LED lights) are sending a review kit of their new Rotolight LED light and microphone!

Also, the last components for my custom PC built should arrive today, so the next time I post shall be from a multimedia supercomputer!!Image

Amazing week in Amsterdam!

Check out my snaps, all are copyright Adam Plowden Videography 2013. Places include various sights from walking around the city of diamonds! [gallery ids="594,595,596,597,598,599,600,601,602,603,604,605,606,607,608,609,610,611,612,613,614,615"]

I've been a busy bee lately

I've been a busy bee lately

If you follow me on Twitter (twitter.com/Plowman91) you will have seen I've been busy keeping up #Indiefilm as well as doing some filming and photography for Manfrotto and Josh! There will be more soon, looking forward to Glen coming back and doing some more awesome work tomorrow!

Light trails in Hyde Park

IMG_9933 I went on a road trip around London on Saturday night with Glen, Sam, Hayden and Tom. We were passing through Hyde Park as the crowds left after watching the live broadcast of The BBC's Last Night At The Proms, gutted I missed it as the proms are always awesome, but I did get to capture the mad rush of the public trying to leave Hyde Park at around 23:30!