backpack

Out filming with the Sony A7S and Atomos Shogun in 4K!

I am still testing out the many brilliant features and benefits of the 4K combo I now have, one biggie was being able to grade the footage much more than what you're able to with internal camera recording.

I headed out to a local country park to catch some of the spring bluebells flowering, as well as to try out the dynamic range of the 4K Prores HQ footage and really push it in the grade.

A couple of photos while I was out and about, lovely day!

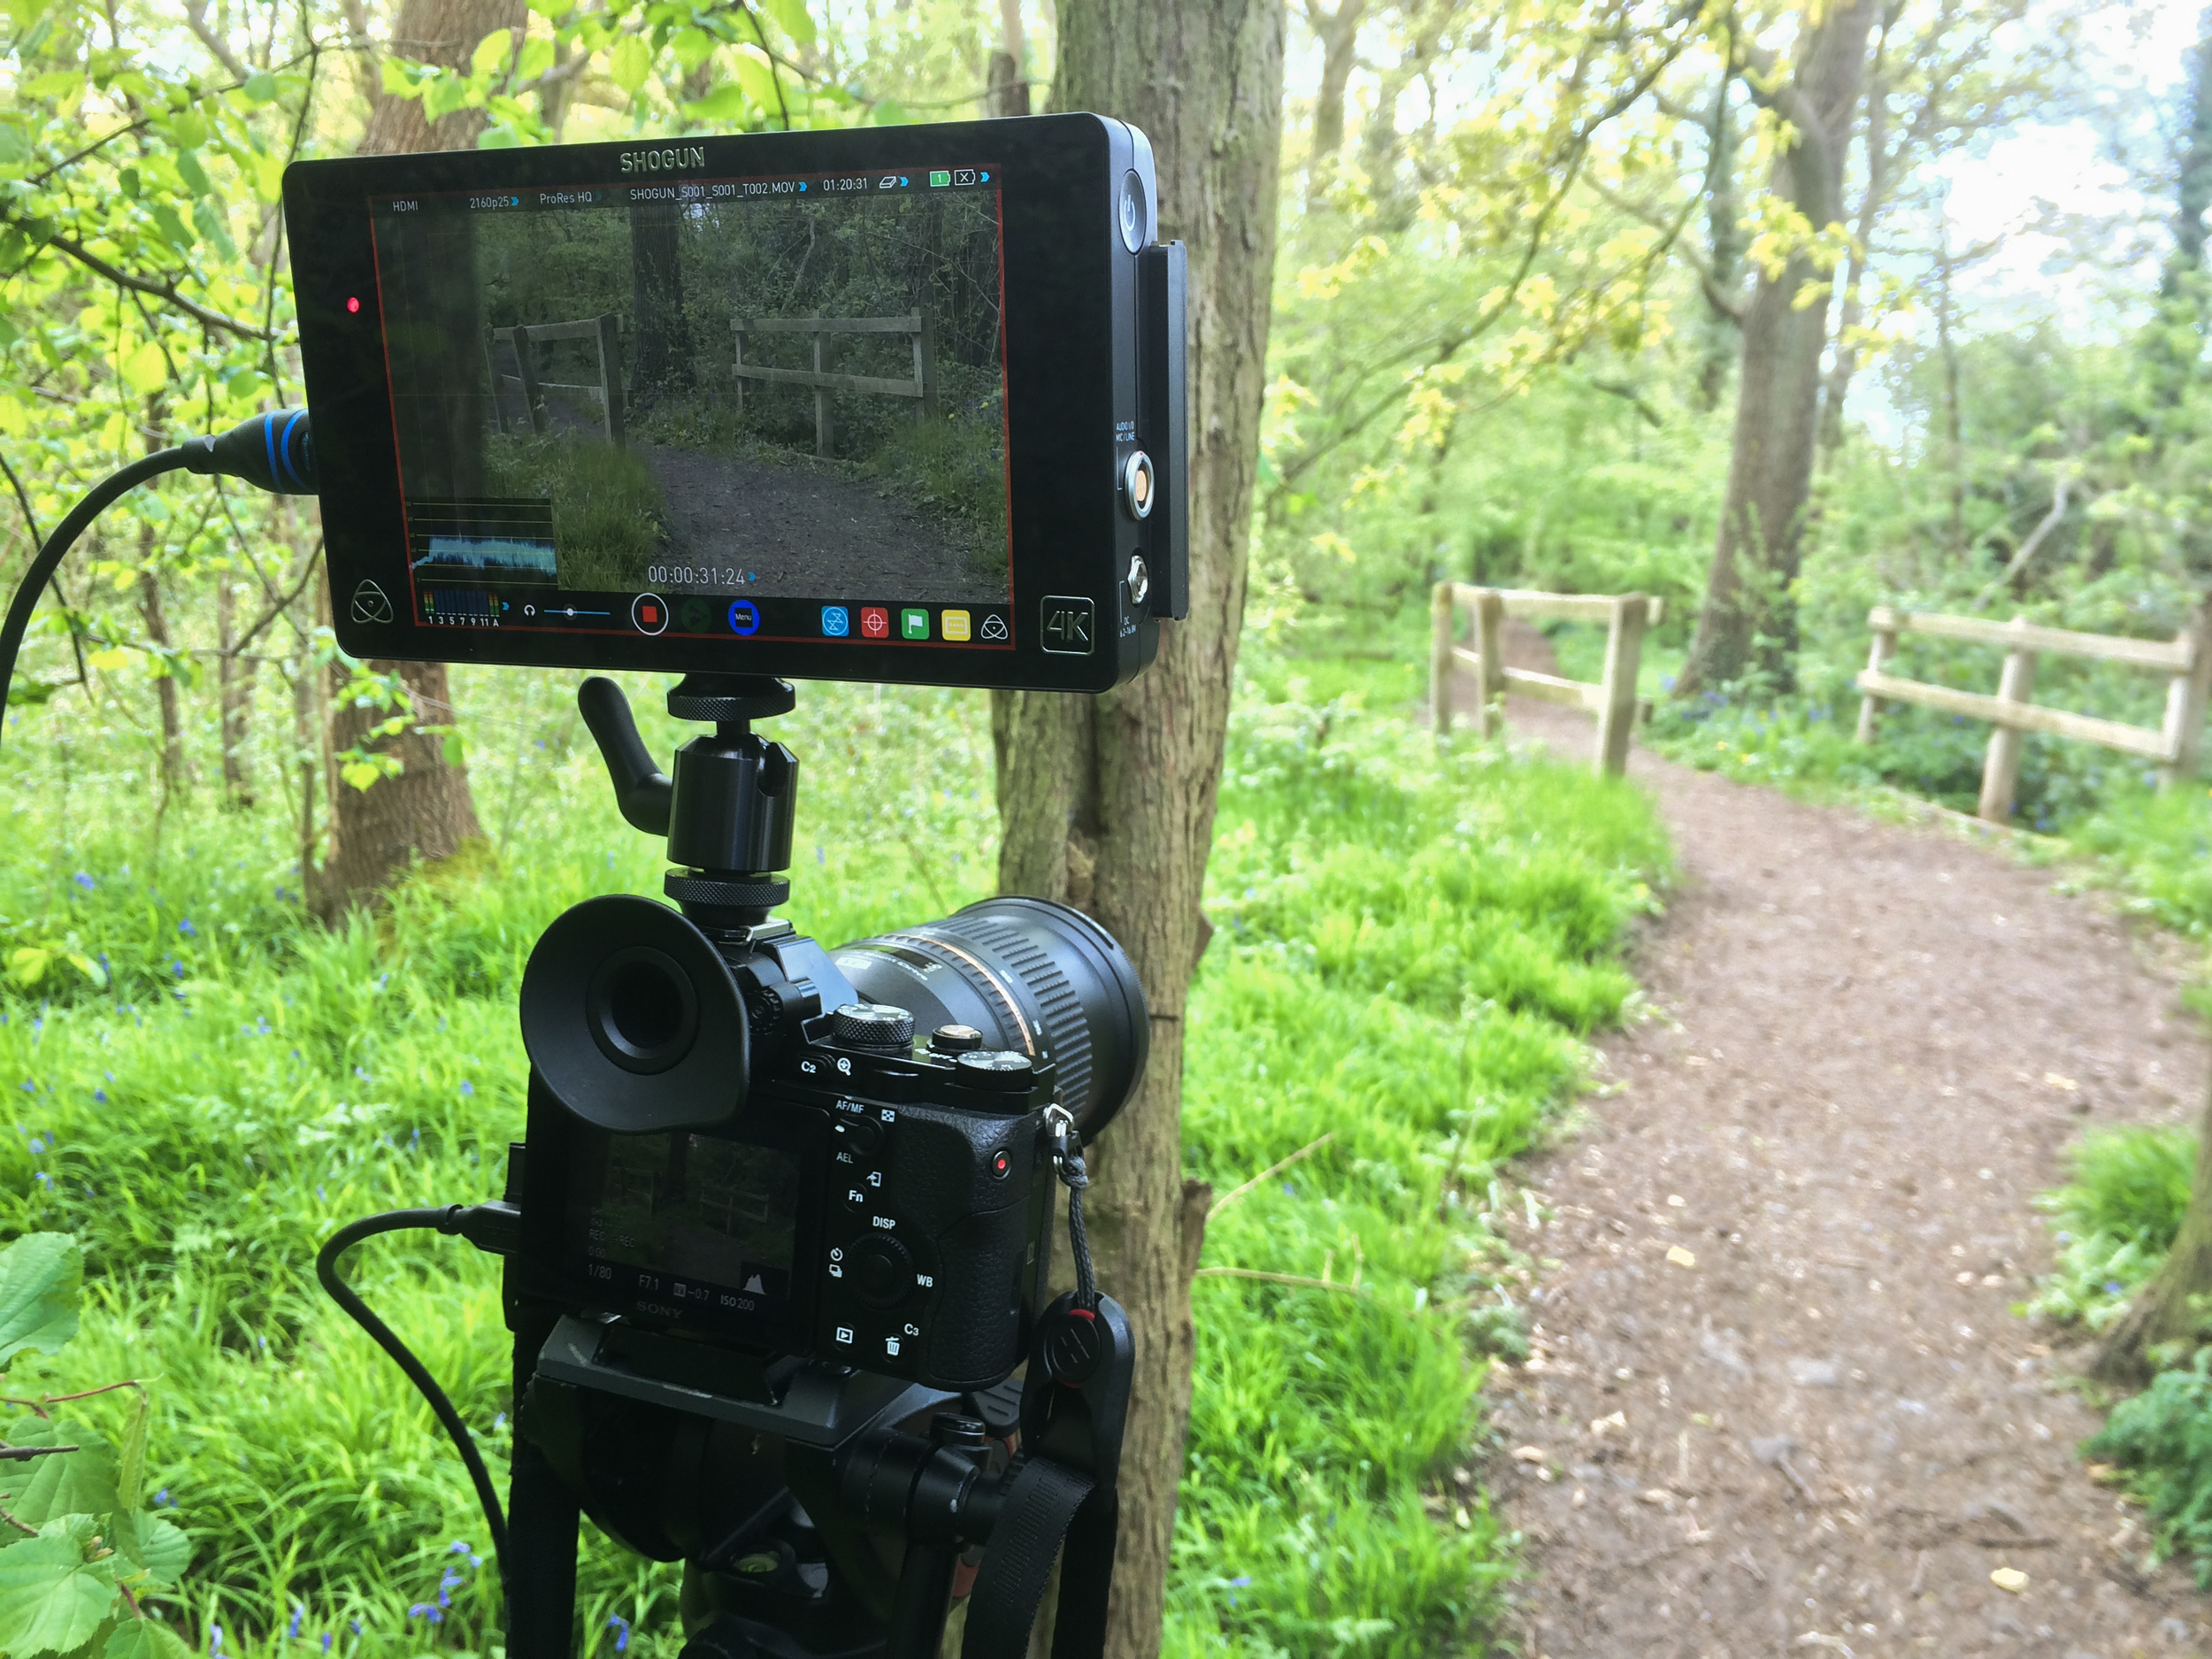
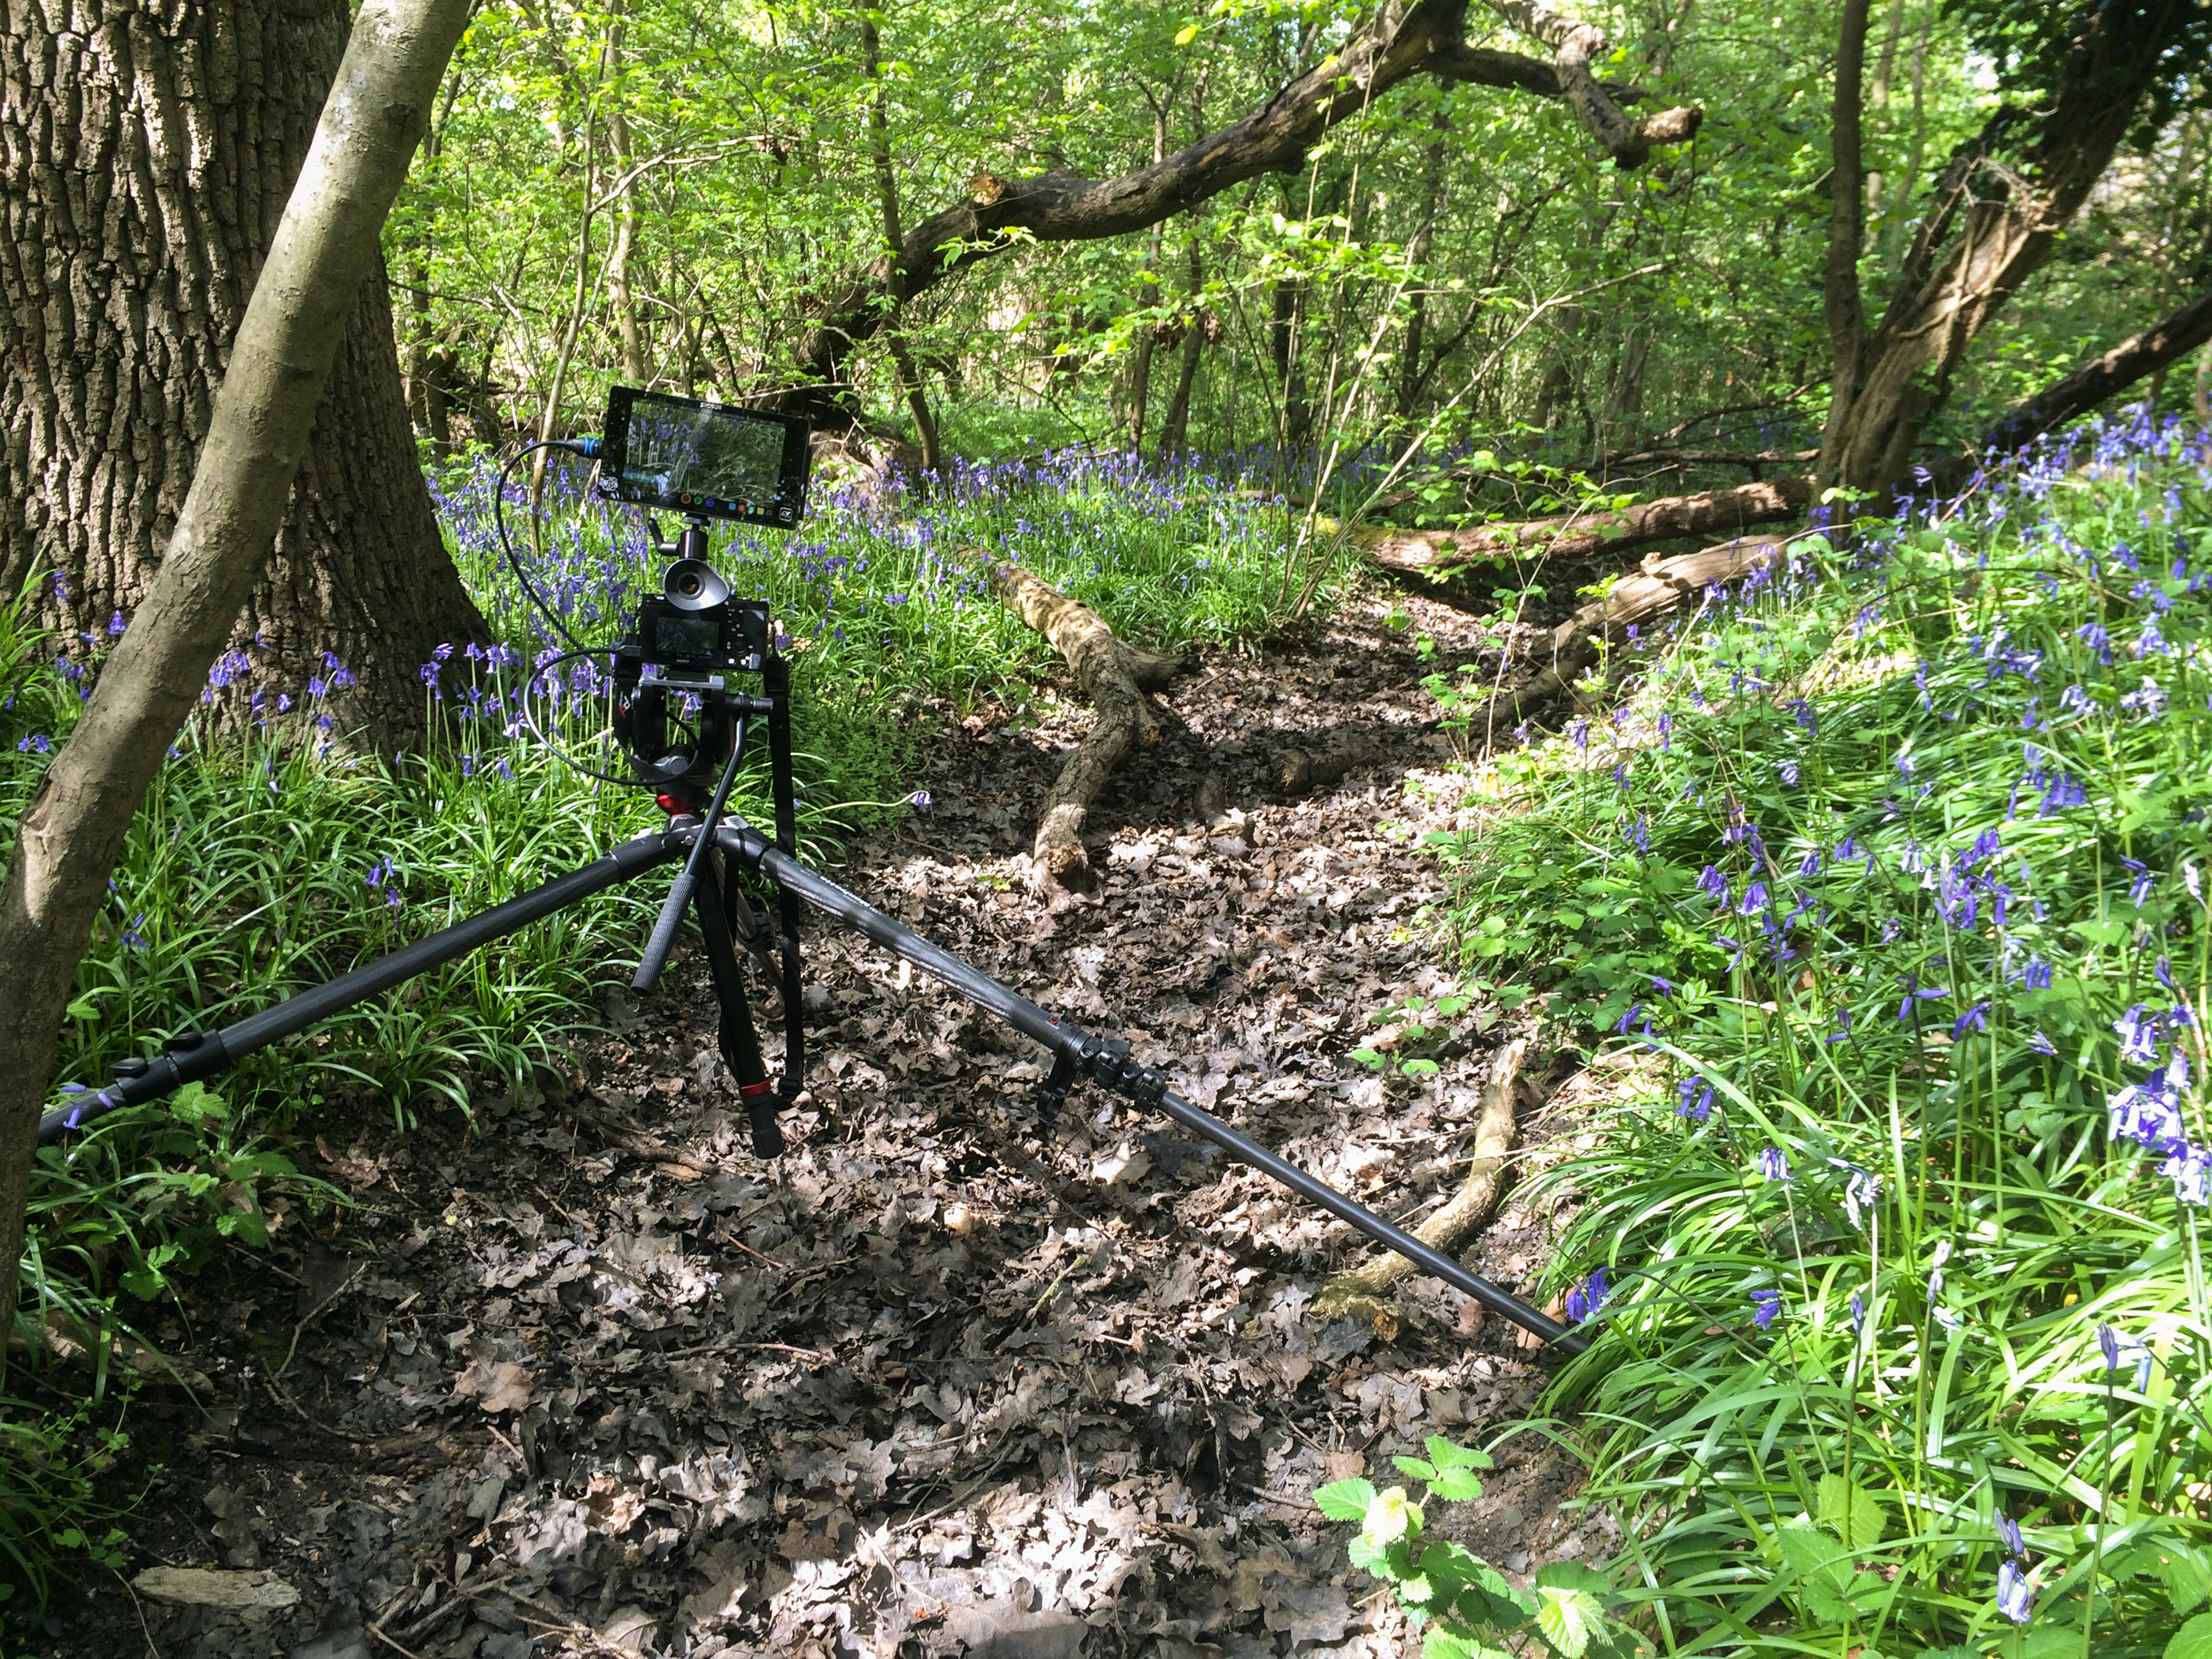
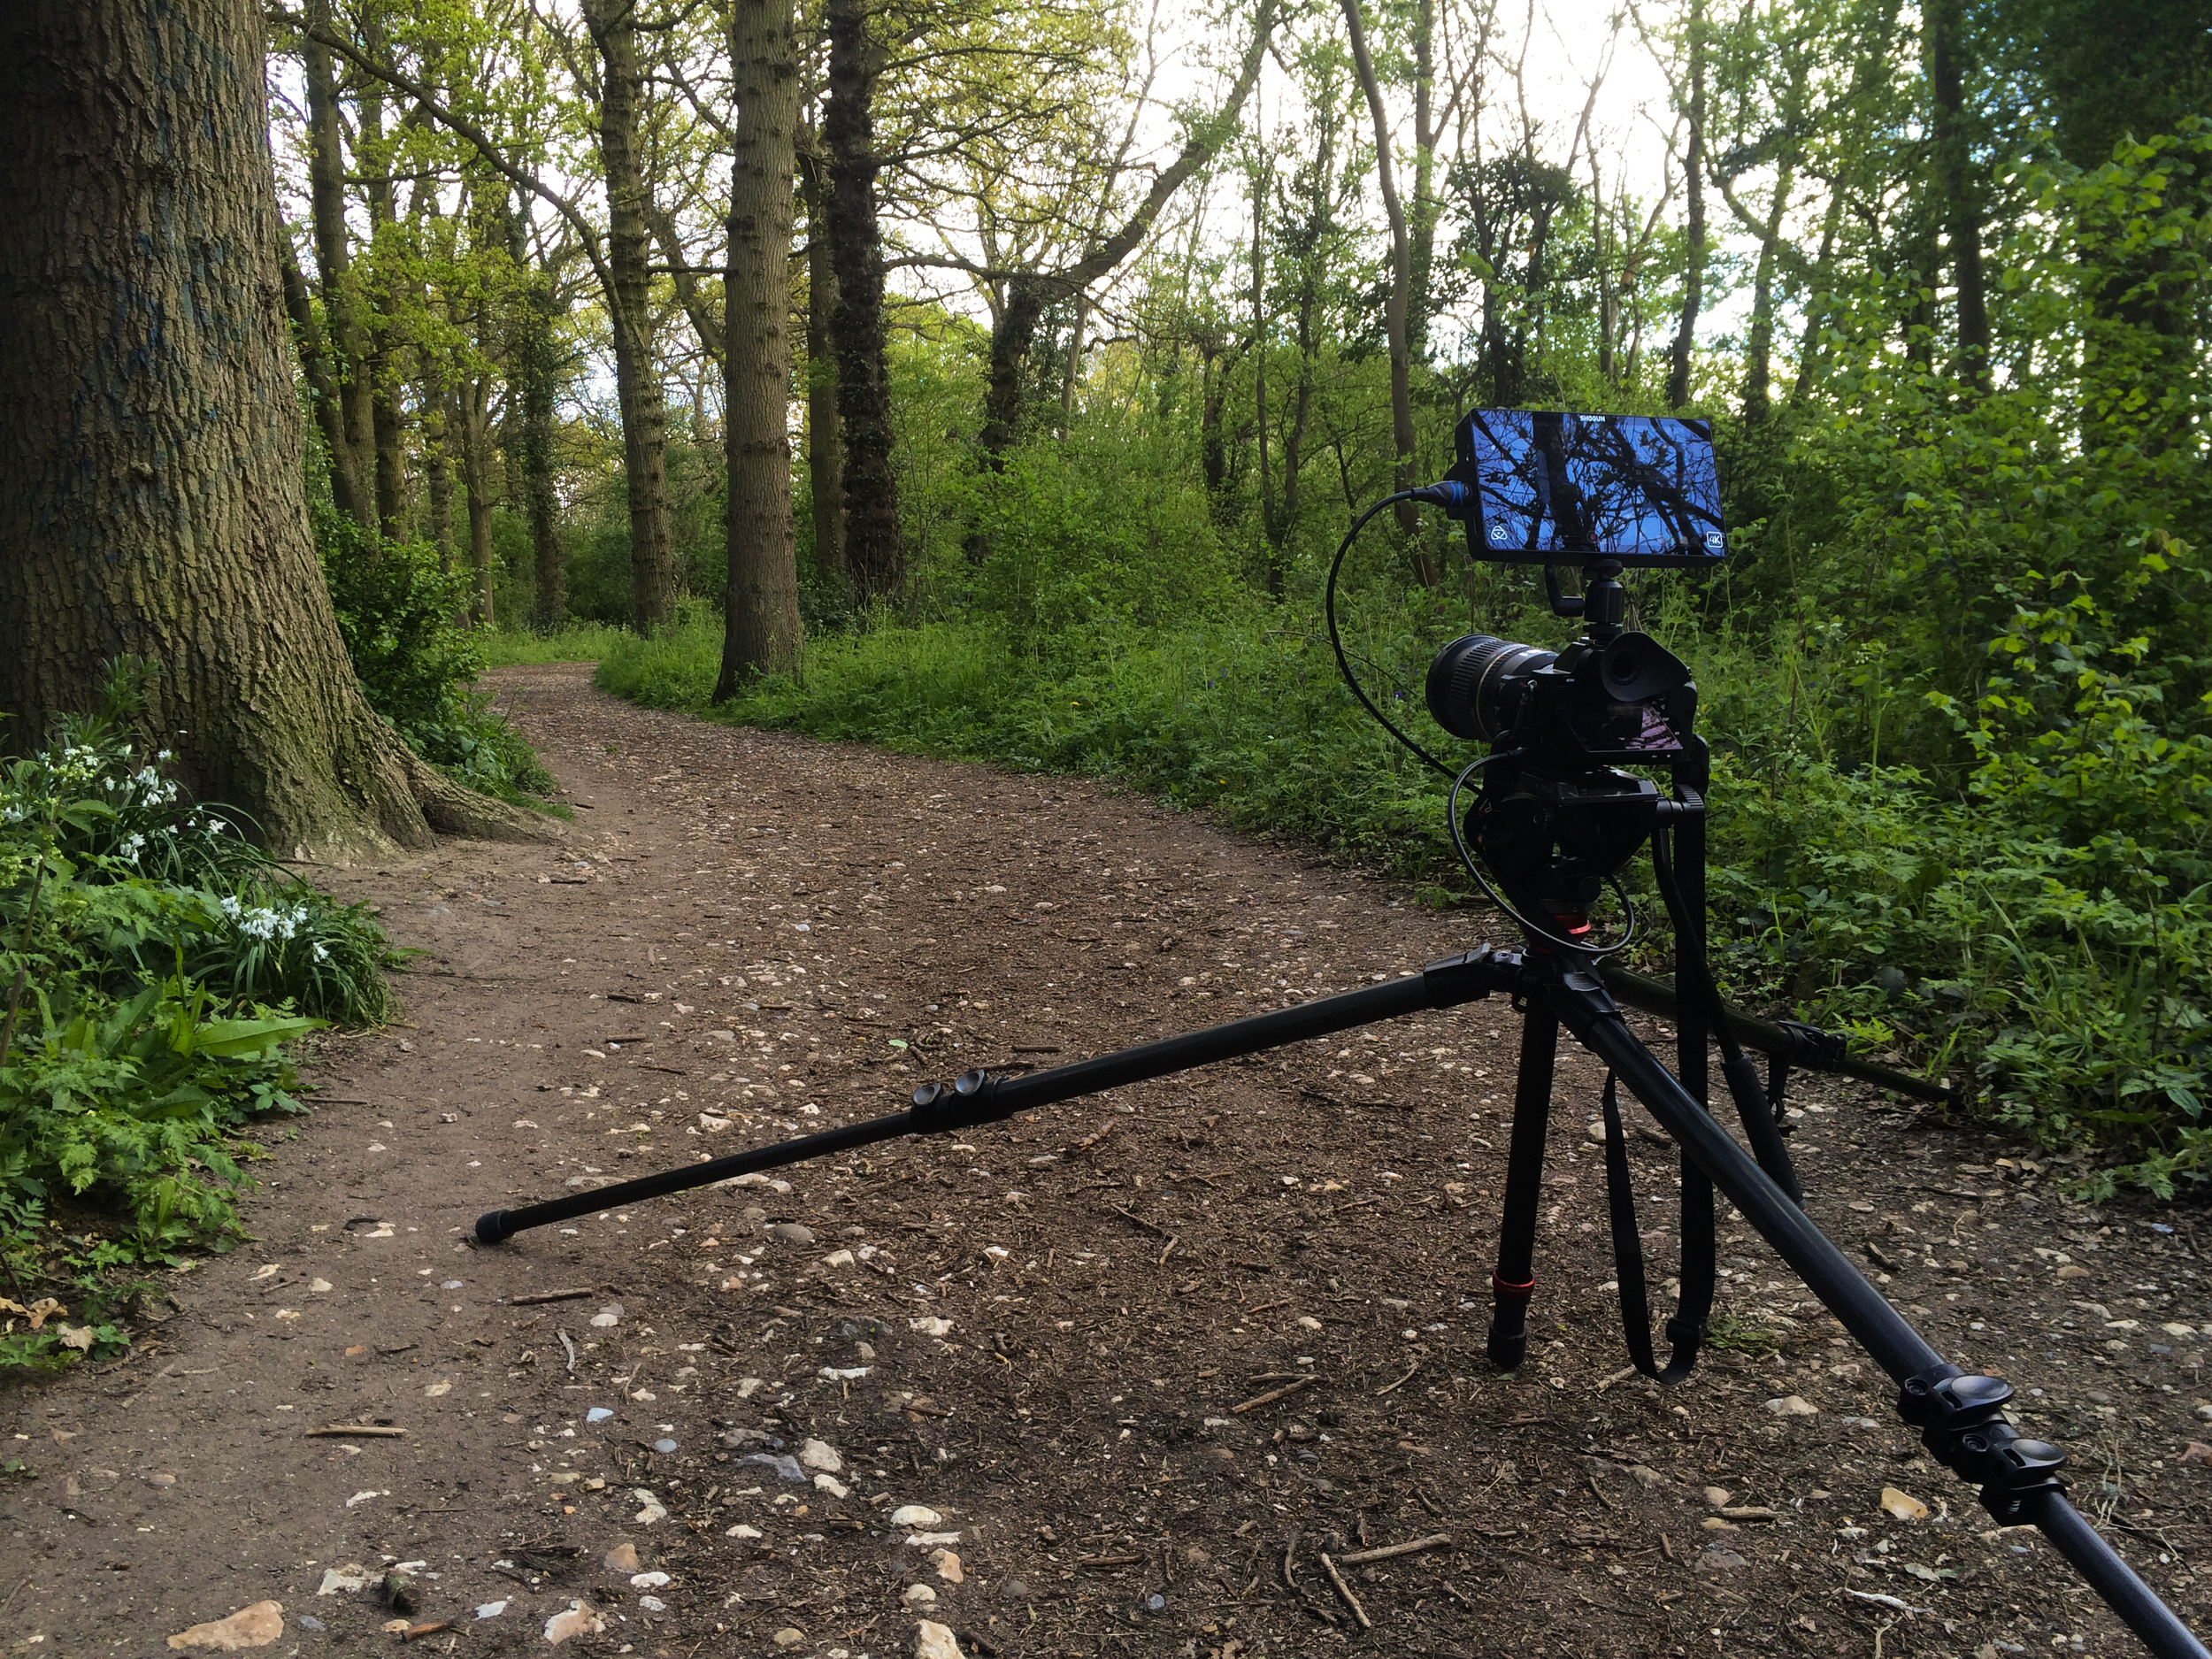
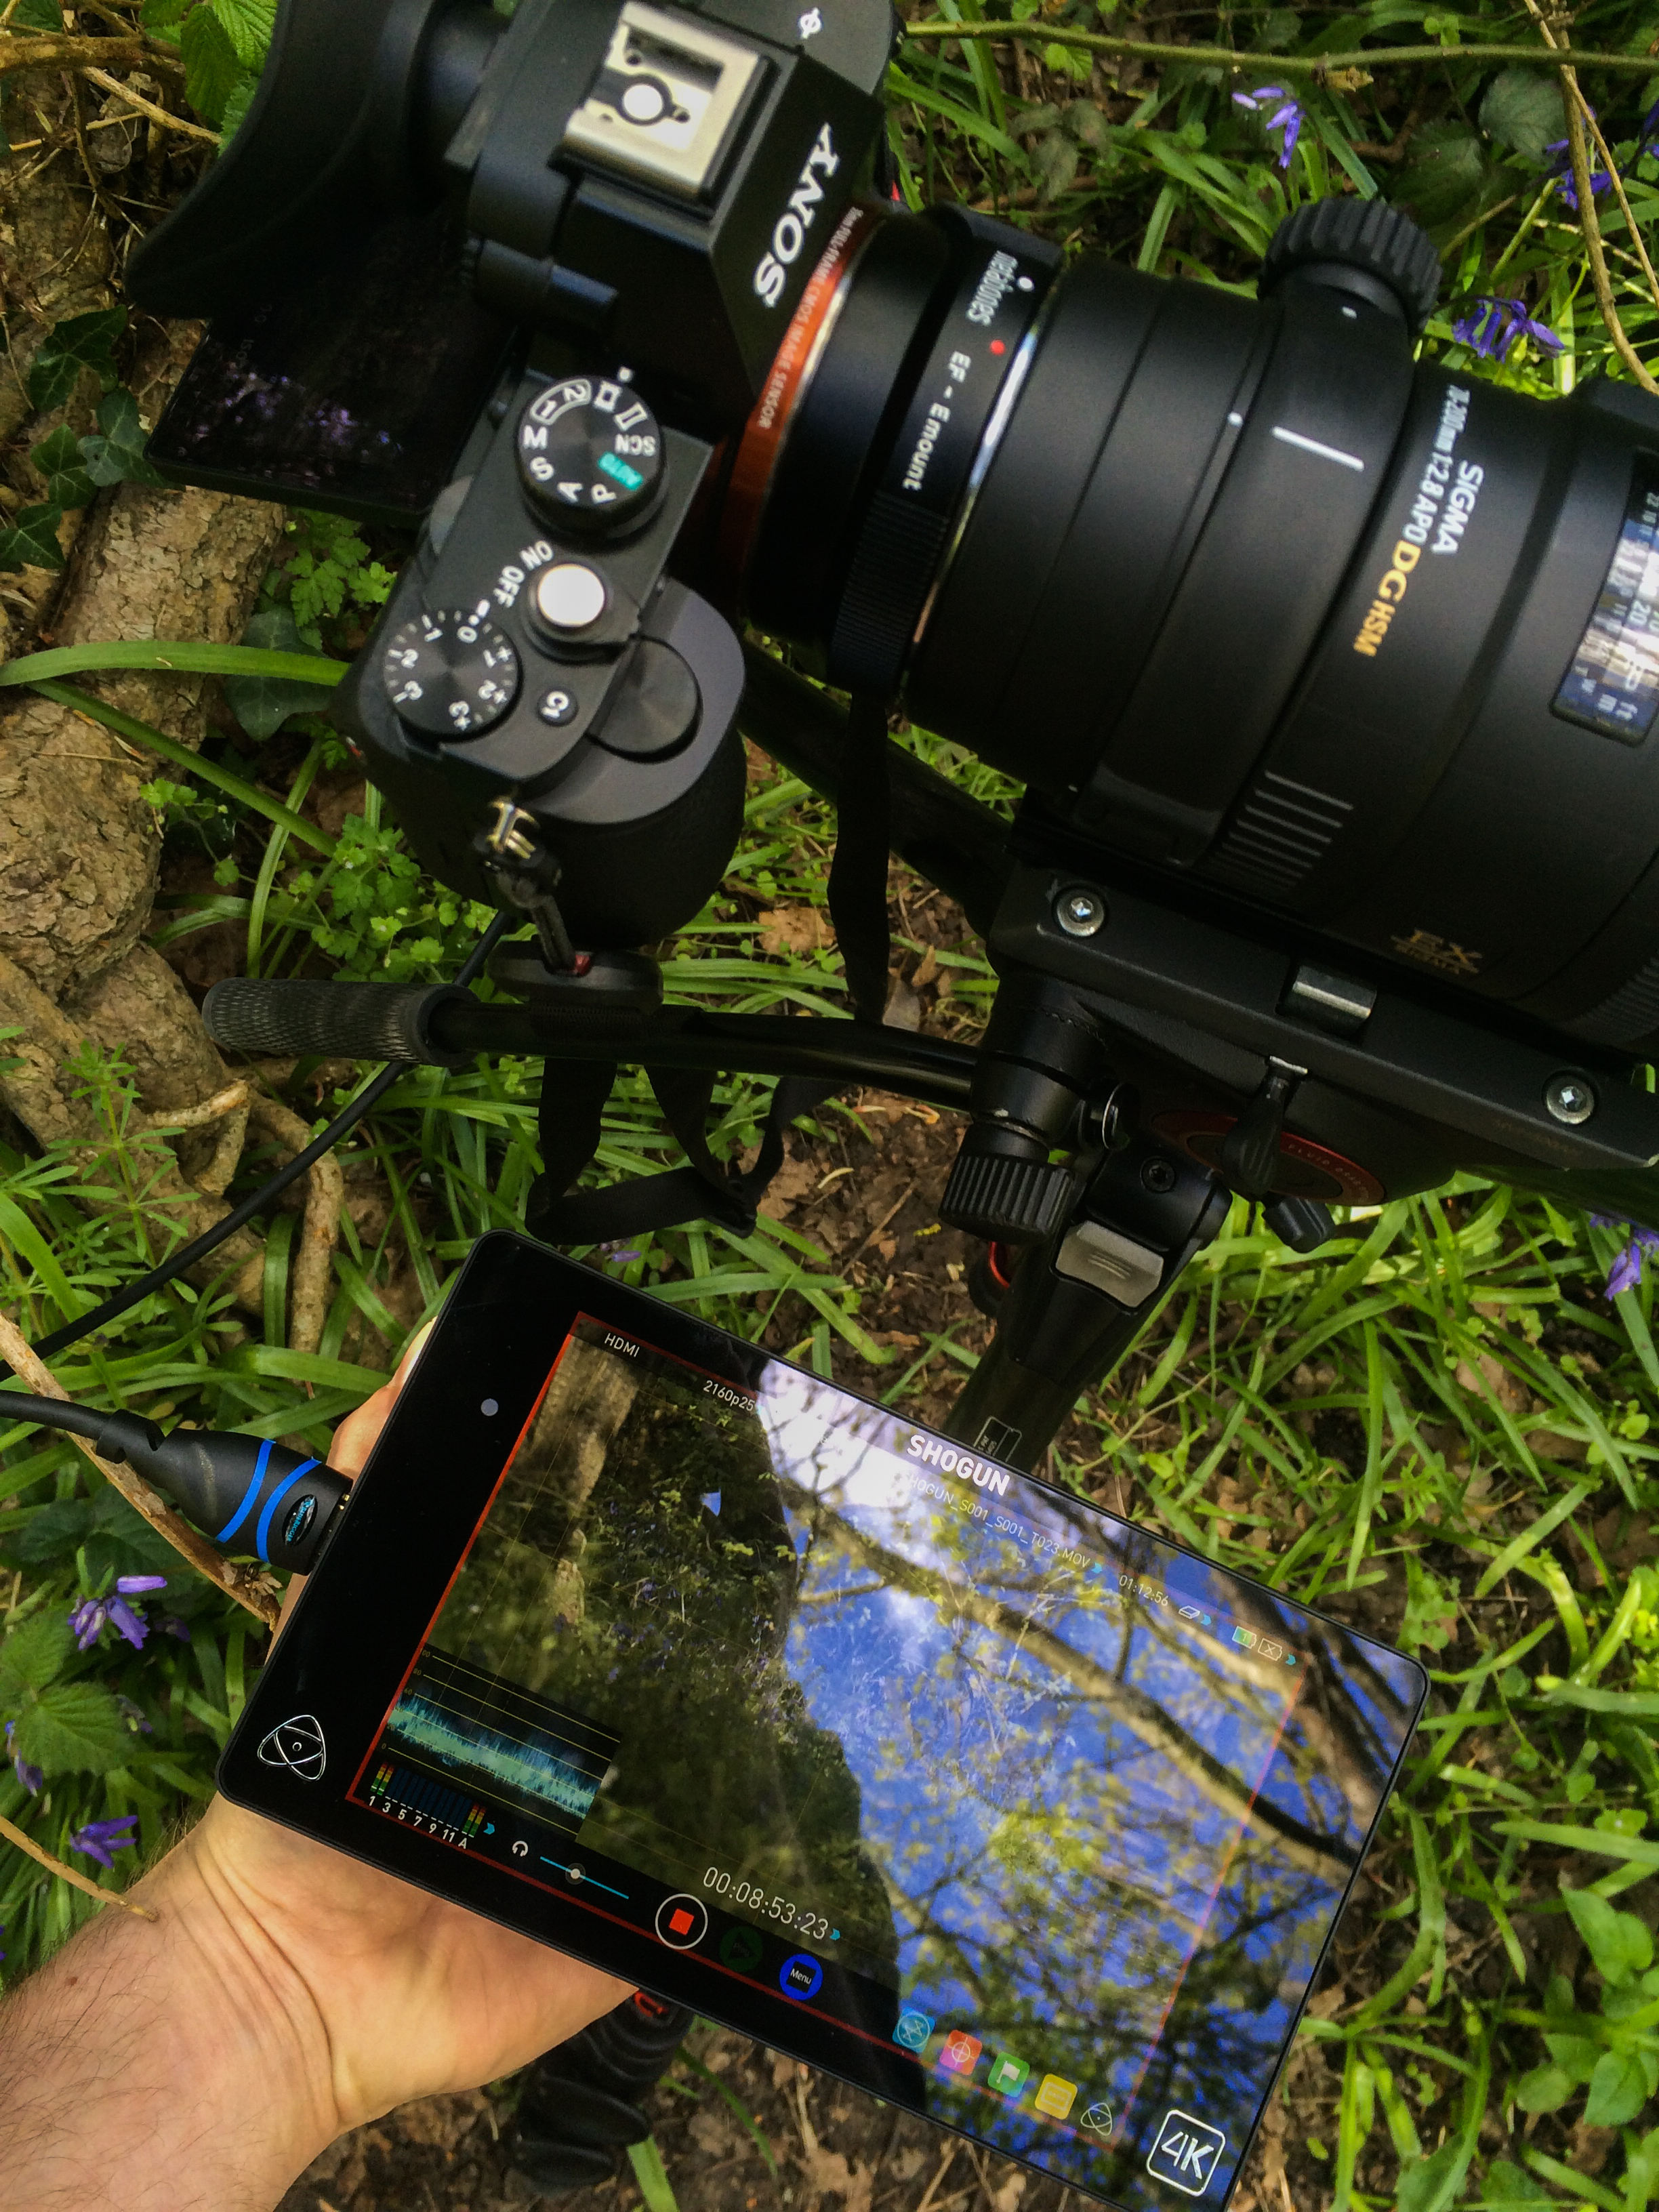
I took the Manfrotto 755CX-3 tripod with me as it is brilliantly lightweight, and despite the center column it can get pretty low to the ground for shots needing some perspective.

Still no Movcam cage yet, so I'm pretty nervous about having the Shogun on a ball mount, on the hot shoe, I did take care when moving around and took out the HDMI cable just in case.

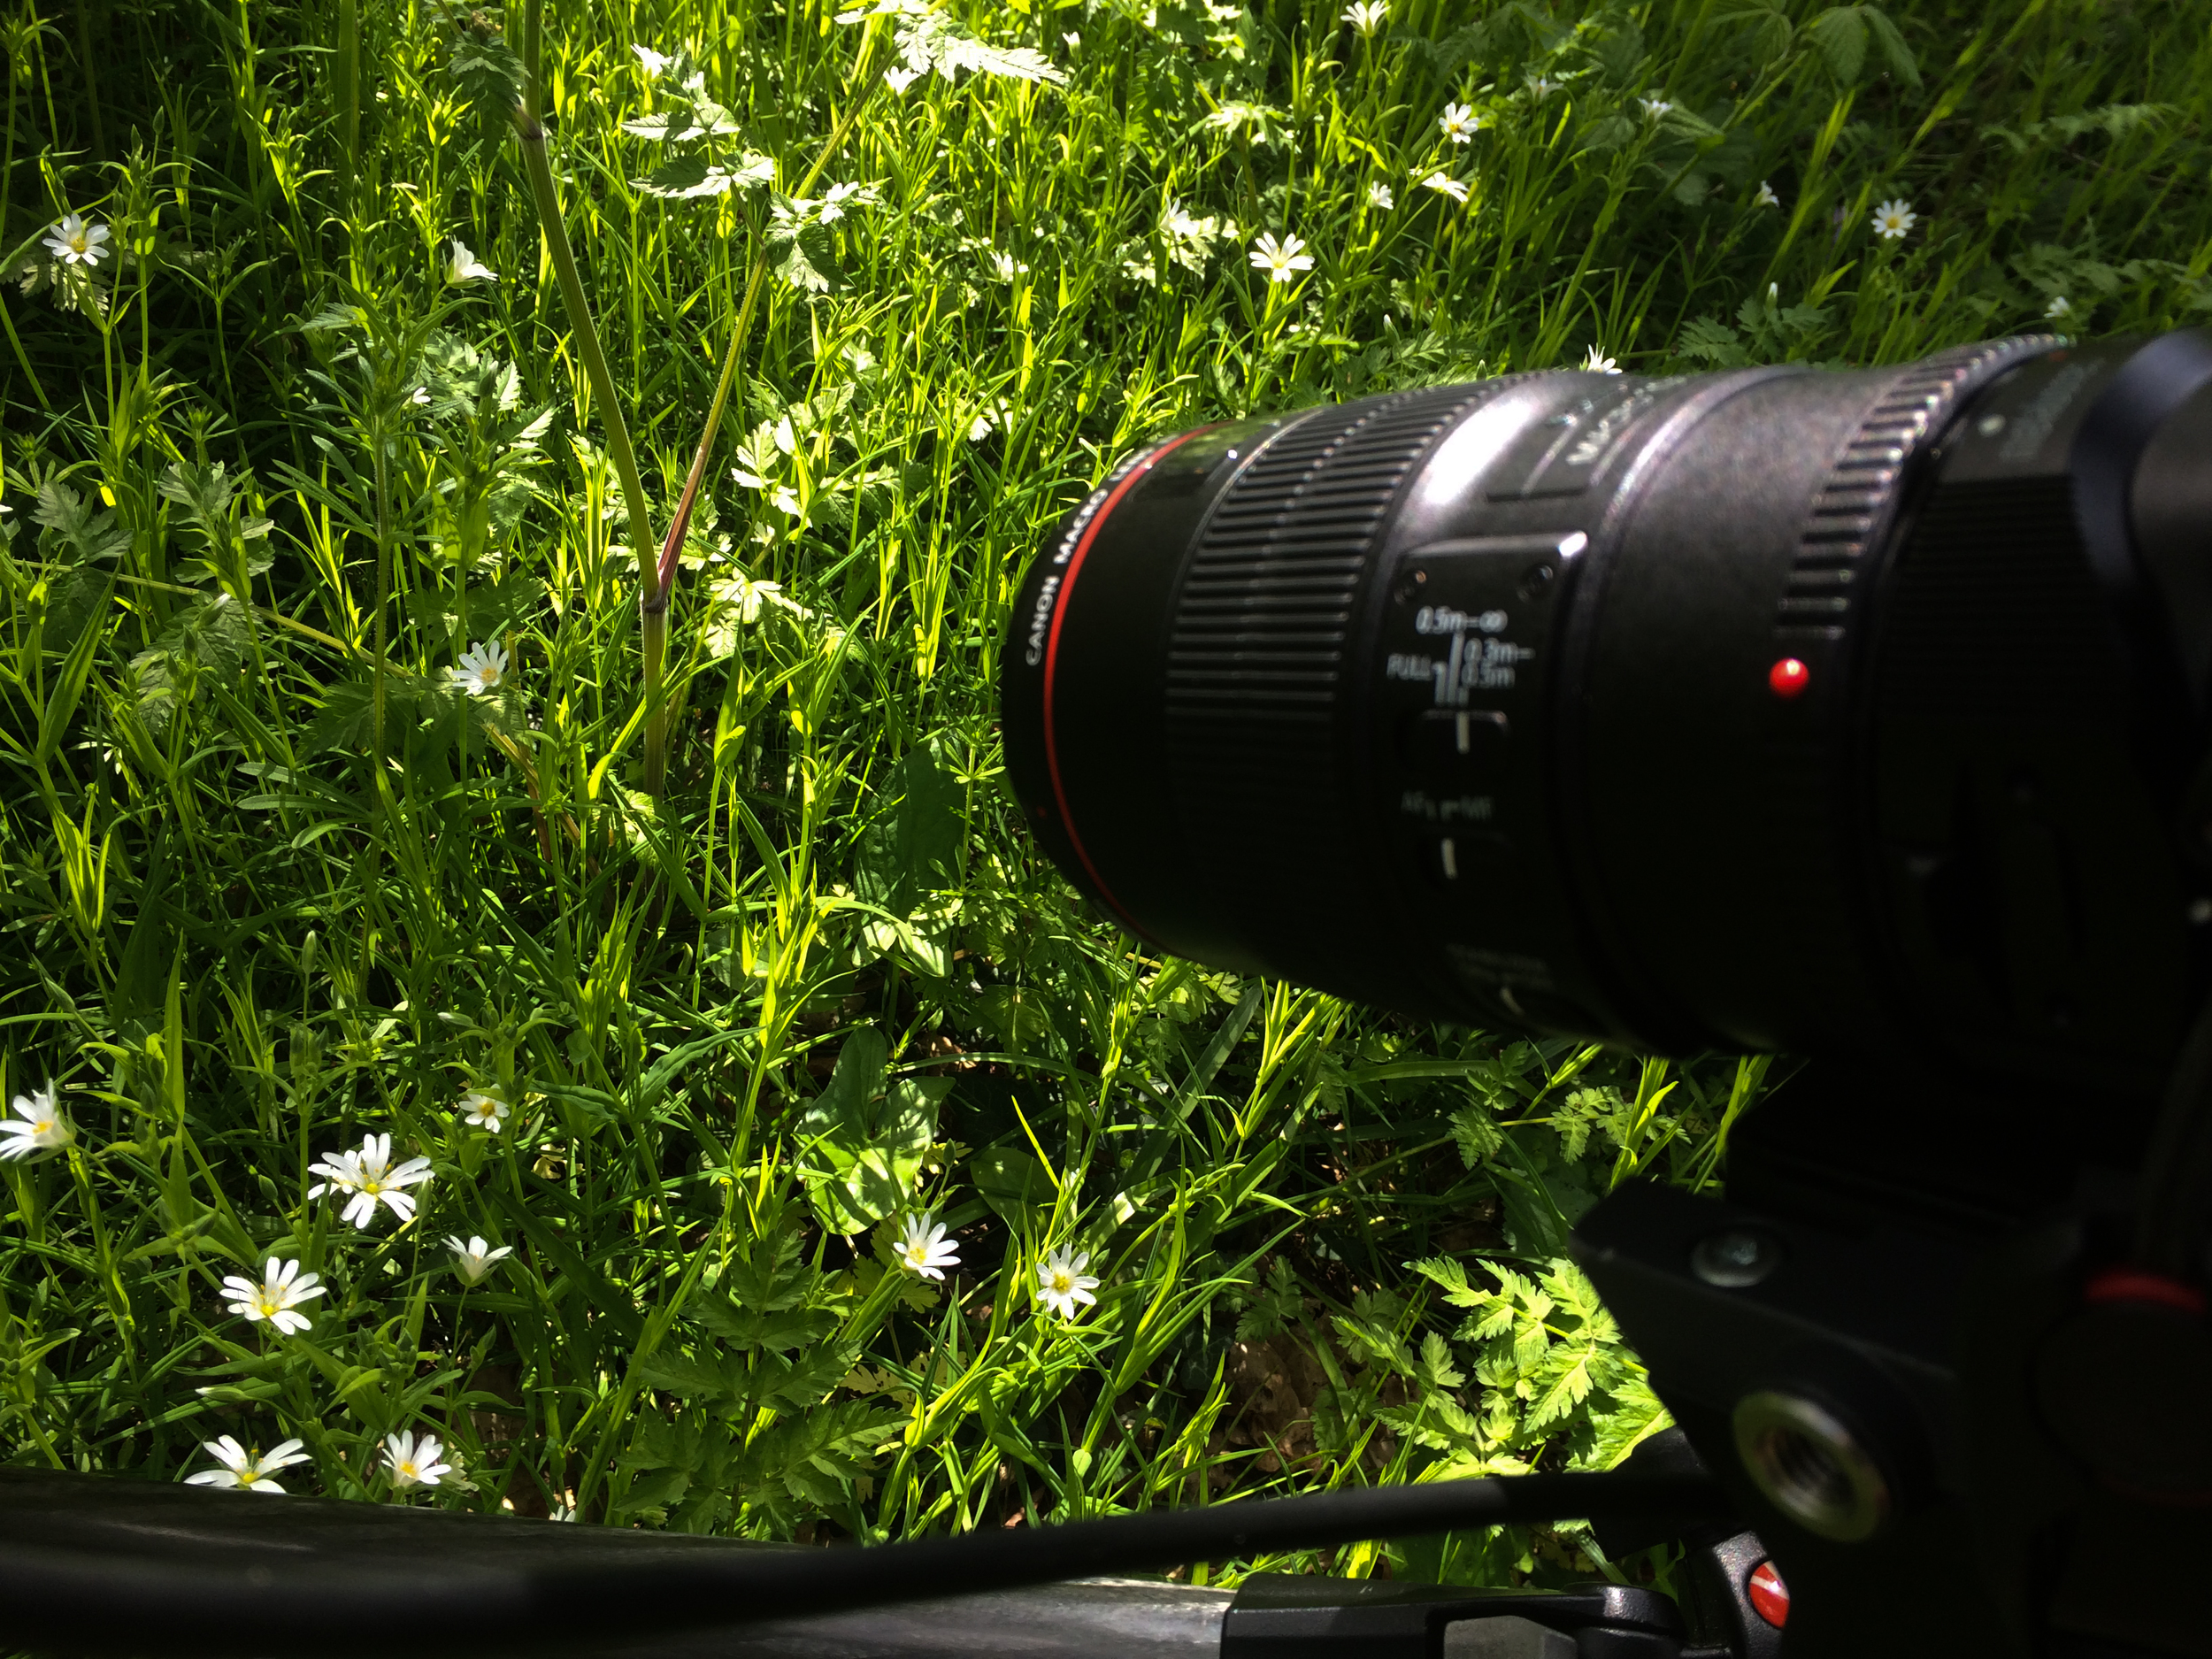
I had 3 lenses with me, the Tamron 24-70, Sigma 70-200 and Canon 100mm L as I wanted to have a simple setup, one Manfrotto bag, essential kit, batteries etc.

After watching Philip Bloom's talk hosted by B&H a few months back, I set the camera settings to what he advised and went from there. Using PP7 for S-log increases the native ISO to 3200, so is not practical for bright scenes without ND filters, so here are my settings.

PP6 (allows ISO 200, practical for bright shoots) - Black Level 0, Gamma Cine 4, Color mode S-gamut, Saturation 0, Detail -7.

It was a bright sunny day and the Shogun was the perfect tool for the job. It's screen is very clear, unlike cheaper monitors which don't have a high contrast ratio or use LCD screens. Exposing for the highlights, I used the in-built Waveform monitor to gague exposure as well as the 2:1 crop in for getting critical focus - definitely needed for the wide landscape and macro shots.

You will not be surprised to see the HUGE file size of recording 4K in Prores HQ, averaging at about 2GB for 20 seconds.

It's less than 10 minutes worth of footage, in fact!

I did find this out while I was trying out the different outputs and recording formats.. For the PAL region the A7S has THREE HDMI output settings -

 - 1080 50p, 1080 50i, 4K 25p.

The Shogun will not record 25p footage from the camera when the HDMI output is set to 1080 50p, but you can record 1080 50p slow motion on the Shogun. Remember to set the A7S' recording format to 50p/50, instead of 25p for normal speed filming.

The Shogun will only record 1080 25p footage from the camera when the HDMI output is set to 1080 50i, with a 2:2 frame drop set. Remember to set the A7S' recording format to 25p/50.

You must set the '4K HDMI' setting in the A7S to output the 4K signal, and record in 4K 25p on the Shogun.

As part of the new 4K workflow, I am using Davinci Resolve Lite (FREE) for the colour grading process, but as this is a short video I tried out it's NLE which worked great. Similar look and feel to FCPX, but it gives you the ability to change edit points, manipulate scale, track and much more. It even has a keyer!

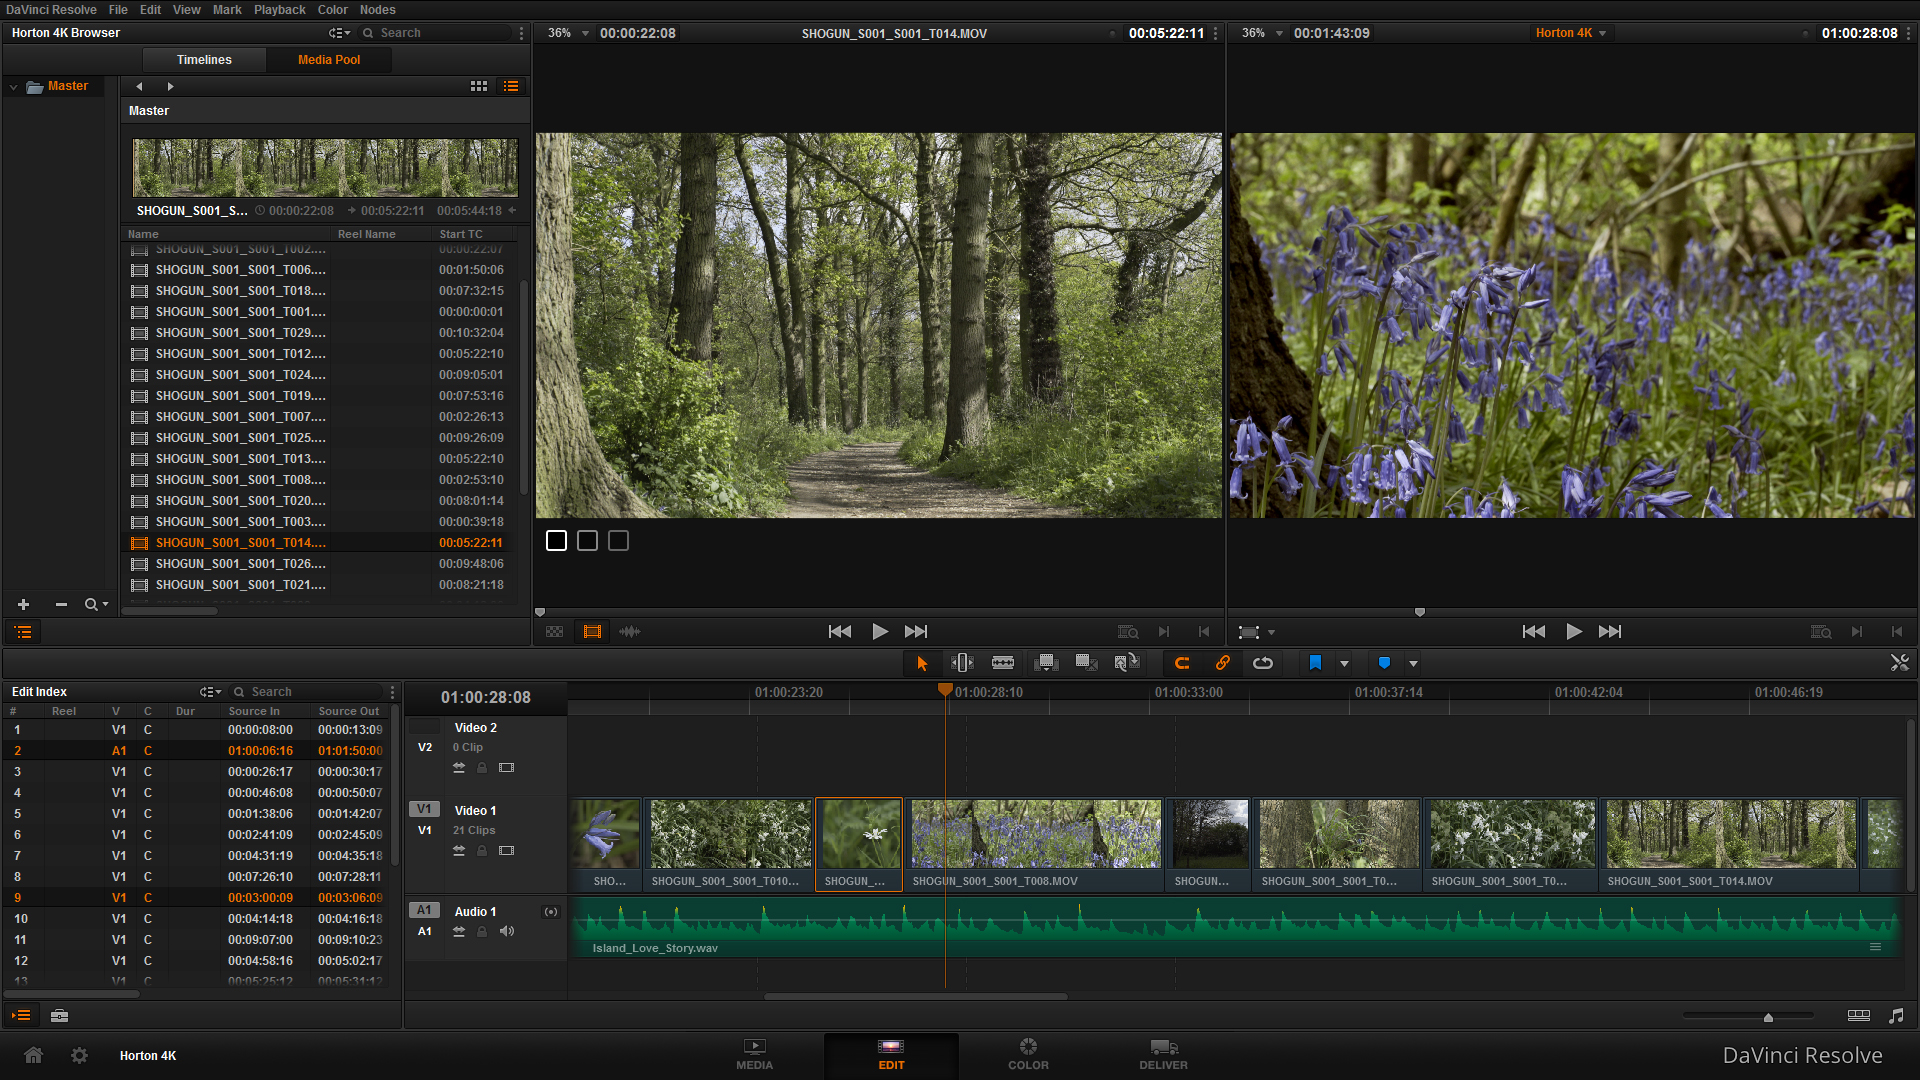
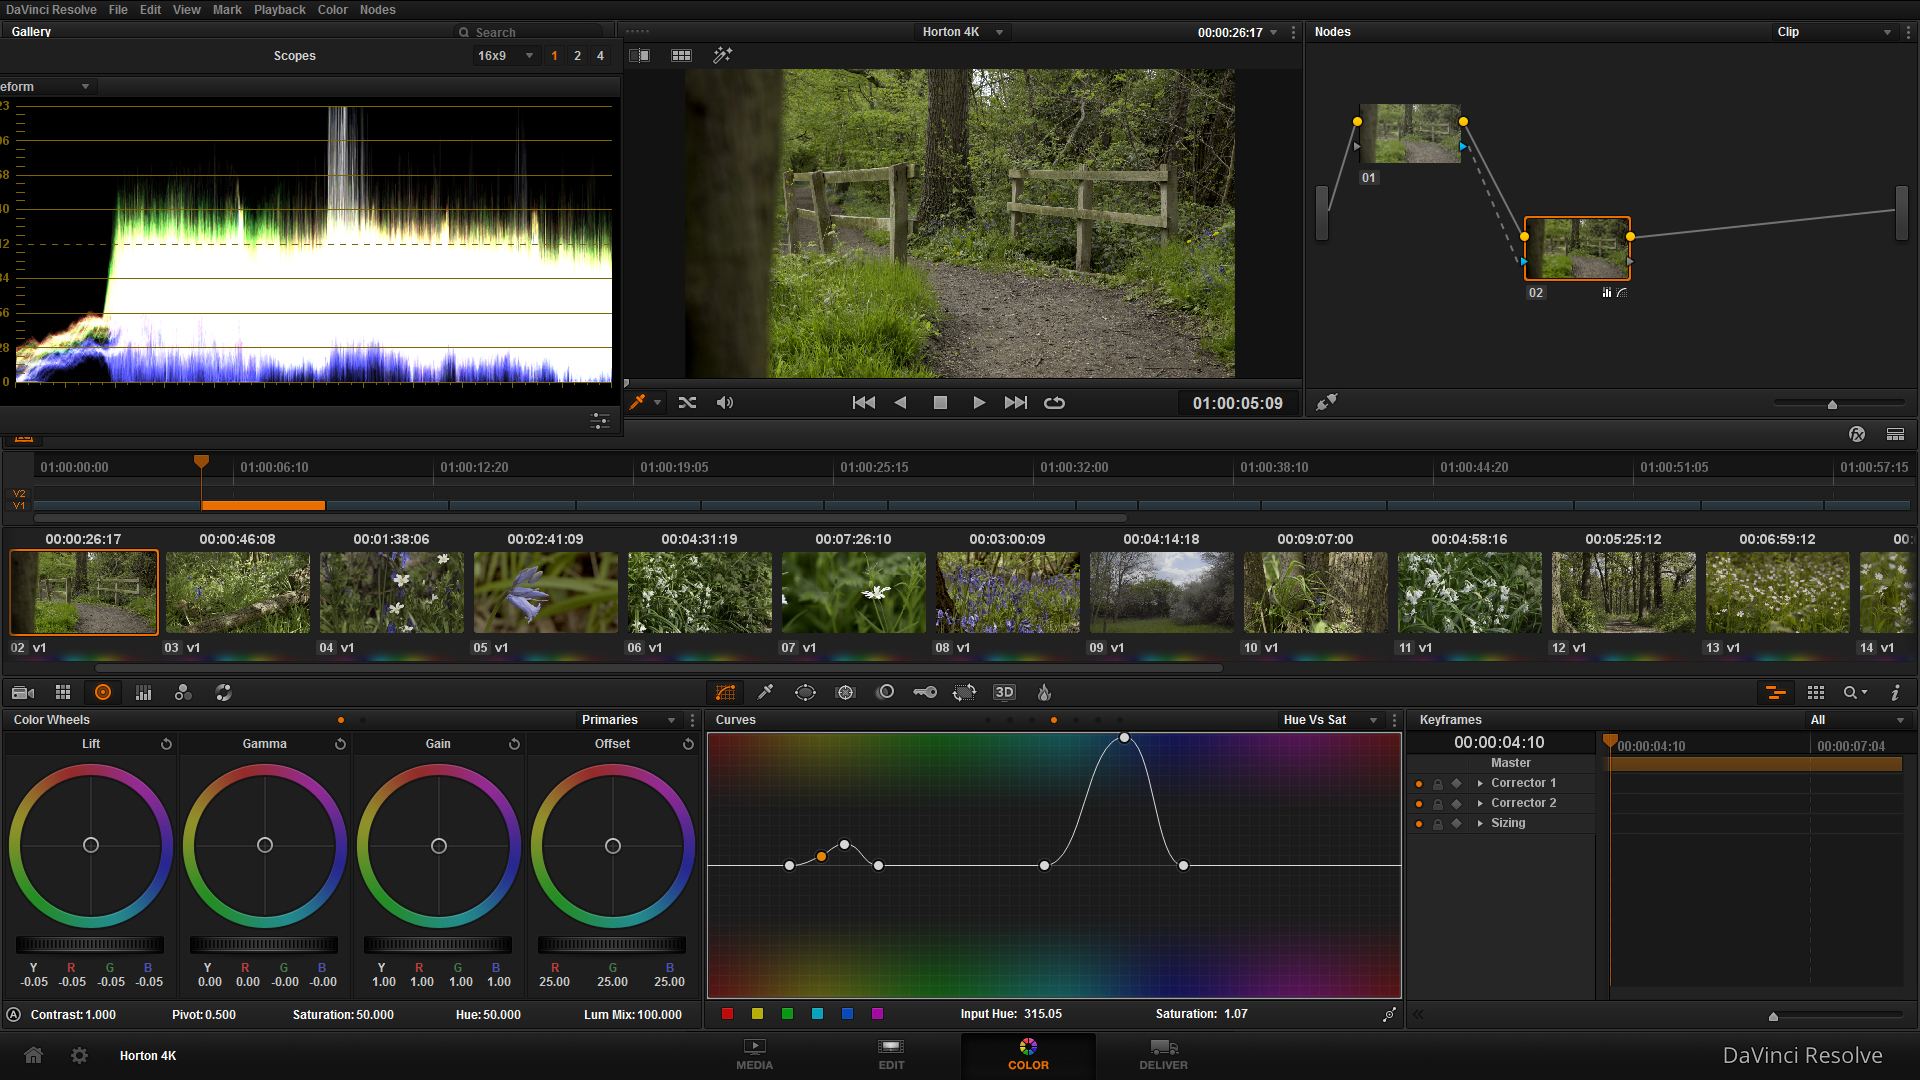
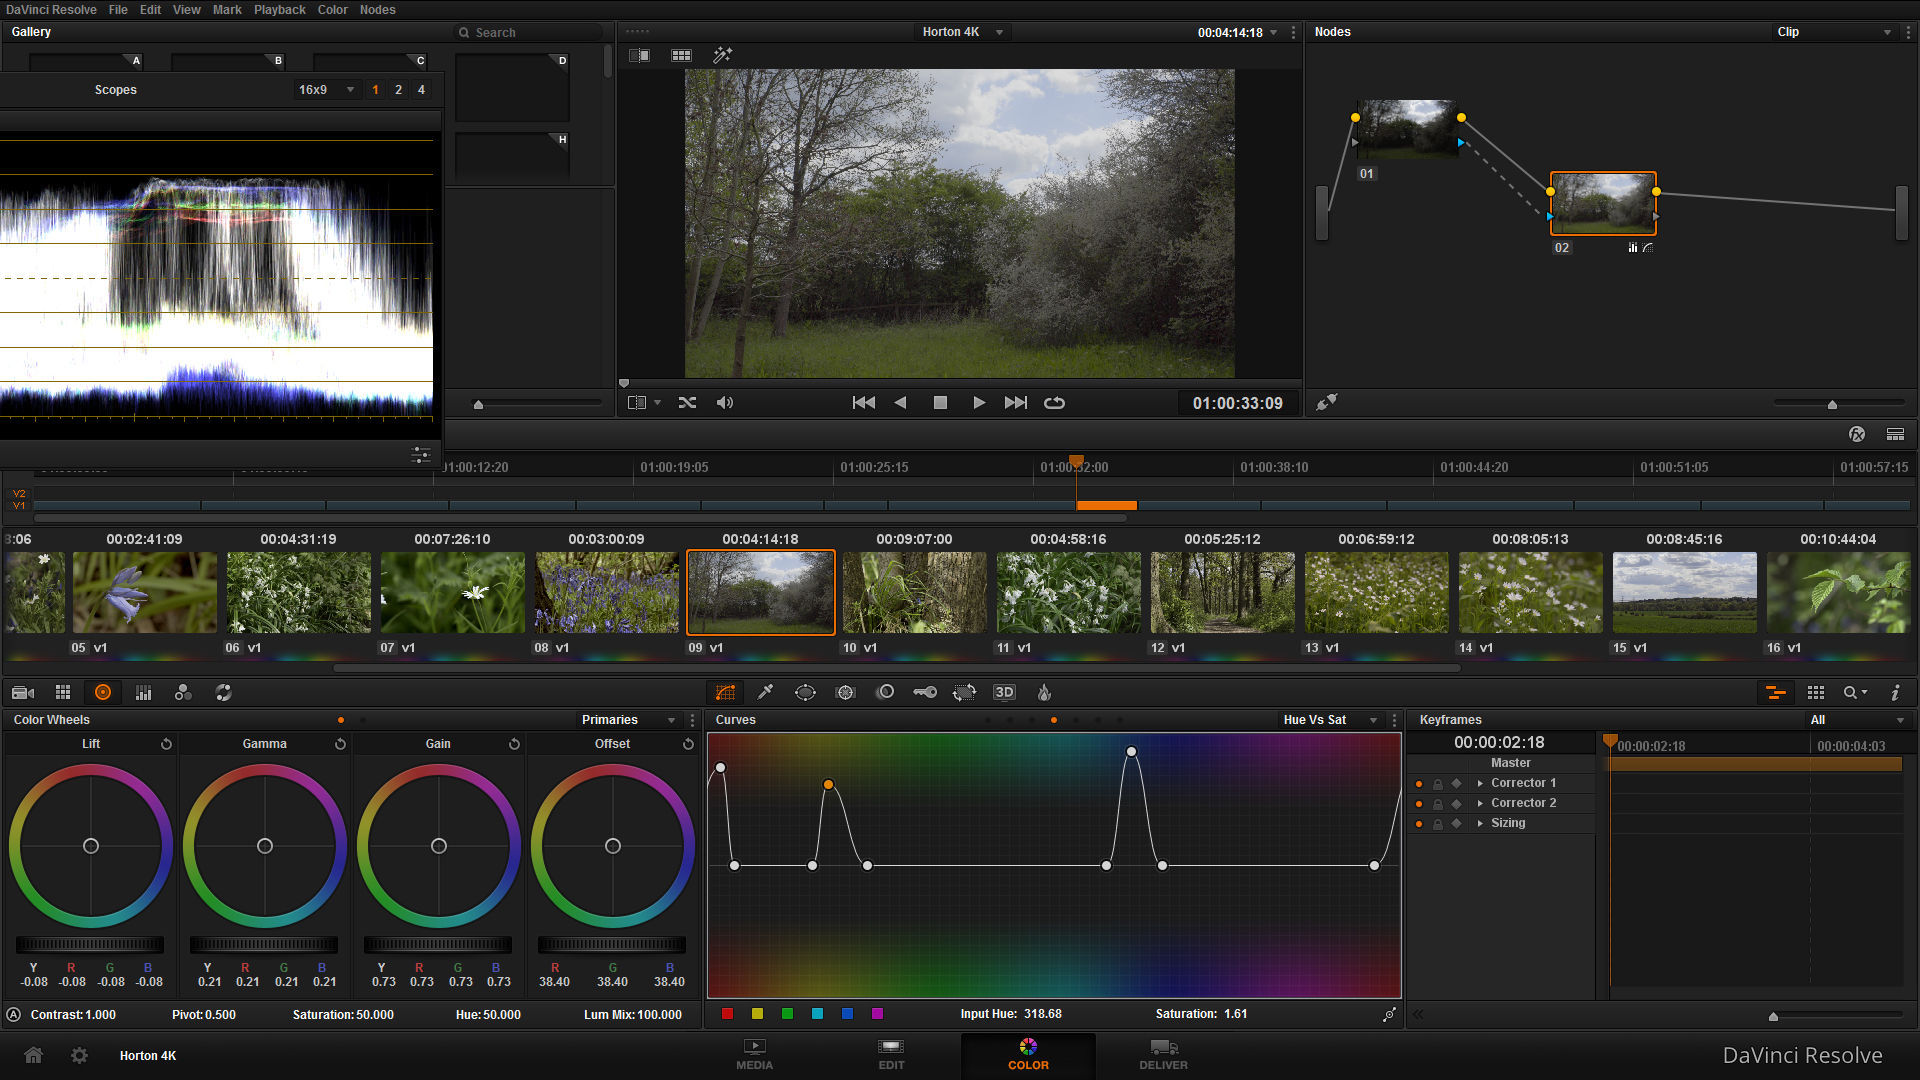
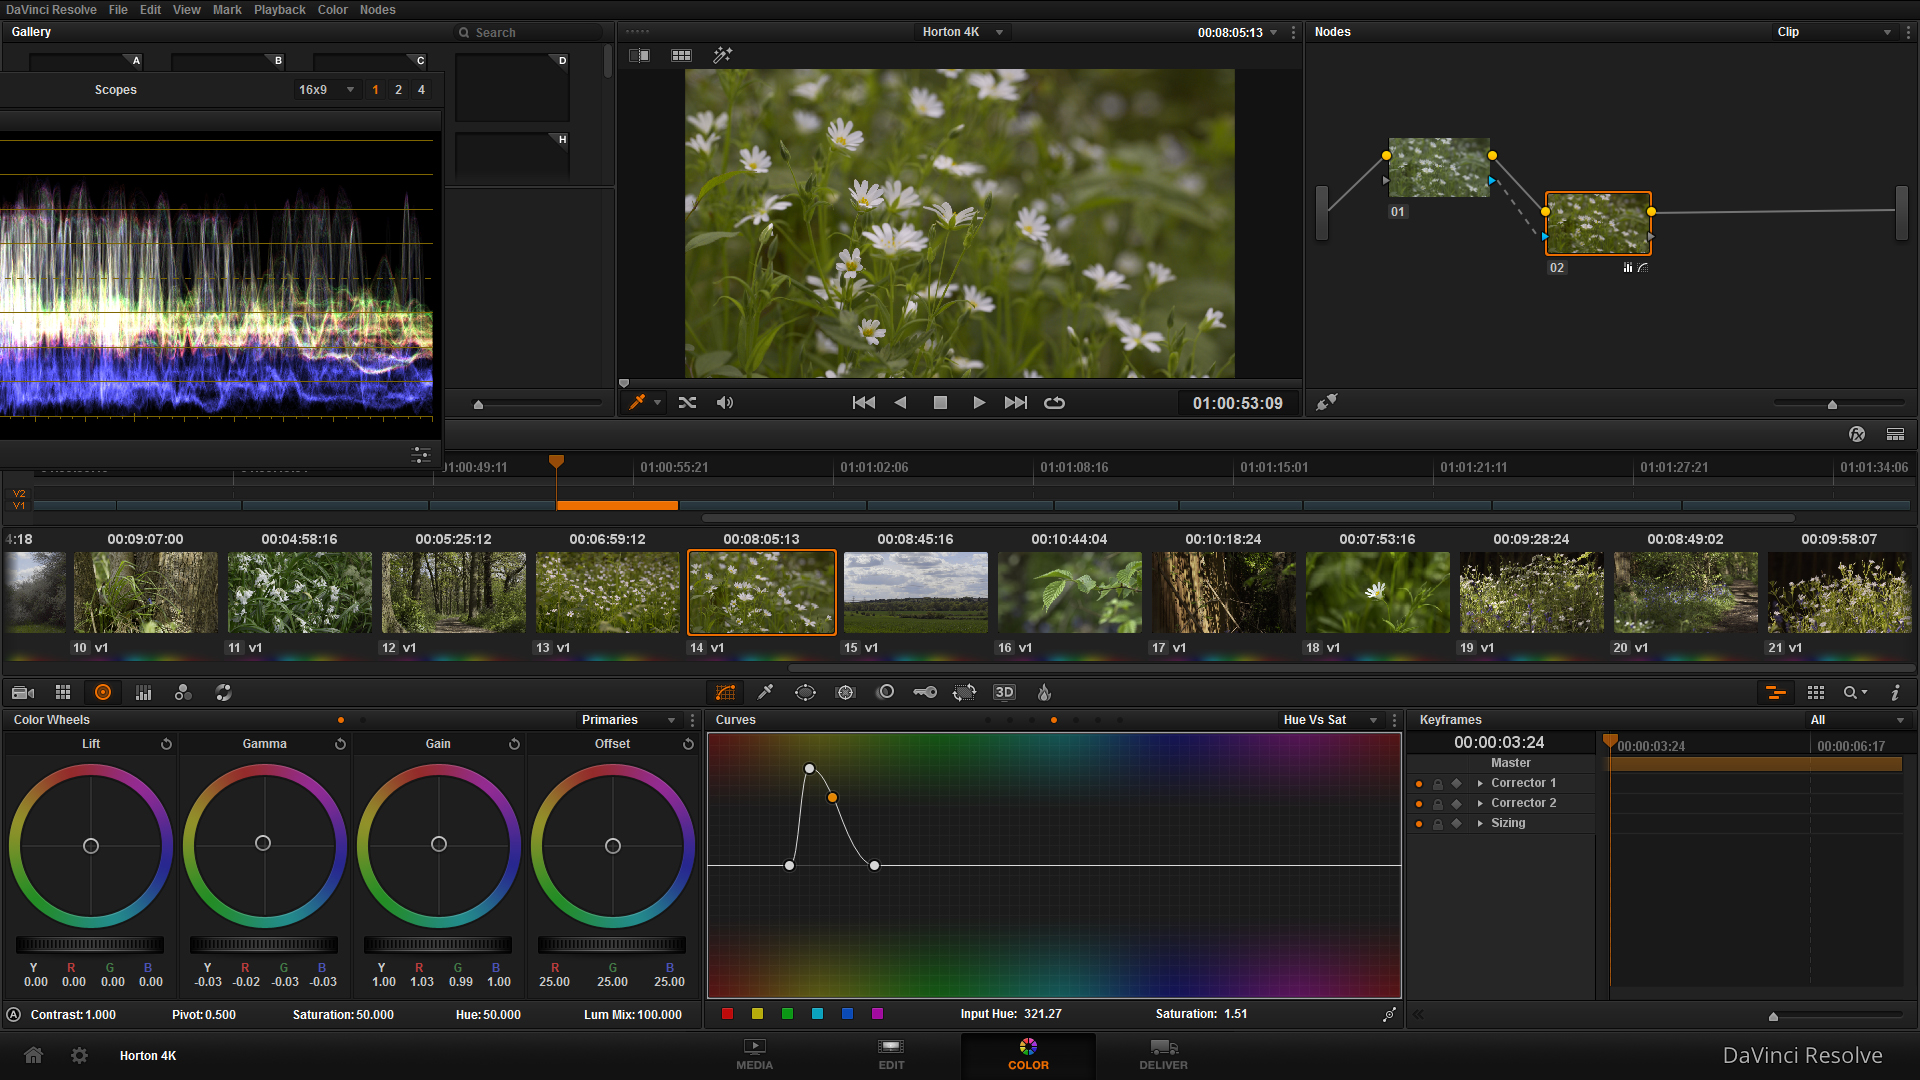
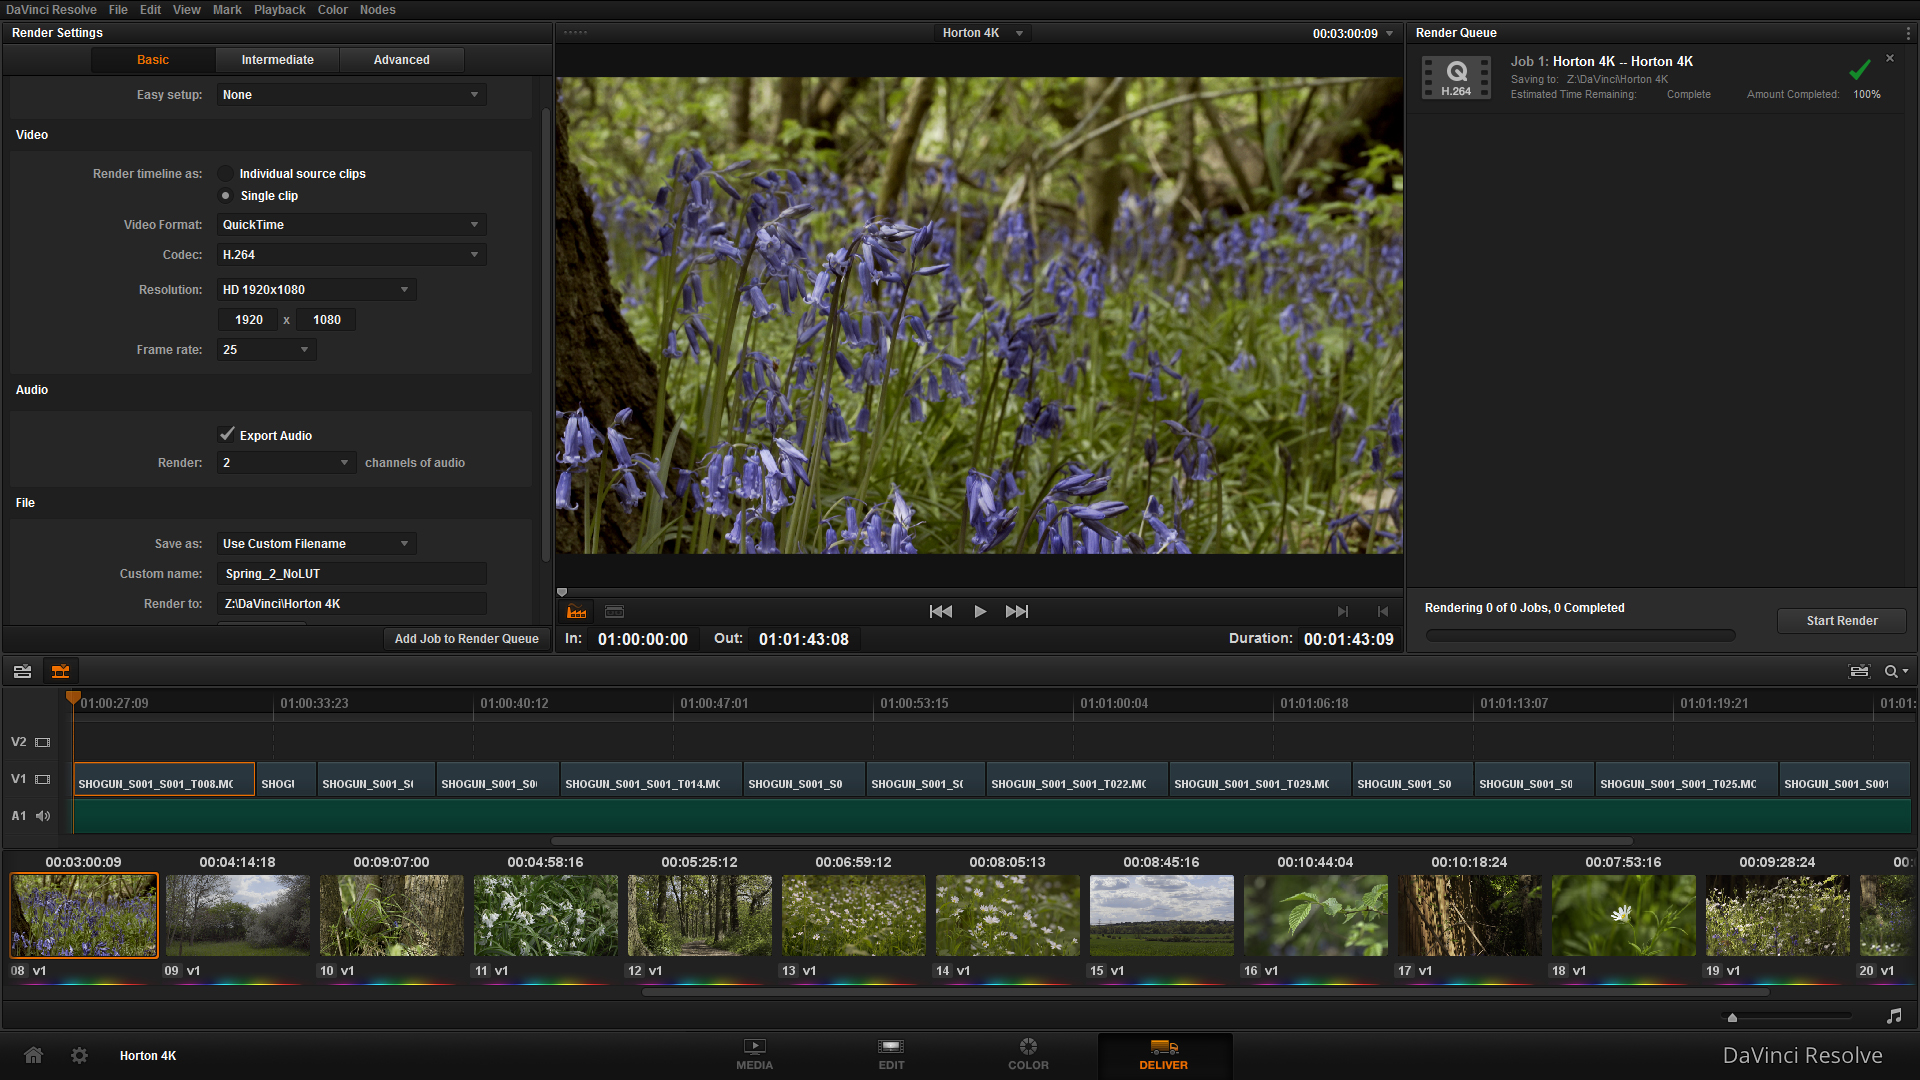
First Image - Editing interface, Second Image - Adjusting saturation in Color interface, Third Image - High contrast image BEFORE correction/grade, Fourth Image - High contrast image AFTER correction/grade, Fifth Image - Delivery interface.

Here is the ungraded version, with footage captured on the Shogun.

Here is a work-in-progress edit that is down-ressed to 1080 to upload it to Vimeo, the Youtube version in 4K (remember to change the resolution to 2160) is below!

I look forward to hearing your comments on the  videos I've put up!

Tomorrows video shoot for the IABM at the Hospital Club!

Tomorrow APV is filming at The Hospital Club for the IABM. We're holding a technical discussion and debate on a number of industry topics. I'll have much more to come tomorrow!

The setup will be similar to the previous IABM panel video, but without the Lastolite Panoramic background. As always I have the Manfrotto Pro Light 35 packed with two camera bodies, essential lenses, batteries, memory and audio gear, as well as 3 1x1 bi-colour LED lights and pro stands.

I'll be trying out the old Soligor Pentax K mount 35-140mm F/3.5 macro on the 60D, as it does not register with the 5D. I may have to remove the chip.. I'll have some detail shots of it tomorrow.

Audio wise, we'll be using the Zoom H6 for recording multi-track audio from the 4 Sony and Rode lavalier microphones, as well as other on camera mics.

Manfrotto Backpack50 Video.. It's taken its time!

I've finally got around to working on the Manfrotto Backpack50 product video that I shot back in November with Glen and Sam. I made the most of the beautiful 'golden hour' to capture unique images of the product in use. The shoot location was our usual hotspot for kit testing; Epsom Downs. manfrotto backpack50 product video demo professional photography videography

The Backpack50 is an insanely good bag, dedicated to protecting your prized possessions and increasing your productivity when out on a photo or video shoot. Aimed at both professional videographers and photographers; the bag features plenty of space for multiple camera bodies, lenses and telephoto lenses. For the on-the-go editor, you can also carry a laptop and a tablet with you, as well as strapping on a tripod. Your complete equipment in one bag. One solution.

I'm editing the footage in Premiere Pro, to achieve that awesome bokeh I used a Nikor 50mm F/1.4 manual lens and shot handheld, so I will be applying some stabilization to those shots. Because of the strong sunlight, I worked with that light to determine the exposure of my subject, Glen. Essentially putting him in a silhouette, defining his and the backpacks shape. For the ambient settings I was working with, I believe this worked well, and is a good technique to try when shooting in the golden hour!

However, when working with low contrast ratios (number of stops between black and white) it is easy to over or under expose parts of the image, which not only burns in detail but can cause problems when encoding and playing back the video, so remember to check your reference monitors and keep to legal limits!

premiere pro video reference manfrotto

More to come later!

Review: Manfrotto Backpack50

Hello all! Here is the anticipated review of the new Manfrotto Backpack50, the flagship range of professional photography and videography bags for cameras and equipment. edt1

The new range comes in a variety of sizes depending on the equipment and lenses you use. If you are going to be shooting for ENG, or know you will need fast access to your camera and lens kit then the Holster range may be for you, or if you're looking for a perma-home for a vast range of bodies, lenses and accessories then a Roller Bag or Backpack will be for you.

screen1

I got a great surprise through the post a couple of weeks ago, it was the Backpack50, which I have been using out on photo and video shoots, testing it to the extreme in a wide range of shooting situations such as weddings, on location video and corporate events.

First things first, as you can see the bag is BIG! Not too big that it is laborious to carry around, as the support straps provide great comfort for a fully packed bag. Having a bigger bag eliminates the need to bring extra sling bags if you take laptops and tablets on shoots, as there two separate zip pockets for both, and also allows me (predominantly shooting video) to keep all of my essentials in one place. For example, the bag is currently full with my kit needed for a shoot for Tesco on Friday, so a 7" HD field monitor, clamps, Rode VideoMic, 2x DSLR bodies and 6 lenses sit snugly in the protective separators. I have all I need in one convenient place, a perfect solution especially as I am a SINGLE shooter.

IMG_1918_1

Overview of the Backpack50's features:

DSC_0173_1

Unlike other camera bags which open from the side or the back, the Backpack50 opens from the top, which allowed me to quickly grab my camera (with lens attached) almost immediately with ease. If you've got the waist support done up then this is even quicker as you can swing the bag from your back to front and grab the camera that way. The other handy feature of this is that you can have a telephoto lens attached to the camera and still take it out with ease, as the support pads can be customized to fit your individual kit needs.

DSC_0179_1

Here you can see the bag open, the top flap unzips all the way down revealing many side pockets, 3 zip pockets on the flap (which I use for little bits that I can grab quickly such as batteries, SD cards, hot shoe adapters etc). There is even a protected zip pocket for a tablet if you have one too!

The capacity of the Backpack50 is fantastic! As I mentioned before I filled it up with various accessories for shooting video, but it will comfortably hold a large DSLR body and telephoto lens attached in the middle section, up to 8 standard lenses in the side sections, as well as two ideally large and deep side pockets. These would be great for clamps and arms, but I use mine for my microphone and a little tool box for emergencies!

IMG_1861_1

A small but memorable Manfrotto logo on the main flap of the bag, the branding is not in your face which keeps the bag discrete.

IMG_1892_1

With a fully packed bag (including a laptop, EVF) it is heavy as you would expect, however the inclusion of a very comfortable, padded waist strap distributes the weight evenly through the body, rather than putting the pressure on your shoulders, reducing fatigue, and it was a welcome relief for me to see too! All the straps are padded, and are very heavy duty for a camera bag which is fantastic when shooting in rugged and fast paced environments, or for a very long time.

The Backpack50 also includes a waterproof cover, essential for protecting your beloved kit in times of heavy downpour, however it would have been better to see this built into the bag rather than a separate part, as this reduces the risk of forgetting it!! It also has a side strap for tripods which is a welcoming sight. Previously I used a Lowepro bag and simply strapped my Manfrotto 055B tripod and 701 head to the main straps, which is heavy and also puts lots of strain on the bags fastenings (i don't recommend this). The external strap loops through a heavy duty fabricated patch on the side of the bag, and the strap can be secured around the head of the tripod. It is quick release too, so you can get the tripod off the bag and set up quickly. A great improvement.

IMG_1903_1

Overall, I am delighted with Manfrotto's new Backpack50 as it caters for the pro photographer AND videographer, protecting our livelihood (equipment) with fantastically engineered bag sections, as well as providing flexibility when out shooting which many backpacks restrict due to their bulky and un-ergonomic design. Manfrotto have overcome this by designing a bag with the pro in mind, and have produced a very successful and ergonomic addition to the growing kit list of photographers and videographers alike.

Check out the new range on Manfrotto's website here - http://www.manfrotto.co.uk/collection/8615.1065.17520.0.0/Professional