

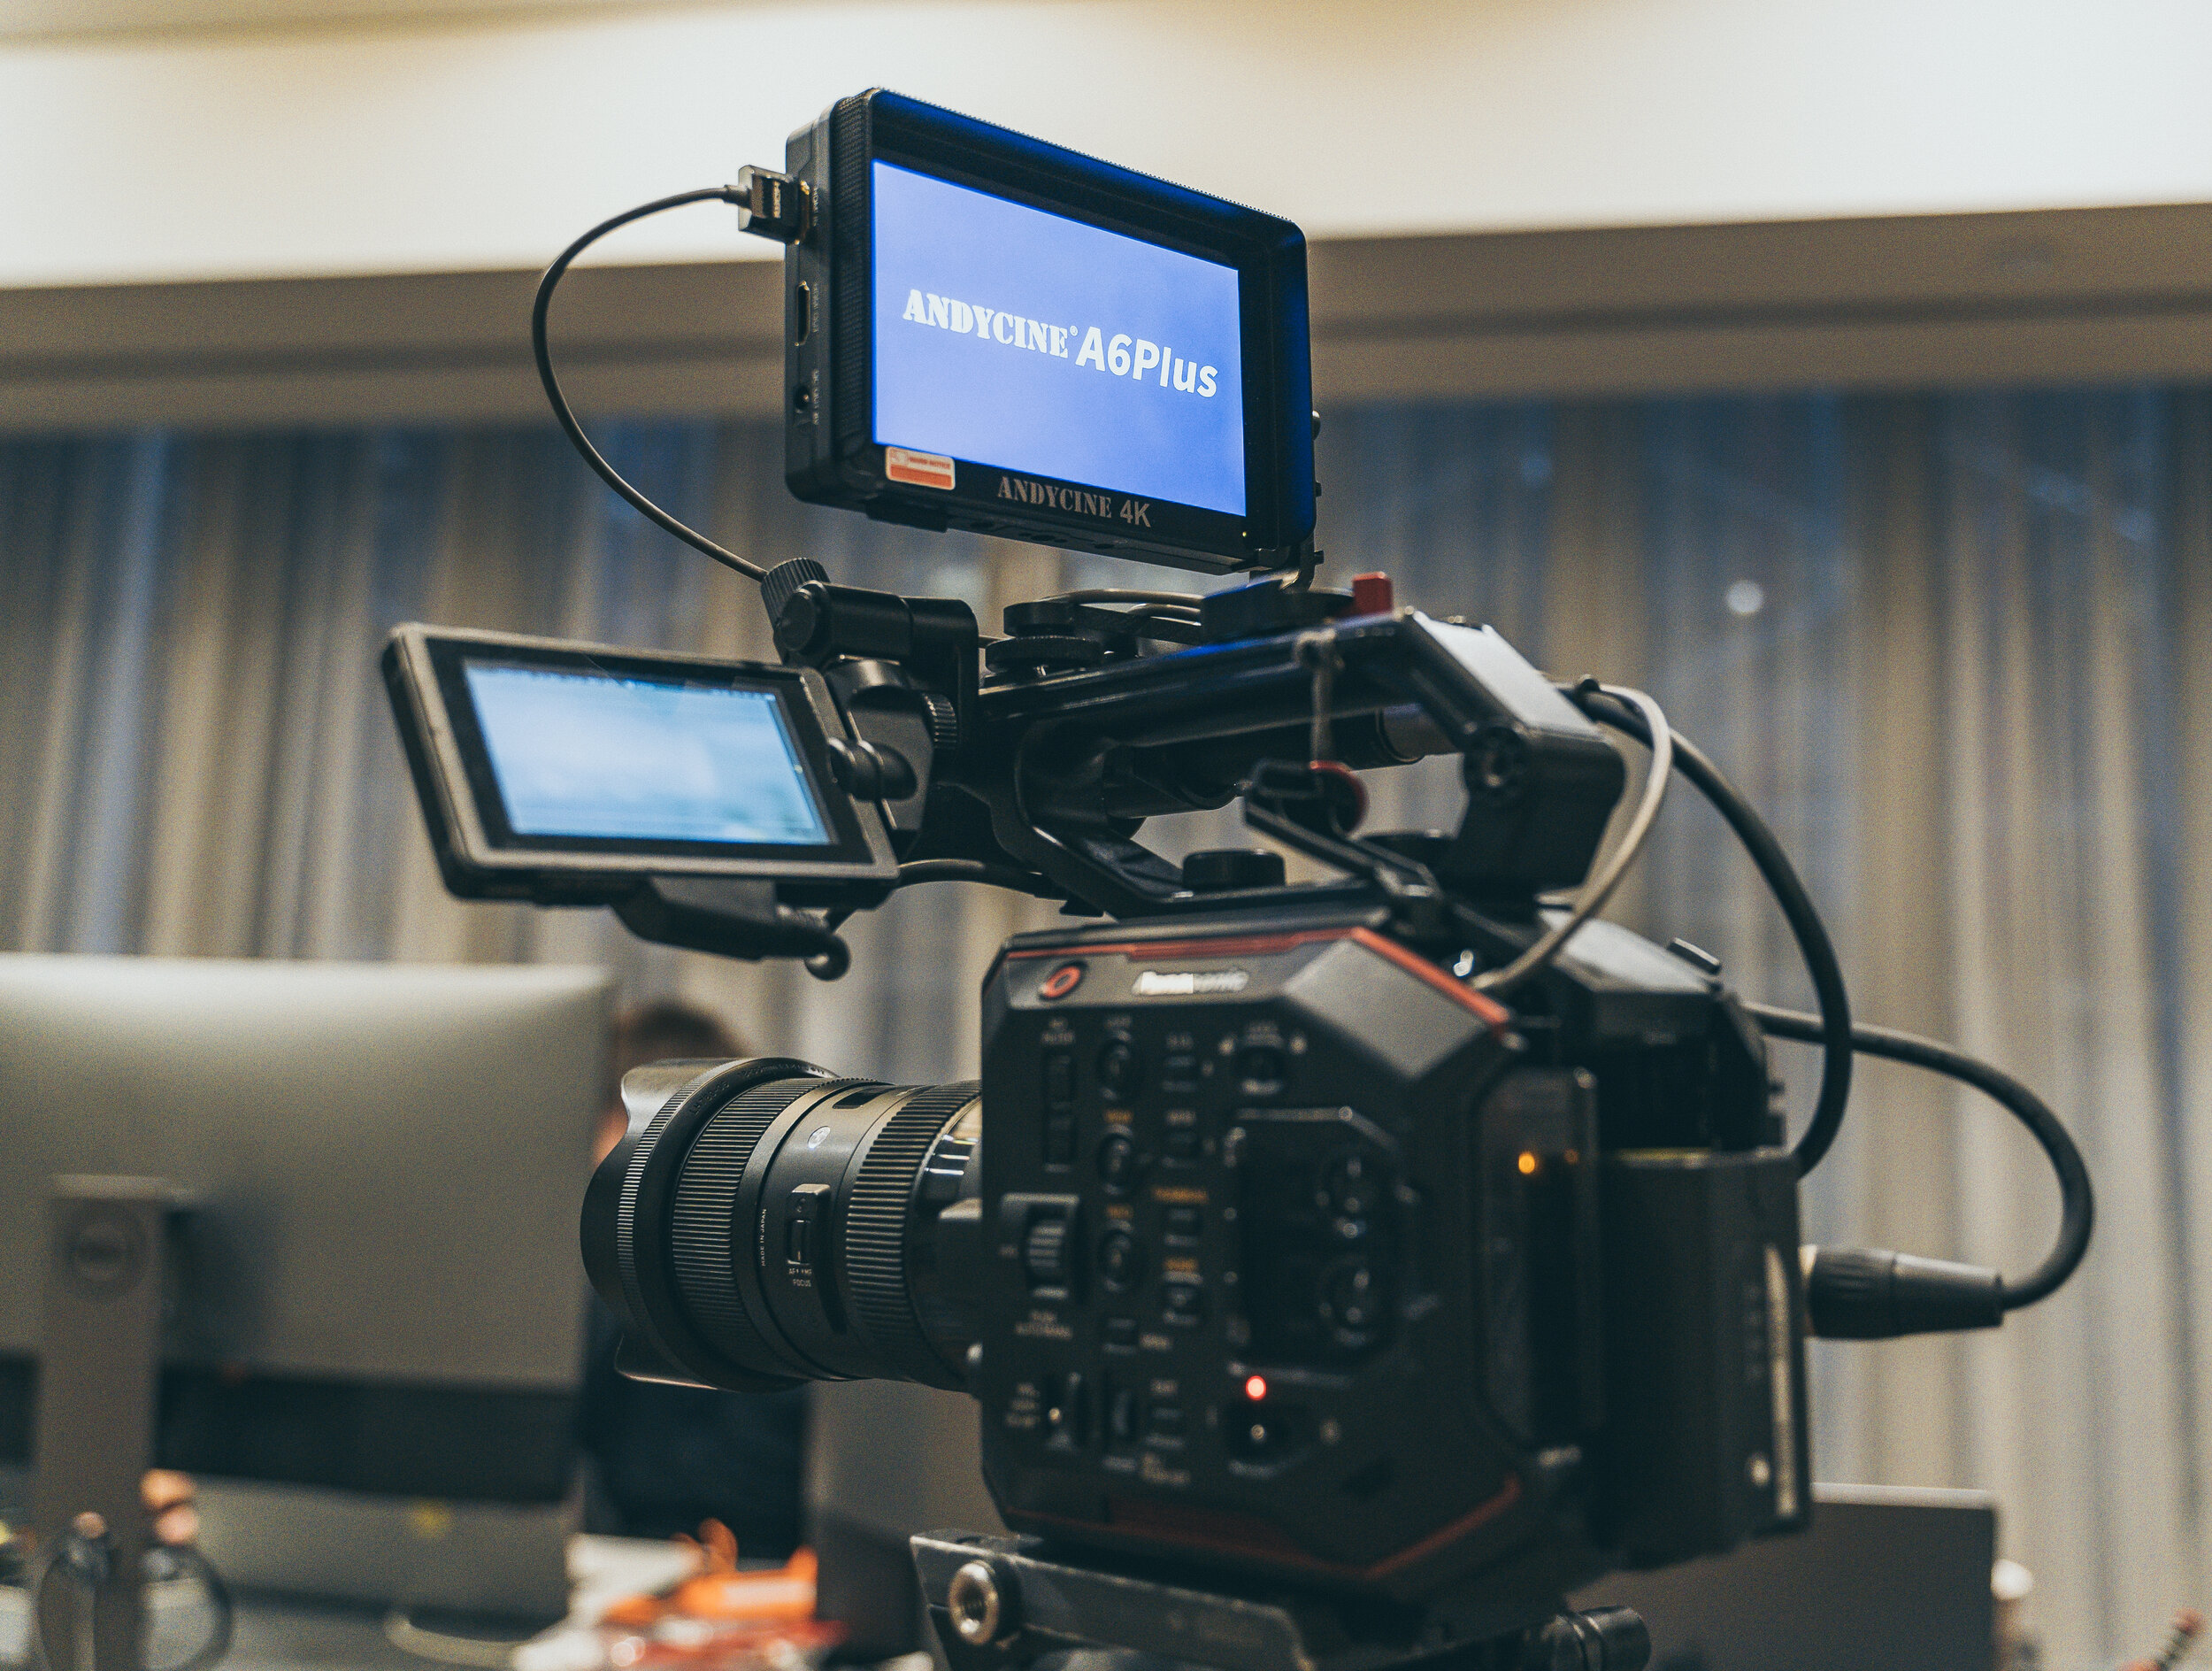
With LUT Preview and a new touch screen, the ANDYCINE A6 Plus 4K monitor provides video productions with an affordable and practical solution.
I received the ANDYCINE A6 Plus monitor in 2019, after using the original A6 monitor for most of the year. For a predominant Sony mirrorless and Panasonic EVA-1 shooter, having an external monitor is useful for the larger screen size, but also the additional monitoring features.

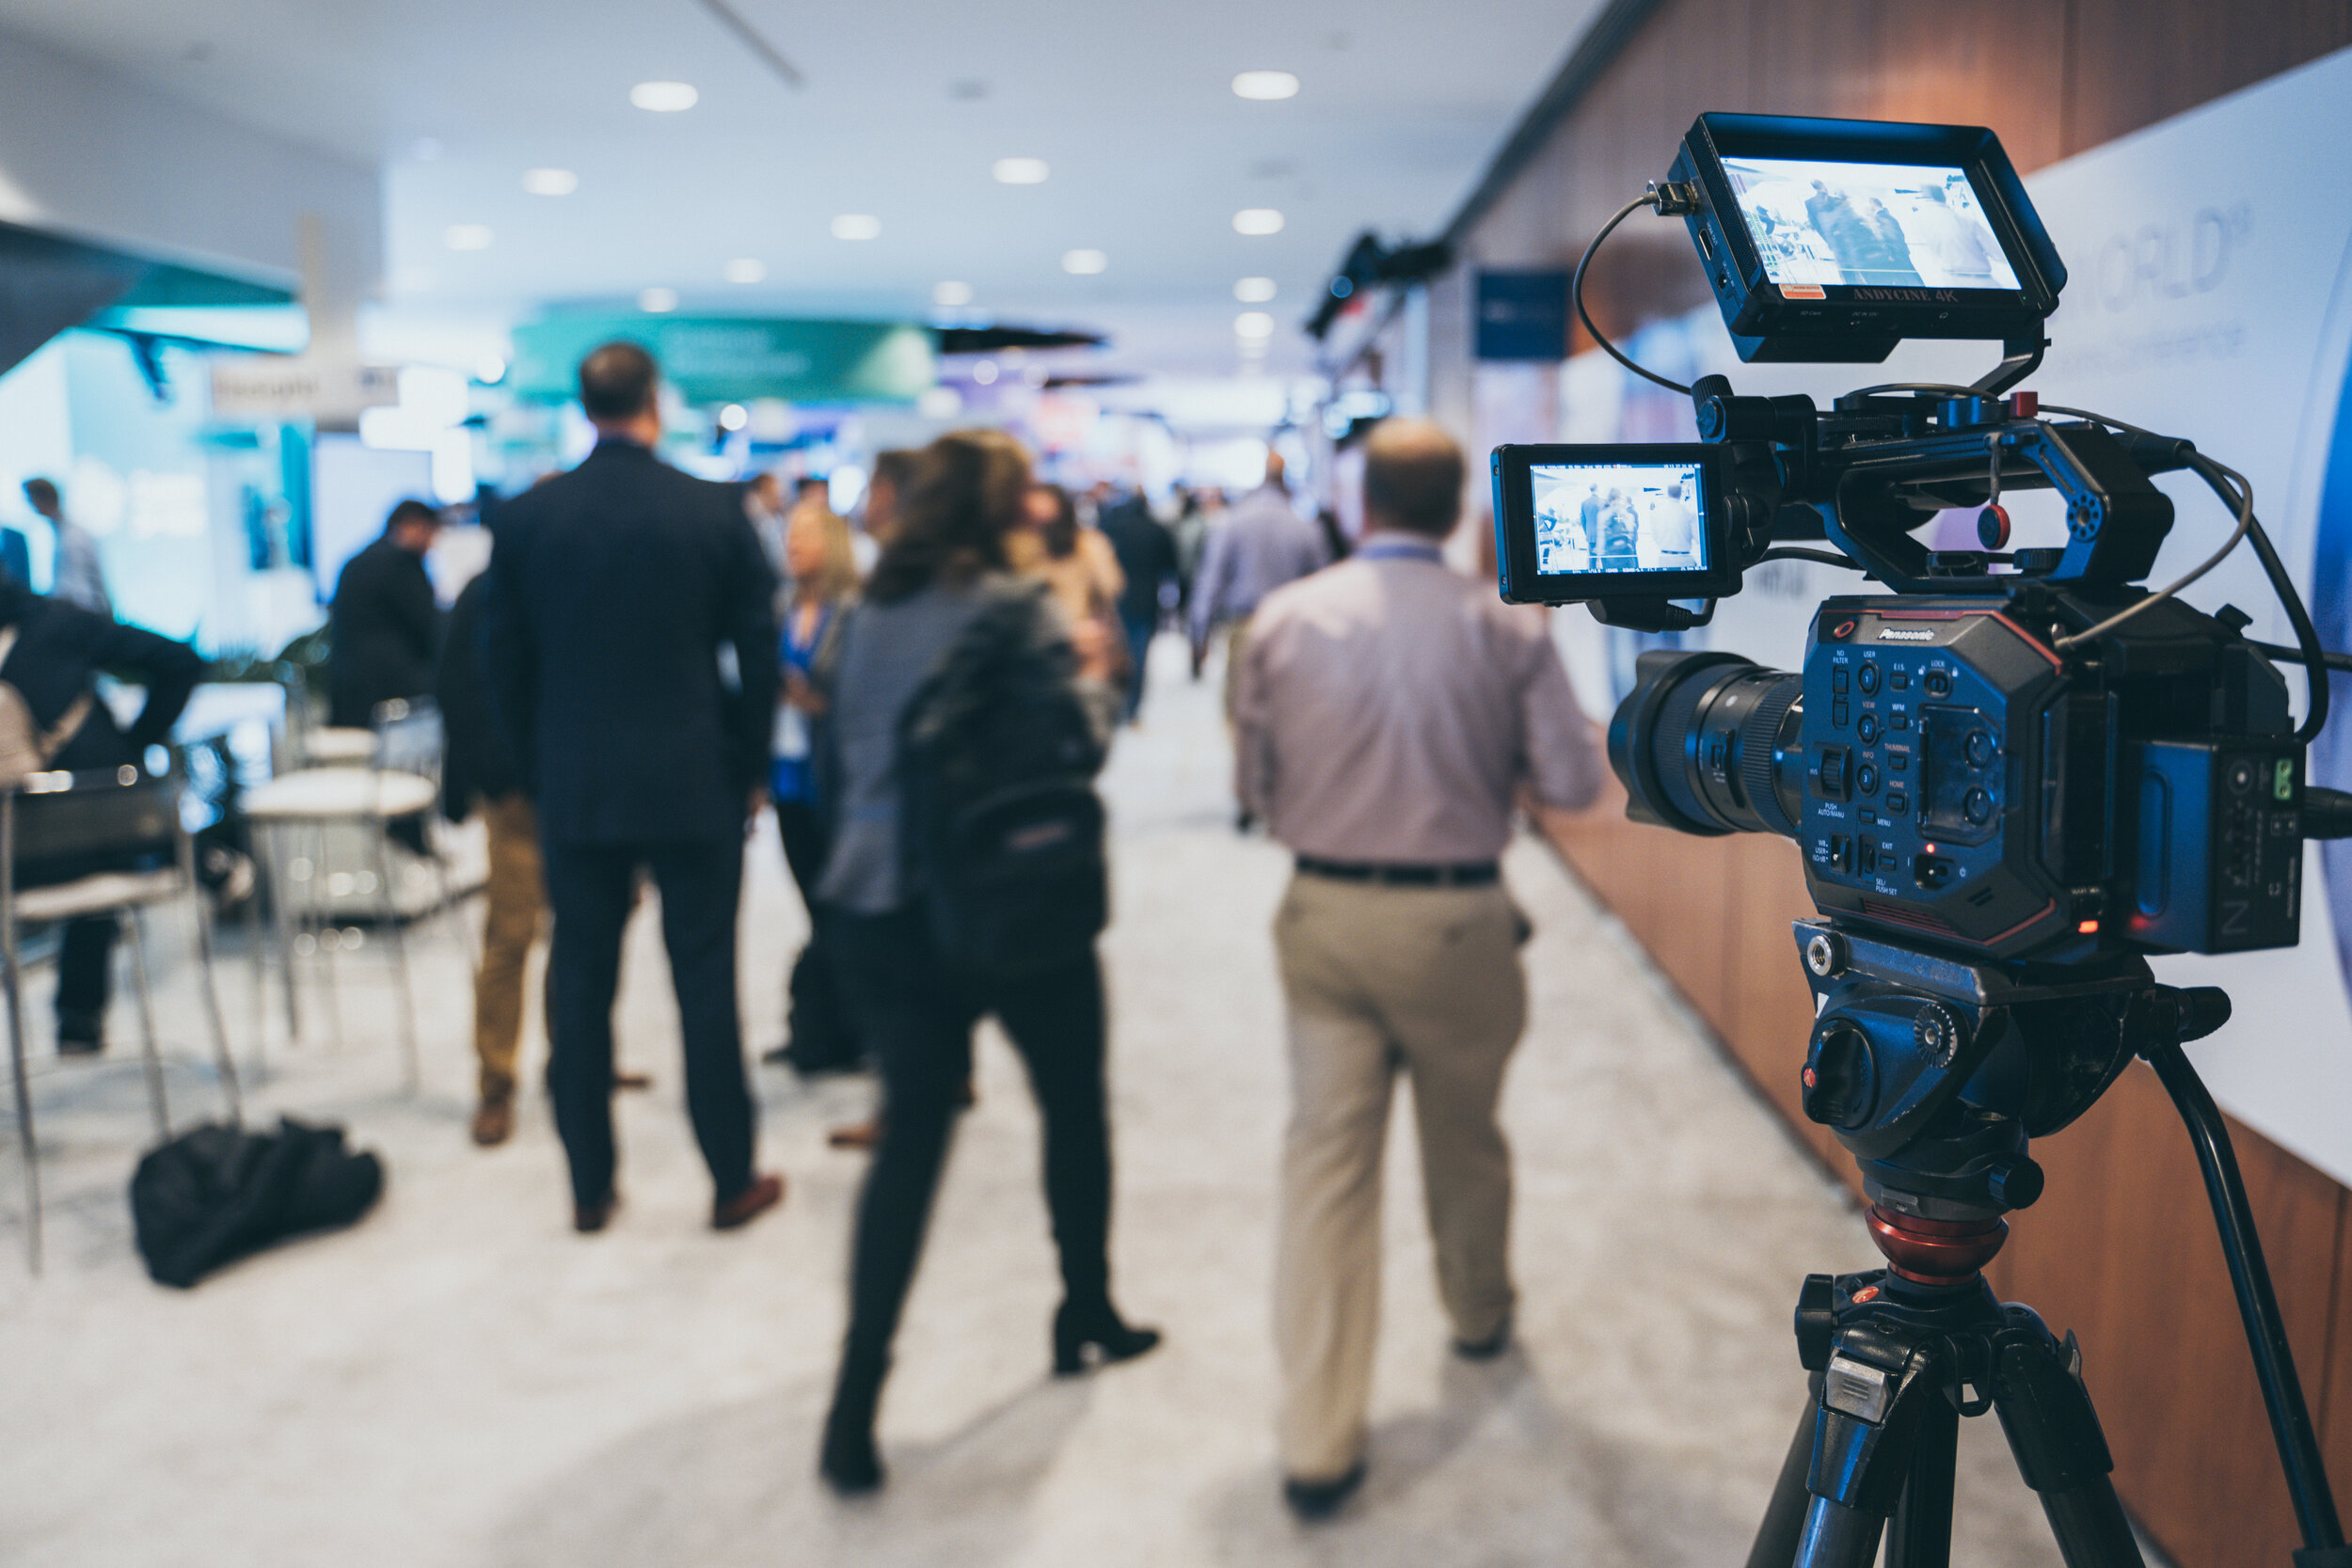
The ANDYCINE A6 Plus 4K monitor rigged with the Panasonic EVA-1
The monitor accepts HDMI inputs/loop outputs from 480p, 1080/60p, 4K/30p up to DCI 4K/24p (4096×2160), which makes this affordable monitor accessible to a range of cameras.
Advancing on the first generation A6 monitor, the A6 Plus has a number of new features that brings it in line with competition from the likes of SmallHD, SWIT and Atomos.

First up, let’s look at the LUT Preview feature
Whether you film with a Sony (SLOG), Panasonic (VLOG), Canon (C-LOG) or any other camera, filming in a LOG colour profile can pose some problems when it comes to judging exposure and essentially what the final shot will look like.
The A6 Plus overcomes this with the new LUT Preview tool; there are 4 pre-installed preview LUT’s (pulldown to REC709) for the common LOG profiles which include:
LOG-C (ARRI)
VLOG (Panasonic)
SLOG2 (Sony)
SLOG3 (Sony)
Although this feature doesn’t include other standard LOG profiles from the likes of Canon, Fujinon, Blackmagic or JVC, I would assume that with a firmware update, these could be included. One thing to bear in mind is that you should update the firmware to V1.0.7 (link here).
Additionally, much like the SWIT and SmallHD monitors it is now possible to import custom LUT’s via an SD card. If you’re shooting for a specific look or colour pallete, this is an ideal way of previewing the footage on the monitor while shooting in LOG in camera.
After discussions with the ANDYCINE team, it is only possible to import 8 LUT’s at a time. That’s not a huge library, but it is 8 more than what as possible before. Things to note when installing your custom LUT’s:
SD card needts to be in FAT32 or NTFS format.
Maximum 8 LUT files in CUBE format.
The LUT file names must be complete and in either English or Arabic.
To install the LUT’s, insert the SD card into the A6 Plus monitor, double tap the screen to bring up the main menu, then select the ‘Colour’ menu (RGB wheel).
Lut Switch should be ‘On’, and then select ‘Initializing’ under the Lut Import (SD). The LUT’s will then be imported and show as ‘Complete’.

ANDYCINE A6 Plus Monitoring Tools
Enlarging the cameras built in screen isn’t the only feature of an external monitor. The A6 Plus has a range of additional features that can aid with focus, exposure and audio levels. These include:
Histogram.
Focus Assist (with focus level and colour selection).
Zebras from 1% to 100%.
Monochorme.
False colour (2 modes).
Grids.
I use the Focus Assist tool all the time when I shoot with the Panasonic EVA-1 because the viewfinder on the camera isn’t very reliable. This ‘peaking’ feature is a great addition to ensure you nail focus every time, especially when filming with a shallow depth of field.
Pinch zoom is particularly useful for quickly checking focus or particular details in the frame.
False Colour is another advanced monitoring feature that aids with exposure, always aiming for the subject to be in the middle grey range.
New Updated Menu
The new menu design is far more advanced than the previous A6 model. The touch screen aides this greatly, meaning you can make any display or LUT changes quickly. The menu is intuitive, meaning it updates and expands depending on the settings you are changing.
The fast access menu is displayed by swiping up in the bottom zone of the screen. This displays your common settings, I have Focus Assist, False Colour, Histogram, Lut Switch, Nine Grid and Markers on mine. By double tapping the setting you can customize your quick menu too.

Filming Anamorphic With The ANDYCINE A6 Plus
YES, it is possible to monitor a ‘de-squeezed’ image using the A6 Plus. As more cameras include anamorphic filming modes (notably the Panasonic GH5/S1H and Blackmagic), the A6 provides the ideal monitoring tool to de-squeeze your footage in the following modes:
1.25x
1.33x
1.5x
2.0x
2.0x mag
Unfortunately I haven’t been able to test this feature out.
Additional Tools and Features
I’ll often use the A6 Plus when I film with a gimbal, so the size and weight of the monitor is of course important. It is possible to flip the display horizontally and vertically depending on your rigging preferences.
You may be framing your shots for a particular aspect ratio (especially as more and more content is shot in ‘portrait’ for social media content. Although the A6 Plus doesn’t have a 9:16 or 1:1 aspect ratio display included, it does have the following built in:
70%
80%
90%
16:9
16:10
4:3
5:4 (close to Facebook/Twitter/Instagram formats)
1.85:1
2.35:1 (widescreen)
Filming With The ANDYCINE A6 Plus
The A6 Plus has been my go-to monitor for filming across the world, as I mentioned above the Panasonic EVA-1 viewfinder leaves much to be desired, so a larger, brighter and featureful monitor like the A6 Plus is a reliable choice.

The A6 Plus monitor can be powered via LP-E6 or Sony type NP-F batteries, or D-tap.
A lot of my filming involves fast changing locations and setups, so the higher brightness (500cd/m2) and 1000:1 contrast ratio is beneficial for filming outdoors. The backlight brightness can also be controlled by swiping left or right to decrease or increase the intensity.
When filming in New York, the A6 Plus was used with the Panasonic EVA-1 as the main monitor, it provided the clarity of focus and exposure needed when I was shooting in a dark conference area and outdoors on the streets.
The touch screen monitor is quickly accessible by double-tapping, but quick features can also be accessed by pressing the menu button or swiping, which is much easier than navigating through a complex menu.
The power consumption of the A6 Plus is very good, and I can often use the monitor for a whole shoot before needing to swap out the battery. It is also possible to power the monitor via 12V D-tap, LP-E6 or NP-F (Sony type) batteries.
Final Thoughts and Should You Buy The ANDYCINE A6 Plus?
If you film with a Sony mirrorless camera like the A7III, or the GH5, or even the Blackmagic Pocket Cinema Camera 4K/6K, this a great external monitor for you. It is smaller and cheaper than the SmallHD or Atomos competitors, and is just as featureful. The new A6 Plus’ menu is very easy to navigate, with clear and understandable text. This makes it even easier to install and load up your own custom LUTs.
The A6 Plus is certainly an upgrade from the less than favourable EVA-1 viewfinder, pinch zoom is fast and accurate and the battery life is a big plus point for long filming days.
What I would like to see in new firmware updates or models include 10-bit display, more in-built LUT’s for common cameras, higher brightness and HDR capabilities. What I have come to learn is that the ANDYCINE team are very easy to communicate with, answering any of my queries very quickly, and that they listen to feedback. The advancements from the original A6 monitor to the A6 Plus are great, and I look forward to seeing more from ANDYCINE in the future.

If you have any questions about the A6 Plus or how I have been filming with it, please comment below. You can purchase the ANDYCNE A6 Plus here.